(新頁面: 掉落页面!) |
Laundry Machine(留言牆 | 貢獻) 小 (撤销由123.241.42.205(讨论)所作出的修订17228) |
||
| (未顯示由 9 位使用者於中間所作的 16 次修訂) | |||
| 第1行: | 第1行: | ||
| + | [[File:Grineer Schliessschrank Offen.png|right|200px]]{{tocright|limit=2}} |
||
| − | 掉落页面! |
||
| + | '''可拾取物'''是指游戏中那些玩家角色在其周围或上方经过时可以自动拾取的物品。它们的功能多种多样,有的能为当前任务提供援助(弹药、生命等),有的可以作为资源进行收集。大多数可拾取物是所有队员都能看到。 |
||
| + | |||
| + | ==战利品容器{{anchor|Lootables}}== |
||
| + | 所有战利品容器,如[[Storage Containers|储存容器]]和可搜刮的尸体,都会在装备[[Thief's Wit|盗贼天赋]]MOD时在地图上显示。 |
||
| + | * [[Butcher|屠夫]]的尸体会在自毁[[Environmental Hazards|危机]]中出现。当玩家按照提示对着尸体按下操作键(默认{{Key|X}})后,尸体周围就会出现可拾取物。 |
||
| + | * 屠夫和[[Crewman|船员]]的尸体会在[[Invasion|入侵]]任务中出现。具体会出现哪种和当前地图版块中的派系有关。当玩家角色在尸体上走过时,可拾取物就会出现。 |
||
| + | * 储存柜分锁住的和没锁住的两种状态。亮着绿灯的储存柜是没有被锁上的,可以玩家可以对着柜子按操作键(默认{{Key|X}})打开。亮着红灯的储存柜是被锁上的,这种柜子只有在战甲装备[[Master Thief|盗贼大师]]或携带装备[[Scavenge|搜集]]的[[Kubrow|库狛]]时才有一定几率被解锁。 |
||
| + | * [[Storage Containers|储存容器]]用子弹、某些战甲能力、[[Syndicate|集团]]MOD或武器的范围攻击效果,以及近战攻击来打开。[[Orokin Void|Orokin虚空]]中有两种储存容器:正常型和爆炸型。两种容器还是比较容易区分的:爆炸型的存储容器体型较小,容器上的灯光颜色为红色,并且还会不断散发出烟雾。 |
||
| + | * [[Orokin Void|Orokin虚空]]中,那些处于隐藏区域的战利品容器通常有较高几率装有稀有资源和MOD。 |
||
| + | *[[Master Thief|盗贼大师]]MOD和[[Nekros]]的[[Desecrate|亵渎]]技能都会影响可拾取物的出现几率。 |
||
| + | |||
| + | ===[[Grineer]]战利品容器{{anchor|Grineer Lootables}}=== |
||
| + | <gallery widths="150" spacing="small" orientation="square" hideaddbutton="true" captionposition="within"> |
||
| + | CBGrinLocker.png|储存柜 |
||
| + | GrineerCansquare.png|储存容器 |
||
| + | Crate.png|储存箱 |
||
| + | Grineer Lootable.png|尸体 |
||
| + | </gallery> |
||
| + | |||
| + | ===[[Corpus]]战利品容器{{anchor|Corpus Lootables}}=== |
||
| + | <gallery widths="150" spacing="small" orientation="square" hideaddbutton="true" captionposition="within"> |
||
| + | CorpusLockers.png|储存柜 |
||
| + | CorpusCansquare.png|储存容器 |
||
| + | CorpusLootCorpse2.png|尸体 |
||
| + | </gallery> |
||
| + | |||
| + | ===[[Orokin]]战利品容器{{anchor|Orokin Lootables}}=== |
||
| + | <gallery widths="150" spacing="small" orientation="square" hideaddbutton="true" captionposition="within"> |
||
| + | OrokinLockers.png|储存柜 |
||
| + | OrokinCansquare.png|储存容器 |
||
| + | </gallery> |
||
| + | |||
| + | === 稀有战利品容器 === |
||
| + | <gallery widths="750" hideaddbutton="true" captionposition="within"> |
||
| + | 稀有戰利品容器.png |
||
| + | </gallery> |
||
| + | * Their appearance is similar to the standard storage container, but with a golden glow and a humming noise identical to that of the Sabotage Caches. |
||
| + | * Always contains a Detonite Injector/Fieldron/Forma. |
||
| + | * Always contains a single rare rank 5 Fusion Core. |
||
| + | * Always drops a random 30 minute Affinity/Credit Booster. |
||
| + | * Credit quantity is typically 10,000 to 20,000, although it often partially/fully does not award this to clients. |
||
| + | * Codex entry requires 5 scans for each faction variant. |
||
| + | |||
| + | === 强化战利品容器 === |
||
| + | * Reinforced containers have their own model, with significantly bulkier plating than the standard variants, plus the golden glow and humming sound of the rare storage container. |
||
| + | * Always contains a Detonite Injector/Fieldron/Forma. |
||
| + | * Always contains a single rare rank 5 Fusion Core. |
||
| + | * Always drops a random 60 minute Affinity or Credit Booster. |
||
| + | * Often drops one of a number of random weapon blueprint, including several normally Research exclusive blueprints. Reinforced Orokin Containers will either drop a Boltor Prime or Glaive Prime Blueprint. |
||
| + | * Credit quantity is typically 40,000 to 60,000, although it often partially/fully does not award this to clients. |
||
| + | * Codex entry requires 3 scans for each faction variant. |
||
| + | * They require more damage to break than regular containers. The models also reflect this with sections breaking off as the container is damaged. |
||
| + | |||
| + | === 稀有/强化战利品容器的生成 === |
||
| + | Rare and Reinforced Containers do not spawn in the same manner as standard Storage Containers. |
||
| + | * The type of Rare/Reinforced Container (Grineer/Corpus/Orokin) matches the other containers found throughout the mission. |
||
| + | * In any given mission, there is a roughly 10% chance of a single Rare Storage Container spawning somewhere in the map. If one spawns, it will randomly select a vacant Medallion/Sabotage Cache hotspot, and spawn in it. |
||
| + | * In any given mission, there is a roughly 1% chance of a single Reinforced Storage Container spawning somewhere in the map. If one spawns, it will randomly select a vacant high-value Medallion hotspot, and spawn in it. |
||
| + | * Trials have significantly increased chances of encountering Rare and Reinforced Containers, with approximately a 50% chance of a Rare and a 25% chance of a Reinforced in each mission of the Trial. This means that as many as six may be found over the course of a single Trial. Note that, since the Trials use a modified tileset, the Containers often spawn out of bounds or in walls, making them inaccessible. |
||
| + | * The rolls for Rare and Reinforced Containers are separate, and very rarely both may spawn in a mission. If incredibly lucky, they may even spawn within sight of each other.{{clr}} |
||
| + | |||
| + | ==物品{{anchor|Items}}== |
||
| + | 储存容器中和被杀死的敌人都有几率掉落弹药。这些弹药所有玩家都能拾起。弹药上方有会有一个光柱方便玩家辨认。拾起后,该弹药就会从画面上消失。弹药的种类可以根据其颜色和形状来分辨。拾起的弹药的数量则会根据弹药类型发生变化。除了弹药,玩家还有几率获得补给球。它们可以补充玩家的生命和能量。有些还能提供经验、[[Blueprints|蓝图]]。[[Clan Dojo|氏族道场]]中的[[Obstacle Course|障碍训练场]]内还有特殊的能补充耐力的绿色补给球,它可以为玩家的[[Maneuvers|操控]]提供续航。 |
||
| + | |||
| + | ==弹药{{anchor|Ammo}}== |
||
| + | {{:Ammo}} |
||
| + | {{clr}} |
||
| + | |||
| + | ==補給球{{anchor|补给球}}== |
||
| + | ===能量=== |
||
| + | [[File:EnergyOrb.png|right|110px]] |
||
| + | * 敌人掉落的能量球補充25或50[[Energy|能量]]. |
||
| + | * 由柜子,罐子,保险柜裡取得的能量球可以补充25~100 [[Energy|能量]]. |
||
| + | * 掉落几率比其他补给球高 |
||
| + | {{clr}} |
||
| + | |||
| + | ===血量{{anchor|Health}}=== |
||
| + | [[File:HealOrb.png|right|110px]] |
||
| + | * 紅球補充25血量 |
||
| + | * 從置物櫃,箱子,罐子裡取得 |
||
| + | * 正常情況下不會由敵人掉落(技能和野生庫柏除外) |
||
| + | * 也可以補充守護血量 |
||
| + | {{clr}} |
||
| + | |||
| + | ===耐力=== |
||
| + | [[File:StaminaOrb.png|right|110px]] |
||
| + | * 綠球回復100耐力 |
||
| + | * 只能在道場的跑酷房裡找到,避免挑戰者在時限內跑到虛脫 |
||
| + | {{clr}} |
||
| + | |||
| + | ===經驗=== |
||
| + | [[File:AffinityOrb.png|right|110px]] |
||
| + | * 白球補充100經驗給目前手持的武器 |
||
| + | * 從置物櫃,箱子,罐子裡取得 |
||
| + | {{clr}} |
||
| + | |||
| + | ===Nav Coordinate{{anchor|Nav Coordinates}}=== |
||
| + | [[File:NavCoordinateCloseup.png|right|110px]] |
||
| + | * [[Nav Coordinates|Nav Coordinate]]主要用于制作[[Orokin Derelict|被遗弃的Orokin船只]]钥匙(刺杀钥匙除外)。 |
||
| + | * 它们通常可以在储存容器、储存箱中找到。[[Drahk|爪喀]]和[[Kubrow (Feral)|库狛(野生)]]也有几率掉落。 |
||
| + | {{clr}} |
||
| + | |||
| + | ===魔像定位座標=== |
||
| + | [[File:NavCoordinateCloseup.png|right|110px]] |
||
| + | * 魔像Nav座標 是用來製造 [[Orokin Derelict|Orokin遺跡]]刺殺任務鑰匙 |
||
| + | * 可以在遺跡任務裏打破箱子罐子取得 |
||
| + | {{clr}} |
||
| + | |||
| + | ===信标{{anchor|Beacons}}=== |
||
| + | [[File:NavCodeVayHekD.png|right|120px]] |
||
| + | *信标是Grineer[[Prosecutor|判官]]的掉落物。它们的作用同[[Nav Coordinates|Nav Coordinate]]类似,也是用来制作钥匙的。不过目前游戏中它们暂时没有实际用处(以前版本的游戏中,它们是被用来制作Vay Hek频率三角定位仪的,这个物品是进行[[Councilor Vay Hek|Vay Hek议员]][[Assassination|刺杀]][[mission|任务]]所必须的钥匙)。 |
||
| + | {{clr}} |
||
| + | |||
| + | ===加成=== |
||
| + | *30分鐘的經驗或金錢加倍,打破稀有容器(金箱子)會掉落,外型和耐力球一樣但周圍有綠色光芒的綠色球體 |
||
| + | {{clr}} |
||
| + | |||
| + | ==其他{{anchor|Other}}== |
||
| + | ===MOD{{anchor|Mods}}=== |
||
| + | [[File:FusionCorePackSilversingle.png|right|110px]] |
||
| + | 所有派系的单位[[Factions|派系]]的单位都有几率掉落[[Mods|MOD]]。强力的敌人和[[Bosses|头目]]通常有较高几率掉落MOD。高等级的敌人通常会掉落等级更高的MOD。 |
||
| + | |||
| + | 游戏中,玩家最好养成习惯用标记键(默认为{{Key|G}})来为少见的MOD做上标记。这样其他玩家就不会错过得到这些MOD的机会。这可以算是游戏中的礼节。标记成功后,所有尚未拾取该MOD的玩家的屏幕上就会出现一个标记,标记上就会显示“MOD”字样。如果你在任务过程中看到蓝色的发光区域或金色的光柱,但是周围却没有MOD,这说明你已经拾取了该MOD,但队伍中仍然有玩家尚未拾取该MOD。当装备有[[Thief's Wit|盗贼天赋]]时,小地图上会显示当前玩家尚未拾取的MOD。 |
||
| + | |||
| + | 稀有MOD和融合核心上方都会有一个黄颜色的光柱作为标记。 |
||
| + | |||
| + | {{clr}} |
||
| + | |||
| + | ===蓝图{{anchor|Blueprints}}=== |
||
| + | [[File:BPDrop.png|right|110px]] |
||
| + | * [[Blueprints|蓝图]]可以通过击败[[Captain Vor|Vor上尉]]、[[Stalker]]、[[Zanuka Hunter|Zanuka猎犬]]和[[The Grustrag Three|Grustrag三霸]]后获取。[[Eximus|卓越者]]单位也有几率掉落[[Oberon]]部件蓝图。 |
||
| + | **在[[Update 13|更新13]]后,蓝图会以紫色光柱标记。 |
||
| + | **在[[Update 15|更新15]]后,掉在地上的蓝图会有实体模型显示。 |
||
| + | {{clr}} |
||
| + | |||
| + | ===生命维持装置{{anchor|Life Support Modules}}=== |
||
| + | [[File:Oxygenpack.png|right|110px]] |
||
| + | 生命维持装置会由[[Survival|生存]]任务中的敌人掉落。每个装置会恢复4%生命维持系统。这些装置出现后游戏会自动为它们加上一个黄色的标记。 |
||
| + | {{clr}} |
||
| + | |||
| + | ===资源{{anchor|Resources}}=== |
||
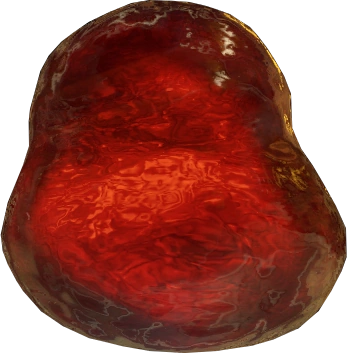
| + | [[File:Resource Orange.png|right|130px]] |
||
| + | [[Resources|资源]]可以在储存容器中找到或杀死敌人后获取。其掉落几率会随资源稀有程度和任务所在地而变化。具体出现何种资源则是由当前所处的星球而决定。当玩家装备有[[Thief's Wit|盗贼天赋]]时,资源掉落物就会在小地图以方形图标标出。 |
||
| + | {{clr}} |
||
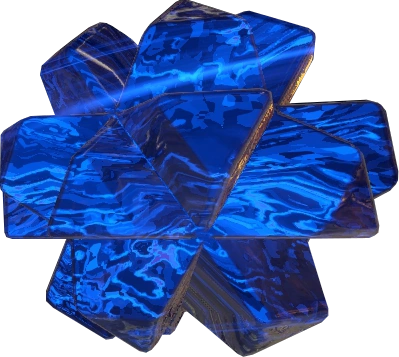
| + | [[File:Resource Blue.png|left|80px]] |
||
| + | [[Research|研究]]所需的资源,如[[Detonite Ampule|Detonite安瓿]]、[[Fieldron Sample|电磁力场装置样本]]和[[Mutagen Sample|样本突变原]],是以蓝色显示,并且单次资源掉落物中只能得到1个。 |
||
| + | {{Clr}} |
||
| + | |||
| + | ===现金{{anchor|Credits}}=== |
||
| + | [[File:CreditsBoth.png|200px|right]] |
||
| + | * [[Credits|现金]]由储存容器和敌人掉落。 |
||
| + | * 出现数量不定,一般为1-50。 |
||
| + | * 拾取的现金是在团队间共享的,也就是说,任何一个玩家拾取了现金相当于所有玩家拾取了现金。 |
||
| + | * 绿色的现金掉落物每个至少值100现金。 |
||
| + | {{clr}} |
||
| + | |||
| + | ===勋章{{anchor|Medallions}}=== |
||
| + | [[File:AHCommonPickup.png|200px|right]] |
||
| + | [[Syndicate Medallions|集团勋章]]是只会在[[Syndicate|集团]]任务中出现的可拾取物。这些勋章可以兑换为集团声望点数,兑换地点为[[Relay|中继站]]中的集团代表处。它们只能通过操作键手动拾取。 |
||
| + | {{clr}} |
||
| + | |||
| + | ==小常识{{anchor|Trivia}}== |
||
| + | [[File:Warframe canister egg.jpg|60px|right]][[File:Blueprint Orb.png|right|60px]] |
||
| + | *如果可拾取物落到的地图边缘外,这些东西通常(不过经常也会发生意外)会被自动传送至原先的地点(这个机制同一般的单位类似)。 |
||
| + | *开发方一般会在节日[[:Category:活动|活动]]任务中更换Corpus储存容器的皮肤。比如,2013的万圣节和复活节期间,这些储存容器就被换上了南瓜和复活节彩蛋皮肤。 |
||
| + | *在更新15在之前,可拾取的蓝图是用粉色光球显示的。 |
||
| + | {{MechNav}} |
||
| + | [[Category:游戏机制]] |
||
| + | [[Category:可拾取物]] |
||
於 2017年12月24日 (日) 09:27 的最新修訂
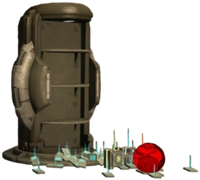
可拾取物是指游戏中那些玩家角色在其周围或上方经过时可以自动拾取的物品。它们的功能多种多样,有的能为当前任务提供援助(弹药、生命等),有的可以作为资源进行收集。大多数可拾取物是所有队员都能看到。
战利品容器
所有战利品容器,如储存容器和可搜刮的尸体,都会在装备盗贼天赋MOD时在地图上显示。
- 屠夫的尸体会在自毁危机中出现。当玩家按照提示对着尸体按下操作键(默认X)后,尸体周围就会出现可拾取物。
- 屠夫和船员的尸体会在入侵任务中出现。具体会出现哪种和当前地图版块中的派系有关。当玩家角色在尸体上走过时,可拾取物就会出现。
- 储存柜分锁住的和没锁住的两种状态。亮着绿灯的储存柜是没有被锁上的,可以玩家可以对着柜子按操作键(默认X)打开。亮着红灯的储存柜是被锁上的,这种柜子只有在战甲装备盗贼大师或携带装备搜集的库狛时才有一定几率被解锁。
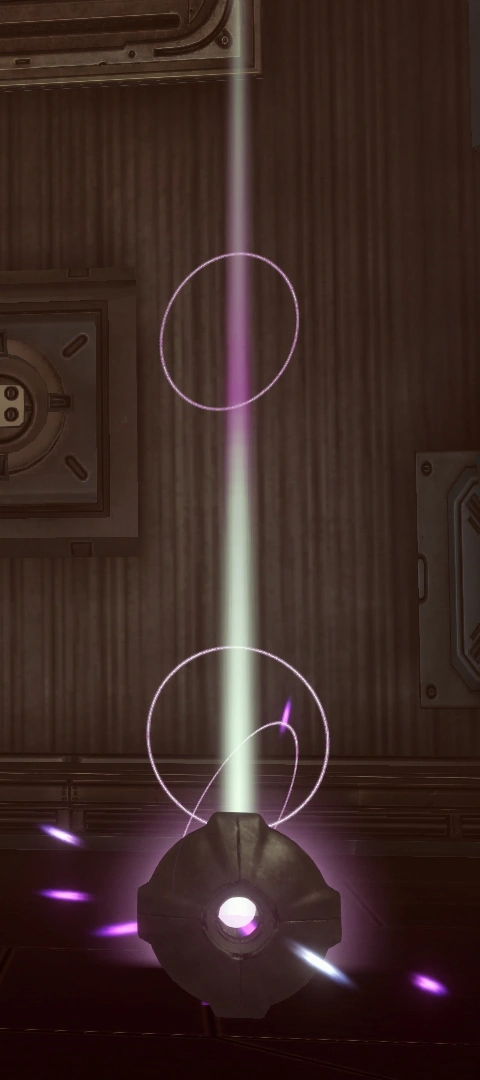
- 储存容器用子弹、某些战甲能力、集团MOD或武器的范围攻击效果,以及近战攻击来打开。Orokin虚空中有两种储存容器:正常型和爆炸型。两种容器还是比较容易区分的:爆炸型的存储容器体型较小,容器上的灯光颜色为红色,并且还会不断散发出烟雾。
- Orokin虚空中,那些处于隐藏区域的战利品容器通常有较高几率装有稀有资源和MOD。
- 盗贼大师MOD和Nekros的亵渎技能都会影响可拾取物的出现几率。
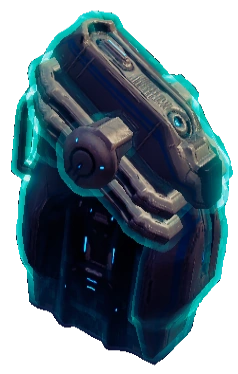
Grineer战利品容器
")
")
")
")
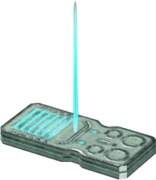
Corpus战利品容器
")
")
")
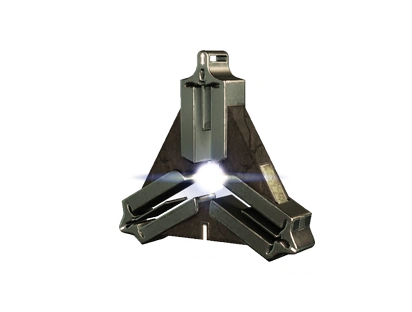
Orokin战利品容器
")
")
稀有战利品容器
")
- Their appearance is similar to the standard storage container, but with a golden glow and a humming noise identical to that of the Sabotage Caches.
- Always contains a Detonite Injector/Fieldron/Forma.
- Always contains a single rare rank 5 Fusion Core.
- Always drops a random 30 minute Affinity/Credit Booster.
- Credit quantity is typically 10,000 to 20,000, although it often partially/fully does not award this to clients.
- Codex entry requires 5 scans for each faction variant.
强化战利品容器
- Reinforced containers have their own model, with significantly bulkier plating than the standard variants, plus the golden glow and humming sound of the rare storage container.
- Always contains a Detonite Injector/Fieldron/Forma.
- Always contains a single rare rank 5 Fusion Core.
- Always drops a random 60 minute Affinity or Credit Booster.
- Often drops one of a number of random weapon blueprint, including several normally Research exclusive blueprints. Reinforced Orokin Containers will either drop a Boltor Prime or Glaive Prime Blueprint.
- Credit quantity is typically 40,000 to 60,000, although it often partially/fully does not award this to clients.
- Codex entry requires 3 scans for each faction variant.
- They require more damage to break than regular containers. The models also reflect this with sections breaking off as the container is damaged.
稀有/强化战利品容器的生成
Rare and Reinforced Containers do not spawn in the same manner as standard Storage Containers.
- The type of Rare/Reinforced Container (Grineer/Corpus/Orokin) matches the other containers found throughout the mission.
- In any given mission, there is a roughly 10% chance of a single Rare Storage Container spawning somewhere in the map. If one spawns, it will randomly select a vacant Medallion/Sabotage Cache hotspot, and spawn in it.
- In any given mission, there is a roughly 1% chance of a single Reinforced Storage Container spawning somewhere in the map. If one spawns, it will randomly select a vacant high-value Medallion hotspot, and spawn in it.
- Trials have significantly increased chances of encountering Rare and Reinforced Containers, with approximately a 50% chance of a Rare and a 25% chance of a Reinforced in each mission of the Trial. This means that as many as six may be found over the course of a single Trial. Note that, since the Trials use a modified tileset, the Containers often spawn out of bounds or in walls, making them inaccessible.
- The rolls for Rare and Reinforced Containers are separate, and very rarely both may spawn in a mission. If incredibly lucky, they may even spawn within sight of each other.
物品
储存容器中和被杀死的敌人都有几率掉落弹药。这些弹药所有玩家都能拾起。弹药上方有会有一个光柱方便玩家辨认。拾起后,该弹药就会从画面上消失。弹药的种类可以根据其颜色和形状来分辨。拾起的弹药的数量则会根据弹药类型发生变化。除了弹药,玩家还有几率获得补给球。它们可以补充玩家的生命和能量。有些还能提供经验、蓝图。氏族道场中的障碍训练场内还有特殊的能补充耐力的绿色补给球,它可以为玩家的操控提供续航。
弹药
Ammo
補給球
能量
血量
- 紅球補充25血量
- 從置物櫃,箱子,罐子裡取得
- 正常情況下不會由敵人掉落(技能和野生庫柏除外)
- 也可以補充守護血量
耐力

- 綠球回復100耐力
- 只能在道場的跑酷房裡找到,避免挑戰者在時限內跑到虛脫
經驗
- 白球補充100經驗給目前手持的武器
- 從置物櫃,箱子,罐子裡取得

- Nav Coordinate主要用于制作被遗弃的Orokin船只钥匙(刺杀钥匙除外)。
- 它们通常可以在储存容器、储存箱中找到。爪喀和库狛(野生)也有几率掉落。
魔像定位座標
- 魔像Nav座標 是用來製造 Orokin遺跡刺殺任務鑰匙
- 可以在遺跡任務裏打破箱子罐子取得
信标

- 信标是Grineer判官的掉落物。它们的作用同Nav Coordinate类似,也是用来制作钥匙的。不过目前游戏中它们暂时没有实际用处(以前版本的游戏中,它们是被用来制作Vay Hek频率三角定位仪的,这个物品是进行Vay Hek议员刺杀任务所必须的钥匙)。
加成
- 30分鐘的經驗或金錢加倍,打破稀有容器(金箱子)會掉落,外型和耐力球一樣但周圍有綠色光芒的綠色球體
其他
MOD

所有派系的单位派系的单位都有几率掉落MOD。强力的敌人和头目通常有较高几率掉落MOD。高等级的敌人通常会掉落等级更高的MOD。
游戏中,玩家最好养成习惯用标记键(默认为G)来为少见的MOD做上标记。这样其他玩家就不会错过得到这些MOD的机会。这可以算是游戏中的礼节。标记成功后,所有尚未拾取该MOD的玩家的屏幕上就会出现一个标记,标记上就会显示“MOD”字样。如果你在任务过程中看到蓝色的发光区域或金色的光柱,但是周围却没有MOD,这说明你已经拾取了该MOD,但队伍中仍然有玩家尚未拾取该MOD。当装备有盗贼天赋时,小地图上会显示当前玩家尚未拾取的MOD。
稀有MOD和融合核心上方都会有一个黄颜色的光柱作为标记。
蓝图
生命维持装置
生命维持装置会由生存任务中的敌人掉落。每个装置会恢复4%生命维持系统。这些装置出现后游戏会自动为它们加上一个黄色的标记。
资源

资源可以在储存容器中找到或杀死敌人后获取。其掉落几率会随资源稀有程度和任务所在地而变化。具体出现何种资源则是由当前所处的星球而决定。当玩家装备有盗贼天赋时,资源掉落物就会在小地图以方形图标标出。

研究所需的资源,如Detonite安瓿、电磁力场装置样本和样本突变原,是以蓝色显示,并且单次资源掉落物中只能得到1个。
现金
- 现金由储存容器和敌人掉落。
- 出现数量不定,一般为1-50。
- 拾取的现金是在团队间共享的,也就是说,任何一个玩家拾取了现金相当于所有玩家拾取了现金。
- 绿色的现金掉落物每个至少值100现金。
勋章
集团勋章是只会在集团任务中出现的可拾取物。这些勋章可以兑换为集团声望点数,兑换地点为中继站中的集团代表处。它们只能通过操作键手动拾取。
小常识


- 如果可拾取物落到的地图边缘外,这些东西通常(不过经常也会发生意外)会被自动传送至原先的地点(这个机制同一般的单位类似)。
- 开发方一般会在节日活动任务中更换Corpus储存容器的皮肤。比如,2013的万圣节和复活节期间,这些储存容器就被换上了南瓜和复活节彩蛋皮肤。
- 在更新15在之前,可拾取的蓝图是用粉色光球显示的。
| 遊戲機制 | |||
|---|---|---|---|
| 貨幣 | |||
| 常用 | 軍械庫 • 資料庫 • 每日獻禮 • 鑄造廠 • 商店 • 精通段位 • 午夜電波 • 軌道飛行器 • 星圖 | ||
| 故事 | 善惡偏向 • 碎片 • Leverian • 系列任務 | ||
| 派系 | Corpus • Grineer • Infested • Orokin • Sentient • 集團 • Tenno | ||
| 社交 | 聊天 • 氏族 • 氏族道場 • 交易 | ||
| 小隊 | 主機遷移 • 不活躍懲罰 • 隊伍配對 | ||
| 遊戲 | 經驗 • Buff & Debuff • 死亡 • 傷害 (異常狀態, 傷害類型修正, 免疫) • 地形 • 操控 • 單手操作 • 可拾取物 • 地圖板塊 • 虛空遺物 • 路徑點 | ||
| 任務 | 仲裁 • 九重天 • 突擊 • 戰術警報 • 鋼韌之道 • 虛空裂縫 | ||
| 敵人 | Bosses • 死亡標記 • 敵人行為 • 赤毒巫妖 • 威脅等級 | ||
| 活動 | Captura • 保育 • 釣魚 • K式懸浮板競速 • 街機遊戲 • 挖礦 | ||
| 潛行 | 駭入 • 噪音等級 | ||
| PvP | 決鬥 • 武形秘儀 (月動球) • 戰甲快打 | ||
| 裝備 | Mod與賦能 | 賦能 • 融合 • MOD (裂罅) • 極化 • 轉換 | |
| 戰甲 | 屬性 (護甲 • 能量 • 生命 • 護盾 • 衝刺速度) • 技能 (強化 • Helminth 系統 • 被動能力 • 持續時間 • 效率 • 範圍 • 強度) | ||
| 武器 | 精準度 • 次要射擊 • 彈藥 • 攻擊速度 • 暴擊 • 傷害衰減 • 顯赫武器 • 射速 • 近戰 • 多重射擊 • 拋射物飛行速度 • 穿透 • 後坐力 • 裝填速度 • 射擊模式 • 瞄準 | ||
| 指揮官 | 增幅器 • 專精 (Madurai • Vazarin • Naramon • Unairu • Zenurik) • 晶體 | ||
| 其他 | Archwing • 同伴 • K式懸浮板 • 亡骸機甲 • 萬靈袖刃 • 銳捷號 | ||
| 技術性 | 抬頭顯示界面 • 按鍵設定 • 遊戲設置 • 壓力測試 • 文字圖示 • 掉落表 • 世界狀態 | ||
| 數據計算 | 敵方等級變化規律 • 最大化 • 玩家研究 | ||