True Damage is a hidden, unique damage type which has no damage modifier against any health or armor type. This damage type only applies to health and overguard, and bypasses armor's damage reduction. It is primarily available through some Warframe abilities.
Mechanics[]
True Damage can not be directly added to a weapon through mods.
The Basmu is currently the only weapon that deals it innately: fully depleting the weapon's magazine produces three 10-meter pulses that deals up to 10True Damage, staggers nearby enemies and heals the user's health by 10x the damage done to each enemy per pulse.
Misc:
3 (number of hits per mark) 2 (number of Shadow Clones) Slash status per hit 50 % (invisible mark discount) 100 % (energy discount for Teleport on marked enemy)
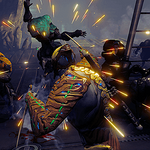
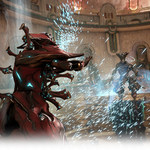
Ash toggles a state of intense focus as he searches for targets to assassinate. During targeting mode, enemies within 50 meters from Ash that are seen near the aiming reticle become highlighted and tagged with a death mark above their head, consuming 12energy per enemy.
Leaving this range while targeting will unmark enemies and refund the energy.
When 1 or more enemies are marked, reactivating the ability will create 2 Shadow Clones that teleport to each marked enemy, striking them with 3 Finisher attacks that inflict 750 / 1000 / 1500 / 2000True damage per hit with a guaranteed Slash status effect.
Blade Storm gains 25% additional damage for each combo multiplier, up to a 3.75x damage multiplier at 12x combo, or 4.0x with Venka Prime equipped at 13x combo. The Innodems additive stats from Evolution II: Perk 2: increase the attack speed by 25%.
Reactivating Blade Storm with no marks will toggle off targeting mode instead.
While in targeting mode, Ash emits black smoke and his vision darkens.
Blade Storm has no casting animations, so Ash can still perform all other functions normally such as maneuvering, casting other abilities, and firing or reloading weapons.
Ash cannot re-enter targeting mode while his Shadow Clones are attacking marked enemies.
Ability Synergy:
Invisibility by means of Smoke Screen or other allied abilities will halve the energy cost of Blade Storm to 6 energy per enemy.
While Blade Storm is attacking, Teleport can be cast on a marked enemy at 0 energy cost to include Ash in the assault. Ash becomes invulnerable for the duration as he teleports and strikes all remaining marked enemies in a cinematic sequence.
While joining Blade Storm costs no energy, Ash must have enough energy to cast Teleport to join.
Strikes by Ash deal the same damage as his clones, but will attack enemies not targeted by his clones at the moment. He consumes marks, which generally accelerates the assault, when the enemy is not dying from the first hit.
Ash can regenerate his shields during the animation.
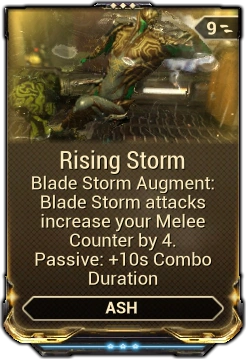
Rising Storm is an AshWarframe Augment Mod that allows the clones generated by Blade Storm to contribute additional hits to the Melee Combo Counter, as well as increases the duration the Melee Combo Counter lasts.
Blade Storm can be activated while zooming in with a ranged weapon. This can be used to more precisely pick targets.
You are invincible while using Blade Storm. This can be used to give time to regenerate your shields.
Blade Storm can be used to pick up items that are very far away or in dangerous situations (an item surrounded by 5 enemies for example). This generally requires a sentinel's Vacuum skill for maximum effectiveness. Simply target an enemy near something you want to pick up and activate the ability. Since you return to your starting point you will return to your "safe spot" but will have picked up health orbs, energy orbs, resources, and even mods.
Blade Storm can be used to start long melee combo chains to gain additional bonus melee damage.
Blade Storm can be empowered by performing melee combo chains before casting, as the ability's damage benefits greatly from the bonus melee damage multiplier.
Since Blade Storm deals True damage, the ability is well suited to dealing with Conculysts and Battalysts.
Ash's second ability, Smoke Screen, synergizes well with this ability, reducing both the energy cost per mark and Ash's vulnerability when marking enemies.
Similarly, Arcane Trickery also synergizes well, since it can be triggered by Blade Storm and reduces the cost per mark.
Blade Storm allows Ash to easily trigger Arcane Ultimatum, giving him a boost in survivability.
Blade Storm finishers also trigger Exodia Might with Zaws, allowing substantial health regeneration without the use of Life Strike.
Considering Blade Storm has a 100% chance to proc Bleed, dealing 43.75% of the base damage 10 times in 9 seconds, the ability actually does 2,000 + ((2,000×0.4375)×10) = 10,750 damage in 9 seconds, making it one of the most powerful abilities in the game if modded and used accordingly.
If used during sliding, Blade Storm seems to use a shorter version of finishing animations, which reduces total animation time.
Blade Storm benefits greatly from the effects of Body Count, Drifting Contact, and Gladiator Rush. Instead of having a 3 second delay before the combo counter disappears, the delay will be 3+12+10+6 = 31 seconds.
Using the Rising Storm augment will further increase the delay.
Since Ash only spawns 2 Shadow Clones, it's highly suggested to equip attack speed mods as the time needed for the Shadow Clones' animations can make gameplay sluggish, especially if a large amount of enemies are marked.
Joining Blade Storm has multiple benefits for Ash:
Becoming invulnerable allows Ash to ignore status effects, such as Toxin, and regenerate his shields.
The rate in which attacks are dealt is increased as there will be 3 attackers instead of 2.
The amount of hits added to the combo counter from the ability will be higher than if Ash were to not join.
Using Teleport on an unmarked enemy while Ash's Shadow Clones are attacking marked ones will result in the unmarked enemy being marked without consuming any energy. Ash will then join Blade Storm until all marks are expended.
Enemies attacked by Blade Storm this way are only attacked once.
Bugs
On certain unspecific occasions Ash will become invulnerable after using Blade Storm. It should also be noted that Blade Storm can cause lag commonly.
Very rarely, after using Blade Storm, Ash will float and become invincible. He is unable to jump or fall down, use melee weapons (or primaries/secondaries in some cases), or use Blade Storm again. Pressing E will teleport to a random enemy and perform a purely aesthetic Blade Storm attack which does no damage. This appears to occur when Blade Storm's initial target is killed before Blade Storm begins.
On some occasions (most likely related to latency), Ash will remain vulnerable whilst being unable to exit this bugged state without getting killed (as in, actually dying and using a revive charge, as revived by a teammate will not end this glitch).
This may occur when the initial target for Blade Storm is killed (by another player/procs) during the teleporting animation, causing Ash to teleport to his casting location, and initiate this bug.
To deactivate the bug, Ash can prompt a "falling out of level" event by power wall climbing to the sky if there is a wall in the map that allows him to. This will respawn Ash to a random location on the ground and deactivate the bug.
Very Rarely, when Ash finishes using Blade Storm he will appear at the location where he used it with 0 Health, unable to move, unable to use weapons, and unable to be damaged by enemies. Any on screen prompts that occur, such as Defense and Interception wave prompts, will not be presented to Ash in this state. Ash cannot be revived as he isn't considered down despite the fact that he has 0 health. The only way to fix this bug is to wait for the mission to end or leave the mission.
If wielding a melee weapon when cast, Blade Storm will occasionally perform Finisher attacks on enemies. This does not occur if the player is hosting.
Occasionally, Ash will fall out of the map after using Blade Storm, where he will either teleport back to the original casting position or die.
If Blade Storm is cast and Ash's holograms seek out a Mind Controlled target, they will attack the target indefinitely until either the Mind Controlled target dies or its duration expires.
Attempting to use Blade Storm against another player when fighting in the Dojo will cause Ash to become invincible and hover in the air. In this state, Ash can only move and use firearms.
When Ash has no melee weapon equipped, it is possible in some cases for Ash to attain an unmodded Skana after using Bladestorm. This Skana is not listed in the end of mission screen, nor in the in-game gear list, and is lost upon dying or completion of the mission.
When used on a Crewship during Railjack missions, and using teleport to join the fray, Ash can grow 10x in size and will be too large to move around not only the Crewship but also the Railjack. Player will have to return to dock to reset size.
Frost expends 50Energy to creates a protective globe of ice with a radius of 5 meters, a base health of 1500 / 2500 / 3000 / 3500, and additional health equal to 500% of Frost's base armor bonuses. Upon activation, the globe is invulnerable for 1 / 2 / 3 / 4 seconds. Incoming damage that is absorbed during the invulnerability period is converted into health and added to the globe's health.
Snow Globe's health uses the following expression when accounting for Ability Strength: Modified Health = { Base Health + Armor Multiplier × [ Frost's Base Armor × (1 + Base Armor Bonus) + Additional Armor) ] } × (1 + Ability Strength) + Absorbed Damage
For example, with a maxed Steel Fiber and Intensify, rank-3 Snow Globe will have an initial health of { 3500 + 5 × [ 300 × (1 + 1.1) ] } × (1 + 0.3) = 8,645 before converting absorbed damage.
While active, a health counter becomes visible on the ability icon that tracks the health percentage of the most recently placed Snow Globe from 100% to 0%.
Frost and his allies do not contribute to Snow Globe's health gain by shooting the globe during the invulnerability period.
Upon activation, Snow Globe freezes enemies within its radius over a duration of 3 seconds while violently pushing them outwards. If the enemies hit obstacles, they can be dealt as much as 50% of their maximum health as True damage. Enemies that enter the globe will have their attack/movement speed reduced by 40% / 50% / 60% / 67%.
Most gunfire, both friendly and hostile, is blocked from entering the globe (gunfire can exit the globe normally). Abilities that are not area-of-effect in nature (e.g., Shuriken) are blocked as well.
Snow Globe can be recast multiple times, but there are restrictions on the number of globes that can be created in the environment.
A maximum of 4 separate Snow Globes can be cast at any given time. Casting Snow Globe after reaching the maximum will remove the oldest globe.
Casting Snow Globe while inside an existing globe will remove the older globe and combine the total remaining health values of both globes for the newer one. The invulnerability period is reactivated for each cast.
Snow Globes created inside existing globes do not count toward the maximum number of instances, and Snow Globe's health can stack with repeated casts until reaching a maximum combined health of 1,000,000.
Ability Synergy: Casting Freeze onto the exterior of a globe will destroy it, triggering an icy explosion that deals Freeze's base Cold area damage in an area of effect.
The damage does not diminish with distance and bypasses obstacles in the environment.
Place over a cryopod in defense missions to shield it from all incoming fire.
Maximized Ability Duration will reduce the globe's radius to 1.7 meters, allowing the globe to protect a cryopod without obstructing friendly fire.
Maximized Ability Range will create a snow globe that can cover large areas, making it ideal for slowing down large numbers of enemy units or melee-oriented Bosses. Bear in mind however that this strategy runs the risk of incapacitating players wielding explosive weapons, and generally makes it difficult for players outside the globe from attacking enemies inside it. As such, use this strategy at your own discretion.
When a teammate is downed, place a Snow Globe over them to protect you while reviving.
When facing a boss with ranged attacks, do not place a Snow Globe on it. Instead, place it where your team is to protect them from incoming damage.
The particle effect inside the globe can distract players' vision. Having a black energy color will remove this particle effect entirely, allowing better vision inside the globe.
Recasting the ability after 4 seconds while remaining inside the Snow Globe will allow to sustain an impenetrable Snow Globe, that will grow stronger and stronger. This is due to the fact that it absorbs the enemy fire into its health and adds this health to the next Globe, as long as it is cast inside the first one.
Particularly useful in T4 Defense, since the enemies will quickly reach a level where it does not matter how much base health your Snow Globe has.
Snow Globe's ability to temporarily freeze and push away enemies can be an effective way to rapidly clear a large safe area to revive teammates or remove enemies attacking a defense objective.
Using Freeze to detonate a Snow Globe can also be done while inside another globe. This will not affect the globe you are in. If multiple globes overlap, it is possible to shatter a globe which protrudes into another globe by aiming at the part inside your globe.
It is possible to detonate the Snow Globe that you are in in some Corpus or Void missions by bouncing Freeze off the Bubble of a Nullifier Crewman.(Results May be unpleasant)
Bugs
While using Helios, the Deconstructor projectile can be caught outside the globe and will not return to Helios unless Helios exits the globe.
The globe can sometimes push enemies through walls and could soft-lock the game if the target is required. This has a higher chance of happening if the enemy is touching a wall.
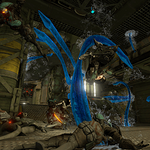
Hydroid expends 50energy to summon a creature from the deep, causing up to 8 / 12 / 16 / 20 tentacles to emerge from all surfaces within a marked location 15 / 15 / 15 / 15 meters in radius, cast over unrestricted range. Tentacles prioritize spawning beneath enemies inside the radius, with each tentacle capturing their initial targets and lifting them into the air until the ability expires after 10 / 13 / 18 / 20 seconds. Captured enemies are incapacitated in a Ragdoll state and stay attached to the tentacles while suffering 50 / 100 / 150 / 200Corrosive Damage with 100%status chance per second.
Against enemies with crowd control immunity and protected by Overguard, tentacles will not capture targets or inflict their Corrosive damage over time, since they are not physically attached. However, Overguarded enemies will be attacked once by the tentacle spawning under them, inflicting 50 / 100 / 150 / 200True damage with a guaranteed Corrosive status effect.
Tentacles detect and capture new enemy targets when they come into range.
Each tentacle can only capture one enemy at once.
This means that Tentacle Swarm can only incapacitate 20 enemies at any given time.
Tentacles with captured enemies will hold their victims steady in the air, allowing players to take aim and kill their targets.
Ability Synergy:
Hydroid's Passive allows the first Corrosive stack to remove 50% armor and is able to fully remove all armor at 10 stacks.
However, Tentacle Swarm alone cannot reach 10 Corrosive stacks and is only able to reach 8 stacks at most due to inflicting status per second and the status's 8 second duration.
Casting Tentacle Swarm is a two-handed action that stops Hydroid's movement and other actions.
Can be recast while active; however, only one instance of Tentacle Swarm can be active at a time. Recasting will replace the previous instance.
Hydroid briefly summons the Kraken at the center of the spawn area as a visual effect. The Kraken emerges from a pool of water, then submerges slowly and disappears. Kraken is affected by Hydroid's chosen Warframe appearance and energy colors.
Tentacles appear as translucent water tendrils emerging from a small puddle of water. Tentacles emit splashes of water periodically, as well as a steam particle effect at their base which is affected by Hydroid's chosen Warframe energy color. However, when the ability is cast by Hydroid Prime, the tentacles will be opaque and more organic in appearance.
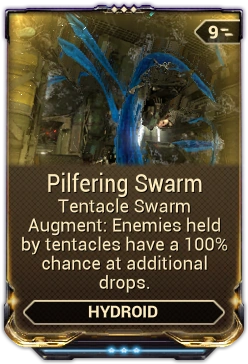
Pilfering Swarm is a HydroidWarframe Augment Mod that grants Tentacle Swarm a chance to yield additional loot from enemies killed while they're ensnared by the tentacles.
Inaros expends 25energy to scatter a wave of cursed sand that inflicts Stagger to all enemies up to 10 / 12 / 13 / 15 meters away in a 180 degree cone in front of him, dealing 75 / 100 / 125 / 150True damage on hit, then 2 / 4 / 6 / 8True damage per second for 3 / 5 / 6 / 8 seconds; 25% of any damage dealt by the damage-over-time effect is conferred back to Inaros as Health. Enemies are also blinded by sand and open to Melee Finisher attack prompts (default X ) for the duration.
Desiccation bypasses obstacles in the environment and does not require line of sight.
Effect cone is directed at the reticle and not always forward like the visual effect suggests. For example, aiming directly upwards will apply desiccation to all enemies around but not below Inaros, counting as 360° in many circumstances.
Can be recast while active. Affected enemies that are not blinded can be blinded by another instance of Desiccation.
Cast delay of 0.5 seconds, affected by Casting Speed. Casting will interrupt movement.
Inaros visually creates a pile of sand on the ground beside him as he throws a handful forward. The sand pile lingers for a few seconds then dissipates.
Subsuming Inaros to the Helminth will offer Desiccation and its augments to be used by other Warframes.
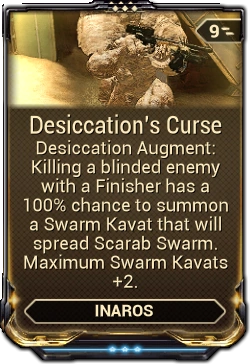
Desiccation's Curse is a Warframe Augment Mod for Inaros' Desiccation ability that has a chance to summon a Swarm Kavat when killing a blinded enemy with a Finisher. Also passively increases the maximum limit of Sand Kavats.
Dessication provides an easy way for Inaros to deal melee finishers, allowing him to quickly regenerate his health when performed on a crowd.
Against certain types of enemies, namely Infested or MOAs, melee finisher is only triggerable from the back of the enemy. Blind them from the front, then execute the finisher attack from their back.
Inaros expends 50Energy to sink an enemy target within 20 / 30 / 40 / 50 meters into quicksand for 15 / 20 / 25 / 30 seconds, trapping it in place as it flails in panic becoming unable to move, attack, or use special abilities. While enemies are trapped, Inaros or any allies can perform the "Devour" action on them by holding down the Interact key (default X ); when devouring an enemy, the player (but not any companions) is completely Invulnerable to damage and Status Effects as Shields and Health are restored at a rate of 400 health per second, while also inflicting True damage per second to the victim. During the Devour action, the victim initially receives 50 / 100 / 150 / 250 damage per second, that ramps up to 100 / 200 / 300 / 500 damage per second over 2 seconds; damage is dealt in 10 ticks per second.
Enemies are unable to act while being actively devoured even if the ability's timer has expired.
The act of devouring a trapped enemy does not consume energy whether from Inaros or allies and can be sustained indefinitely for as long as the Use key is held, or the enemy expires.
The enemy being devoured by a player is invulnerable to outside sources of damage.
If an enemy is killed by being devoured by Inaros, a Sand Shadow is created, which is a friendly copy of the unit killed that will fight alongside Inaros. Sand Shadows last for a duration equal to the time spent devouring them, or a minimum of 15 seconds. A maximum of 3 Shadows can be created.
Creating a new Sand Shadow will remove the oldest created one in existence.
If cast on an enemy target by holding down the ability key (default 2 ), Inaros latches energy tethers onto the enemy from up to 20 / 30 / 40 / 50 meters away, dragging it towards him and automatically devouring it upon making contact so long as the key is held.
Tethered enemy is dragged along the ground and can fall to lower terrain elevations.
Tethered enemy is invulnerable to outside sources of damage while being dragged in.
Dragging speed is affected by movement impairing effects such as Cold procs and Molecular Prime.
Ability Synergy: Enemies trapped by Devour will automatically restore health to Inaros and create a Sand Shadow on death when killed inside Sandstorm.
Devour cannot be cast on naturally flying enemies like Ospreys and Orokin Drones. Units that only have temporary flight abilities though like Hellions can still be pulled from mid-air and then devoured once on the ground.
Cast delay of 1 second is affected by Casting Speed, while devour recovery delay of 2 seconds is not. Casting will interrupt movement.
If the target dies before Inaros finishes his casting animation, energy used for Devour will be refunded; however, if the target is already trapped in quicksand and is being dragged in by the tether, it will not refund energy if killed during travel.
Cannot be recast on affected targets.
Ancient Disruptors will resist the ability heavily, causing only 1 damage per tick to occur, which will often cause the bug listed below. The same goes for Infested allies that are linked to the Disruptor.
Tips & Tricks
If Inaros consumes a Boiler, the Boiler will become a Sand Shadow as normal, and the spawn pods created when it dies will not spawn allied units while the Shadow's will. Similarly, Brood Mother Sand Shadows will spawn friendly maggots on death.
Bugs
Inaros may become stuck in the devour animation, unable to move or cancel the ability until the enemy is killed. Pressing escape will force the player out of the animation although this is exploitable, as you will continue to gain health from the enemy and you can use high powered weapons to kill the enemy, guaranteeing that a Sand Shadow will form.
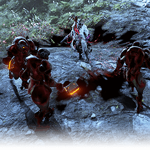
Kullervo sends forth a curse that binds enemies. When a cursed enemy takes damage from him, every other cursed enemy also suffers a portion of that damage.
Kullervo expends 75Energy to cast forth a misty wave in a 65 degrees cone that spreads across a distance of 20 / 22 / 23 / 25 meters. Enemies caught in the mist and in Kullervo's line of sight receive a Stagger and Knockback effect, becoming shackled and linked to each other by cursed chains lasting for 10 / 15 / 20 / 25 seconds. Any weapon or ability damage inflicted by Kullervo himself to a cursed enemy is spread to other cursed enemies at 20% / 30% / 40% / 50% of the initial damage instance.
Damage redirection is capped at 100%, achievable with 200%Ability Strength.
Damage spread deals True Damage or Shield Drain Damage depending on whether the initial target's health or shields were damaged.
Damage spread by Collective Curse ignores armor, but is still affected by units with innate Damage Reduction.
Damage spread by damaging the initial target's shields will only damage shields on linked enemies; Damage spread by damaging the initial target's health will only damage health on linked enemies.
Damage from Wrathful Advance, Recompense, and Storm of Ukko spread to other cursed enemies when striking an enemy under Collective Curse.
Can be recast while active to curse a new group of enemies and refresh duration to full on cursed enemies. Only the enemies cursed by the same instance spread damage to each other.
Casting Collective Curse is an upper-body animation that allows movement and Maneuvers while restricting other actions.
Collective Curse is not dispelled by Kullervo entering an ability nullification zone or falling out of bounds. Each individual enemy must enter a null zone to dispel their curse. While standing inside a null zone, Kullervo may still spread damage to cursed enemies by attacking a cursed target.
Tips & Tricks
Striking multiple enemies through Punch Through or area of effect weapons will spread its damage across all cursed enemies. For example, an attack dealing 100 damage upon striking 5 cursed enemies at maximum damage redirection will deal 500 damage to each enemy.
Emit an energy pulse that depletes enemy shields and armor as it restores ally shields. Debris left over from the pulse becomes Polarize Shards. Nearby Polarize Shards orbit Mag and cut enemies, inflicting bleed status.
Mag expends 75energy to emit a spherical pulse of magnetic energy from herself with an initial radius of 8 meters. The pulse expands outwards for 5 seconds, at a constant rate of 5.9 meters per second, reaching a total radius of 37.5 meters. If the pulse comes into contact with an enemy that has shields, the pulse will drain up to 250 / 300 / 350 / 400 of them. If the enemy has armor, it will be permanently drained by up to 250 / 300 / 350 / 400 points with the enemy additionally suffering True damage equal to the amount removed. Any allies that come into contact with the pulse will have their shields restored by up to 250 / 300 / 350 / 400.
Initial radius and traveled distance are summed to: Total Radius = (1 + Ability Range) × 8 + (1 + Ability Duration) × 5 × 5.9.
With maxed Stretch and Continuity, rank-3 Polarize will have a total radius of (1 + 0.45) × 8 + (1 + 0.3) × 29.5 = 49.95 meters.
Cast animation of 1 second, affected by Casting Speed.
Shields must be completely drained from a target before a new Polarize cast can deplete armor as well.
All drained enemies will produce a violent outburst of magnetic energy inflicting 100% / 150% / 200% / 250% of the drained shields or armor as Magnetic damage to all other enemies within a 2.5 / 3 / 3.5 / 4 meter radius of them.
Explosion damage diminishes with distance.
Damage bypasses obstacles in the environment.
Explosion radius is increased by 0.5̅5 meters for each meter the pulse grows outwards after the initial radius.
Explosion can hit objects, such as Containers and Resource Nodes.
Enemies who have been drained are not damaged by their own explosion, but they can be damaged by nearby enemies who were also drained.
All drained enemies drop one Polarize Shard that lingers for 30 seconds, with a 50% chance to drop two. These Shards are automatically picked up by Mag once she is within 3 meters of them, and will rapidly orbit her to attack enemies within 1 meter. Polarize Shards inflict 50 damage distributed evenly between Puncture and Slash, scaling with the total shields or armor drained, and with a guaranteed status effect.[1]
Shard damage is affected by total shields or armor drained, gaining 25% of the total drained value as damage.
Magnetize will absorb Polarize Shards, trapping the Shards within and allowing them to do immense damage.
Shards will return to their previous state when Magnetize ends.
Polarize's visual effects, including shards, are affected by Mag's chosen energy color.
Casting Polarize is a One-Handed Action that can be done while performing many actions without interrupting them, including reloading, charging, shooting, and moving (either sprinting or sliding).
Can be used in mid-air, but not while on a zipline.
Can be used to restore shields to stationary defense objectives such as Cryopods and Excavators.
Explosions can damage or break objects such as Containers, Resource Nodes, Laser Plates, and Rotation Plates in the Orokin Tower, given a drained enemy was close enough to them.
Shards can inflict high amounts of Slash procs, if used in conjunction with Magnetize they can cause immense Bleed damage.
Pairing this combo with Nourish will grant Shards Viral damage and status, allowing you increase their Bleed damage even further.
The damage portion of Polarize is useless in missions where enemies completely lack shields and armor.
Due to the high base shield replenishment, using Catalyzing Shields will drop down your shields to 111 on max rank, making negative strength still fully replenish at percentages as low as 30% strength.
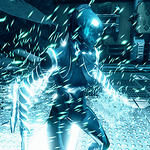
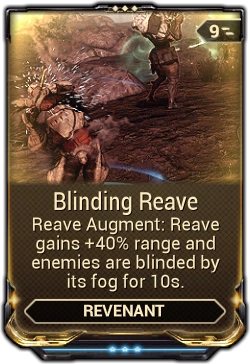
Revenant expends 50energy to transform into a torrent of Sentient mist-like energy that surges forward toward the aiming reticle, at a speed of 25 meters per second for 0.25 / 0.5 / 0.75 / 1 second. While traveling in energy form, Revenant is intangible, Invulnerable to damage and protected against new Status Effects, as he pushes an energy current with a width of 3 / 4 / 5 / 6 meters. Reave can be manually cancelled by pressing the ability key again (default 3 ) or jumping during the dash.
Travel speed and distance are affected by Sprint Speed.
Enemies passing through the energy current are drained 2% / 4% / 6% / 8% of their maximum Shields and Health, while Revenant restores 2% / 4% / 6% / 8% of his maximum shields and health from each enemy leeched; all active status effects on Revenant are also transferred to enemies he passes through.
Does not restore shield points to Revenant if enemies do not possess shields.
Hitpoints from enemies can be drained and restored to Revenant multiple times, if enemies pass through the same instance of Reave.
Ability Synergy:
Reave steals 10% / 20% / 30% / 40%Health and Shields from enemies affected by Enthrall (5x more than base).
The drain percentage displayed in Abilities and the Upgrade screen display the Thrall-empowered drain.
While Mesmer Skin is active, Reave restores 1 charge per thrall that Revenant passes through, up to the full charge count.
While Mesmer Skin is active, allies such as Warframes and Companions that contact Reave's current will gain 1 Mesmer Skin charge.
Reave costs halved energy during Danse Macabre, with instantaneous casting speed and Danse Macabre's stopping animation can be skipped if deactivated during Reave.
During Reave, Revenant continuously dashes toward the direction of the aiming reticle.
While grounded, Revenant can freely change his dash direction.
While airborne, Revenant cannot change directions until he makes contact with a horizontal surface.
Can be cancelled by jumping, which preserves forward momentum.
Casting Reave is an upper body animation that interrupts only upper body actions such as melee attacks or reloading and can be cast while airborne.
Revenant visually becomes translucent and enveloped in Sentient energy during the dash.
Sentient energy cloak, energy current, and particle trails are affected by Revenant's chosen Warframe energy color.
Subsuming Revenant to the Helminth will offer Reave and its augments to be used by other Warframes. Note that the UI's listed 40% damage is not applicable for non-Revenant frames and instead deals 8% damage.
Since Reave deals a set percent damage to enemies' health, it can scale indefinitely.
Without mods, at 100% Ability Strength, it would take 13 Reave casts to kill any enemy, only 3 if that enemy is enthralled.
The percent damage is always significantly reduced against Nox, even with enthralled one. Thus, it is quite ineffective and inefficient to kill them with Reave.
Use Aim Glide during Reave to descend slowly.
Move the aiming reticle during Reave to change your dash direction.
Dash in a circle around enemies to drain from them multiple times.
Consoles can be activated and terminals can be hacked while Reave is active.
When falling from a sufficient height that would induce a hard landing, activate Reave before or immediately after the hard landing to cancel it.
Jump right before Reave ends to take full advantage of its speed and to conserve its momentum. This is especially handy on larger tilesets or the open world maps.
If a turret on the Plains of Eidolon is hit with Reave, it is instantly destroyed, regardless of level.
Plant a death seed in nearby targets to drain their lifeforce. Reap what has been sown to detonate afflicted enemies, dealing a percentage of their health as radial damage. The souls of the dead fill the Death Well.
Sevagoth expends 50energy to damn the souls of the wicked and implant death seeds into all enemies within a radius of 10 / 12 / 14 / 16 meters. Seeded enemies decay toward death taking 100 / 150 / 200 / 250True damage per second over 5 / 8 / 11 / 10 seconds.
True damage inflicts armor-bypassing damage directly to health, ignoring any shield values enemies have.
Ability Synergy:
Sown enemies hit by Reap receive a second Radiation damage instance and detonate, dealing 25% of their current health as Blast damage to all enemies in a 4 meter radius.
Explosion damage has no falloff.
While Gloom is active, Sown enemies heal Sevagoth's health as they take damage per second.
Each enemy seeded then killed by any source, or directly killed by Sow fills 5% of the Death Well for Exalted Shadow.
Death Well gain stacks when Sown enemies die from Reap, but not vice-versa.
Cannot be recast when at least one enemy is affected by Sow.
Casting Sow is an upper-body animation that allows movement and Maneuvers while restricting other actions.
Sevagoth visually conjures rising darkness around him that briefly remains visible to indicate the effective range, as he spreads his arms to sow the death seeds into his foes. Affected enemies are shrouded in a cloak of darkness with a tint of Sevagoth's chosen energy colors.
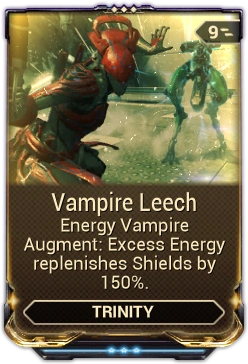
Trinity expends 50energy to extract pure energy from a single enemy target within 100 meters. The target is incapacitated in place, glows bright blue and emits 4 energy pulses over 5 / 6 / 7 / 9 seconds. Each energy pulse restores 10 / 15 / 20 / 25 energy points to Trinity and allied Warframes within a radius of 15 / 17 / 20 / 25 meters, while the target is constantly Staggered. During this time, 6.25% of the target's current health is dealt to it as True Damage each pulse, bypassing the target's Shields. If the target's health drops, or is already, below 25% of its maximum value the target will instead be dealt 6.25% × 25% = 1.5625% of the its maximum health as True Damage each pulse.
If a marked target dies, all remaining pulses are released at once.
Pulses are emitted at every quarter of the duration, the first occurring immediately on cast. The final pulse occurs when three-quarters of the duration has elapsed.
Increasing Ability Duration will cause the pulses to take longer to come out, while decreasing Ability Duration quickens the pulses.
The 6.25% damage percentage is applied to either the target's remaining health or to 25% of its maximum health - whichever is greater at the time of each pulse. Each energy pulse inflicts at least 5True damage if the resulting damage is below 5 damage points.
Cast time of 1.2 seconds is affected by Casting Speed.
The pulses' stagger will not interrupt the attacks of heavy enemy units. It also does not affect enemies immune to stagger, such as Grineer Rollers, Corpus Ospreys, or certain bosses.
Energy Vampire cannot be recast on the same target until its duration has expired.
Energy Vampire cannot be cast on invulnerable targets.
If Energy Vampire is cast on a Manic during its vulnerable phase, pulses can continue through its invulnerable phase.
Players with channeled abilities active do not gain energy from Energy Vampire.
Players channeling Effigy and Mend & Maim still do benefit from Energy Vampire.
Casting Energy Vampire on a weak enemy and killing it will grant players a quick burst of energy.
While increased duration slows energy gain by spreading the pulses over a longer period, killing the target quickly negates this penalty, allowing Trinity's other abilities to benefit from increased duration.
Decreasing Energy Vampire's duration via Corrupted Mods will quicken the energy restoration at the cost of a shortened span of stagger control per cast.
With a maxed Transient Fortitude and Fleeting Expertise, a rank-3 Energy Vampire will trigger all four pulses over 1.125 seconds, staggering the target only once at most.
A low duration build will allow Trinity to cast Energy Vampire multiple times on a single target, providing a large source of energy and quickly dealing true damage.
If used on Grineer Latchers, the Latcher will not be destroyed by the pulses and Energy Vampire can be cast upon it repeatedly for more energy. The effect will stop if it latches onto a player.
Energy Vampire can be used on Sortie Bosses to make quick work of them, as it deals percentage based damage.
Bugs
If Energy Vampire is cast on a Shockwave MOA readying to stomp the ground, it will still produce a shockwave and won't be stunned.
In Corpus levels, if the player targets something outside of the above-mentioned target tracking range, the nearest turret (and possibly cameras) will be targeted.
If Energy Vampire is cast on an Eidolon Vomvalsyt, it will not emit the remaining energy pulses if their physical form is destroyed before the effect wears off.
Notes[]
The term "True Damage" is player-created and not used in the game.
Previously, the term "Finishing Damage" was used, often leading to confusion with Finisher attacks.
 True Damage can not be directly added to a weapon through mods.