(→Mods: fortitude) |
|||
| Line 102: | Line 102: | ||
<gallery captionposition="below" captionalign="center" hideaddbutton="true" spacing="small" navigation="false" position="center" bordersize="none" bordercolor="#FFFFFF" perrow="3"> |
<gallery captionposition="below" captionalign="center" hideaddbutton="true" spacing="small" navigation="false" position="center" bordersize="none" bordercolor="#FFFFFF" perrow="3"> |
||
PainThresholdMod.png|link=Pain Threshold|{{M|Pain Threshold}} |
PainThresholdMod.png|link=Pain Threshold|{{M|Pain Threshold}} |
||
| + | ConstitutionModU145.png|link=Constitution|{{M|Constitution}} |
||
| + | HandspringMod.png|link=Handspring|{{M|Handspring}} |
||
</gallery> |
</gallery> |
||
Revision as of 02:25, 13 August 2020

Stagger, also known as Interrupt, is a Status Effect that causes enemies to flinch and recoil.
Contents
Script error: The function "Proc" does not exist.
When an Script error: The function "Proc" does not exist. proc occurs, the enemy will flinch and recoil backwards. However, Ospreys, Bosses, and Tenno are immune to the effects of stagger caused by Script error: The function "Proc" does not exist..
Self Interrupt Weapons
All weapons with a radial area of effect can cause Tenno to stagger if the user is caught in the resulting explosion. Depending on how far the user is from the center of the radial effect, the Tenno may either flinch or backflip away, being unable to take any action during these animations. Players are not invulnerable during these animations, meaning they can still get hit by enemies.
Players can cancel out of the backflip animation early if they jump when the Warframe glows yellow.
Sources of Stagger Resistance
These sources prevent self-staggering completely or provide a chance to ignore self-staggering effects.
Passives
Abilities
- Abilities with unconditional stagger prevention as long as they are active
|
 2 |
Kinetic Plating Generate armor plating that converts a portion of absorbed Kinetic Damage (Physical, Introduced in Update 25.7 (2019-08-29) |
|
|
Misc:
0.1% (battery drain per hit) |
Info
- Gauss expends
 50 energy to shield himself in a barrier of kinetic energy with one swift motion, protecting himself against incoming
  Impact,
  Puncture,
  Slash, Cold, Heat, and Blast damage types, while also becoming immune to Heat, Cold, Blast, Stagger, and Knockdown statuses for 15 / 20 / 25 / 30 seconds. While active, Kinetic Plating drains 1% battery power per second and
 battery power per hit received, to reduce affected damage by a minimum of
14% / 16% / 18% / 20% at empty battery, up to a maximum of 70% / 80% / 90% / 100% at full battery. 2% / 3% / 4% / 5% of incoming damage is converted into extra Energy for Gauss. Melee attacks while Kinetic Plating is active will restore 0.25% battery. Kinetic Plating deactivates on duration end or by manually pressing the ability key again (default 2 ).
- Maximum damage reduction cannot exceed 100%. Minimum damage reduction cannot exceed 50%.
- Damage reduction is calculated as:
Min Damage Reduction + (Max Damage Reduction - Min Damage Reduction) × Current Battery Level - For example, with Kinetic Plating at rank 3, 100% Ability Strength, and battery level at 80%, the damage reduction will be: 20% + (100% - 20%) × 80% = 84%
- Damage reduction is calculated as:
- Battery drain per second, battery drain per hit, energy restore per hit, and battery charge per melee attack are not affected by Mods.
- Both damage reduction and energy restoration still function even when the battery is empty.
- Energy restoration is calculated before all damage mitigation.
- Maximum damage reduction cannot exceed 100%. Minimum damage reduction cannot exceed 50%.
- Ability Synergy:
- While Kinetic Plating is active, it adds 100% Slash damage to Mach Rush's shockwave, and makes it inflict a Slash proc on enemies caught in the explosion radius.
- While the battery level is boosted during Redline, Kinetic Plating also grants Gauss a 100% base melee damage bonus and 100% chance to stagger enemies on hit.
- While Kinetic Plating is active, it adds 100%
Tips & Tricks
- Kinetic Plating stacks and synergizes well with Adaptation.
- Kinetic Plating provides initial protection while Adaptation builds up damage resistance from 0% to 90%.
- Though Kinetic Plating's damage resistance can reach 100% at full battery, it cannot cover all damage type and the battery wouldn't be full for most of the time.
- On the other hand, Adaptation can reduce only one damage type for each particular attack.
- Kinetic Plating stacks with Hunter Adrenaline and, when combined, can quickly restore energy while under heavy fire.
- Kinetic Plating synergizes well with Quick Thinking as it reduces energy drain upon fatal hit, and also compensates with its energy restoration.
- Kinetic Plating does not require high Ability Strength to be viable as its damage reduction is primarily scaled with battery level.
- Damage reduction will be 84% with 100% Ability Strength at 80% battery level.
- This can be scaled up to 90%, which requires 250% Ability Strength.
- However, at full battery, damage reduction will reach 100% if Ability Strength is 100% or more.
|
 1 |
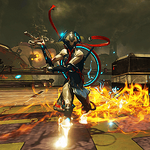
Fire Walker Blaze a trail of flames, scorching enemies and cleansing allies. Introduced in Update 18.1 (2015-12-16) |
500 / 750 / 1000 / 1250 ( |
5 / 6 / 7.5 / 10 s (flame duration) | |||
|
Misc:
15 / 15 / 20 / 25 % (movement speed bonus) | |||
| Subsumable to Helminth |
Info
- Nezha expends 25 energy to ignite his Wind Fire Wheels to gain 15% / 15% / 20% / 25% bonus Movement Speed for 15 / 20 / 25 / 30 seconds, while leaving behind a trail of fire beneath his feet that lasts for 5 / 6 / 7.5 / 10 seconds. Enemies that walk over the flames are dealt 50 / 100 / 150 / 200 Heat damage per 0.5 seconds, with each instance of damage having a 10% / 25% / 50% / ? Heat status chance. While Nezha and his allies stand on the flames, they are immune and continually cleansed of all Status Effects.
- Cast animation of ~0.5 seconds, affected by Casting Speed.
- Flames can be formed in mid-air but only while Bullet Jumping. Falling will not leave behind any flames.
- Ability Synergy: If Fire Walker is active when using Blazing Chakram's teleportation, Fire Walker will overheat at the destination and deal 500 / 750 / 1000 / 1250 Heat damage with a 10% / 25% / 50% / ? Heat status chance within a radius of 3 / 4 / 5 / 6 meters, as well as leaving a lingering ring of Fire Walker's flames for ? seconds.
- Damage does not bypass obstacles in the environment and diminishes with distance.
- Fire Walker can be cast while moving but will interrupt all other actions.
- Can be recast while active to refresh its duration.
- Subsuming Nezha to the Helminth will offer Fire Walker and its augments to be used by other Warframes.
- This does not allow other Warframes to use Fire Walker's explosion on teleport. This is exclusively a synergy with Blazing Chakram.
Augment
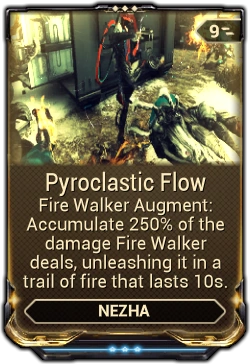
- Main article: Pyroclastic Flow
Pyroclastic Flow is a Warframe Augment Mod for ![]() Nezha and
Nezha and ![]() Nezha Prime that accumulates the damage
Nezha Prime that accumulates the damage ![]() Fire Walker deals and unleashes it in a trail of fire upon reactivating the ability.
Fire Walker deals and unleashes it in a trail of fire upon reactivating the ability.
Tips & Tricks
- The 100% chance of the Heat status effect makes this an effective form of control for narrow hallways or choke points.
- Quickly sliding into groups of enemies can reliably disable them.
- The amount of ground that can be covered in flames can be improved using Sprint Speed mods.
- Also works as an escape tool to prevent enemies from following you.
- Can be used to cut off melee units from defense objectives.
- Briefly tapping slide key allows for additional control over Nezha's momentum while maintaining the additional speed.
- Choosing a dark energy color makes the visual effect less intrusive.
|
 3 |
Warding Halo Create a protective ring of fire that also stuns and damage enemies who get too close. Introduced in Update 18.1 (2015-12-16) |
50 / 75 / 100 / 125 ( 1.15x / 1.25x / 1.75x / 2.50x (armor multiplier) 2.5x (absorption multiplier) |
|
Misc:
3 s (invulnerability duration on cast) |
Info
- Nezha expends 75 energy to summon a fiery ring that encircles him, granting immunity to Status Effects and 90% Damage Redirection towards the ring's health pool. The ring starts with 500 / 650 / 800 / 1000 base health, to which 115% / 125% / 175% / 250% of Nezha's total armor is added as bonus health. Upon activation, the ring is invulnerable for 3 seconds, during this time all incoming damage it takes is multiplied by 250% and added to its total health. Enemies that wander within 1.25 / 1.5 / 1.75 / 2 meters of Nezha are continuously Staggered and dealt 50 / 75 / 100 / 125 Slash damage every second. Warding Halo cannot be refreshed while it is active, and only expires when its health is depleted or when it is dispelled.
- Warding Halo's health uses the following expression:
Modified Health = (Base Health + Armor Multiplier × (Health Conversion Armor + Nezha's Base Armor × (1 + Armor Bonus)) + Absorbed Damage × Absorption Multiplier) × (1 + Ability Strength)- As an example, with a maxed Steel Fiber and Intensify, and one stack on Health Conversion, a rank-3 Warding Halo will have an initial health of (1000 + (2.5 × (450 + 190 × (1 + 1.1)))) × (1 + 0.3) = 4,059.25 before absorbing damage.
- As an example, with a maxed
- While active, a health counter is displayed on the lower-right of the HUD, above the ability icons, indicating how much damage absorption is left.
- Slash damage instances immediately affect enemies as they enter the stun radius.
- Cast animation of ~1 second, affected by Casting Speed.
- Casting this ability makes Nezha stop all other actions, including movement. However, players can perform a running slide and hold it before casting in order to maintain momentum during the animation.
- Warding Halo's health uses the following expression:
- Upon expiring, Warding Halo releases, inflicting all surrounding enemies with a guaranteed Heat status effect, and making Nezha invulnerable for 1 second.
- Warding Halo cannot be cast while active, but can be recast during this expiry invulnerability period.
- Damage taken from the last hit which exceeds the health of Warding Halo will still transfer over in full to Nezha's health, potentially killing him (if strong enough), before the 1 second invulnerability can take effect.
- Blocking with a melee weapon will not reduce damage taken to Warding Halo's Health, but will reduce damage taken from the 10% that is not absorbed by Warding Halo.
Augment
- Main article: Safeguard
Safeguard is a Warframe Augment Mod for ![]() Nezha that allows him to cast
Nezha that allows him to cast ![]() Warding Halo on allies, albeit with reduced durability.
Warding Halo on allies, albeit with reduced durability.
Tips & Tricks
- Using Health Conversion to gain armor stacks before casting Warding Halo, greatly increases its base health without requiring as much Power Strength.
- Be careful against enemies like Mutalist Osprey. Their toxin cloud for example deals damage to your Warding Halo and to your HP, bypassing your shield. This can kill you very easily, even with a full Warding Halo.
|
 3 |
Parasitic Link Bind to a target with a parasitic link. For allies, both the host and Nidus gain increased Ability Strength. Linked enemies take the damage inflicted on Nidus. Introduced in Update 19.5 (2016-12-22) |
10% / 15% / 20% / 25% (damage bonus) 20% / 30% / 40% / 50% (damage redirection) |
10 / 13 / 16 / 20 m (enemy link) |
Info
- Nidus expends 1 Mutation stack to perform symbiosis with a targeted ally Warframe within 24 / 28 / 34 / 40 meters or parasitically link with a targeted enemy within 10 / 13 / 16 / 20 meters. The link persists as long as Nidus and his target remain in range of each other, lasting for 30 / 35 / 45 / 60 seconds or when manually deactivated by pressing the ability key again.
- When linked with an ally Warframe, Nidus and his target both receive a 10% / 15% / 20% / 25% Ability Strength bonus and a 10% / 15% / 20% / 25% weapon damage bonus.
- Parasitic Link's Ability Strength bonus affects Ability Strength multiplicatively using the following expressions:
- Modified Strength Bonus = Strength Bonus × (1 + Ability Strength)
- With a maxed Intensify and the 15% Ability Strength rank bonus, Nidus will have 145% Ability Strength, resulting in 0.25 × (1 + 0.3 + 0.15) = 36.25% Modified Strength Bonus displayed on the UI.
- Modified Ability Strength = (1 + Ability Strength) × (1 + Modified Strength Bonus)
- Modified Strength Bonus then increases Ability Strength multiplicatively, granting 1.45 × (1 + 0.3625) = 197.5625% Modified Ability Strength that affects Nidus' other abilities while a rank-3 Parasitic Link is active.
- The Modified Strength Bonus is the same percentage for the linked ally. However, Modified Ability Strength's calculation will depend on the linked ally's own Ability Strength.
- Parasitic Link's Ability Strength bonus affects Ability Strength multiplicatively using the following expressions:
- When linked with an enemy, the target is incapacitated for the duration while Nidus gains 20% / 30% / 40% / 50% Damage Redirection toward the linked target. All negative Status Effects, including Knockdown and Stagger, are also redirected.
- Damage Redirection is capped at 90%, achievable with 180% Ability Strength.
- Enemy target is invulnerable to outside sources of damage and immune to external crowd control effects while linked, but is not immune to damage and crowd control effects transferred from Nidus. All damage prevented by the external invulnerability are stored and dealt in full when the ability ends.
- Friendly fire is not transferred to the linked target.
- Can link to enemies with Overguard, however they will not be incapacitated and can still attack.
- Parasitic Link does not require Line of Sight to maintain connection between Nidus and his target.
- If the target dies during cast before the link is attached, the single Mutation stack used for Parasitic Link will be refunded.
- When linked with an ally Warframe, Nidus and his target both receive a
- Ability Synergy: While linked to a target, using Virulence will spawn a second instance from the linked target that grows towards the targeted location, converging with the first instance from Nidus.
- Enemies hit by the second instance separately counts toward Mutation stack, even when the same enemies also get hit by the first instance.
- Parasitic Link is a One-Handed Action and can be cast while in midair.
- Nidus and the target are visibly covered in infestation and connected via a tether of biochemical energy, which is affected by the chosen Warframe energy color.
- Cannot link to a target already affected by Parasitic Link. Multiple Nidus players cannot link to the same target, nor to each other while their own Parasitic Link ability is active.
- When connected to another Nidus player, both players will use the Ability Strength bonus from the casting player; the link will break if the partner activates Parasitic Link on a different target.
Augment
- Main article: Parasitic Vitality
Parasitic Vitality is a Warframe Augment Mod for ![]() Nidus that allows
Nidus that allows ![]() Parasitic Link to grant Nidus and the ally he is linked through with the ability bonus Health, scaling with each mutation stack.
Parasitic Link to grant Nidus and the ally he is linked through with the ability bonus Health, scaling with each mutation stack.
Tips & Tricks
- Link with a nearby teammate or enemy for Virulence to create two lines from Nidus and the linked target. This effectively extends Virulence's reach, doubles its damage output, staggers enemies in its paths, collects more hits for stacks, and earns extra energy for the cost of one cast.
- Linking with a teammate creates a mobile casting point that can relocate quickly to find new enemies.
- Linking with an enemy provides a stationary casting point that allows you move around to adjust Virulence's travel direction and length.
- Use Virulence's range indicator by holding 1 to determine the number of targets both lines will hit before releasing the button to cast.
- Teammates with Warframes that possess high ability damage and Ability Strength-based effects are prime candidates for Parasitic Link.
- Alternatively, the Ability Strength bonus allows allies to use more balanced builds instead of builds that focus solely on Ability Strength.
- Enemies with high health and armor values such as Heavy Gunners can absorb a large amount of damage transferred from Nidus.
- As long as Nidus and his target are in range of each other, Parasitic Link's biochemical tether will help you visually track your positions.
- Before reviving a downed teammate, link with a nearby enemy to protect yourself from taking too much damage.
- Linking with an enemy caught by Larva causes it to become immune to damage from outside sources, which may hinder your crowd control ability because Larva will go through its full duration before you can recast it. Press 3 to manually deactivate the link, allowing you and your allies to kill the enemy to end Larva early for recast.
- This immunity to damage can be beneficial for racking up the melee combo counter. Simply attack the target as many time as possible. Combine with combo mods like Blood Rush for best results.
- This immunity to damage can be beneficial for racking up the melee combo counter. Simply attack the target as many time as possible. Combine with combo mods like
- Maggots from Ravenous will ignore your linked enemy target. However, maggot explosions will still count as hits for the Mutation gauge even when they cannot damage the target. When you cast Parasitic Link on an enemy with maggots attached, the maggots will detach once the link is established.
- Parasitic Link can be cast on the Juggernaut, and though it will not immobilize the Juggernaut it will still transfer damage to it, bypassing the Juggernaut's normally-impenetrable armor.
- This can be done for most Boss enemies such as Acolytes, Kuva Liches, and Sisters of Parvos.
- Can be used to immobilize Synthesis target, instead of deploying Kinetic Siphon Trap. This also prevents the target from being killed, accidentally or not, provided Nidus himself is not under heavy fire.
- Parasitic Link can transfer negative Conduit Effects given in Disruption. For example, Energy Drain will drop from 5 energy per second to 1. This reduces, but does not negate, the threat of negative effects from conduits, should one fail.
|
 2 |
Mesmer Skin Become enveloped in Sentient energy, which redirects damage and stuns all those who dare attack. Stunned enemies can be Enthralled at no energy cost. Introduced in Update 23.5 (2018-08-24) |
|
|
Misc:
100% (reflected damage and status) |
Info
- Revenant expends 50 energy to surround himself in a shroud of Sentient energy that reflects 3 / 4 / 5 / 6 incoming enemy attacks; attackers receive 100% of the reflected damage and Status Effects, while also becoming stunned for 2 / 3 / 4 / 5 seconds. Upon consuming a charge, Revenant becomes Invulnerable for 1 second. Mesmer Skin lasts indefinitely until all charges are used.
- Casting speed is affected by Casting Speed.
- Number of remaining charges is displayed on the ability icon.
- For any non-integer the number of charges is rounded up to the next whole number. For example, 255% Ability Strength = 15.3 charges, this is rounded to 16. However in game the maximum charges will display 15, with the 16th charge displayed as 0.
- Revenant is immune to self-stagger, which does not consume a charge.
- Does not reflect damage dealt by status effects and objects created by enemies (e.g., Napalm flame patches)
- Does not negate damage from Explosive Barrels or Environmental Hazards, although they will not use up a charge.
- Revenant's Health can still take damage, but will not be lowered below 2 and therefore cannot die as long as he has charges.
- Mesmer Skin converts knockdown from Shockwave MOA waves into a knockback.
- Mesmer Skin reflects damage from Scorpion and Ancient hookshots, as well as blocking their knockdown and pull effects.
- Ability Synergy:
- Enthrall costs 0 energy to cast on an enemy stunned by Mesmer Skin.
- While Mesmer Skin is active, Reave restores 1 charge per thrall that Revenant passes through, up to the full charge count.
- While Mesmer Skin is active, allies such as Warframes and Companions that contact Reave's current will gain 1 Mesmer Skin charge.
- Can be recast while active to apply a new instance. Previously unused Mesmer Skin charges are removed during recast.
- Casting Mesmer Skin is a full body animation that interrupts grounded movement and other actions.
- Revenant visually grows a cluster of Eidolon tendrils on his left shoulder, emits fumes from his body and a shroud of white mist around his torso while Mesmer Skin is active. Allies that gain Mesmer Skin also exhibit these visual effects on their body.
- Eidolon tendrils and fumes color tinting are affected by Revenant's chosen Warframe energy color.
Augment
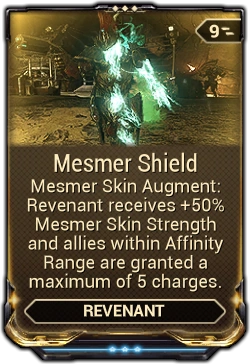
- Main article: Mesmer Shield
Mesmer Shield is a Warframe Augment Mod for ![]() Revenant's
Revenant's ![]() Mesmer Skin that increases its own Ability Strength and grant charges to allies within Affinity Range.
Mesmer Skin that increases its own Ability Strength and grant charges to allies within Affinity Range.
Tips & Tricks
- It is probably more beneficial to focus on Ability Strength, Ability Duration and Ability Range, rather than equipping Health and Shield mods on Revenant as Mesmer Skin provides high survivability.
- Casting while in air allows Revenant to maintain forward momentum while activating Mesmer Skin.
- When receiving the Ability Strength and Ability Range buff from Void Fissure missions, activate Mesmer Skin right before the buff ends. Avoid Nullifier Crewmen and other enemies with an ability nullifying field to take full advantage of the buffed Mesmer Skin. Additionally, if Mesmer Skin is activated and the buff is no longer active, the un-buffed Mesmer Skin value will replace the buffed Mesmer Skin value, even if the buffed value was greater.
Bugs
- Damage dealt by Nullifier Crewman with its null sphere intact does not use up Mesmer Skin charges. Damage is still mitigated completely.
- The remaining charge counter on the ability icon can sometimes disappear while the ability is still active, most prominently observed after performing Transference back into the Warframe.
- Charges can be modified into decimals, but the ability icon counter only displays whole numbers, including 0 which can be misleading.
- When using Rage or Hunter Adrenaline, even though damage is fully nullified, if the damage exceeds Revenant's shield value, energy will still be granted.
|
 2 |
Iron Skin Rhino hardens his skin, insulating himself from all damage. Introduced in Vanilla (2012-10-25) |
? / 1.25 / 1.75 / 2.50x (armor multiplier) |
|
Misc: 1.5 / 2 / 3 / 3 s (invulnerability duration) |
Info
- Rhino expends 50 energy to harden his skin, receiving Overguard with 400 / 600 / 800 / 1200 base health. Rhino's total armor multiplied by ? / 125% / 175% / 250% is also added to Overguard. Upon activation, Iron Skin is invulnerable for 1.5 / 2 / 3 / 3 seconds, during which all incoming damage is absorbed and added to the Overguard.
- During the 3 seconds period Rhino is still vulnerable to crowd control effects.
- Iron Skin's health uses the following expression:
Modified Health = (Base Health + (Armor Multiplier × Base Armor × (1 + Armor Mods))) × (1 + Ability Strength) + Absorbed Damage.- Note that the base armor value is different between Rhino and Rhino Prime; while Rhino has 240 Base Armor, Rhino Prime has 290 Base Armor.
- As an example for Rhino:
- With a maxed Steel Fiber and Intensify, a Rank 3 Iron Skin cast by Rhino will have an initial health of (1200 + (2.5 × 240 × 2)) × 1.3 = 3,120 before absorbing damage.
- With a maxed
- Modifying that equation for Rhino Prime:
- With a maxed Steel Fiber and Intensify, a Rank 3 Iron Skin cast by Rhino Prime will have an initial health of (1200 + (2.5 × 290 × 2)) × 1.3 = 3,445 before absorbing damage.
- With a maxed
- Ability Synergy: While Iron Skin is active, damage from Rhino Charge will have a 100% status chance for Blast effects.
- For Rhino Prime, Iron Skin's visual effects will take into account the chosen accent color.
Augment
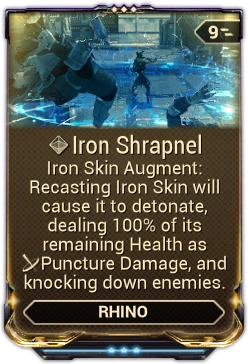
- Main article: Iron Shrapnel
Iron Shrapnel is a Warframe Augment Mod usable in both PvE and Conclave for ![]() Rhino's
Rhino's ![]() Iron Skin that when active allows it to be detonated by pressing the ability key (default 2 ), unleashing a radial AoE attack that deals a portion of its remaining health as
Iron Skin that when active allows it to be detonated by pressing the ability key (default 2 ), unleashing a radial AoE attack that deals a portion of its remaining health as ![]() Puncture damage.
Puncture damage.
Tips & Tricks
- Ironskin can be removed early by:
- Entering the bubble of a Nullifier Crewman (Corrupted)
- Entering the aura range of Combas & Scrambuses
- Being dispelled by Stalker
- Falling out of the map.
- Host Migration
- With a Streamline or Fleeting Expertise mod, Rhino can cast Iron Skin immediately after the first Energy Drain tick in order to give himself a "shield" of sorts.
- It is possible to gain a significant amount of health for Iron Skin by standing in the path of a Death Orb beam during the invulnerability phase. Be warned however, as the beam can quickly deplete said health if the player does not move out of the way once the invulnerability phase ends.
- Using Rhino Charge with Ironclad Charge installed before casting Iron Skin can significantly boost its health by boosting the armor.
- By this method, you can easily reach over 50k of Iron Skin health by charging into a group of enemies when invested in armor and ability strength.
- Ironclad Charge's armor bonus is applied to Iron Skin as long as Iron Skin's casting was started in the duration of the buff.
- Iron Shrapnel can help by providing the ability to re-cast Iron Skin at any given time, even with extremely lowered ability duration as long as you cast Iron Skin right after a Rhino Charge.
- Arcane Tanker can significantly provide armor boost, effectively increasing Iron Skin's health by roughly over 100%.
Bugs
- Migrating hosts will completely remove Iron skin, regardless of the level it was at.
- If Rhino manages to activate Iron Skin as he falls backwards and enters bleedout, his bleedout timer will reach zero and he will never die. He will remain in bleedout until he is revived.
- Using Iron Skin while in a conveyor would make Rhino immovable.
|
 1 |
Spellbind Enemies fumble their weapons as they tumble into the air. Nearby allies become immune to Status Effects. Introduced in Update: The Silver Grove (2016-08-19) |
|
20 / 30 / 40 / 50 m (cast range) | |||
|
Misc: 100 % (status cleanse and immunity) | |||
| Subsumable to Helminth |
Info
- Titania expends 25 energy to scatter enchanted dust in a 1 / 3 / 3 / 5 meter radius around the location she aims at, up to 20 / 30 / 40 / 50 meters away. Enemies within this area are Disarmed and Ragdolled as they weightlessly float in mid-air for 10 / 12 / 14 / 16 seconds. Titania and her allies caught within the dust cloud are cleansed from Status Effects and gain immunity to them for the duration of the ability. Holding down the ability key (default 1 ) casts the ability centered on Titania.
- Cast animation of 1 second is affected by Casting Speed.
- Can be cast while moving, but will interrupt other actions such as reloading, charging or shooting.
- Status immunity also protects from crowd control effects such as Knockdown and Stagger, including the lock-out animation of Archwing and Razorwing when impacting a surface.
- Cast animation of 1 second is affected by Casting Speed.
- After Spellbind expires, enemies previously armed with weapons cannot attack until they retrieve their weapons on the ground. Those that do not use weapons (such as the Infested) will recover quickly.
- Spellbound allies and enemies emit unique particle effects:
- Enemies visually emit energy butterflies fluttering about and an upward stream of energy stripes, both affected by Titania's energy colors.
- Allies visually emit energy butterflies fluttering about, affected by their own energy colors.
- Spellbind can be aimed at any surface, but will only allow you to use it if an enemy is within the predicted area of effect.
- Subsuming Titania to the Helminth will offer Spellbind and its augments to be used by other Warframes.
Augment
- Main article: Spellbound Harvest
Spellbound Harvest is a Warframe Augment Mod for ![]() Titania which lets her regain Energy and increases the next cast's Ability Range when hitting at least 4 enemies with
Titania which lets her regain Energy and increases the next cast's Ability Range when hitting at least 4 enemies with ![]() Spellbind.
Spellbind.
Tips & Tricks
- The status immunity granted by Spellbind also prevents Titania from being staggered when hitting surfaces in Razorwing. Holding the button down to activate Spellbind on yourself can be really helpful when flying through tight spaces.
|
 3 |
Link Any damage taken while Link is active will be channeled to a nearby enemy. Introduced in Update 4 (2012-11-02) |
|
|
Misc:
1 / 2 / 2 / 3 (affected enemies) |
Info
- Trinity expends 75 energy to link herself with up to 1 / 2 / 2 / 3 enemies within a radius of 12 / 14 / 17 / 20 meters for 6 / 8 / 10 / 12 seconds. While linked, she receives 50% / 60% / 70% / 75% Damage Redirection and any Status Effects toward the linked enemies. Linked enemies take 100% of the redirected attack's damage and Status Effect.
- Casting time of 0.6 seconds is affected by Casting Speed.
- Trinity must be linked to at least one enemy at any given moment to gain the ability's defensive benefits.
- Status immunity applies to Stagger and Knockdown.
- Includes knockdown from environmental traps such as Corpus Laser Barriers. Note that tripping these barriers in Spy missions will still trigger vault alarms.
- Ability Synergy: Link can tether to a Well of Life target, applying lifesteal during Link's Damage Redirection.
- If Trinity is bleeding out while this ability is active, she will not link with nearby enemies.
- Trinity cannot link with Stalker.
- Trinity and linked enemies will shine the color of her energy.
- Cannot be recast while active.
- Casting Link is a full-body animation that stops grounded movement and all other actions.
Augment
- Main article: Abating Link
Abating Link is a Warframe Augment Mod for ![]() Trinity's
Trinity's ![]() Link that reduces the armor of all connected enemies.
Link that reduces the armor of all connected enemies.
Tips & Tricks
- Keeping this ability active when surrounded by high-level enemies will dramatically increase Trinity's survivability.
- Be careful of Link's slow, immobile cast delay, lest you become overwhelmed by burst fire.
- Use Trinity's Energy Vampire to fuel Link's high energy cost.
- Link connects to enemies through walls and other obstacles, which serves as an early-warning system indicating if enemies are nearby.
- Be wary of mods and effects which reduce Ability Range as they make it harder to maintain an active link, and with that, Link's defensive benefits.
|
 4 +2.5-15/s |
Hysteria Valkyr is imbued with energy and becomes a ball of vicious rage, capable of unleashing a torrent of deadly claw attacks on unsuspecting foes. Introduced in Update 11.0 (2013-11-20) |
|
|
Misc:
1% / 2% / 4% / 5% (lifesteal) |
Info
- Overcome with rage, Valkyr unleashes a pair of energy talons, the Valkyr Talons, as her melee Exalted Weapon. Normal attacks deal 100 / 125 / 200 / 250 damage within 2 meters and all of Valkyr's attacks heal her for 1% / 2% / 4% / 5% of the damage dealt.
- Damage is distributed evenly between Impact, Puncture, and Slash.
- Wall attacks and slide attacks inflict 300 / 375 / 600 / 750 damage for each strike.
- Aerial attacks inflict 200 / 250 / 400 / 500 damage.
- Slam attacks inflict 300 damage within 5 meters.
- Attacks have a 2x critical multiplier, 50% critical chance, and 10% status chance.
- Damage is distributed evenly between
- Damage is affected by Ability Strength and most mods.
- As an example, with a maxed Pressure Point, Shocking Touch and Intensify, the normal attacks of a rank-3 Hysteria will deal
Base Damage × (1 + Damage Mods) × (1 + Elemental Mods) × (1 + Strength Mods) =
250 × (1 + 1.2) × (1 + 0.9) × (1 + 0.3) = 1,358.5 damage. - The mods that can be equipped on and affect Valkyr Talons include:
- damage (e.g., Steel Charge)
- physical damage (e.g., Jagged Edge)
- elemental damage (e.g., Shocking Touch)
- faction (e.g., Smite Corpus)
- critical chance and damage (e.g., True Steel and Organ Shatter)
- Status chance (e.g., Melee Prowess and Vicious Frost)
- attack speed (e.g., Fury and Berserker Fury)
- range (e.g., Primed Reach)
- Tennokai (e.g., Dreamer's Wrath)
- Condition Overload
- Healing Return
- Relentless Combination
- Shattering Impact
- While officially Set Mod bonuses do not affect Exalted Weapons (with the exception of the Sacrificial Mod Set), the Gladiator Mod Set can still apply if equipped on Melee and not on the Exalted Weapon itself.
- damage (e.g.,
- Valkyr Talons can not be equipped with Melee Combo Counter Mods (except Drifting Contact), Acolyte Mods (e.g., Blood Rush), or Amalgam Mods (e.g. Amalgam Organ Shatter).
- Riven Mods are not generated for Valkyr Talons.
- The combo counter will reset when equipped with Xoris.
- Hysteria's combo counter decay is affected by Naramon's Power Spike
- Hysteria's innate lifesteal is calculated from the total damage of Valkyr's melee attacks after resistances are applied. Hysteria's lifesteal is also additive when combined with other sources of lifesteal
- For example, a maxed Life Strike and a rank-3 Hysteria will yield
Base Lifesteal + Lifesteal Mods = 5% + 20% = 25% lifesteal on heavy hits.
- For example, a maxed
- As an example, with a maxed
- While active, Valkyr becomes Invulnerable to damage and Status Effects.
- Certain attacks will still push Valkyr away, and shock waves will cause her to bounce into the air. However, these attacks will not force Valkyr to the ground.
- Statuses that were already active when Hysteria was cast will not be removed. However, Valkyr will be immune to their damage regardless.
- Valkyr is not immune to Commander teleportation, Regulator minimap disruption, Cryo Floors, Tar-Mutalist MOA slows, or Swarm-Mutalist MOA screen hazing.
- Valkyr emits an aura with a radius of 5 meters around her while Hysteria is active, and 30% of the total damage she ignores is stored. If any enemies within this aura have Line of Sight of Valkyr when Hysteria is deactivated, Valkyr will be dealt 25% of all stored damage as Impact damage.
- The aura will continue to grow up to 20 meters and each kill reduces it by 1 meter. The aura cannot be decreased below 5 meters.
- Stored damage is calculated from the total damage Valkyr ignores before resistances are applied.
- The amount of stored damage can be monitored at the top right of the HUD under Hysteria's ability icon.
- Stored damage dealt bypasses shield gating and can kill instantly if too large.
- Stored damage is reset upon swapping weapons.
- Highlighted enemies become unmarked if Valkyr moves out of range, negating the damage taken when Hysteria expires.
- Since enemies need line-of-sight, invisibility prevents the damage.
- After activation, a percentage counter will appear on the ability icon. The percentage increases from 0% to 100% over the course of 40 seconds.
- Hysteria costs 25 energy to activate, then consumes 2.5 energy per second at 0% while active. The cost will increase by an additional 2.5 until it caps out at 15 energy per second at 100%. Hysteria will remain active until either Valkyr's energy is depleted, or the ability is deactivated by casting it again (default 4 ).
- Valkyr cannot replenish energy using Energy Vampire, Rally Point, Rift Plane's innate energy regeneration, Squad Energy Restores, Energy Siphon, Energy Nexus, Dreamer's Bond, and/or Wellspring while Hysteria is active.
- Energy Orbs, Orokin Void Death Orb's energy restores, Spellbound Harvest, Arcane Energize, and Emergence Dissipate's Energy Motes can still replenish Valkyr's energy during Hysteria.
- Hysteria's energy drain is not converted into shields by Augur Mods.
- Hysteria costs
- Hysteria is affected by and can trigger Warframe arcanes, Exodia Might , and Melee Crescendo (even though the benefit from exodia might is minimal and it does not share the same combo counter as the melee weapon thus not benefiting directly from Melee Crescendo).
- While Hysteria is active, Valkyr can cast other abilities and use primary and secondary weapons. Switching weapons will disable Hysteria's effects, including making her vulnerable to damage again; it will also pause the energy cost increase but will continue to drain energy at the current rate.
- Hysteria comes installed with its own unique stance. Additional combos will be unlocked as Hysteria increases in rank.
- Cast time of 1 second is affected by Casting Speed.
- Hysteria's attacks can damage enemies across the Rift Plane.
- Some of the passives of the Incarnon melee weapons work on Hysteria.
Weapon
- Main article: Valkyr Talons
Valkyr Talons are ![]() Valkyr and
Valkyr and ![]() Valkyr Prime's signature Exalted Weapon, summoned by activating the ability
Valkyr Prime's signature Exalted Weapon, summoned by activating the ability ![]() Hysteria. The weapon exclusively uses the Hysteria stance.
Hysteria. The weapon exclusively uses the Hysteria stance.
- This weapon deals equal physical damage.
- Innate and two polarities.
- Negates the infinite combo extender of Xoris, resetting combo count on activation.
Advantages:
- Tied with Desert Wind for the highest critical chance of all melee weapons.
- Innate 5% lifesteal.
- Very high attack speed.
Disadvantages:
- Low status chance.
- Short range.
- Requires energy to activate and keep active.
- Damage isn't affected by the combo counter.
- As an Exalted Weapon, it cannot benefit from, nor contribute to the set bonus of any Set Mods (excluding the Sacrificial Mod Set; the Gladiator Mod Set can still apply if equipped on Warframe, Melee, or Robotic Weapons, and not on the Exalted Weapon itself).
- Cannot equip Melee Combo Counter Mods (except Drifting Contact), Acolyte Mods (e.g., Blood Rush), or Amalgam Mods (e.g., Amalgam Organ Shatter).
- Cannot equip Melee Arcane Enhancements.
Stance
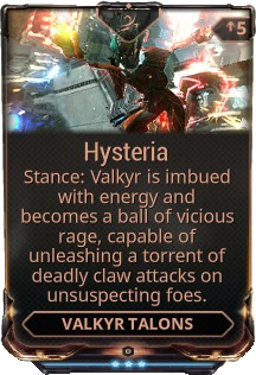
- Main article: Hysteria (Stance)
Hysteria is a unique Stance exclusive to ![]() Valkyr Talons that can only be acquired and used by activating
Valkyr Talons that can only be acquired and used by activating ![]() Valkyr's fourth ability,
Valkyr's fourth ability, ![]() Hysteria. This Stance overrides the Stance on any currently equipped melee weapon for as long as Hysteria remains active.
Hysteria. This Stance overrides the Stance on any currently equipped melee weapon for as long as Hysteria remains active.
Combos
| Combo/Attack | Name | Attack Multipliers and Forced Procs | Avg Dmg Multi/s | Length @ 1.0 Attack Speed |
Animation | ||||||||||||||||||||||
|---|---|---|---|---|---|---|---|---|---|---|---|---|---|---|---|---|---|---|---|---|---|---|---|---|---|---|---|
| Neutral (While Not Moving) |
Fervor | 100% |
100% |
100% |
2x 100% |
315.8%/s | 2.9s | 
| |||||||||||||||||||
| Forward (While Moving) |
Rage | 100% |
100% |
100% |
235.3%/s | 1.7s | 
| ||||||||||||||||||||
| Forward Block (While Blocking & Moving) |
Madness | 100% |
2x 100% |
3x 100% |
2x 100% |
3x 100% |
2x 100% 200% |
416.7%/s | 3.6s | 
| |||||||||||||||||
| Block (While Blocking) |
Delirium | 100% |
2x 100% |
3x 100% |
100% 100% 200% |
416.7%/s | 2.4s | 
| |||||||||||||||||||
| Heavy (Heavy Attack) |
Rise From Ashes | 500% |
4x 100% 100% |
500.0%/s | 2.0s | 
| |||||||||||||||||||||
| Slide (While Sliding) |
Launching Spring | 2250.0%/s | 0.8s | 
| |||||||||||||||||||||||
| Aerial (While In Air) |
One Point | 200% |
2x 200% |
300% |
620.7%/s | 1.4s | 
| ||||||||||||||||||||
| Wall (While Wall Latching) |
Through Strike | 300% |
176.5%/s | 1.7s | 
| ||||||||||||||||||||||
| Finisher (On Knocked Down Enemy) |
Roaring Drums | 5x 1000% 400% |
4153.8%/s | 1.3s | 
| ||||||||||||||||||||||
| Slam (Looking At Ground While In Air) |
Slam Attack | 461.5%/s | 0.7s | 
| |||||||||||||||||||||||
View Full Legend
View Full Legend
| |||||||||||||||||||||||||||
Augment
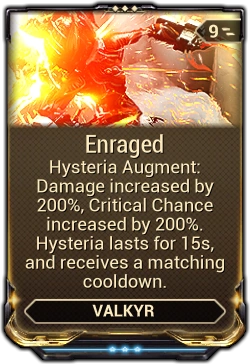
- Main article: Enraged
Enraged is a Warframe Augment Mod for ![]() Valkyr's
Valkyr's ![]() Hysteria that increases its damage and critical chance but fixes its duration to 15 seconds and adds a matching cooldown. The base Energy cost is also increased to 50, while the Energy drain over time is removed.
Hysteria that increases its damage and critical chance but fixes its duration to 15 seconds and adds a matching cooldown. The base Energy cost is also increased to 50, while the Energy drain over time is removed.
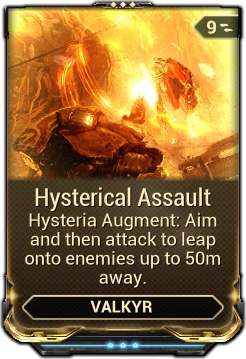
- Main article: Hysterical Assault
Hysterical Assault is a Warframe Augment/Exilus mod for ![]() Valkyr that allows her to pounce onto enemies while in
Valkyr that allows her to pounce onto enemies while in ![]() Hysteria by meleeing while aiming, dealing damage on contact. It also provides brief Invulnerability when switching off her Valkyr Talons while in Hysteria.
Hysteria by meleeing while aiming, dealing damage on contact. It also provides brief Invulnerability when switching off her Valkyr Talons while in Hysteria.
Tips & Tricks
- There may be a dark red hue for the duration of Hysteria, making it difficult to see enemies. This is especially problematic if Infested Parasites are nearby.
- Turning 'Color Correction' off in Options > Display can alleviate this issue.
- Her invulnerability can be taken advantage of in reviving teammates in exchange for consuming energy and not attacking enemies with her powerful claws.
- This can also be used to escape powerful opponents at the middle point of this ability. Allowing greater hit and run tactics.
- It's preferable to use Steel Charge over Growing Power when modding for pure damage as the former adds more damage to Hysteria than the latter.
- Even with Steel Charge equipped, using Power Drift will still add more damage than Coaction Drift.
- Even with Steel Charge equipped, using
- It's recommended to activate Melee Auto-targeting System in the options as Valkyr's awkward attack animations may miss a lot.
- Players who suffer low FPS (Frames per second) may want to avoid attack speed boosts, such as Warcry, while using Hysteria. High attack speeds can result in a loss of DPS as melee attacks are "semi-automatic".
- Heavy Attacks in Hysteria open enemies to Finishers, allowing you to reliably use the damage boost without spending energy on her Paralysis ability.
- This finisher also knocks enemies down, allowing for a successive ground finisher for a quick burst of high damage.
Bugs
- Using Hysteria the moment you are downed by enemies will cause you to bug. Sometimes, you will only be able to use your actual melee weapon, but it will swing as though it is your claws; Other times you will be able to use your other weapons, and all while being invincible. You must wait until the effect ends for the bug to clear.
- Attacks outside the vulnerability radius of Hysteria are still counted to the damage received in the Hysteria status, however these additional points do no effect at the end of the duration.
- If only a melee weapon is equipped in the player's loadout, casting Hysteria while holding either a Codex or Synthesis Scanner will cause Hysteria's attacks to instead use the equipped melee's quick-attacks, while also rendering both combos and blocking unusable.
- Abilities that provide conditional prevention
For example, self-stagger is prevented if a player stands on ![]() Oberon's
Oberon's ![]() Hallowed Ground or shoots behind
Hallowed Ground or shoots behind ![]() Volt's
Volt's ![]() Electric Shield.
Electric Shield.

|
 2 |
Tectonics Summon a rock-wall, activate again to send the rocks crashing towards the enemy. Introduced in Update 17.5 (2015-10-01) |
1 x (health multiplier to 250 / 300 / 350 / 500 (explosion 150 / 300 / 450 / 600 (roll |
|
Misc:
5 x (armor multiplier) |
Info
- Reshaping the surrounding terrain, Atlas expends 50 energy to erect a Bulwark made of stone with a base health of 2850 / 3150 / 3450 / 3750 and additional health equal to 500% of Atlas' modded armor. Upon activation, the bulwark is Invulnerable for 1 / 2 / 3 / 4 seconds; incoming damage that is absorbed during the invulnerability period is converted and added to the bulwark's health. After the invulnerability phase, whenever the Bulwark receives damage, the amount of health lost multiplied by 1 times is converted into Slash damage and inflicted on all enemies within ? meters from the Bulwark. Atlas can maintain only 1 bulwark at a time.
- The bulwark's health uses the following expression when accounting for Ability Strength:
Modified Health = (Base Health + 5 × (Atlas' Base Armor × (1 + Armor Mods)) × (1 + Strength Mods) + Additive Armor) + Absorbed Damage. - For example, with a maxed Steel Fiber and Intensify, rank-3 Tectonics will produce a bulwark with an initial health of
(3750 + 5 × 450 × 2.1) × (1 + 0.3) = 11,017.5 before converting absorbed damage.
- The bulwark's health uses the following expression when accounting for Ability Strength:
- While active, a health counter becomes visible on the ability icon that tracks the bulwark's health percentage from 100% to 0%. Placing the HUD's targeting reticle over the bulwark will also display its health bar.
- Atlas and his allies do not contribute to a bulwark's health gain by shooting it during the invulnerability period.
- Reactivating the ability will cause the bulwark to compact into a Boulder that rolls towards the current direction of aim, dealing 150 / 300 / 450 / 600 Impact damage per second to enemies that are dragged along its path. After rolling 15 meters or hitting an environmental object, the boulder will explode and inflict 250 / 300 / 350 / 500 Puncture damage to enemies within a radius of 3 / 3 / 4 / 5 meters.
- Enemies affected by the rolling damage are ragdolled.
- The explosion damage does not bypass obstacles in the environment and diminishes with distance.
- Ability Synergy: Casting Petrify on the Bulwark hardens it into a Petrified Bulwark. Boulders created from Petrified Bulwarks gain 200% rolling velocity and have their rolling distance increased to 30 meters. They also inflict 200% bonus damage on rolling and explosion damage.
- Bulwarks and Boulders become silver-colored and metallic when petrified.
- As the 3 bulwarks created by Tectonic Fracture cannot become boulders, Petrify has no effect on them.
- Casting Petrify on a moving boulder will not grant it bonuses.
- While the bulwark is capable of blocking most hostile gunfire, it does not provide cover from area of effect damage, including the explosive attacks of Grineer Bombards and Napalms.
- Bulwarks and Boulders have collision detection for enemies only. Atlas and allies can move through Tectonics' objects unobstructed.
- Enemies will attack the Bulwark if it obstructs their path. Though some enemies may simply run up against it.
- Upon transforming the Bulwark into a Boulder, Tectonics can be recast immediately to create a new Bulwark.
- The Bulwark will spawn on the same elevation as Atlas, but the bulwark does have gravity and will fall down if created in the air or without a surface directly underneath it.
- Casting and reactivation duration of 1 second are affected by Natural Talent and Speed Drift.
Augment
- Main article: Tectonic Fracture
Tectonic Fracture is a Warframe Augment Mod for ![]() Atlas that modifies
Atlas that modifies ![]() Tectonics to allow additional simultaneous walls, but sacrifices the ability to turn them into offensive boulders.
Tectonics to allow additional simultaneous walls, but sacrifices the ability to turn them into offensive boulders.
Tips & Tricks
- Can completely block off narrow enough areas or chokepoints from enemies without limiting the movement of allies.
- The Boulder can be used to push down long corridors, but care should be taken when aiming as the Boulder will detonate when it hits a side wall or standing obstacle.
- The Bulwark's cover can assist in reviving allies who have fallen to a frontal threat.
- Note that Bulwark's protection is less effective against enemy AoE attacks.
- Enemies will not change their motion to sidestep a rolling Boulder. This makes the boulder very effective against lines of charging foes.
- Although it does not boast above average threat level, The Bulwark can be used to draw fire away from the player as long as it is closer to the enemy than the player is.
- This is most effective against fast and threatening melee attackers like Thrax Centurions or many infested, which can often force the player into the air to avoid them. Placing a Bulwark can completely halt this attack provided these enemies get close enough to start attacking it instead.
- Thrax Centurions specifically can be completely neutralized by placing a wall as, for unknown reasons, they will focus on the wall but not attack it. This potentially means they can be indefinitely taken out of the fight as long as the wall is not destroyed or recast.
|
 3 |
Snow Globe Frost deep freezes any vapor and moisture in the area, creating a protective sphere with brief invulnerability to boost its strength. Introduced in Update 6.0 (2013-01-29) |
1500 / 2500 / 3000 / 3500 (base health) |
|
Misc:
1 / 2 / 3 / 4 s (invulnerability duration) |
Info
- Frost expends 50 Energy to creates a protective globe of ice with a radius of 5 meters, a base health of 1500 / 2500 / 3000 / 3500, and additional health equal to 500% of Frost's base armor bonuses. Upon activation, the globe is invulnerable for 1 / 2 / 3 / 4 seconds. Incoming damage that is absorbed during the invulnerability period is converted into health and added to the globe's health.
- Snow Globe's health uses the following expression when accounting for Ability Strength:
Modified Health = { Base Health + Armor Multiplier × [ Frost's Base Armor × (1 + Base Armor Bonus) + Additional Armor) ] } × (1 + Ability Strength) + Absorbed Damage- For example, with a maxed Steel Fiber and Intensify, rank-3 Snow Globe will have an initial health of
{ 3500 + 5 × [ 300 × (1 + 1.1) ] } × (1 + 0.3) = 8,645 before converting absorbed damage.
- For example, with a maxed
- While active, a health counter becomes visible on the ability icon that tracks the health percentage of the most recently placed Snow Globe from 100% to 0%.
- Frost and his allies do not contribute to Snow Globe's health gain by shooting the globe during the invulnerability period.
- Snow Globe's health uses the following expression when accounting for
- Upon activation, Snow Globe freezes enemies within its radius over a duration of 3 seconds while violently pushing them outwards. If the enemies hit obstacles, they can be dealt as much as 50% of their maximum health as True damage. Enemies that enter the globe will have their attack/movement speed reduced by 40% / 50% / 60% / 67%.
- Most gunfire, both friendly and hostile, is blocked from entering the globe (gunfire can exit the globe normally). Abilities that are not area-of-effect in nature (e.g., Shuriken) are blocked as well.
- Snow Globe will not block direct-targeted attacks, such as Soul Punch, Shock, and Smite. It will block attacks with punch through, but not Railgun MOA projectiles.
- Snow Globe can be recast multiple times, but there are restrictions on the number of globes that can be created in the environment.
- A maximum of 4 separate Snow Globes can be cast at any given time. Casting Snow Globe after reaching the maximum will remove the oldest globe.
- Casting Snow Globe while inside an existing globe will remove the older globe and combine the total remaining health values of both globes for the newer one. The invulnerability period is reactivated for each cast.
- Snow Globes created inside existing globes do not count toward the maximum number of instances, and Snow Globe's health can stack with repeated casts until reaching a maximum combined health of 1,000,000.
- Ability Synergy: Casting Freeze onto the exterior of a globe will destroy it, triggering an icy explosion that deals Freeze's base Cold area damage in an area of effect.
Augment

- Main article: Chilling Globe
Chilling Globe is a Warframe Augment Mod for ![]() Frost that gives
Frost that gives ![]() Snow Globe a chance to temporarily freeze enemies solid that enter its range.
Snow Globe a chance to temporarily freeze enemies solid that enter its range.
Tips & Tricks
- Maximized Ability Strength along with Steel Fiber and Armored Agility will add up to a total health of 26,386.75 (using Arcane Squall Helmet and Arcane Guardian is recommended, because they increase Snow Globe's health even further).
- Place over a cryopod in defense missions to shield it from all incoming fire.
- Maximized Ability Duration will reduce the globe's radius to 1.7 meters, allowing the globe to protect a cryopod without obstructing friendly fire.
- Maximized Ability Range will create a snow globe that can cover large areas, making it ideal for slowing down large numbers of enemy units or melee-oriented Bosses. Bear in mind however that this strategy runs the risk of incapacitating players wielding explosive weapons, and generally makes it difficult for players outside the globe from attacking enemies inside it. As such, use this strategy at your own discretion.
- When a teammate is downed, place a Snow Globe over them to protect you while reviving.
- When facing a boss with ranged attacks, do not place a Snow Globe on it. Instead, place it where your team is to protect them from incoming damage.
- The particle effect inside the globe can distract players' vision. Having a black energy color will remove this particle effect entirely, allowing better vision inside the globe.
- Recasting the ability after 4 seconds while remaining inside the Snow Globe will allow to sustain an impenetrable Snow Globe, that will grow stronger and stronger. This is due to the fact that it absorbs the enemy fire into its health and adds this health to the next Globe, as long as it is cast inside the first one.
- Particularly useful in T4 Defense, since the enemies will quickly reach a level where it does not matter how much base health your Snow Globe has.
- Snow Globe's ability to temporarily freeze and push away enemies can be an effective way to rapidly clear a large safe area to revive teammates or remove enemies attacking a defense objective.
- Using Freeze to detonate a Snow Globe can also be done while inside another globe. This will not affect the globe you are in. If multiple globes overlap, it is possible to shatter a globe which protrudes into another globe by aiming at the part inside your globe.
- It is possible to detonate the Snow Globe that you are in in some Corpus or Void missions by bouncing Freeze off the Bubble of a Nullifier Crewman.(Results May be unpleasant)
Bugs
- While using Helios, the Deconstructor projectile can be caught outside the globe and will not return to Helios unless Helios exits the globe.
- The globe can sometimes push enemies through walls and could soft-lock the game if the target is required. This has a higher chance of happening if the enemy is touching a wall.
|
 4 +3-5/s |
Mass Vitrify Create an expanding ring of molten glass that slowly crystallizes enemies who enter. When the expansion is complete, the ring hardens to block weapons fire. The ring draws extra strength from the health and shields of crystallized enemies. Use Shattered Lash to smash the ring and send razor-sharp glass flying outward. Introduced in Update 22.0 (2017-10-12) |
500 / 750 / 1000 / 1600 (ring segment base health) 500 / 600 / 700 / 800 (segment explosion damage) 5x (armor multiplier) |
10 / 12 / 14 / 16 s (effect duration) | |||
3 m/s (ring expansion rate) 8 / 8.75 / 10.25 / 11 m (ring max radius) 8 / 10 / 12 / 15 m (explosion range) | |||
|
Misc:
3 m (ring initial height) |
Info
- Gara expends 75 Energy and coats herself in a shell of hardened glass, becoming immobile and Invulnerable to damage as she unleashes a radial ring of molten glass that expands outward and downward. The molten glass ring's initial horizontal radius from Gara is 2 meters, which expands horizontally at a rate of 3 meters per second over 2 / 2.25 / 2.75 / 3 seconds, up to a maximum horizontal radius of 8 / 8.75 / 10.25 / 11 meters. Ring expansion initially drains 3 energy per second, which ramps up to 5 energy per second over the course of expansion. The molten glass ring's initial height is 3 meters high, which expands downward up to a maximum height of 12 meters.
- Molten glass bypasses all entities, obstacles, and terrain as it expands.
- When the molten glass ring is created, its base is aligned with Gara's feet to ensure that the initial ring height is about Warframe height.
- Ring height expands downward much faster than ring horizontal radius, reaching full height before expansion time completes.
- Mass Vitrify's glass undergoes two distinct phases with diverse effects on Gara, allies, and enemies:
- Enemies that contact the molten glass are crystallized over 3 seconds, slowing in movement and attack speed until completely solidified in place for 10 / 12 / 14 / 16 seconds. Crystallized enemies receive 20% / 30% / 40% / 50% Damage Vulnerability. Each enemy crystallized contributes extra health to the barrier formation phase, based on a portion of their maximum Shields and Health.
- Crystallize converted health is affected by both Ability Strength and Armor mods such as Steel Fiber equipped on Gara.
- Crystallize converted health is affected by both
- If Gara or allies are affected by a Radiation proc, allies may also be vitrified. This includes Sortie Defense Operatives, Syndicates Operatives, and Kavor Defectors in addition to fellow Tenno.
- On death, crystallized enemies shatter into glass with visual and sound effects.
- Barrier segment health uses the following expression:
Modified Health = (Base Health + 5 × (Base Armor × (1 + Armor Mods) + Additional Armor)) × (1 + Strength Mods) + Absorbed Health- With a maxed Steel Fiber and Intensify a wall segment would have
(1600 + 5 × (150 × (1 + 110%))) × (1 + 30%) = 4,127.5 Health before accounting for converted health from crystallized enemies (values resulting from intermediate calculations are rounded down to the nearest whole number).
- With a maxed
- Minimum Health added from each enemy affected by the crystallization phase is
Health Added = (320 + 5 × (Base Armor × (1 + Armor Mods) + Additional Armor)) × (1 + Strength Mods) - Maximum Health added is
Health Added = (Max Enemy Health + Max Enemy Shields) ÷ 10- Whichever formula results in a greater value is used for health added.
- During the crystallization phase, the number of total crystallize converted health is displayed beside the shield and health indicators on the HUD, as a buff icon with the number of converted health below the icon.
- The number of intact glass barrier segments is shown on the ability icon while at least 1 segment exists.
- Ally players, allied AI, ally weapon fire, and Warframe abilities can pass through unhindered. However, some friendly projectile-based weapons are deflected when striking either side of the wall, such as Miter and Arca Plasmor.
- Some allies such as hacked Eidolon Lures and Sortie Defense Operatives cannot pass through.
- Most enemies are blocked by the glass barrier from moving and attacking through it, including Kuva Clouds. However, most bosses and the Eidolon Teralyst can pass through unhindered.
- Area of effect attacks (e.g., Shockwave MOAs and Bombards) and weapons with innate punch through (e.g. Tusk Grineer units) can hit through the glass barrier.
- Ability Synergy:
- Gara's Passive allows casting abilities to have a 15% chance to Blind enemies within 12 meters for 10 seconds, exposing them to Melee Finisher attacks. Blind chance increases by 20% until the blind triggers.
- If Gara strikes her own Mass Vitrify glass barrier with Shattered Lash's glass longsword, the barrier is shattered and destroyed in an explosion of glass fragments that inflicts Shattered Lash's damage and 500 / 600 / 700 / 800 damage to all enemies within 8 / 10 / 12 / 15 meters from the barrier's exterior surface, as well as all enemies inside the barrier.
- Shattered Lash's damage is affected by equipped melee mods including:
- Damage (e.g., Steel Charge and Pressure Point)
- Puncture and Slash damage (e.g., Sundering Strike and Jagged Edge)
- Elemental damage (e.g., Shocking Touch)
- Augments (e.g. Bright Purity) and Rivens that add any of the aforementioned stats
- Manticore's damage bonus.
- Shattered Lash is not affected by critical chance and critical multiplier mods (e.g., Organ Shatter and True Steel), status chance mods (e.g., Drifting Contact), melee range mods (e.g., Reach), and faction-specific mods (e.g., Smite Grineer).
- Shattered Lash is not affected by the equipped melee weapon's stats and innate effects.
- Damage (e.g.,
- Resulting explosion has infinite punch through throughout its entire effective range and can hit enemies behind walls.
- Mass Vitrify's total damage uses the following expression when accounting for Ability Strength:
Total Damage = [Shattered Lash Base Damage × (1 + Base Damage Bonus) × (1 + Ability Strength)] + [Mass Vitrify Explosion Damage × (1 + Ability Strength)].- As an example, with a maxed Steel Charge, Pressure Point, and Intensify, a rank-3 Mass Vitrify will have (800 × 2.8 × 1.3) = 2,912 Puncture or Slash damage + (800 × 1.3) = 1,040 damage = 3,952 total damage before resistances.
- As an example, with a maxed
- Explosion is radial and not dependent on the direction Gara strikes Mass Vitrify with Shattered Lash. Gara must strike a currently intact part of the barrier, but the explosion will occur even around broken segments.
- Shattered Lash's damage is affected by equipped melee mods including:
- Casting Mass Vitrify will also refresh the duration of Splinter Storm on Gara, as well as any affected allies that contact the molten glass during its expansion.
- If Mass Vitrify's barrier is destroyed by Shattered Lash and Splinter Storm is within the explosion radius of the barrier, 50% of the glass fragments' damage is permanently added to Splinter Storm's damage per second until its duration expires.
- Absorbed damage is also affected by equipped melee mods including:
- Base damage (e.g., Steel Charge), elemental damage, and physical damage mods.
- As Shattered Lash's damage is not comprised of Impact damage, physical damage mods that affect Impact have no effect on absorbed damage for Splinter Storm.
- Absorbed damage is calculated after additional damage from mods.
- Base damage (e.g.,
- Absorbed damage can stack from repeated Mass Vitrify explosions inside Splinter Storm's radius.
- Splinter Storms on Gara herself and allies can absorb damage from Mass Vitrify's explosion, while storms on affected enemies do not.
- Absorbed damage is also affected by equipped melee mods including:
- Gara's Passive allows casting abilities to have a 15% chance to
- Initial casting animation and release animation are affected by casting speed, from mods such as Natural Talent and Speed Drift.
- Can be recast while active to expand molten glass and create a new barrier. Only 1 barrier may remain active per player.
- Molten glass, hardened glass, and crystal tint color and particle effects energy color are affected by Gara's chosen Warframe energy color.
- As with most abilities, if a Nullifier Crewman bubble touches the glass, it will end the ability prematurely if casting, and instantly shatter it without dealing any damage to surrounding enemies if already hardened. However, enemies hardened with glass will only harden prematurely if the nullifier touches them.
Tips & Tricks
- While Mass Vitrify is a potent defensive tool, Gara players can convert it into an offensive tool by investing in Ability Range and Efficiency, to increase the effective range of the resulting shrapnel explosion and reduce casting cost for repeated use. Equipping a melee damage boosting Arcane such as Arcane Blade Charger, Arcane Fury, Arcane Arachne and Mods like Steel Charge and Vigorous Swap can further power up the resulting shrapnel explosion from Shattered Lash's damage, boosted by melee weapon mods like Proton Snap, Boreal's Contempt, and Nira's Contempt, Syndicate mods Blade of Truth, Justice Blades, and Toxic Blight, Corrupted Mods Spoiled Strike and Corrupt Charge, also Melee damage buffs from Melee weapons like the Lesion synergizing with Mass Vitrify.
- For this offensive purpose, Gara players can opt to eschew Ability Duration to either further augment Range and Efficiency (by, for example, equipping Fleeting Expertise) or to increase Ability Strength. As this may entail reducing the effectiveness of either Spectrorage or Splinter Storm, Helminth may replace one of them for a damage-increasing ability such as Rhino's Roar, Mirage's Eclipse, Mesa's Shooting Gallery, Helminth exclusive Empower. Arcanes like Molt Augmented, Molt Vigor and Pax Bolt Operator abilities Sling Strength and Hardened Wellspring and Archon Shard Crimson Archon Shard can augment Shattered Lash's base damage which, in turn, will also increase Mass Vitrify's shrapnel explosion.
- For this offensive purpose, Gara players can opt to eschew Ability Duration to either further augment Range and Efficiency (by, for example, equipping
- While Mass Vitrify is a potent defensive tool, Gara players can convert it into an offensive tool by investing in Ability Range and Efficiency, to increase the effective range of the resulting shrapnel explosion and reduce casting cost for repeated use. Equipping a melee damage boosting Arcane such as
- A defensive play style with Gara can be effective taking into consideration that Mass Vitrify scales with enemy armor values. The more enemies caught inside the ring, the stronger the glass walls and effectively CC'ing a large area. This can be strong enough to stop very high level Demolisher and Acolytes if enough enemies are vitrified inside the ring. The Armor value of Mass Vitrify is displayed with an icon onscreen, and can be boosted with Armor boosting Arcanes Arcane Ultimatum, Arcane Tanker, Arcane Guardian, Operator Focus skill Stone Skin Helminth ability Parasitic Armor, Chroma's Cold Elemental Ward and Vex Armor, Oberon's Renewal synergy with Hallowed Ground, Wukong's Defy, Mods like Mecha Pulse.
- Synergizes well with Magus Anomaly to bring in a group of enemies to vitrify and build stronger walls. Scaling infinitely. Perfect for choke points.
- Synergizes well with
- A defensive play style with Gara can be effective taking into consideration that Mass Vitrify scales with enemy armor values. The more enemies caught inside the ring, the stronger the glass walls and effectively CC'ing a large area. This can be strong enough to stop very high level Demolisher and Acolytes if enough enemies are vitrified inside the ring. The Armor value of Mass Vitrify is displayed with an icon onscreen, and can be boosted with Armor boosting Arcanes
- Enemies Vitrified, take 50% more damage from all sources.
- Mass Vitrify will refresh Allies Splinter Storm timers if they are passing through while Mass Vitrify is cast.
- Mass Vitrify will refresh Allies
Bugs
- Casting Mass Vitrify in the air often delays the effect of refreshing Splinter Storm's duration until Gara lands on the ground, or if done from extreme heights, not refresh it at all.
- Interrupting the expansion quickly after casting might sometimes result in a "fake" barrier which does not block damage and can not be detonated with Shattered Lash. This can also occasionally happen without voluntarily stopping the expansion.
- Operators that come into contact with the ring while it's expanding are slowed down.
|
 1 |
Dread Mirror Rip the life force from an enemy and use it as a shield that captures damage. Charge to channel the captured damage into an explosive projectile. Introduced in Update 24.0 (2018-11-08) |
|
6 / 7 / 8 / 10 m (explosion radius) | |||
|
Misc:
8 m (stagger radius) |
Info
- Garuda expends 25 Energy to leap into the air to pounce at an enemy target within 30 meters, Staggering all enemies within an 8 meter radius on landing while violently slashing the victim with her talons to inflict Knockdown. The victim is instantly killed if its health was at or below 40% when Dread Mirror was cast.
- Garuda must have sufficient space to land next to the victim to cast this ability.
- Garuda is invulnerable while charging.
- Dread Mirror's knockdown effect can forcefully interrupt some otherwise uninterruptible enemy attacks, such as the Battalyst's omnidirectional laser phase.
- Enemies with Overguard cannot be targeted until their Overguard is removed.
- Once Garuda strikes the victim, she rips its lifeforce out to conjure a Dread Mirror in front of her for 13 / 15 / 18 / 20 seconds. The mirror is a large hovering invulnerable frontal shield that reorients itself to face the player's camera direction. All incoming enemy ranged and melee attacks are blocked by the mirror on contact, while the damage is absorbed into the Dread Heart beating above the mirror's frame; incoming enemy damage is first multiplied by 1 / 1.5 / 1.75 / 2 times then absorbed by the heart. The heart lingers indefinitely until Garuda throws it.
- 10% of the victim's maximum health is absorbed as initial damage for the heart when Garuda strikes the target.
- Maximum health is considered from health classes (e.g. Cloned Flesh, Flesh, etc.), not shield/armor classes.
- If the victim is instantly killed, the health absorbed is increased to 20%.
- Minimum health threshold is 1000. Meaning, target's maximum health for damage capture will be considered as 1000 if the actual value is lower than this threshold.
- The victim receives damage equal to 10% of their maximum health as Slash damage, but these rules apply:
- The damage does not bypass Armor and Shield. It will be reduced by damage reduction from the Armor and deal to Shield before health, just like other typical damages.
- While the damage is calculated from Health, the instant kill threshold of 40% will be considered from a combination of Health and Shield, regardless of Armor.
- Enemies that touch the mirror will take 100 Impact damage and stagger backwards away from Garuda. Rolling towards enemies will Ragdoll them.
- Mirror contact damage is not affected by mods.
- This damage is also absorbed into the Dread Heart.
- The mirror hits once when Garuda strikes the victim, absorbing one instance of contact damage, unless they are instantly killed.
- Damage absorbed is displayed in a numeric value above the heart.
- Dread Mirror lasts until it expires or the Dread Heart is thrown, while the Dread Heart will persist until thrown, even after the mirror disappears, and can absorb damage from multiple Dread Mirrors indefinitely.
- The mirror can block some directional area of effect abilities, such as Profit-Taker's EMP Slam and Laser Sweep, but not others such as a Heavy Gunner's ground slam or any of the massive Eidolon area of effect attacks.
- Mirror can also prevent knockdown, but not knockback, from Profit-Taker's Repelling Shields.
- 10% of the victim's maximum health is absorbed as initial damage for the heart when Garuda strikes the target.
- While the Dread Heart is floating above Garuda, holding down the ability button (default 1 ) causes Garuda to grasp the heart in her talons and drain 50 Energy per second to continuously increase the absorbed damage by 100% of the currently stored damage value per second. Releasing the ability button or running out of energy causes Garuda to throw the heart as a high velocity explosive projectile toward the location on the aiming reticle. The heart bursts on impact with an enemy or a surface to inflict the amplified damage as Impact with 100% Status Chance and a 6 / 7 / 8 / 10 meter radius.
- Garuda cannot perform parkour Maneuvers (except for rolling and sliding) or general interactions while channeling the heart. However, she can still move.
- Charging in mid-air will allow Garuda to hover for a few seconds.
- The explosion bypasses obstacles in the environment and its damage does not decrease with distance.
- Can be recast while active to pounce at a target and refresh the mirror's duration.
- Can be cast while airborne.
- Casting Dread Mirror is full-body animation that relocates Garuda to her target. Charging the Dread Heart is an upper-body animation that reduces Garuda's movement speed and grounds her once landed, as well as preventing other actions until the heart is thrown.
- The Dread Heart visually drips blood constantly, beats faster when absorbing damage, and grows spikes when its stored damage is high enough.
- The maximum charged damage of the Dread Heart is displayed as 4.29+03eM, which likely represents the value 4,294,967,295. However, when used, it might instead deal no damage.
- The Dread Mirror's frame colors are affected by Garuda's chosen Appearance colors.
- Dread Mirror, Dread Heart and particle effects are affected by Garuda's chosen Energy color.
Augment

- Main article: Dread Ward
Dread Ward is a Warframe Augment Mod for ![]() Garuda that makes her unkillable when an enemy is instantly killed by
Garuda that makes her unkillable when an enemy is instantly killed by ![]() Dread Mirror.
Dread Mirror.
Tips & Tricks
- Synergizes well with Guardian Derision, making more enemies attack Garuda and her Dread Mirror, allowing quick, indefinite damage build-up for Dread Heart.
- The ability to instantly kill enemies solely relies on a percentage threshold, making it a potentially powerful tool to quickly dispatch otherwise tough high level enemies - including Steel Path-difficulty versions of Sentient fighters in Lua missions and Veil Proxima anomalies, and Thrax Centurions and Legates in the Zariman Ten Zero.
- Combined with Blood Altar, Garuda can effectively tank and shrug off most damage that comes her way.
- Considering how far Garuda can move with her pounce, it can make for an effective means to escape an encounter while defending yourself.
- Facing Dread Mirror outward while standing in the corner makes Garuda less vulnerable to direct attacks.
- Alternatively, positioning herself to face enemies within a tight corridor gives her virtually unparalleled survivability from the front, and at the same time racking a lot of damage for Dread Heart.
- Using the ability multiple times before unleashing the heart will ramp up the damage rapidly, eliminating the reliance on enemy aggro.
- The mirror can prevent some AoE damage like an explosion from a barrel, or even massive attacks from the Profit-Taker Orb, by facing the barrier directly along the path of these attacks.
- However, it can't block AoE stagger from self-damage weapons.
- It also can't block damage-over-time AoE attacks such as from Nox's toxic blobs or Napalm missiles.
- Dread Mirror can help Garuda avoid the energy-draining Magnetic proc from Profit-Taker's EMP Slam, as well as being knocked down by the field boss's Repelling Shields.
- While Dread Mirror cannot save Garuda from AoE sweeps by an Eidolon, it still helps her survive the incoming homing missiles.
- Dread Mirror can protect Garuda from Arc Traps, providing the Mirror is between her and the trap. The trap will self-destruct after 3 seconds as if it has been activated, but since there is no arc, no damage will be absorbed.
- Rolling into enemies with Dread Mirror active will ragdoll them, frequently drag them along for a brief moment, and send them flying for several meters. This is a good makeshift crowd control.
- Dread Heart, being a projectile, fully benefits from the buffs of Mutalist Quanta's alternate fire.
- Be aware that crossing Nullifier bubbles, falling out of bounds, or activating Archwing will remove Dread Heart, thus losing its accumulated damage.
Bugs
- There currently is a very frequent UI bug where you won't see the remaining duration at the ability icon.
|
 2 |
Hallowed Ground Sanctifies the ground before Oberon with righteous fire, inflicting damage to any enemy that stands in the flames. Introduced in Update 11.5 (2013-12-19) |
5 / 10 / 12 / 15% (Status Chance) |
8 / 10 / 12 / 15 m (radius) |
Info
- Oberon expends 50 energy to consecrate the ground in an angle of 90 / 100 / 120 / 180 degrees in front of him, spanning up to 8 / 10 / 12 / 15 meters, for 10 / 15 / 17 / 20 seconds. Enemies standing on the area of effect are dealt 25 / 50 / 75 / 100 Radiation damage with a 5 / 10 / 12 / 15% Radiation status chance every 0.5 seconds, while allies are relinquished of any negative Status Effects and become immune to them for as long as they are standing on the area. Up to a maximum of 4 Hollowed Ground can exist at a time.
- Radius follows the expression:
- Base Range + 11.25 × (Ability Range - 1)
- For example, with a maxed Stretch, the radius will increase to:
- 15 + 11.25 × (1.45 - 1) = 20.0625 meters.
- Angle follows the expression:
- Base Angle + 135° × (Ability Range - 1)
- For example, with a maxed Stretch, the angle will increase to:
- 180° + 135° × (1.45 - 1) = 240.75°).
- 234% Ability Range is needed to bring the angle up to 360°, making it a full circle. This will also increase the radius to 15 + 11.25 × (2.34 - 1) = 30.075 meters.
- Flying enemies that are too high above the ground may not be affected by this ability.
- Radius follows the expression:
- Ability Synergy:
- If Oberon or any allies affected by Renewal stands on Hallowed Ground, they will receive the Iron Renewal buff, which grants 125 / 150 / 175 / 200 bonus armor for as long as Renewal is active. Once Renewal is deactivated, the armor buff will remain on all affected units for 20 more seconds.
- Bonus armor is added after other armor increases (e.g. an Oberon with a maxed Steel Fiber and Intensify will have (185 × 2.0) + (200 × 1.3) = 630 armor).
- As Link Fiber scales with the player's armor, companions with this mod benefit twice from Iron Renewal, as the companion links into the player's increased armor and then gets buffed by Iron Renewal.
- Bonus armor is added after other armor increases (e.g. an Oberon with a maxed
- Enemies that survive Reckoning while standing on Hallowed Ground will have their armor permanently reduced by ?% / ?% / ?% / 50%.
- Armor is fully removed at 200% Ability Strength.
- Armor is fully removed at 200%
- If Oberon or any allies affected by
- If cast in midair, Oberon will instantly drop to the ground to perform this ability.
- Hallowed Ground spawns foliage inside its area of effect as visual representation. Oberon creates a field of grass, while Oberon Prime creates a field of ferns. Grass and ferns are affected by Oberon's chosen Warframe Accent color.
- The shimmering energy field encompassing the ground is affected by Oberon's chosen Warframe energy color.
Augment
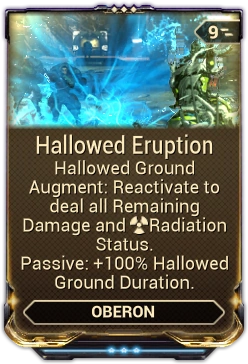
- Main article: Hallowed Eruption
Hallowed Eruption is a Warframe Augment Mod for ![]() Oberon. Upon casting
Oberon. Upon casting ![]() Hallowed Ground again with a previous instance still active, the first one will immediately expire, dealing all remaining damage in a single instance with a chance to deal
Hallowed Ground again with a previous instance still active, the first one will immediately expire, dealing all remaining damage in a single instance with a chance to deal ![]() Radiation proc. This mod also passively increases Hallowed Ground's duration.
Radiation proc. This mod also passively increases Hallowed Ground's duration.
Tips & Tricks
- Enemies will traverse and fight through Hallowed Ground without any special attempts to evade its area of effect.
- Narrow pathways such as doorways and halls are effective at forcing groups of enemies to cluster into Hallowed Ground.
- Summoning multiple, overlapping layers of Hallowed Ground will deal the full combined damage over time to enemies.
- Hallowed Ground is most efficiently used in areas where constant enemy and ally activity is expected over an extended period of time.
- Hallowed Ground's status effect immunity can be used to pass through environmental traps unhindered, such as Grineer Magnetic Sensor Bars and Corpus Laser Barriers.
- Note however that activating these traps in spy missions will still trigger vault alarms.
- Hallowed Ground will make players immune to to Radiation and Magnetic singularities in Sorties.
|
 3 |
Electric Shield Volt deploys an obstacle of energy, providing cover in any situation. Introduced in Update 5.3 (2013-01-10) |
|
|
Misc:
+50% (damage bonus) |
Info
- Volt expends 50 energy to create an electrical energy barrier 4.25 meters high and 6 meters wide that blocks enemy fire, lasting for 10 / 15 / 20 / 25 seconds. Shots fired through the shield made by Volt and his allies gain +50% Electricity damage and +100% critical multiplier. A maximum of 6 Electric Shields can be created at a time.
- The critical multiplier is applied after weapon mods.
- The Electricity damage bonus is an additive bonus that's applied to the weapon's base damage, similar to an elemental mod. For an unmodified weapon that inflicts 100 base damage, firing through a shield will increase the total damage to 100 × (1 + 0.5) = 150. The weapon now inflicts 100 base damage and 50 Electricity damage.
- Firing through multiple Shields will cause the Electricity damage bonus to stack additively (e.g., firing through 3 shields will grant a 150% Electricity damage bonus). The critical multiplier bonus on the other hand does not stack with additional shields.
- The Electricity damage bonus does not combine with other elemental types to create secondary elements; the weapon will separately proc the elements present on it and Electricity from Electric Shield.
- Warframe abilities do not gain bonuses from being fired through the shield, with the exception of Ember's Fireball, Frost's Freeze, Oberon's Smite, and Vauban's Flechette Orb.
- Casting Electric Shields after reaching the maximum will remove the oldest shield.
- Volt has the ability to pickup one of his Electric Shields through a context action (default X ). Doing so will cause the shield to decrease in size to 2.0 m × 3.0 m and become mobile as a hovering frontal shield that reorients itself to face the player's camera direction, as well as Ragdolling enemies that come into contact with it. Activating the context action again will place down the shield and revert its size.
- Only one shield can be equipped at a time.
- Transference will unequip the shield.
- Electric Shield affects certain weapons differently:
- All primary and secondary weapons will gain Electricity damage and amplified critical damage.
- Thrown melee weapons, such as the Glaive, are not affected by Electric Shield.
- Weapons that have additional sources of damage, such as the Quanta, will have their additional sources affected by Electric Shield so long as the damage can be modified. For example, firing a Torid grenade through a Shield will affect the projectile damage and the area damage. Firing a Mutalist Quanta orb through a Shield will not affect the orb's contact damage, but it will affect the orb's explosion damage.
- Held-trigger weapons will gain hitscan properties.
- All primary and secondary weapons will gain
- While most hostile gunfire and area of effect damage are blocked by Electric Shield, weapons with innate punch through, such as a Scorch's Ignis, can bypass Electric Shield.
- Prevents self-stagger from area of effect weapons if the player shoots behind the shield.
- Ability Synergy: Casting Shock through an Electric Shield will electrify it, inflicting 100% of Shock's damage to enemies that pass through it (e.g., Electric Shield will deal 260 damage if Shock's modified damage is 260).
- The bonus damage from Volt's passive will also be stacked onto the damage from Shock (e.g., Electric Shield will deal 810 damage if Shock's modified damage is 260 and the Passive bonus is 550 at the time Shock is cast).
Augment
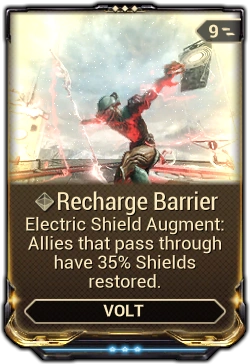
- Main article: Recharge Barrier
Recharge Barrier is a PvE and Conclave Warframe Augment Mod for ![]() Volt's
Volt's ![]() Electric Shield that restores allies' shields when they pass through the barrier.
Electric Shield that restores allies' shields when they pass through the barrier.
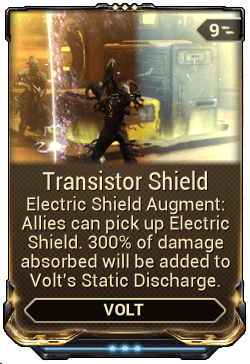
- Main article: Transistor Shield
Transistor Shield is a Warframe Augment Mod for ![]() Volt's
Volt's ![]() Electric Shield that allows allies to pick up and move Electric Shields. Additionally, a percentage of enemy damage absorbed by the Electric Shield(s) will add up to Volt's Static Discharge passive.
Electric Shield that allows allies to pick up and move Electric Shields. Additionally, a percentage of enemy damage absorbed by the Electric Shield(s) will add up to Volt's Static Discharge passive.
Tips & Tricks
- Multiple instances of the Electric Shield can provide a 360o wall of protection, or can be used once if backing up into a tight space, blocking enemy fire from all angles.
- Note that Electric Shield does not protect its users from above and below attacks. Placing them above and below the player can be done to counter this.
- As Electric Shield doesn't buff Warframes directly but instead the weapons fired through it, it's one of the only ways to increase Operator damage output. This is particularly useful for Eidolon hunts.
Bugs
- The Penta does not gain any damage bonuses.
- The Ignis, Embolist and Opticor lose their AoE properties.
- If Shock is cast through Electric Shield with the max bonus damage from Static Discharge (1000) the total damage dealt may be slightly lower than expected (e.g., if Shock adds 100 damage to Electric Shield plus the 1000 bonus damage from passive, the amount of damage inflicted will only be 1098 instead of 1100).
Augments
")
")
Mods
")
")
")
")
")
Sources of Stagger Recovery Speed
")
")