m (They don't spawn randomly) Tag: rte-source |
(→Tips: Added a note.) Tag: rte-wysiwyg |
||
| Line 137: | Line 137: | ||
**Alternatively, avoid a direct line of sight with the Tomb Protector to prevent it from producing Sand Shadows to begin with. |
**Alternatively, avoid a direct line of sight with the Tomb Protector to prevent it from producing Sand Shadows to begin with. |
||
*At all points where the player needs to kill the guardians of the collected urns, the player can simply stand in a place which can only be reached with [[Maneuvers]] or certain abilities and pick them off with any gun equipped, as most of the guardians are melee-oriented, with the exception of the Tomb Protector and the [[Tomb Protector Effigy|Tomb Protector Effigies]]. |
*At all points where the player needs to kill the guardians of the collected urns, the player can simply stand in a place which can only be reached with [[Maneuvers]] or certain abilities and pick them off with any gun equipped, as most of the guardians are melee-oriented, with the exception of the Tomb Protector and the [[Tomb Protector Effigy|Tomb Protector Effigies]]. |
||
| + | **The [[Tomb Guardian|Tomb guardians]] seem to have gotten the ability to throw boulders at you at an unknown date, making this a little less useful. |
||
==Trivia== |
==Trivia== |
||
Revision as of 07:27, 8 April 2017
Sands of Inaros is an optional Quest introduced in Update 18.5 (2016-03-04), involving Baro Ki'Teer's interest in the hidden treasures underneath Mars. Completing this quest will reward the Inaros Warframe.
Walkthrough
To unlock the quest, players must first purchase the quest blueprint from Baro Ki'Teer when he visits for ![]() 100 and
100 and ![]() 25,000, and then construct it in the Foundry under the Keys section. Purchasing the blueprint requires mastery rank 5. The blueprint can also be traded between players.
25,000, and then construct it in the Foundry under the Keys section. Purchasing the blueprint requires mastery rank 5. The blueprint can also be traded between players.
| Manufacturing Requirements | |||||
|---|---|---|---|---|---|
5,000 |
5,000 |
400 |
1 |
Time: 6 hrs | |
| Rush: | |||||
Upon claiming the item, the Quest will appear in the World State Window under the Quest tab, where it will then prompt players to see a new inbox message from Baro Ki'Teer, which will start off the quest proper.
Explore the tomb on Desert Tomb, Mars
Baro explains that Mars was a desolate backwater colony, which used to be the home of the 'sky worshipers', a group of colonists that the Grineer exterminated in the past. Despite this, the relics left behind became valuable antiques, and thus the object of interest for Baro. Players must fight through a small contingent of Infested as they proceed.
The Tenno soon reach a temple carved on the side of a mountain, where Baro scoffs his disbelief at the stories of the 'God King' called "Inaros". As the Tenno explore deeper inside a disembodied female voice begins to narrate a story to her child about the 'Golden Skymen' — presumed to be the Orokin — who would abduct people from them, until the arrival of Inaros. The voice unnerves Baro, who can apparently also hear it speaking, asking the Tenno to stop it.
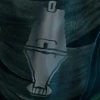
At the end of the temple path lies a large chamber with a shrine of the God King, where a large jar — the Sacred Vessel — lies at its feet, which players must take. Baro preemptively placates the Tenno by justifying the taking of a burial vessel as creating riches instead of defiling a tomb, and orders them to extract.
The blueprint for Inaros is rewarded at the end of the mission.
Fulfill the first vessel's challenge
On returning to the ship, Baro exclaims his surprise at the inscriptions on the vessel being a blueprint of sorts, and wonders if a Warframe was entombed there. He then reads an inscription on the vessel, which suggests that they may need to defeat an enemy in order to fulfill its condition, and suggests carrying the vessel into battle. Players can re-examine the vessel by interacting with it in the orbiter's control room.
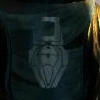
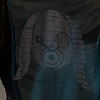
For this part of the quest, players must kill a number of the specified enemy that is represented by the glyph on the vessel, while the vessel is equipped in the player's Gear inventory. Upon killing an example of the correct enemy, the screen will momentarily flash with the Warframe's energy color, accompanied by a distinct guttural sound. As these enemies are killed, the image on the vessel begins to fill, serving as a status bar indicating how many are left to kill. Upon killing the needed number of the specified enemy, Baro Ki'Teer will tell the Tenno to return to their ship, signifying completion of that step.
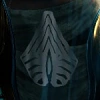
There are three types of enemies that can be designated by the glyph — a Corpus, a Grineer, and an Infested type — which will be different between individual players. The enemies associated with a particular glyph, as well as the required number of kills, are shown below:
| 60 kills | ||
|---|---|---|
 Detron Crewman |
 Seeker |
 Volatile Runner |
Once the required number of kills of the specified enemy has been made, Baro will instruct the player to return to their ship to further examine the vessel, where they will find the vessel's glyph now glowing. Players must then return to the temple in Ara, Mars to return the vessel.
From the main shrine chamber, players must proceed to a designated door where they must lay down the Sacred Vessel, which will cause the door to open, and reveal another Sacred Vessel at the center of the room inside. Upon players taking the Sacred Vessel in the room, the female narrator from the previous visit continues the story, revealing that Inaros was once a warrior of the 'Golden Skymen', until he could no longer withstand the abductions taking place, with the latest one being that of a child. This culminated in Inaros killing the child's abductors and returning him to the colony, after which Inaros 'ascended' to watch over the colony as their King. Unusually, Baro becomes unnerved the more he hears of the story, asking whether the story might be true.
At this point a large number of Feral Kavats will attack, which players must eliminate before they can proceed. After the last Kavat is killed, Baro nervously asks the player to return to their ship.
As of Update 19.10 (2017-02-09) a timer is present for players to eliminate the Kavat. There is no indication that this portion of the mission is timed until a warning is received that the player is about to fail the mission due to not killing the Kavat fast enough, at which point a 60 second timer will appear on screen. This significantly limits the amount of Kavat that can be scanned for those wishing to collect Kavat DNA or complete their codex entries.
Completing this portion of the quest rewards the blueprint for Inaros' helmet, labelled as the "Protector" helmet.
Fulfill the second vessel's challenge
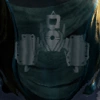
Baro now believes that the story of Inaros was drawn from an actual Warframe, and once more tasks the player with completing the challenge of the second vessel. Identical to the previous challenge, players must carry the Sacred Vessel in their inventory and kill the required number of a specified enemy. This enemy can be one of the following types:
| 20 kills | ||
|---|---|---|
 Railgun MOA |
 Hyekka Master |
 Brood Mother |
When the challenge is again completed, Baro will once more tell the player to go back to Ara to return the second vessel. This time however, the Grineer will be present in place of the Infested, whereupon Baro panics at their presence, seemingly scared for both himself and the safety of Inaros, and now wants to hear the rest of the narrator's story.
As before, players must find the designated door and deposit the second vessel in order to collect the third one. The narrator continues her story, where after years of peace, the colony was set upon by the Infested, which nearly wiped out the colonists in spite of their prayers to Inaros. With the end seemingly in sight, the surviving colonists were once again saved by Inaros via a sandstorm that eradicated the Infested, but at great cost to himself. The colonists took Inaros' battered body and hid its parts among the four Sacred Vessels to hide it from thieves and raiders.
The central shrine will now be occupied by a single hostile Tomb Guardian, essentially a gigantic stone Rumbler, which players must defeat. Destroying the Tomb Guardian will make it spawn into numerous smaller versions of itself, and each of these in turn will spawn more, smaller copies of themselves upon being destroyed. This process will repeat at least 2 more times before the Tomb Guardians are finally destroyed.
Baro seems distressed and emotional at this point and is eager to find out more about Inaros as he asks players to return.
Inaros Chassis Blueprint is rewarded upon completing the mission.
Fulfill the third vessel's challenge
With Baro now believing that the story might be true, he once more asks players to prove themselves as Tenno by completing the third vessel's challenge.
With conditions identical to the previous two challenges, players must kill their third enemy type. As shown on the vessel, the glyphs and their corresponding enemy are as follows:
| 5 kills | ||
|---|---|---|
 Denial Bursa |
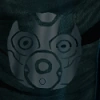 Manic |
 Juggernaut |
A distressed Baro now pleads to the Tenno to save Inaros as the Grineer have caught wind of the Tenno being in the area, and he claims that he isn't in it for the money anymore. Like before, placing the vessel by the door will open it and a final vessel will appear in the center. Taking it will cause a Tomb Protector to appear, which is essentially a copy of Inaros armed with a Mutalist Cernos and a Lesion along with its normal abilities. At certain points in the Tomb Protector's health bar it will retreat to its sarcophagus where it cannot be harmed, and this will cause one of the giant statues in the main room to come to life in the form of a Tomb Protector Effigy which takes the form of Inaros wielding the Lesion. Defeating the Effigy will make the Tomb Protector rise again and summon a Sand Shadow resembling the player while doing so, and this process is repeated until all of the Effigy giants are defeated, and the Tomb Protector is finally able to be destroyed.
In the conversations leading up to and after the battle with the Tomb Protector, it is revealed that the child being spoken to by the disembodied voice is none other than Baro himself, and the voice was his mother's. The final narration sees the mother hide Baro away, telling him to pray to Inaros as the Grineer ultimately kill her, and the rest of the colonists. Baro explains that he had long tried to forget those events, and that the Tenno have made him remember his true reason for seeking out the treasure. With the components in hand, Baro tells the Tenno that Inaros will rise again.
Completing the quest will reward the final component for Inaros, the Systems blueprint. Players will also receive the Sacred Urn as an Orbiter decoration.
Notes
- Remember, however, that you can only do this quest once! If you sell your Inaros Warframe after completion of this quest the only way to reacquire him is with Platinum through the Market.
- The flames burning in jars throughout the temple will apply a Script error: The function "Proc" does not exist. status on contact.
- Kills obtained within the Simulacrum do not count towards the Vessel's goal.
- The attacks delivered by Tomb Guardians can travel through the Rift Plane.
- Although the Tomb Protector's abilities are largely identical to Inaros' abilities; there are some slight differences.
- Desiccation merely inflicts the damage over time and does not immobilize nor blind any player caught in its wake.
- Devour does not immobilize the player it targets nor does it pull the player towards Inaros. The Sand Shadow is generated even if the player survives Devour, and has access to the Warframe's full set of abilities.
- Note that hacking Denial Bursas will not count towards the Vessel's goal, they must be destroyed in order to fulfill the challenge.
- Buying Inaros from the market can start this quest rather than having to purchase it from Baro Ki'teer.
Tips
- When collecting kills for a given urn, the following tips can help streamline the process;
- Kills still count if you abort the mission.
- For the first urn, Arid, Drekar, and Frontier Seekers will count toward Seeker kills
- For the third urn, Juggernaut Behemoths and Drekar Manics count toward Juggernaut and Manic kills respectively.
- If the target enemy for the first urn is the Volatile Runner, consider sparing any spawn pods generated by Boilers as they have a chance to spawn Volatile Runners.
- You can farm Denial Bursas by triggering the alarm in a Corpus Exterminate mission and waiting for them to spawn.
- As the Bursa variants are tied to the level range of a given Corpus mission, it is recommended to play Corpus missions with the 15-19 level range, to guarantee Denial Bursa spawns.
- If the target enemy is a Grineer unit, Kuva variants will count towards kills.
- Due to the large number of Feral Kavats spawned when turning in the first urn (and collecting the second), this portion of the mission is a great place to collect Kavat Genetic Codes.
- Due to the Tomb Guardian's ability to split itself into several smaller Guardians, it is recommended to use explosive area-of-effect weapons (e.g., Penta, Tonkor, etc.) to damage or kill as many of them as possible upon being created.
- At the same time, Nova's Molecular Prime will carry over to the smaller guardians.
- Similar to Specters, the Sand Shadow in the last section of the quest will copy your Warframe and loadout, but will only make use of your primary weapon. Equipping a weak primary weapon will essentially make the Sand Shadow harmless, allowing you to ignore it and focus on the Tomb Protector.
- Alternatively, avoid a direct line of sight with the Tomb Protector to prevent it from producing Sand Shadows to begin with.
- At all points where the player needs to kill the guardians of the collected urns, the player can simply stand in a place which can only be reached with Maneuvers or certain abilities and pick them off with any gun equipped, as most of the guardians are melee-oriented, with the exception of the Tomb Protector and the Tomb Protector Effigies.
- The Tomb guardians seem to have gotten the ability to throw boulders at you at an unknown date, making this a little less useful.
Trivia
- Apart from the blueprint itself, all of Inaros's components are marked as Protector components rather than its name, making it the first Warframe to not have its own name in the components. This was temporarily removed in Hotfix 18.5.5 (2016-03-08), then returned in Update 18.6 (2016-03-16).
- The missions that involve the tomb on Ara are unique in the fact that the level is identical each time it is run, instead of some parts becoming randomly generated with different tiles.
- The fact that Inaros's components are stored in 4 urns — along with his allusions to Egyptian Mythology — call into mind Canopic jars, which were used by ancient Egyptians to store internal organs (specifically the liver, lungs, stomach and intestines) during the process of mummification.
Bugs
- During the final boss, it is possible for the Effigy's laser beam to become stuck on players for the remainder of the fight. The only way to remove this proc is to die.
- The Kavats that appear during the second visit to the temple may spawn in the closed off sections, making it impossible to attack them without AoE damage.
- The Sand Shadows generated by the Tomb Protector use the Stalker's helmet, clipping through whatever helmet the copied Warframe is using.
- Having the queue set to solo can cause the dialog to not appear and make it impossible for missions to be succesfully completed.
Media
")
 (15 KB)")