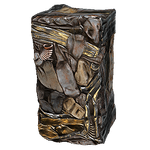
(-> "Saturn should have Hexenon added to it's table as a common resource.") |
No edit summary |
||
| (17 intermediate revisions by 9 users not shown) | |||
| Line 1: | Line 1: | ||
| + | {{Infobox |
||
| − | {{UpdateMe}}[[File:Resource Orange.png|130px|right|Normal resources]]'''Resources''' are items which drop from all normal missions around the star chart that are used solely for the manufacturing of other items in the [[Foundry]] with [[Blueprints]]. Other than [[Orokin Cell]]s, each resource can only be found in specific [[Planets|planet systems]]. Bundles of resources can also be a reward for alert missions as of {{ver|9.3.4}}. Alert resource awards do not come as a set quantity but will yield far more than a normal drop. This is not the case for rare-class resources. |
||
| + | | Box title = Resources |
||
| + | | image = Resource Orange.png |
||
| + | | caption = Normal resources |
||
| + | }} |
||
| + | '''Resources''' are items that are obtained in any mission around the [[Star Chart]] and can have multiple uses depending on the type of Resource; most of them however are used solely for the manufacturing of other items in the [[Foundry]] with [[Blueprints]]. |
||
| ⚫ | |||
| − | {{clr}} |
||
| ⚫ | |||
| + | With very few exceptions such as [[Ayatan Star]]s, resources are automatically picked by the player while moving over them. Several [[Mod]]s can help in detecting resources or storage containers, or make the process of harvesting resources faster by increasing the range at which loots are automatically picked (e.g. {{M|Vacuum}}). |
||
| + | {{tocright}} |
||
==Resource Types== |
==Resource Types== |
||
| − | Resources are classified by the method of collection, quantity obtained in each pickup and their primary purposes. |
+ | Resources are classified by the method of collection, quantity obtained in each pickup, and their primary purposes. |
===Common Resources=== |
===Common Resources=== |
||
| − | Common resources, like the name implies, are very commonly found |
+ | Common resources, like the name implies, are very commonly found. They drop from lockers, breakables, normal enemies, and bosses. |
===Uncommon Resources=== |
===Uncommon Resources=== |
||
| − | Uncommon resources, like the name implies, are found uncommonly in quantities usually between 10 and 30. They drop from lockers, breakables, normal enemies and bosses. Some of the uncommon Resources are found in higher quantities between 50 and 100. |
+ | Uncommon resources, like the name implies, are found uncommonly in quantities usually between 10 and 30. They drop from lockers, breakables, normal enemies, and bosses. Some of the uncommon Resources are found in higher quantities between 50 and 100. |
===Rare Resources=== |
===Rare Resources=== |
||
| Line 17: | Line 23: | ||
===Research Resources=== |
===Research Resources=== |
||
| − | Research resources are resources with a distinctive blue color |
+ | Research resources are resources with a distinctive blue color and are dropped uncommonly from common enemies in quantities of 1 to 3. They are crucial materials for [[Research]]. |
===Navigators=== |
===Navigators=== |
||
| − | Navigators are orbs that are required to build a variety of keys. Like Research Resources, they can be classified as uncommon or rare depending on different factors such as drop rate or quantity obtained. |
+ | Navigators are orbs that are required to build a variety of keys. Like Research Resources, they can be classified as uncommon or rare depending on different factors such as drop rate or quantity obtained. [[Nav Coordinates]] are dropped uncommonly in storage containers. |
| + | |||
| + | ===Special Resources=== |
||
| + | These unique resources are usually not dropped by normal enemies, but are obtained as a reward for completing very specific mission types or challenges, or are dropped by specific enemy types (such as [[Sentient Core]]s dropped by [[Sentient]]s). Some of these resources currently have only one use. |
||
===Minerals=== |
===Minerals=== |
||
{{main|Mining}} |
{{main|Mining}} |
||
| − | Special ores and rough gems are acquired through [[mining]] in the [[Plains of Eidolon]] |
+ | Special ores and rough gems are acquired through [[mining]] in [[Landscape]]s such as the [[Plains of Eidolon]], the [[Orb Vallis]] and the [[Cambion Drift]]. They can be refined into alloys or cut gems and are usually used for building equipment purchased in [[Cetus]], [[Fortuna]], and the [[Necralisk]]. These include [[Kitgun]]s, [[K-Drive]]s, Operator [[Amp]]s, several weapons and Warframes components, [[MOA (Companion)|MOA]] companions, [[Zaw]]s, and [[Necramech]]s. |
===Fish=== |
===Fish=== |
||
{{main|Fishing}} |
{{main|Fishing}} |
||
| − | Fish |
+ | Fish are acquired through [[fishing]] in the [[Plains of Eidolon]], the [[Orb Vallis]], and the [[Cambion Drift]]. Their organs can be extracted and are usually used for building equipment purchased in [[Cetus]], [[Fortuna]], and the [[Necralisk]]. They can be used to build the items listed in mining. |
| + | |||
| + | ===Empyrean Resources=== |
||
| + | Empyrean resources are mostly unique to the [[Empyrean]] game mode and have three different rarity types like normal Star Chart resources. They are dropped from enemy fighters, can be found in storage containers inside of Crewships/points of interest, or dropped by destructible items around the space. [[Carbides]], [[Cubic Diodes]], [[Pustrels]] and [[Copernics]] are also dropped by [[Eximus]] units spawning in specific planets. Mainly used for building Railjack components/turrets, but also required for crafting several Warframe parts or weapons. |
||
| + | |||
| + | ===Quest/Event Resources=== |
||
| + | Exclusive to the Quest/Event they are tied to, they serve no purpose outside of them. Most of Event resources were removed with the end of their Operations. |
||
| + | |||
| + | ==Resource Deposits== |
||
| + | {{main|Storage Containers#Resource Deposits}} |
||
| + | |||
| + | {{#lst:Storage Containers|resource_deposits}} |
||
==Farming Tips== |
==Farming Tips== |
||
For best results, it is recommended to farm resources either solo or in a dedicated group. This will reduce any tensions that might otherwise come up between players who are trying to farm resources and those who have other goals and do not wish to look for resources. |
For best results, it is recommended to farm resources either solo or in a dedicated group. This will reduce any tensions that might otherwise come up between players who are trying to farm resources and those who have other goals and do not wish to look for resources. |
||
| − | * |
+ | *[[Infested]] levels tend to spawn more enemies, which means more chances for resources. |
| − | **In addition to always being |
+ | **In addition to always being controlled by the Infested, all [[Dark Sectors|Dark Sector]] missions have an increased resource drop rate that varies by individual mission. |
*The {{M|Vacuum}} Sentinel mod and {{M|Fetch}} Beast mod picks up materials around you in a good radius, removing the need to focus on manually collecting every last resource drop. |
*The {{M|Vacuum}} Sentinel mod and {{M|Fetch}} Beast mod picks up materials around you in a good radius, removing the need to focus on manually collecting every last resource drop. |
||
| − | **At rank 0, Vacuum still has a respectable 6.5 |
+ | **At rank 0, Vacuum still has a respectable 6.5-meter range while costing only two mod capacity. Adding it to every sentinel streamlines resource pickup and should reduce (though not eliminate) the need for dedicated resource farming. |
| − | *Break ''everything'' |
+ | *Break ''everything''. Look for open containers or crates, and do not be shy to break them open, even if your team decides it's not worth it. Some but not all Area-effect Warframe abilities break containers, which can be combined with Vacuum to vastly speed up the process. |
**If playing a level with a very linear route, explore the ''entire'' level, including taking elevators to floors where the objective isn't located to look for more containers. |
**If playing a level with a very linear route, explore the ''entire'' level, including taking elevators to floors where the objective isn't located to look for more containers. |
||
**{{M|Thief's Wit}} enables the player to spot all breakable crates within range through the mini-map, along with highlighting mods through walls. |
**{{M|Thief's Wit}} enables the player to spot all breakable crates within range through the mini-map, along with highlighting mods through walls. |
||
**{{M|Master Thief}} grants the player a certain chance to open locked lockers (40% at level max). |
**{{M|Master Thief}} grants the player a certain chance to open locked lockers (40% at level max). |
||
**{{M|Scavenge}} allows a [[Kubrow]] to have a 90% chance to open locked lockers. However, this only works on lockers the Kubrow can actually reach. |
**{{M|Scavenge}} allows a [[Kubrow]] to have a 90% chance to open locked lockers. However, this only works on lockers the Kubrow can actually reach. |
||
| − | **[[Codex Scanner]] can be used to see all containers in current room within the range of 50 meters. |
+ | **[[Codex Scanner]] can be used to see all containers in the current room within the range of 50 meters. |
**Weapons such as the {{Weapon|Ignis}} with large AoE bursts are very useful for breaking multiple containers or Resource formations at once. |
**Weapons such as the {{Weapon|Ignis}} with large AoE bursts are very useful for breaking multiple containers or Resource formations at once. |
||
| − | ***Weapons like {{Weapon|Orthos Prime}} or {{Weapon|Telos Boltace}}, with large range and decent attack speed, are also very useful at cracking open containers. |
+ | ***Weapons like {{Weapon|Orthos Prime}} or {{Weapon|Telos Boltace}}, with a large range and decent attack speed, are also very useful at cracking open containers. |
| + | **Keep a lookout for resource deposits that may spawn around the map. These are a good source for uncommon and rare resources when destroyed. |
||
*Several Warframe abilities or [[Warframe Augment Mods|Augments]] affect resource drops. |
*Several Warframe abilities or [[Warframe Augment Mods|Augments]] affect resource drops. |
||
| − | **{{WF|Nekros}}' {{A|Desecrate}} gives a 54% chance for most enemies killed in a wide radius around him to roll their loot tables again, as well as spawning health orbs that help you keep up the fight, especially against the shield-bypassing [[Toxic Damage|Toxic]] damage used by many [[Infested]] enemies. Neither Power Strength nor Power Duration |
+ | **{{WF|Nekros}}' {{A|Desecrate}} gives a 54% chance for most enemies killed in a wide radius around him to roll their loot tables again, as well as spawning health orbs that help you keep up the fight, especially against the shield-bypassing [[Toxic Damage|Toxic]] damage used by many [[Infested]] enemies. Neither Power Strength nor Power Duration affects this ability; mod for range and efficiency. The {{M|Despoil}} augment is also a good idea, as it makes desecrate entirely self-sustaining and allows you to freely use your energy on other abilities. In addition, it makes it much less likely that Desecrate will deactivate itself, as Nekros generally has a much larger health pool than energy pool. In combination with {{M|Rejuvenation}}, the ability is essentially free with all the health orbs that drop. |
***The ''fixed'' 54% chance makes this the least efficient ability on a ''per-enemy'' basis, which is balanced out by its extreme ease of use and lack of augment requirement. This, in combination with Nekros being commonly known as "the farming frame," makes Desecrate a popular choice. |
***The ''fixed'' 54% chance makes this the least efficient ability on a ''per-enemy'' basis, which is balanced out by its extreme ease of use and lack of augment requirement. This, in combination with Nekros being commonly known as "the farming frame," makes Desecrate a popular choice. |
||
**{{WF|Ivara}}'s {{A|Prowl}} allows her to passively "pickpocket" nearby enemies, releasing one random item from their drop table per enemy. This is slow, only working on one enemy at a time and taking multiple seconds, but prioritizing specific enemies allows for more focused farming efforts and since it leaves affected enemies completely untouched, it can be easily coordinated with other farming abilities used by teammates. |
**{{WF|Ivara}}'s {{A|Prowl}} allows her to passively "pickpocket" nearby enemies, releasing one random item from their drop table per enemy. This is slow, only working on one enemy at a time and taking multiple seconds, but prioritizing specific enemies allows for more focused farming efforts and since it leaves affected enemies completely untouched, it can be easily coordinated with other farming abilities used by teammates. |
||
| − | ***In addition to making the ability itself more efficient, duration mods can reduce pickpocket times significantly. Power Strength mods have no beneficial effect on pickpocket but corrupted mods that ''reduce'' |
+ | ***In addition to making the ability itself more efficient, duration mods can reduce pickpocket times significantly. Power Strength mods have no beneficial effect on pickpocket but corrupted mods that ''reduce'' Power Strength give the ability a failure chance, requiring the ability to start over and try again. |
| − | **{{WF|Atlas}}' {{M|Ore Gaze}} augment gives [[Petrify|Petrified]] enemies a base 25% chance to reroll their drop tables. Unlike Desecrate, this ''is'' affected by Power Strength(up to a 100% chance at 400% |
+ | **{{WF|Atlas}}' {{M|Ore Gaze}} augment gives [[Petrify|Petrified]] enemies a base 25% chance to reroll their drop tables. Unlike Desecrate, this ''is'' affected by Power Strength (up to a 100% chance at 400% Power Strength) but is harder to use, only working on enemies that are turned to stone at the time of their deaths. It can be used alongside Desecrate. |
| − | ***"Thawed" enemies |
+ | ***"Thawed" enemies aren't affected by Ore Gaze; increase Power Duration or coordinate with your teammates to ensure that enemies are killed while still petrified. |
| − | **{{WF|Hydroid}}'s {{M|Pilfering Swarm}} doubles the drop chance of all enemies killed while ensnared by {{A|Tentacle Swarm}} and tentacles formed by Hydroid's passive. Note that the tentacles '''do not''' have to kill the enemy for the effect to occur. Drop chance is unaffected by |
+ | **{{WF|Hydroid}}'s {{M|Pilfering Swarm}} doubles the drop chance of all enemies killed while ensnared by {{A|Tentacle Swarm}} and tentacles formed by Hydroid's passive. Note that the tentacles '''do not''' have to kill the enemy for the effect to occur. Drop chance is unaffected by Power Strength but this is still the most powerful single effect, which is counterbalanced by Tentacle Swarm being difficult to use efficiently in the first place. Its ability to synergize with other farming abilities appears to need more testing. |
| − | ***''All'' ability-affecting mods have their uses with Pilfering Swarm: Despite not affecting the ''augment'' or increasing the number of tentacles, |
+ | ***''All'' ability-affecting mods have their uses with Pilfering Swarm: Despite not affecting the ''augment'' or increasing the number of tentacles, Power Strength scales particularly well with Tentacle Swarm's damage, allowing you to kill enemies and re-target a different horde much more quickly and easily. Likewise, Efficiency allows you to more easily compensate for the difficult targeting and the limited number of tentacles. Power Range can be either increased to give the tentacles more room to target groups of enemies or reduced to limit them to smaller choke points. Duration, of course, gives you and your teammates more time to kill ensnared enemies but may be wasteful if you find yourself targeting new groups of enemies often. |
| − | **{{WF|Khora}}'s {{M|Pilfering Strangledome}} gives a 65% chance for enemies ensnared by {{A|Strangledome}} to drop additional loot. This chance is not affected by mods, and as with Hydroid's Pilfering Swarm the enemy must be held in the dome to be |
+ | **{{WF|Khora}}'s {{M|Pilfering Strangledome}} gives a 65% chance for enemies ensnared by {{A|Strangledome}} to drop additional loot. This chance is not affected by mods, and as with Hydroid's Pilfering Swarm the enemy must be held in the dome to be affected by the additional drop chance but do not need to be killed by it. As the Strangledome only has a set amount of vertices that can hold enemies this limits its effectiveness against hordes, however, this is balanced by the fact that foes are drawn into it from range, take damage over time, take extra damage from attacks and become vulnerable to friendly fire. |
| − | ***The same enemy ''cannot |
+ | ***The same enemy ''cannot'' be affected by both Pilfering Swarm and Pilfering Strangledome at the same time. However it does have some synergy with Desecrate as 1/3 of the damage over time effect is Slash based, giving a decent chance for foes to be dismembered. |
| − | **A common squad composition for a dedicated farming mission is a Speed {{WF|Nova}} — that is, a Nova with less than |
+ | **A common squad composition for a dedicated farming mission is a Speed {{WF|Nova}} — that is, a Nova with less than 70% strength using her {{A|Molecular Prime}} ability, which will speed enemies up instead of slowing them down, a Desecrating Nekros, sometimes with the {{M|Despoil}} augment for ease of use, a {{M|Pilfering Swarm}} {{WF|Hydroid}} and an {{A|Energy Vampire}} {{WF|Trinity}} to allow the other frames to recast their abilities. A common tactic is to find an easy room and "camp" for a while, speeding the enemies to the camping location and massacring them. |
| − | *If there's a rare resource that can be acquired from a planet in their loot drop tables (e.g. Neural Sensors from Jupiter or Argon Crystals from the Void) then there is a way to farm them with the [[Spare_Parts#Notes|Spare Parts]] mod equipped. |
+ | *'''(NOTE: This method may not be working currently. Needs verification and possible removal)''' If there's a rare resource that can be acquired from a planet in their loot drop tables (e.g. Neural Sensors from Jupiter or Argon Crystals from the Void) then there is a way to farm them with the [[Spare_Parts#Notes|Spare Parts]] mod equipped. |
| − | **Choose a quick mission such as a [[Capture]] and then once the mission begins get yourself killed a few times (save yourself a couple of lives in case of emergencies) and see if the resource you were after drops. If it doesn't then quit and restart the mission and try again until it does. |
+ | **Choose a quick mission such as a [[Capture]] and then, once the mission begins, get yourself killed a few times (save yourself a couple of lives in case of emergencies) and see if the resource you were after drops. If it doesn't then quit and restart the mission and try again until it does. Afterward, proceed through the mission normally until you reach the extraction point. Then kill off any remaining lives you have for additional loot drop chances and finish. |
| − | ***It can also drop Tellurium on submersible and Kuva Fortress missions. |
+ | ***It can also drop Tellurium on submersible and [[Kuva Fortress]] missions. |
| + | *For passive farming, [[Extractor]]s can be placed on planets with all of its nodes completed. However, this method is effective for getting common and uncommon resources, even with the [[Distilling Extractor]]. Rare resources are hard to come by using Extractors. |
||
==Recommended Farming Locations== |
==Recommended Farming Locations== |
||
| Line 68: | Line 90: | ||
! style="width: 70%; background-color:#7C7C7C;" | Location |
! style="width: 70%; background-color:#7C7C7C;" | Location |
||
|- |
|- |
||
| − | | |
+ | | {{Icon|Resource|Alloy Plate|Text}} || Gabii ([[Ceres]]), Draco ([[Ceres]]) or Malva ([[Venus]]) |
|- style="background-color:#BFD3DE;" |
|- style="background-color:#BFD3DE;" |
||
| − | | |
+ | | {{Icon|Resource|Argon Crystal|Text}} || Any [[Orokin Void|Void]] Capture/Exterminate/Sabotage |
|- |
|- |
||
| − | | |
+ | | {{Icon|Resource|Circuits|Text}} || Draco ([[Ceres]]) or Malva ([[Venus]]) |
| − | |-style="background-color:#BFD3DE;" |
+ | |- style="background-color:#BFD3DE;" |
| − | | |
+ | | {{Icon|Resource|Control Module|Text}} || Any [[Orokin Void|Void]] Survival/Defense, [[Hyena Pack]] (Psamathe, [[Neptune]]) or [[Raptors]] (Naamah, [[Europa]]) |
|- |
|- |
||
| − | | |
+ | | {{Icon|Resource|Cryotic|Text}} || Any [[Excavation]] mission |
|- style="background-color:#BFD3DE;" |
|- style="background-color:#BFD3DE;" |
||
| − | | |
+ | | {{Icon|Resource|Ferrite|Text}} || Any [[Orokin Void|Void]] Survival/Defense, Tikal ([[Earth]]) or Apollodorus ([[Mercury]]) |
|- |
|- |
||
| − | | |
+ | | {{Icon|Resource|Gallium|Text}} || Assur ([[Uranus]]) or [[Lieutenant Lech Kril]] (War, [[Mars]]) |
|- style="background-color:#BFD3DE;" |
|- style="background-color:#BFD3DE;" |
||
| + | | {{Icon|Resource|Hexenon|Text}} || Ganymede ([[Jupiter]]) or Cameria ([[Jupiter]]) |
||
| − | | [[Morphics]] || Wahiba ([[Mars]]), [[Captain Vor]] (Tolstoj, [[Mercury]]) or Apollodorus ([[Mercury]]) |
||
|- |
|- |
||
| − | | [[ |
+ | | {{Icon|Resource|Morphics|Text}} || Wahiba ([[Mars]]), [[Captain Vor]] (Tolstoj, [[Mercury]]) or Apollodorus ([[Mercury]]) |
|- style="background-color:#BFD3DE;" |
|- style="background-color:#BFD3DE;" |
||
| − | | |
+ | | {{Icon|Resource|Nano Spores|Text}} || Hyf ([[Deimos]]), Terrorem ([[Deimos]]), the [[Cambion Drift]] ([[Deimos]]), Akkad ([[Eris]]) or Piscinas ([[Saturn]]) |
|- |
|- |
||
| + | | {{Icon|Resource|Neural Sensors|Text}} || Cameria ([[Jupiter]]), [[Alad V]] (Themisto, [[Jupiter]]) or [[Raptors]] (Naamah, [[Europa]]) |
||
| − | | [[Neurodes]] || [[Orokin Derelict]] Assassination/Defense/Survival, Tikal ([[Earth]]) or Zabala ([[Eris]]) |
||
|- style="background-color:#BFD3DE;" |
|- style="background-color:#BFD3DE;" |
||
| + | | {{Icon|Resource|Neurodes|Text}} || Hyf or Terrorem ([[Deimos]]), [[Lephantis]] (Magnacidium, [[Deimos]]) or [[Zealoid Prelate]] (Exequias, [[Deimos]]), Tikal ([[Earth]]) or Zabala ([[Eris]]) |
||
| − | | [[Orokin Cell]] || [[Orokin Derelict]] Survival, Draco ([[Ceres]]) or Piscinas ([[Saturn]]) |
||
|- |
|- |
||
| − | | |
+ | | {{Icon|Resource|Orokin Cell|Text}} || Terrorem ([[Deimos]]), Draco ([[Ceres]]) or Piscinas ([[Saturn]]) |
|- style="background-color:#BFD3DE;" |
|- style="background-color:#BFD3DE;" |
||
| − | | |
+ | | {{Icon|Resource|Oxium|Text}} || Galatea ([[Neptune]]), or Despina ([[Neptune]]) |
|- |
|- |
||
| − | | |
+ | | {{Icon|Resource|Plastids|Text}} || Zeugma ([[Phobos]]), Ophelia ([[Uranus]]) or Zabala ([[Eris]]) |
|- style="background-color:#BFD3DE;" |
|- style="background-color:#BFD3DE;" |
||
| + | | {{Icon|Resource|Polymer Bundle|Text}} || Assur ([[Uranus]]), Ophelia ([[Uranus]]) or Apollodorus ([[Mercury]]) |
||
| ⚫ | |||
|- |
|- |
||
| ⚫ | |||
| − | | [[Salvage]] || |
||
| − | Cameria ([[Jupiter]]) or Wahiba ([[Mars]]) |
||
|- style="background-color:#BFD3DE;" |
|- style="background-color:#BFD3DE;" |
||
| − | | |
+ | | {{Icon|Resource|Salvage|Text}} || Cameria ([[Jupiter]]) or Wahiba ([[Mars]]) |
| + | |- |
||
| + | | {{Icon|Resource|Tellurium|Text}} || Ophelia ([[Uranus]]), Caelus ([[Uranus]]) or Salacia ([[Neptune]]) |
||
|} |
|} |
||
==Resources By Planet== |
==Resources By Planet== |
||
| − | Note, some resources are not tied to specific planets: [[Tellurium]] can drop as a rare resource in any Archwing mission and [[Oxium]] will drop from [[Oxium Osprey]]s in most [[Corpus]] missions |
+ | Note, some resources are not tied to specific planets: [[Tellurium]] can drop as a rare resource in any Archwing mission and [[Oxium]] will drop from [[Oxium Osprey]]s in most [[Corpus]] missions. |
{{ResourceList}} |
{{ResourceList}} |
||
| + | |||
| + | ==Notes== |
||
| + | *Resource pickups can despawn if not picked up by the player if there are too many individual pickups at once. |
||
==Patch History== |
==Patch History== |
||
| Line 116: | Line 142: | ||
*Changed general resource pickup model |
*Changed general resource pickup model |
||
}} |
}} |
||
| + | |||
{{ResourceNav}} |
{{ResourceNav}} |
||
| + | [[es:Recurso]] |
||
[[Category:Resources]] |
[[Category:Resources]] |
||
[[Category:Vanilla]] |
[[Category:Vanilla]] |
||
Revision as of 08:14, 24 September 2020
Resources are items that are obtained in any mission around the Star Chart and can have multiple uses depending on the type of Resource; most of them however are used solely for the manufacturing of other items in the Foundry with Blueprints.
Resources are usually shown on the map as unique objects that resemble the actual resources themselves. Players can also find resource caches unique to the resource type around the map.
With very few exceptions such as Ayatan Stars, resources are automatically picked by the player while moving over them. Several Mods can help in detecting resources or storage containers, or make the process of harvesting resources faster by increasing the range at which loots are automatically picked (e.g. ![]() Vacuum).
Vacuum).
Resource Types
Resources are classified by the method of collection, quantity obtained in each pickup, and their primary purposes.
Common Resources
Common resources, like the name implies, are very commonly found. They drop from lockers, breakables, normal enemies, and bosses.
Uncommon Resources
Uncommon resources, like the name implies, are found uncommonly in quantities usually between 10 and 30. They drop from lockers, breakables, normal enemies, and bosses. Some of the uncommon Resources are found in higher quantities between 50 and 100.
Rare Resources
Rare resources will usually drop one at a time. Some drop in higher quantities, like 2 or 3. They are most often found by defeating bosses or a specific type of enemy, and very rarely from common enemies or storage lockers/containers.
Research Resources
Research resources are resources with a distinctive blue color and are dropped uncommonly from common enemies in quantities of 1 to 3. They are crucial materials for Research.
Navigators are orbs that are required to build a variety of keys. Like Research Resources, they can be classified as uncommon or rare depending on different factors such as drop rate or quantity obtained. Nav Coordinates are dropped uncommonly in storage containers.
Special Resources
These unique resources are usually not dropped by normal enemies, but are obtained as a reward for completing very specific mission types or challenges, or are dropped by specific enemy types (such as Sentient Cores dropped by Sentients). Some of these resources currently have only one use.
Minerals
- Main article: Mining
Special ores and rough gems are acquired through mining in Landscapes such as the Plains of Eidolon, the Orb Vallis and the Cambion Drift. They can be refined into alloys or cut gems and are usually used for building equipment purchased in Cetus, Fortuna, and the Necralisk. These include Kitguns, K-Drives, Operator Amps, several weapons and Warframes components, MOA companions, Zaws, and Necramechs.
Fish
- Main article: Fishing
Fish are acquired through fishing in the Plains of Eidolon, the Orb Vallis, and the Cambion Drift. Their organs can be extracted and are usually used for building equipment purchased in Cetus, Fortuna, and the Necralisk. They can be used to build the items listed in mining.
Empyrean Resources
Empyrean resources are mostly unique to the Empyrean game mode and have three different rarity types like normal Star Chart resources. They are dropped from enemy fighters, can be found in storage containers inside of Crewships/points of interest, or dropped by destructible items around the space. Carbides, Cubic Diodes, Pustrels and Copernics are also dropped by Eximus units spawning in specific planets. Mainly used for building Railjack components/turrets, but also required for crafting several Warframe parts or weapons.
Quest/Event Resources
Exclusive to the Quest/Event they are tied to, they serve no purpose outside of them. Most of Event resources were removed with the end of their Operations.
Resource Deposits
- Main article: Storage Containers#Resource Deposits
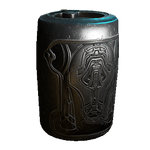
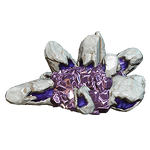
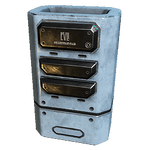
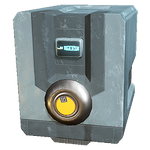
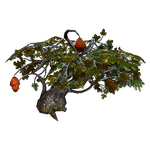
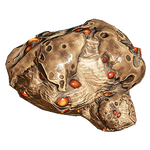
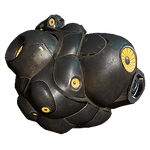
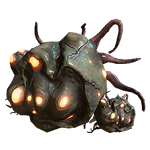
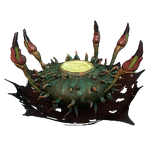
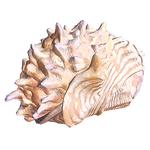
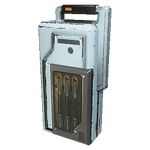
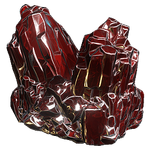
Resource Deposits are special containers that hold only a single type of resource. These deposits have a unique name and appearance matching the resource that they contain, and can only be found in the same areas as their associated resource. The rarity of deposits usually corresponds to the rarity of the contained resource; for example, Alloy Drums will be more common than Neural Arrays. Rare resource deposits can drop between 1 to 3 of the associated rare resource.
The various types of Resource Deposits include:
(1-5x
Each deposit has to be scanned five times to complete codex entry (currently, unscanned deposits will not be shown in Codex).
Farming Tips
For best results, it is recommended to farm resources either solo or in a dedicated group. This will reduce any tensions that might otherwise come up between players who are trying to farm resources and those who have other goals and do not wish to look for resources.
- Infested levels tend to spawn more enemies, which means more chances for resources.
- In addition to always being controlled by the Infested, all Dark Sector missions have an increased resource drop rate that varies by individual mission.
- The
 Vacuum Sentinel mod and
  Fetch Beast mod picks up materials around you in a good radius, removing the need to focus on manually collecting every last resource drop.
- At rank 0, Vacuum still has a respectable 6.5-meter range while costing only two mod capacity. Adding it to every sentinel streamlines resource pickup and should reduce (though not eliminate) the need for dedicated resource farming.
- Break everything. Look for open containers or crates, and do not be shy to break them open, even if your team decides it's not worth it. Some but not all Area-effect Warframe abilities break containers, which can be combined with Vacuum to vastly speed up the process.
- If playing a level with a very linear route, explore the entire level, including taking elevators to floors where the objective isn't located to look for more containers.
 Thief's Wit enables the player to spot all breakable crates within range through the mini-map, along with highlighting mods through walls.
 Master Thief grants the player a certain chance to open locked lockers (40% at level max).
 Scavenge allows a Kubrow to have a 90% chance to open locked lockers. However, this only works on lockers the Kubrow can actually reach.
- Codex Scanner can be used to see all containers in the current room within the range of 50 meters.
- Weapons such as the
 Ignis with large AoE bursts are very useful for breaking multiple containers or Resource formations at once.
- Weapons like
 Orthos Prime or
  Telos Boltace, with a large range and decent attack speed, are also very useful at cracking open containers.
- Weapons like
- Keep a lookout for resource deposits that may spawn around the map. These are a good source for uncommon and rare resources when destroyed.
- Several Warframe abilities or Augments affect resource drops.
 Nekros'
  Desecrate gives a 54% chance for most enemies killed in a wide radius around him to roll their loot tables again, as well as spawning health orbs that help you keep up the fight, especially against the shield-bypassing Toxic damage used by many Infested enemies. Neither Power Strength nor Power Duration affects this ability; mod for range and efficiency. The
  Despoil augment is also a good idea, as it makes desecrate entirely self-sustaining and allows you to freely use your energy on other abilities. In addition, it makes it much less likely that Desecrate will deactivate itself, as Nekros generally has a much larger health pool than energy pool. In combination with
  Rejuvenation, the ability is essentially free with all the health orbs that drop.
- The fixed 54% chance makes this the least efficient ability on a per-enemy basis, which is balanced out by its extreme ease of use and lack of augment requirement. This, in combination with Nekros being commonly known as "the farming frame," makes Desecrate a popular choice.
 Ivara's
  Prowl allows her to passively "pickpocket" nearby enemies, releasing one random item from their drop table per enemy. This is slow, only working on one enemy at a time and taking multiple seconds, but prioritizing specific enemies allows for more focused farming efforts and since it leaves affected enemies completely untouched, it can be easily coordinated with other farming abilities used by teammates.
- In addition to making the ability itself more efficient, duration mods can reduce pickpocket times significantly. Power Strength mods have no beneficial effect on pickpocket but corrupted mods that reduce Power Strength give the ability a failure chance, requiring the ability to start over and try again.
 Atlas'
  Ore Gaze augment gives Petrified enemies a base 25% chance to reroll their drop tables. Unlike Desecrate, this is affected by Power Strength (up to a 100% chance at 400% Power Strength) but is harder to use, only working on enemies that are turned to stone at the time of their deaths. It can be used alongside Desecrate.
- "Thawed" enemies aren't affected by Ore Gaze; increase Power Duration or coordinate with your teammates to ensure that enemies are killed while still petrified.
 Hydroid's
  Pilfering Swarm doubles the drop chance of all enemies killed while ensnared by
  Tentacle Swarm and tentacles formed by Hydroid's passive. Note that the tentacles do not have to kill the enemy for the effect to occur. Drop chance is unaffected by Power Strength but this is still the most powerful single effect, which is counterbalanced by Tentacle Swarm being difficult to use efficiently in the first place. Its ability to synergize with other farming abilities appears to need more testing.
- All ability-affecting mods have their uses with Pilfering Swarm: Despite not affecting the augment or increasing the number of tentacles, Power Strength scales particularly well with Tentacle Swarm's damage, allowing you to kill enemies and re-target a different horde much more quickly and easily. Likewise, Efficiency allows you to more easily compensate for the difficult targeting and the limited number of tentacles. Power Range can be either increased to give the tentacles more room to target groups of enemies or reduced to limit them to smaller choke points. Duration, of course, gives you and your teammates more time to kill ensnared enemies but may be wasteful if you find yourself targeting new groups of enemies often.
 Khora's
  Pilfering Strangledome gives a 65% chance for enemies ensnared by
  Strangledome to drop additional loot. This chance is not affected by mods, and as with Hydroid's Pilfering Swarm the enemy must be held in the dome to be affected by the additional drop chance but do not need to be killed by it. As the Strangledome only has a set amount of vertices that can hold enemies this limits its effectiveness against hordes, however, this is balanced by the fact that foes are drawn into it from range, take damage over time, take extra damage from attacks and become vulnerable to friendly fire.
- The same enemy cannot be affected by both Pilfering Swarm and Pilfering Strangledome at the same time. However it does have some synergy with Desecrate as 1/3 of the damage over time effect is Slash based, giving a decent chance for foes to be dismembered.
- A common squad composition for a dedicated farming mission is a Speed
 Nova — that is, a Nova with less than 70% strength using her
  Molecular Prime ability, which will speed enemies up instead of slowing them down, a Desecrating Nekros, sometimes with the
  Despoil augment for ease of use, a
  Pilfering Swarm
  Hydroid and an
  Energy Vampire
  Trinity to allow the other frames to recast their abilities. A common tactic is to find an easy room and "camp" for a while, speeding the enemies to the camping location and massacring them.
- (NOTE: This method may not be working currently. Needs verification and possible removal) If there's a rare resource that can be acquired from a planet in their loot drop tables (e.g. Neural Sensors from Jupiter or Argon Crystals from the Void) then there is a way to farm them with the Spare Parts mod equipped.
- Choose a quick mission such as a Capture and then, once the mission begins, get yourself killed a few times (save yourself a couple of lives in case of emergencies) and see if the resource you were after drops. If it doesn't then quit and restart the mission and try again until it does. Afterward, proceed through the mission normally until you reach the extraction point. Then kill off any remaining lives you have for additional loot drop chances and finish.
- It can also drop Tellurium on submersible and Kuva Fortress missions.
- Choose a quick mission such as a Capture and then, once the mission begins, get yourself killed a few times (save yourself a couple of lives in case of emergencies) and see if the resource you were after drops. If it doesn't then quit and restart the mission and try again until it does. Afterward, proceed through the mission normally until you reach the extraction point. Then kill off any remaining lives you have for additional loot drop chances and finish.
- For passive farming, Extractors can be placed on planets with all of its nodes completed. However, this method is effective for getting common and uncommon resources, even with the Distilling Extractor. Rare resources are hard to come by using Extractors.
Recommended Farming Locations
These recommendations are based on player opinions and may not be optimal. See discussion comments and individual resource pages for more details.
| Resource | Location |
|---|---|
| Script error: The function "Resource" does not exist. | Gabii (Ceres), Draco (Ceres) or Malva (Venus) |
| Script error: The function "Resource" does not exist. | Any Void Capture/Exterminate/Sabotage |
| Script error: The function "Resource" does not exist. | Draco (Ceres) or Malva (Venus) |
| Script error: The function "Resource" does not exist. | Any Void Survival/Defense, Hyena Pack (Psamathe, Neptune) or Raptors (Naamah, Europa) |
| Script error: The function "Resource" does not exist. | Any Excavation mission |
| Script error: The function "Resource" does not exist. | Any Void Survival/Defense, Tikal (Earth) or Apollodorus (Mercury) |
| Script error: The function "Resource" does not exist. | Assur (Uranus) or Lieutenant Lech Kril (War, Mars) |
| Script error: The function "Resource" does not exist. | Ganymede (Jupiter) or Cameria (Jupiter) |
| Script error: The function "Resource" does not exist. | Wahiba (Mars), Captain Vor (Tolstoj, Mercury) or Apollodorus (Mercury) |
| Script error: The function "Resource" does not exist. | Hyf (Deimos), Terrorem (Deimos), the Cambion Drift (Deimos), Akkad (Eris) or Piscinas (Saturn) |
| Script error: The function "Resource" does not exist. | Cameria (Jupiter), Alad V (Themisto, Jupiter) or Raptors (Naamah, Europa) |
| Script error: The function "Resource" does not exist. | Hyf or Terrorem (Deimos), Lephantis (Magnacidium, Deimos) or Zealoid Prelate (Exequias, Deimos), Tikal (Earth) or Zabala (Eris) |
| Script error: The function "Resource" does not exist. | Terrorem (Deimos), Draco (Ceres) or Piscinas (Saturn) |
| Script error: The function "Resource" does not exist. | Galatea (Neptune), or Despina (Neptune) |
| Script error: The function "Resource" does not exist. | Zeugma (Phobos), Ophelia (Uranus) or Zabala (Eris) |
| Script error: The function "Resource" does not exist. | Assur (Uranus), Ophelia (Uranus) or Apollodorus (Mercury) |
| Script error: The function "Resource" does not exist. | Any Void Survival/Defense or Zeugma (Phobos) |
| Script error: The function "Resource" does not exist. | Cameria (Jupiter) or Wahiba (Mars) |
| Script error: The function "Resource" does not exist. | Ophelia (Uranus), Caelus (Uranus) or Salacia (Neptune) |
Resources By Planet
Note, some resources are not tied to specific planets: Tellurium can drop as a rare resource in any Archwing mission and Oxium will drop from Oxium Ospreys in most Corpus missions.
|
Common |
|||||||||||||||||||
|---|---|---|---|---|---|---|---|---|---|---|---|---|---|---|---|---|---|---|---|
| ✓ | ✓ | ✓ | ✓ | ✓ | ✓ | ✓ | |||||||||||||
| ✓ | ✓ | ✓ | ✓ | ✓ | ✓ | ||||||||||||||
| ✓ | ✓ | ✓ | ✓ | ||||||||||||||||
| ✓ | ✓ | ✓ | ✓ |
|
Uncommon |
|||||||||||||||||||
|---|---|---|---|---|---|---|---|---|---|---|---|---|---|---|---|---|---|---|---|
| ✓ | ✓ | ✓ | |||||||||||||||||
| ✓ | ✓ | ✓ | ✓ | ✓ | ✓ | ||||||||||||||
| ✓ | |||||||||||||||||||
| ✓ | ✓ | ✓ | ✓ | ✓ | |||||||||||||||
| ✓ | ✓ | ✓ | |||||||||||||||||
| ✓ | ✓ | ✓ | ✓ | ✓ | ✓ | ✓ | |||||||||||||
| ✓ |
|
Rare |
|||||||||||||||||||
|---|---|---|---|---|---|---|---|---|---|---|---|---|---|---|---|---|---|---|---|
| ✓ | |||||||||||||||||||
| ✓ | ✓ | ✓ | |||||||||||||||||
| ✓ | ✓ | ||||||||||||||||||
| ✓ | ✓ | ✓ | ✓ | ✓ | |||||||||||||||
| ✓ | ✓ | ||||||||||||||||||
| ✓ | ✓ | ✓ | ✓ | ||||||||||||||||
| ✓ | ✓ | ✓ | |||||||||||||||||
| ✓ | ✓ | ||||||||||||||||||
| ✓ |
|
Research |
|||||||||||||||||||
|---|---|---|---|---|---|---|---|---|---|---|---|---|---|---|---|---|---|---|---|
| ✓ | ✓ | ✓ | ✓ | ✓ | ✓ | ✓ | ✓ | ||||||||||||
| ✓ | ✓ | ✓ | ✓ | ✓ | |||||||||||||||
| ✓ | ✓ |
Notes
- Resource pickups can despawn if not picked up by the player if there are too many individual pickups at once.
Patch History
Update 7.7 (2013-04-03)
- Changed general resource pickup model

