|
 2 |
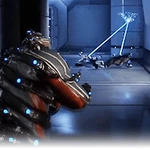
Minelayer Cycle through four deployable mines: Tether Coil, Flechette Orb, Vector Pad and Overdriver. Introduced in Update 18.12 (2016-05-17) |
1 / 2 / 3 / 4 (number of bounces) ? / ? / ? / 400 (shred damage) ? / ? / ? / 40% (armor reduction) |
? / ? / ? / 30 s (trip laser) ? / ? / ? / 4 s (shred debuff) ? / ? / ? / 8 s (concuss deaf) | |||
Info
- Vauban throws one of his variety of specialized mines that performs a different ability depending on the selected mine type. Minelayer cycles between mine types upon tapping the ability key (default 2 ), while holding down the key and releasing throws the selected mine. Up to four different mine types are unlocked as the ability increases in rank, listed below:
Throwing any of the grenades directly on an enemy will instantly activate the affect on that enemy.
- Vauban releases a deployable launch pad that adheres to any surface for five minutes. On contact with an enemy, the pad will deal 15 Script error: The function "Proc" does not exist. damage. Allies and enemies that step onto the pad will be launched, and affected enemies will be dealt 75 / 100 / 125 / 175 Script error: The function "Proc" does not exist. damage with a 100% Script error: The function "Proc" does not exist. status chance. A single launch pad has a maximum of 1 / 2 / 3 / 4 uses and a cooldown period of 3 seconds between each use.
- Repulse damage and contact damage are affected by Power Strength, and the contact damage is increased by body-part multipliers.
- Duration is not affected by Power Duration.
- A Magnetic proc reduces the target's shields by 75% over 4 seconds.
- If an enemy is killed by the repulse damage, the action will not count against Bounce's maximum number of uses.
- For more information about the contact damage, see this blog and this follow-up.
- The pad launches the unit perpendicular to the face of the attached surface (e.g., being attached to a ceiling will launch the user downward).
- When placed on a level floor, the pad launches the unit approximately four times as high as a normal jump.
- Launched enemies suffer a Knockdown.
Deploys a hovering trip wire that causes enemies who walk into it to be stunned for a moment (when walking into it), or become tripped and knocked down (when running into it). The trip wire will disappear after ? / ? / ? / 30s.
Although it seems useful against the Infested, if an Ancient Healer is nearby the only enemy that will be knocked down will be the healer. This makes the tripwire only really useful for Infested when combined with his Concuss grenade, to proc radiation on nearby Healers and disable their links to other Infested.Shred places a single use, explosive trip mine. When an enemy comes near it, the mine explodes and all enemies in a ? / ? / ? / 6m radius are ragdolled into the air and their armor is reduced by ? / ? / ? / 40%.
Concuss places a single use mine. When an enemy comes near it, the mine explodes and all enemies in a ? / ? / ? / 6m radius are stunned and have a radiation proc applied. The mine has a swirling effect and a hum to it.
This is best used around objectives or doorways as enemies who get near it will be stunned then fight other enemies for a while.- Can be used while performing many actions without interrupting them, including reloading.
- Can be cast multiple times while active.
Tips & Tricks
- Can be used to throw enemies to 'dead zone' of the level (effect unpredictable).
- Can be stuck to enemies, but can act unpredictably and leave the bounce effect in mid-air or invisibly stuck to enemies.
- Placing a bounce pad on top of a tall object that Warframes can wall-run or climb onto will launch the player much higher than a normal bounce, easily reaching near ceiling height in tiles with high ceilings.
Maximization
Maximization is a form of specialization: mods may be blended to result in values that vary between the top-end limits listed here. Click any maximized link to learn how to build it.
- Maximized Power Duration increases Trip Laser duration to 85s, Shred debuff to 11s and Concuss debuff to 23s.
- Reduces Shred and Concuss range to 2m.
- Maximized Power Efficiency reduces cost to 12.5 energy.
- Reduces duration of Trip Laser to 12s, Shred to 1.6s and Concuss to 3.2s.
- Maximized Power Range increases Shred and Concuss radius to 15m.
- Reduces Bounce repulse damage to 70 and contact damage to 6. Reduces Shred damage to 160 and armor reduction to 16%.
- Maximized Power Strength increases Bounce repulse damage to 523.25 and contact damage to 44.85. Increases Shred damage to 1200 and armor reduction to 100%.
- Increases cost to 77.5 energy.
Bugs
- Currently, using Bounce on Orokin defense artifacts (the dual cryopod) will cause the artifact to spin upon Bounce's activation. This can even cause the artifact to invisibly move from its central location and create an invisible wall not too far from where the artifact appears to be.
Gallery
")