


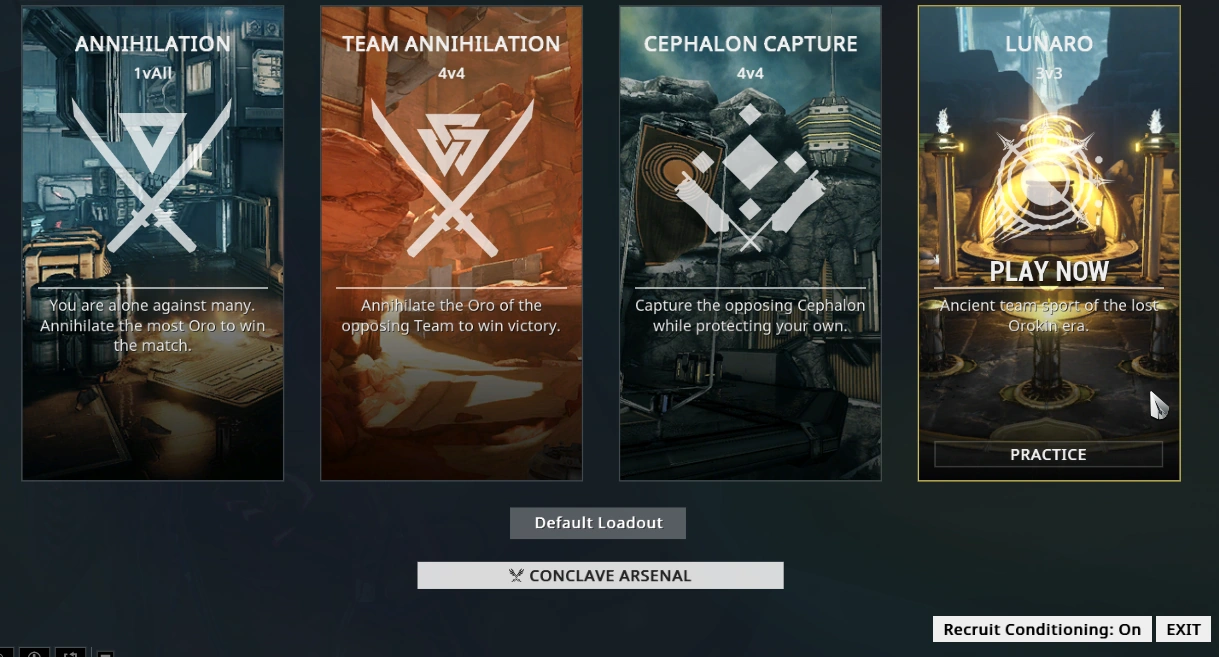
Lunaro is a PvP mode provided exclusively by the Conclave Syndicate, where players participate in an ancient Tenno sport.
It allows two teams of up to 3 players each to face off against each other in 4 different arenas, in a 6-minute match which is split into two halves. The team who reaches 20 points first or has the highest number of goals wins the match, and gains additional ![]() Standing points as a reward.
Standing points as a reward.
Access

Lunaro can be accessed using the Conclave console located to the right of the Orbiter's Navigation hub, as well as the Conclave enclave in the Relay. The players loadout will be automatically switched to their Conclave loadout upon entering the mission.
A Practice mode is also available and can be played freely without affecting the players statistics.
Restrictions
- Lunaro allows one to equip any Warframe, though all attributes will be made equal among all players.
- All types of Mods, including Conclave Mods, are disabled in Lunaro.
- All Weapons, except the Arcata, cannot be used and will not load into the match, even if they are previously equipped in the Conclave Loadout.
- Companions such as Sentinels and Kubrows will not be carried into Lunaro either.
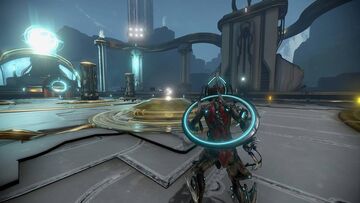
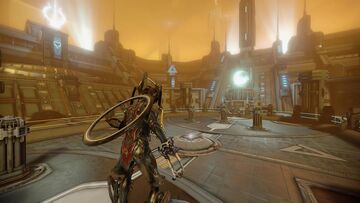
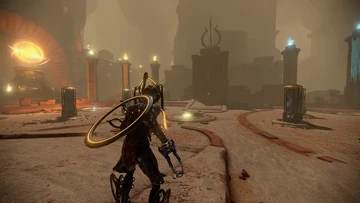
Arenas
Notes

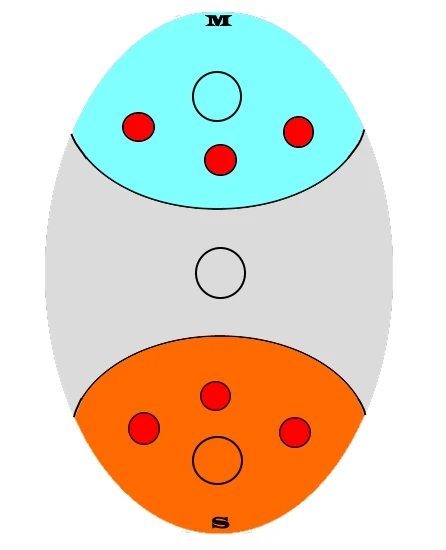
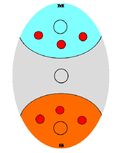
Sun Orange Ribbon

Moon Blue Indicator


- The Lunaro ball glows in 4 different energy colors:
- White (Neutral) is the basic energy color.
- Light Blue (Moon) or Orange (Sun) indicates that the ball was last-hit by either teams. The effect lasts roughly about 5 seconds before it turns back to neutral.
- Purple sparkling energy means that the ball is in unstable state and takes about the same amount of time to wear off.
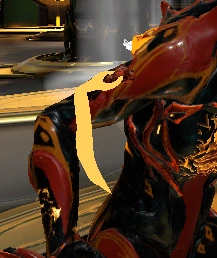
- A colored ribbon is tied to the Warframe's right shoulder, denoting the color of the player's team.
- Teammates will also emit an aura of the same color. (May not be visible in high FoV's).
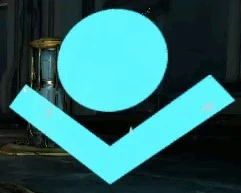
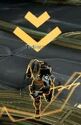
- The ball carrier of either teams will have a downed shaped arrow.
- Not to be confused with V shape straps, as stated in Passing below.
- The ball is released at the center of the arena at the start of each half, while upon scoring a goal it is released inside the ring of the team which was scored in.
- The player's crosshair changes to a "half RPG" type which indicates the pinpoint strike on top and the three lines determine the increase in range. However, it switches to the regular weapon crosshair upon inflicting or receiving hits.
Basics
Grabbing and Launching are essential maneuvers in Lunaro, with exception being launching an unstable Lunaro. Contrary to the current tutorial in-game, the movements and gameplay tasks are all based on Melee configuration, instead of firearm configuration.
Grabbing
- Walking over the ball will instantly pull it to your Arcata, bearing in mind the range which is the same range needed to collect resources, excluding Orbs, in all directions.
- Holding Block (default RMB ) activates an Arcata's magnetic-like force, and glows according to your Warframe energy color. This move once held ensures that the ball is pulled towards the nearest Warframe, which is why short hold is not advised when attempting to grab the ball.
- A 5-seconds rule is applied upon grabbing the ball, which is indicated by a countdown noise and visual bright glow. If the holder runs out of time the ball will blast in a small area, knocking down the holder and launching to a random direction. The blast only affects the ball holder.
- Grabbing can be done during any type of maneuvers, with exception to Bullet jump and Wall climb. Attempting to bullet jump while holding the ball will cause it to drop where it was first grabbed.
- Bullet-jumping to where the ball is located will instantly grab it but this can only happen when the momentum of landing begins and bullet jumping ends.[citation needed]
- Hold Grab is deactivated during melee moves and some of the maneuvers as well.
Launching
There are two methods to launch the ball once it's grabbed:
- Click your Melee Channel (default LMB ) for a short ranged launch, which allows the ball to curve down to the lowest range indicated by the hitbox.
- Hold your LMB for a long ranged strike which has increase in velocity. The ball will always hit the pinpoint of your hitbox as long as it doesn't exceed maximum range, and once it does it will slightly curve down with decrease in velocity.
- The other ways to launch the ball below always do a charged hit even when LMB isn't held.

- Corner Hit / Curved Strike
- To perform this move you have to click your Melee Channel default LMB while sliding. A short ranged launch (indicated above) will cause the Lunaro to curve to the left, while a long ranged launch will cause the Lunaro to curve to the right.
- Purple Charged Hit
- The easiest way to perform this move is to tap your Quick Melee E button once to perform Dash on the ball which will gain the Unstable Effect upon hit and launch to the direction you're facing. This mechanism is highly recommended due to the accuracy which Dash provides to the hit.
Checking
As stated before, the configuration of combat in Lunaro is based on Melee moves, hence the Arcata itself having its own Stance. Not to be confused with Stance. Checking a player is mostly done when enemy team has the ball, in order to steal it, slow the enemy team down, or reduce their possession over the arena.
| Move | Button Combination |
|---|---|
| Rightward Slash | LMB BallSeparated |
| Leftward Slash | LMB LMBStagger Ball |
| Dash | E BallSeperated |
| Onward Stomp | E EStagger Ball |
| Roundhouse Kick | E EStagger Ball E Ball |
| Dive kick | Slide + E BallSeparated |
| Circular Rightward Slash | Slide + LMBStagger BallSeperated |
| Right-handed Slam | In Air + E Ball |
| Frontal Slash | Wallrun + LMBStagger BallSeparated |
= Unstable Ball effect | |
- PS4 Players E = R1 LMB =
- Xbox Players E = RB LMB =
- Notes
- All melee hits apply to targets with or without possession of the ball.
- Target(s) that are CCed become immune to the next hit for 5 seconds if staggered or 2 seconds if knocked down. Lunaro 4
- Hitting a player who has the ball once will cause it to drop and change its glow to white but will not inflect any CC to him.
- All melee hits trigger the Unstable Effect separately since it's required to hit the ball once again after it's cleared from enemy's possessing.
- Dive kick is similar
 Fracturing Wind slide attack Launching Spring. The move however has terrible accuracy compared to other moves and requires a lot of skill to perform correctly.
 - It is possible to chain LMB from more than one player which will knock down enemy player. This often happens when more than one player tries to Steal the ball from opposite team players.
- Despite of full AoE move set it still lacks the range to deliver full its potential. This is noticed when trying to melee in more than one direction as most of your hits will fall on one target.
Unstable Effect
The Lunaro ball gains increased speed and become immune to Grab upon being hit by melee. The ball will Knockdown friendly or enemy players if they are directly in its way as well as sometimes the ball hitter himself. Currently only effective melee hits and especially Dash has as much chance to redirect the ball or deflect it harmlessly.
Clearing
The sole defensive option to have in any game is to keep the ball and enemy team from your goal. Bear in mind the quick movement of Tenno and the rough mechanism of the game which wont leave you much of a choice but to hit the ball and enemy team as hard as you can.
- Clearing is done only inside the friendly team's ring and the ball has to be hit by one of the teammates and reaches outside.
- Not to be confused with Clearing that is done at enemy team's ring after scoring a goal in. In this case Arcata of your team members will be disabled till you exit the ring.
Passing
Passing is crucial for effective teamwork, and can change the flow of the match with sufficient effort and skill.
- To pass the ball to your teammate, simply Grab it and Launch it directly to where they are.
- You'll notice a downed V shape straps indicating that your teammate is in a viable position to Receive the ball. Your teammates do not need to activate the grab on their own, as the ball is pulled towards them instantly.
- If you miss your teammates they are still able to grab it and will count as Pass.
Scoring
To win the match you have to score Goals more than your enemy team.
- Winning only adds additional Standing points to your total points which is significantly more than the gained by doing other tasks. Losing, however, results in subtraction of Winning points, leaving you with only by the points you have made in the match.
- The base score of one goal is 1 point. Additional points are gained when certain conditions are met. Eventually the final score of a single goal can become 3 points.
- Scoring from inside the ring: 1 point
It is somewhat difficult to score close to the goal due to the dead zones around it which gives the advantage to the defenders, most likely. A short LMB is what you need to score, trying to charge-launch the ball may result to it going upwards or hitting the cell.
- Scoring from outside the ring: 2 points
Oddly enough it seems that scoring with a charged launch from the center or close to the middle pillar is easier than scoring inside. This is easy to do with the speed that the ball gains which makes it harder to deflect or catch. It is always recommended to charge before launch as the ball mostly will never make it to the goal with a short launch.
- Scoring a Purple charged ball: 2 points
Whether inside or outside, it seems that this one is hardest one of all to score. Unlike the other two types which require 2 steps to score a goal, this type only requires one step which is launching or rather ramming the ball. It has a higher chance to happen when the ball is free on the ground as a single melee hit is able to launch it to an enemy player.
- The area and height of the arena implies that only ground or mid-air strikes will add additional points if scored accordingly. While it's unknown if the ball is scored from maximum height assuming that someone has launched it upwards and it hit the barrier then someone jumped over a pillar and hit it with melee to score a goal. In this case the total score should be 2 points instead of 1. [citation needed]
Advanced
Assisting
It's the combination of pass, receive and score. Each task has to be done accordingly and cannot be interrupted.
- Since Purple Charged shots require a melee move, hence no receive, it may not give Assist on a score even if your teammate passed it to you.
Intercepting
Attempting to possess the ball while an enemy player passes it to his teammate is counted as an interception. Keep in mind that the ball must have the enemy team glow and also must be launched directly to them and not be interrupted by the surroundings such as Pillars.
- Interceptions can be done by either Grabbing the ball or ramming it with melee attacks.
- Upon a successful interception without trying to grab it, it will either glow with your team's color or become Unstable.
Stealing
The below criteria must be met in order to steal the ball from an enemy player:
- The ball must be possessed by the player and cannot be laying on the ground of flying even if it has his team glow.
Stealing ball after 5 seconds burst
- There's also a chance to count as Steal if the ball is picked immediately after being dropped by enemy player.
- A single melee move is required, as it will steal the ball from him causing no damage nor CC.
- If the ball happens to become Unstable you'll not be able to grab it and even after the effect wears off it will not count as a Steal.
- In case of Dash, Slam and Dive Kick, being close to your target insures you to grab the ball momentarily even after knocking him down. It may count as a Check rather than a Steal in this case.
Saving
Another mechanic was added to the defensive role similar to Clearing, however it's rather harder.
- At first you have to, literally, stand close to the goal cell and pick any ball coming towards you.
- Only the balls which are directed towards the cell count. Thus in different situation if you weren't saving them they would be counted as goals.
- Friendly shots towards your team goal are not counted as a Save.
- Keep in mind that you cannot score in your own goal, hence it's logical to say that picking your teammates balls is counted as Reception.
- Remember that you cannot save Unstable shots which will knock you down if you try to.
- Rebounded shots also count.
Reception
Whenever you receive the ball from a successful pass from your teammate. The ball must have your current team's glow, although it's not necessary to be a result of an Auto-pass, as it also counts when its Grabbed. The ball will remain glowing even when it bounces off objects (Cell, Pillars, Barrier..etc.).
Catching
Confirmation is required In order to catch the ball either you or enemy team have to launch it significantly high and catch it by colliding with it or grab it in mid air.
Both the ball and you have to be in midair, and neither of you can touch the ground before the ball is in your Arcata. This is mostly done, and also easier to do, when enemy team first touches the ball and launches it to the center of the arena. It is also possible to catch your own or your team's ball when it bounces off the top barrier.
Rebounding
(Needs further testing) Rebound mostly refers to the case which the ball bounces off objects or terrains. However, observing the ball physics and certain things in the arena is a bigger hint to when it's counted as Rebound.
- Launching the ball in a certain range and speed towards a Pillar causes the Pillar to pulsate brightly in blue. The ball may or may not lose its current glow, but will still count as Rebound if it successfully enters the goal cell.
- Another status that happens is when the ball is roughly rammed into the pillar. It will cause a blast with small blue smoke left behind, if it happened when you attempted to score it may not count as a rebound.
- Hitting the frame of the goal will also cause a blue pulse but it's currently unknown if it requires a certain move to score in order to be counted as a rebound.
- There's a chance to score by launching the ball to bounce off the barrier as long as the ball isn't under the unstable effect.
Strategy for balanced matches
Roles
Using the terminology of popular contemporary ballgames, a 3v3 match currently supports several roles that can be played and sustained by any player whether they are new to the game or not. It is not unusual for each player to play at least two of these roles in each game, switching from an "offensive" role to a "defensive" role depending on whether the other team is in possession of the ball.
- Goalkeeper (a.k.a. Goalie, Keeper)
A player who ought to stand back and inside his team ring all the time. When the enemy team approaches with the ball the goalie should not move away from the goal area. If the enemy team decides to launch the ball directly at the goal, an effective strategy is for the player to latch while jumping as well as activate his grab to try and intercept the ball, but this action requires timing and skill. Upon catching the ball the Goalkeeper has to act quickly as reacting a fraction of a second too late may cause him to drop the ball and lead to a score for the other side.
- Fielder (a.k.a. Sweeper, Tackler, Pointer)
This role is not simply about scoring goals. The most important actions for a Fielder are Checking enemy players, Clearing the ball and Passing. Fielders also pressure the enemy team and help in obtaining or retaining possession of the ball by passing and intercepting the ball, and stealing it if inside the enemy ring.
- Forward (a.k.a. Target man, Striker)
A striker's main focus is always the ball, whether by receiving the ball from teammates (whether it's a Pass or random clear), intercepting enemy passes and stealing the ball from them or reacting to a player's own shots through either Rebounds or Catches.
Tips
- To avoid unbalanced matchmaking and ping issues you should make your own squad with a host who has decent ping. However, keep in mind that teams fill in order so if you have a squad of 4 including you it will be a 2v2.
- If you want to play with friends or certain people you have to set party matchmaking to Invite Only or Friends before loading and entering the lobby.
- Practice with other players in private games. Real games will stress you and wont leave you enough time to learn as much. Practicing alone wont benefit you at all either.
- Pick a role. Don't go inside without knowing what you're doing. Despite that Lunaro based on Tenno concept it still somewhat requires patience and thinking and if and your teammates working according to your roles and together it should not be as hard.
- As a Goalkeeper: Always think ahead of others, even your teammates, as you have all the time you need before you make your next move. Keep an eye on who's charging towards you and whether they are tracked down by your teammates or not. Clear the ball but don't overdo it, once it's out the ring return to your post and guard it. The Pillars are a great defense line as they will block some of the long shots by the enemy team. They can also be a hindrance if you hit them while trying to clear the ball. You can also help with serving the ball after being scored in if the Pointer lets you do it.
- As a Mid: your most powerful weapon is the OP Dash, use it but in a smart way. try not to be confused with enemy players, always focus on the enemy ball carrier and hit him hard to make sure he doesn't grab the ball back. Aiming is crucial so don't launch the ball aimlessly without checking where your teammate is at. Though you're supposed to clear the ball whenever it's inside your team's ring but a good Pass helps your team to advance quickly. Do the job of harassing the enemy team and especially their goalkeeper to make them lose focus on their position but as long as the ball is possessed by your team.
- As a Forward: You need to be nimble and skillful. Dodging, Latching as well as all other Maneuvers are your base skill. The next thing you need is to be able to catch the ball and mostly in mid air where you'll face little opposition and be free on your way to the enemy goal. Be quick, don't idle even for a second and stick to where the ball is at and predict where it is going to land. You also should steal the ball more often than checking enemy players to grab it. When your Pointer has the ball and attempts to pass it to you, don't shoot recklessly, if the ball is being held for too long don't get rid of it by throwing it carelessly, instead try to pass it or rebound it to catch it again. Flee from any engagements, it's not your role so don't get into the brawl and stay in the air as long as you can. The first-touch of each half has to be yours, even if you're not placed close to the ball. Take advantage of first-touch after you score a goal, interrupt the enemy before they grab the ball to keep it at their side of the arena.
Media

.png)
")
")
 (24 KB)")
")