Like most attribute values, Health is increased by single multiplier formed from effects that additively stack with each other. The health gained from leveling does not interact at all with these multipliers.
Like most attribute values, Health is increased by single multiplier formed from effects that additively stack with each other. The health gained from leveling does not interact at all with these multipliers.
Revision as of 10:55, 20 October 2017
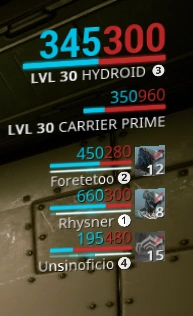
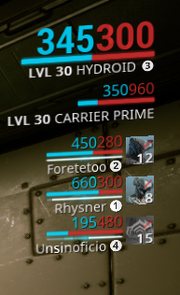
The top right of the screen shows your health and shield, as well as that of your companions and cell members.
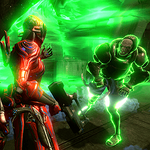
Health represents how much damage an entity can sustain before becoming incapacitated. Warframes, Kubrows, Kavats, and Rescue targets will enter "bleedout" upon running out of health, while all other entities will be killed. A Warframe's health is indicated as a red number at the top right of the screen. The health of other entities can be displayed over their heads, should the player aim directly at them. While a Warframe is losing health, the screen's edges will begin to flash red at a pulse. Once the Warframe reaches 10% health or below, a loud, heartbeat-like sound will play, and a slight ringing can be heard. This sound also plays when bleeding out and when dead.
Most attacks will only damage health after the entity's shields have been fully drained, but there are a few exceptions. Script error: The function "Proc" does not exist. damage, which is commonly dealt by units like Toxic Ancients, Toxic Crawlers and Venomous Eximus, will bypass shields and strike the target's health directly, which can also proc a Script error: The function "Proc" does not exist. damage-over-time effect. Script error: The function "Proc" does not exist. procs, such as those dealt by GrineerPowerfists, will temporarily halve victim's health (both current and maximum) even if the attack itself is absorbed by shields. Finishing damage, such as from the Bleed status effect (from Script error: The function "Proc" does not exist. damage), will also bypass shields.
There are different types of damage which deal reduced or increased numbers against different entities. MOAs, for example, are mostly metal in composition and are not as easily cut open as the flesh of living Crewmen. Hence, MOAs have Robotic health, while Crewmen have Flesh as their health type; Script error: The function "Proc" does not exist. effects deal penalized damage to Robot health and bonus damage to Flesh.
There are thirteen health classes in total, but two of them are reserved for shields only and two of them are reserved for armor only—these four act differently from health, and are covered on Shields and Armor pages. The remaining nine health classes are partitioned into the three standard Factions, though both the Corrupted faction and the Tenno themselves borrow from these.
Faction
Non-Armor Health Classes
Script error: The function "Faction" does not exist.
The fact that Cloned Flesh differs from Flesh and that both Corpus and Tenno have the latter implies that Tenno are as human as the Corpus, while the Grineer are imperfect replications. Relevant to game mechanics, these two types of health share most vulnerabilities and all resistances, except that cloned flesh is Script error: The function "Proc" does not exist. flammable while normal flesh is easily Script error: The function "Proc" does not exist. poisoned.
Infested is different from Infested Flesh, even if by name they would seem identical. While you can check the details on their respective pages, know that both are vulnerable to the same types of damage, just resistant to different types; you can most likely use the same weapon loadout to perform against either type.
Like most attribute values, Health is increased by single multiplier formed from effects that additively stack with each other. The health gained from leveling does not interact at all with these multipliers.
Total Health = Base Health × (1 + Modifier) + Health Gain From Leveling
Base Health refers to the Warframe's health at Rank 0.
Health Gain From Leveling will be the difference between your rank 30 health and your rank 0 health. Zephyr, for instance, has 450 health at rank 30 but 150 health at rank 0, so her health gain from leveling would be 300.
Vitality and Vigor increase your Modifier by 4.4 and 1.2 at their maximum ranks, respectively. The Physiqueaura mod increases it by a mere 0.18 at maximum rank. Each additional cell member that brings Physique will increase your Modifier by an additional 0.18, to a maximum 0.72 addition in a four-player mission or 1.44 in eight-player trial missions. Lastly, the bonus from some Arcane helmets contribute to the Modifier of this equation.
Unlike shields, health does not naturally regenerate over time, except when the Rejuvenationaura mod is equipped by at least one member of the cell. Otherwise, damage inflicted upon health must actively be healed either by picking up a Health Orb (and Energy Orbs with Equilibrium) or directly by a few certain Warframe abilities. Trinity and Oberon are the two Warframes with an inherent ability to explicitly restore health to all Warframes within the cell, and Nekros can Desecrate nearby corpses for a chance to spawn more health orbs. A Chroma in Script error: The function "Proc" does not exist. can raise both players' current and maximum health temporarily with Elemental Ward, and when the effect runs out, only the maximum health returns to its original value; effectively, the affected players have restored that much health. Additionally, Inaros's Scarab Swarm ability is capable of healing allies that are near enemies being affected by the ability. Some weapons have an innate ability to provide health restore to either self or allies. Hirudo is able to absorb 5% damage of every critical hit dealt on an enemy, and Sancti Magistar is able to heal on charged attack, affecting allies, companions, cyropods and hijack objectives. Heal amount is based on damage dealt, while the healing range is affected by melee weapon range mods, with a baseline of 15 meters.
Chroma expends 50Energy to emit an aura of elemental energy, empowering himself and nearby allies within 6 / 8 / 10 / 12 meters for 10 / 15 / 20 / 25 seconds, providing both offensive and defensive buffs.
Elemental Ward exhibits different effects depending on Chroma's current elemental alignment, determined by Chroma's primary emission color or the selected element of Spectral Scream.
Generates a flame aura around Chroma and affected allies that increases base Health by 15% / 20% / 30% / 55% and inflicts 25 / 50 / 75 / 100Heat damage per second within a radius of 5 meters with a 2% / 5% / 7% / 10%status chance.
The health bonus stacks additively with base health modifiers, and the amount of health gained is determined by the affected Warframe's base health at rank 0. Since Chroma has 270 health at rank 0, a rank-3 Elemental Ward with a maxed Vitality and Intensify will increase Chroma's health at rank 30 to 270 × (1 + 2 + 1 + 0.55 × 1.3) = 1,273.05.
Damage bypasses obstacles in the environment and decreases with distance.
Electricity
Infuses Chroma and affected allies with an electric current that increases base Shields by 10% / 15% / 20% / 30% and converts incoming damage into arc discharges. An arc discharge inflicts 250% / 300% / 500% / 1,000% incoming damage as Electricity damage to a single target within 5 / 6 / 8 / 10 meters with a 10% / 15% / 20% / 25%status chance. Arc discharges will inflict a minimum of 50 / 60 / 100 / 200Electricity damage.
The shield bonus stacks additively with base shield modifiers, and the amount of shields gained is determined by the affected Warframe's base shields at rank 0. Since Chroma has 270 shields at rank 0, a rank-3 Elemental Ward with a maxed Redirection and Intensify will increase Chroma's shield capacity at rank 30 to 270 × (1 + 2 + 1 + 0.3 × 1.3) = 1,185.3.
Arc damage bypasses obstacles in the environment.
The final damage of an arc discharge is determined by the amount of shields and/or health lost by incoming damage. For example with a maxed Intensify, losing 100 shields from a single instance of damage will produce an arc that inflicts 100 × 10 × 1.3 = 1,300Electricity damage at rank 3 to a single target as long as it's within range.
When infused into Hildryn by the Helminth, the Shield drained by skills is also converted into damage, but the base multiplier is 1x instead of 10x.
Damage from environmental hazards can also be converted into arc discharges.
Arcs can strike the same target multiple times, and arcs can be produced in quick succession should Chroma and allies receive multiple instances of damage that exceed the minimum threshold.
Toxin
Emits an aura of noxious fumes around Chroma and affected allies that increases base Reload Speed by 15% / 25% / 30% / 35%, as well as weapon damage when Holstering by 15% / 25% / 30% / 35% for ? / ? / 3 / 3 seconds. Within a radius of 5 meters, the noxious fumes also have a 25% / 35% / 40% / 50% chance per second to deal 5% of an enemy's maximum health as Toxin damage with a 100%status chance.
The Toxin damage will only be applied to an enemy if it is not already affected by a Toxin proc, but can occur as soon as an existing Toxin proc expires. As such, its effect cannot stack with itself but can refresh itself every 7 seconds.
Damage bypasses obstacles in the environment and does not decrease with distance.
Cold
Encases Chroma and affected allies in a layer of frost that increases base Armor by 25% / 70% / 90% / 145% and creates an ice shield that reflects incoming fire back to its source. Reflected damage is increased by 150% / 200% / 250% / 300% and has a 10% / 15% / 20% / 25%status chance.
The armor bonus stacks additively with base armor modifiers, and the amount of armor gained is determined by the affected Warframe's base armor, according to the following formula: Base Armor × (1 + Armor Mods + Ability Modifier × (1 + Strength Mods)).
Since Chroma has 370 base armor, a rank-3 Elemental Ward with a maxed Steel Fiber and Intensify will increase Chroma's armor to 370 × (1 + 1 + 1.45 × (1 + 0.3)) = 1,437.45.
As with all other additive armor bonuses, Elemental Ward's bonus is applied before multiplicative armor bonuses.
Incoming hitscan and non-hitscan projectiles are physically redirected after hitting Chroma. As such, obstacles in the environment can prevent reflected damage from hitting enemies.
Hitscan projectiles are reflected directly to the source enemy regardless of distance from Chroma. Melee attacks are not reflected.
Non-hitscan projectiles are reflected in the direction of the source enemy.
Does not prevent damage to Chroma aside from the additional armor bonus and other damage reduction rules; Chroma will be hit normally before reflecting weapons fire.
Elemental Auras of any type from two or more Chromas do not stack and only the first aura will apply its benefits as long as the player is within buff range. For example, two Heat auras do not increase damage nor health values, and possessing a Heat aura will negate receiving a Cold aura.
Has a casting delay of 1 second. The animation interrupts movement and other actions.
Elemental Ward cannot be recast while active.
Elemental Ward does not work on Nekros' Shadows.
Subsuming Chroma to the Helminth will offer Elemental Ward and its augments to be used by other Warframes. The Ward's effects are determined by the Warframe's primary emission color.
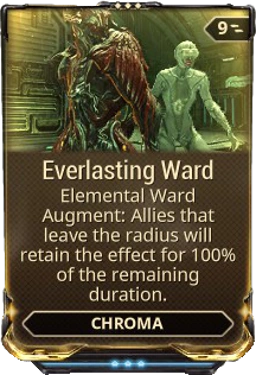
Everlasting Ward is a Warframe Augment Mod for Chroma that allows allies to retain Elemental Ward's effects upon moving out of its range, lasting for a percentage of Elemental Ward's remaining duration.
In a pinch, the bonus Health provided by the Ward can be used as a quick heal, as the Health granted is automatically added to your remaining health and is not reduced from your remaining health when Elemental Ward wears off.
The Ward is capable of damaging containers and hazards, albeit fairly slowly. Combining Elemental Ward with Spectral Scream and range mods will make for a useful farming tool so long as you have the energy to maintain it.
Electricity
Can be used to great effect on Survival and Exterminate missions where enemies approach you from all directions and are often difficult to locate or target. At maximum Ability Strength, the damage reflected can easily finish off weaker enemies and potentially stun any survivors.
Toxin
Works very well with weapons that require you to reload frequently or have long reload times.
Its dmg increase is considered as a Universal base dmg increase, same as Vex Armor and Arcane Arachne
Can reduce recharge delay for Cycron or a Kitgun equipped with Pax Charge, however, it does not affect recharge rate.
Cold
Properly modded, a Cold-oriented Ward can provide an armor bonus high enough that can counteract the armor penalty generated when casting Effigy.
The damage reflection is calculated using the damage before any damage reduction.
Bugs
Allies who enter, leave, then re-enter the radius of Heat-oriented Ward will not regain the buff on the same cast of Elemental Ward. This results in an empty space where the bonus health should have been, even if they took no damage at all.
This causes Medi-Ray and other healing abilities to attempt to heal the player, but if the player gets out of Elemental Ward's range, their health will return to normal again, wasting the health restored in the process.
The in-game UI shows the armor bonus from the Cold aura as a flat bonus rather than a percentage.
Inaros expends 50Energy to sink an enemy target within 20 / 30 / 40 / 50 meters into quicksand for 15 / 20 / 25 / 30 seconds, trapping it in place as it flails in panic becoming unable to move, attack, or use special abilities. While enemies are trapped, Inaros or any allies can perform the "Devour" action on them by holding down the Interact key (default X ); when devouring an enemy, the player (but not any companions) is completely Invulnerable to damage and Status Effects as Shields and Health are restored at a rate of 400 health per second, while also inflicting True damage per second to the victim. During the Devour action, the victim initially receives 50 / 100 / 150 / 250 damage per second, that ramps up to 100 / 200 / 300 / 500 damage per second over 2 seconds; damage is dealt in 10 ticks per second.
Enemies are unable to act while being actively devoured even if the ability's timer has expired.
The act of devouring a trapped enemy does not consume energy whether from Inaros or allies and can be sustained indefinitely for as long as the Use key is held, or the enemy expires.
The enemy being devoured by a player is invulnerable to outside sources of damage.
If an enemy is killed by being devoured by Inaros, a Sand Shadow is created, which is a friendly copy of the unit killed that will fight alongside Inaros. Sand Shadows last for a duration equal to the time spent devouring them, or a minimum of 15 seconds. A maximum of 3 Shadows can be created.
Creating a new Sand Shadow will remove the oldest created one in existence.
If cast on an enemy target by holding down the ability key (default 2 ), Inaros latches energy tethers onto the enemy from up to 20 / 30 / 40 / 50 meters away, dragging it towards him and automatically devouring it upon making contact so long as the key is held.
Tethered enemy is dragged along the ground and can fall to lower terrain elevations.
Tethered enemy is invulnerable to outside sources of damage while being dragged in.
Dragging speed is affected by movement impairing effects such as Cold procs and Molecular Prime.
Ability Synergy: Enemies trapped by Devour will automatically restore health to Inaros and create a Sand Shadow on death when killed inside Sandstorm.
Devour cannot be cast on naturally flying enemies like Ospreys and Orokin Drones. Units that only have temporary flight abilities though like Hellions can still be pulled from mid-air and then devoured once on the ground.
Cast delay of 1 second is affected by Casting Speed, while devour recovery delay of 2 seconds is not. Casting will interrupt movement.
If the target dies before Inaros finishes his casting animation, energy used for Devour will be refunded; however, if the target is already trapped in quicksand and is being dragged in by the tether, it will not refund energy if killed during travel.
Cannot be recast on affected targets.
Ancient Disruptors will resist the ability heavily, causing only 1 damage per tick to occur, which will often cause the bug listed below. The same goes for Infested allies that are linked to the Disruptor.
Tips & Tricks
If Inaros consumes a Boiler, the Boiler will become a Sand Shadow as normal, and the spawn pods created when it dies will not spawn allied units while the Shadow's will. Similarly, Brood Mother Sand Shadows will spawn friendly maggots on death.
Bugs
Inaros may become stuck in the devour animation, unable to move or cancel the ability until the enemy is killed. Pressing escape will force the player out of the animation although this is exploitable, as you will continue to gain health from the enemy and you can use high powered weapons to kill the enemy, guaranteeing that a Sand Shadow will form.
Summon a Scarab Swarm to attack enemies with guaranteed Corrosion Status. Damage scales with Inaros' Health. Enemies killed while immersed in the swarm summon a Swarm Kavat that fights alongside Inaros and guides the scarabs to other enemies.
Inaros expends 100energy to hurl ? swarms of scarabs that travel up to 20 / 22 / 25 / 30 meters away, infesting all enemies in their path. Swarmed enemies will flail in panic and receive ? / ? / ? / 241 plus 10% of Inaros' max health as Corrosive damage with a guaranteed status effect per 0.5~ seconds for 6 / 10 / 12 / 15 seconds, during which they are completely disabled. While active, Scarab Swarm splits a flying swarm every ? seconds to spread to an unaffected enemy within a ? / ? / ? / 12 meter radius from a swarm host for 100% of its remaining duration.
Launching a Scarab Swarm on an enemy that is still under the effects of another Scarab Swarm, will not refresh the debuff.
Scarab Swarm's projectile possesses innate punch through but does not bypass obstacles in the environment.
When an enemy affected by Scarab Swarm dies, they spawn a friendly Swarm Kavat that scratches enemies to spread Scarab Swarm. A maximum of 3 Swarm Kavats can spawn, each lasting 20 seconds.
Number of active Swarm Kavats are tracked as a buff icon beside Inaros' hitpoints indicator.
Swarm Kavat-inflicted Scarab Swarm does not spread flying swarms.
Ability Synergy: Swarm Kavat claw swipes contribute as hits toward Inaros' revival via his Passive.
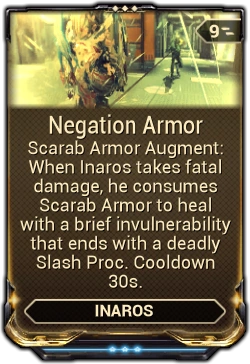
Negation Armor is a Warframe Augment Mod for Inaros that sacrifices an active Scarab Shell to prevent Inaros from entering Bleedout, but receives a Slash status effect once its invulnerability period expires.
It is more energy efficient to cast a Scarab Swarm attack on a single enemy in the middle of a large, clustered group, and allowing the swarm spreading effect to infect all nearby enemies. This is particularly effective against Infested that naturally tend to clump together in groups.
Nekros emits an aura of dark power that affects every corpse within a radius of 10 / 15 / 20 / 25 meters, consuming the corpses and granting a 30% / 40% / 50% / 60% chance to spawn a health orb and a 22.5% / 32% / 42.5% / 54% chance to roll the corpse's drop table again to produce additional loot. After a 2 second delay on the first corpse within range, corpses are consumed one at a time in random order, with subsequent corpses consumed at a rate of 3 corpses per second. Each corpse consumed drains 10energy; the ability will remain active until toggled off or Nekros runs out of energy.
Technically, the corpse's loot table is rolled again at a 75% / 80% / 85% / 90% success rate, but only after a health orb has successfully been spawned. Combined with the 30% / 40% / 50% / 60% chance to spawn a health orb at all, this leads to the 22.5% / 32% / 42.5% / 54% drop table chance.
Therefore, there will always be an additional health orb if there is additional loot.
This also implies that a single enemy may drop up to three health orbs, one as regular loot, one from Desecrate proccing and another from rerolling its loot table.
Even enemies with an empty drop table, like Corpus Security Cameras, may drop health orbs this way.
Despite being a channeled ability, this does not interrupt energy regeneration from any source including Energy Siphon and Wellspring, and it is unaffected by Ability Duration.
Desecrate does not activate channeling-based Incarnon Genesis perk bonuses.
Bodies that are cut in half before or after death by taking Slash damage to the torso are each treated as distinct "corpses", each part with their own chance to yield additional loot. This does not apply to individual limbs that have been removed, but only the large sections of corpses.
Previously, Cold procs being on a target when they died would result in an ice statue, which could then be shattered into two parts to desecrate. Currently this no longer functions in game, and results only in a frozen torso that cannot be broken down further, and therefore can only be desecrated once.
Desecrate affects the corpses of most enemies as well as dead faction allies from Invasions, The Grustrag Three, Eximus enemy corpses, and Corrupted Vor's corpse if it is left behind. Desecrate also affects the following:
Vaporized enemies as long as Desecrate is cast before they fully disappear.
Enemies vaporized by Nova's Molecular Prime even after the corpses have disappeared. When Desecrate is cast, the corpses appear and disappear quickly.
Shadow corpses from Shadows of the Dead. Desecrating shadow corpses will only yield health orbs.
Desecrate does not work on enemies that explode on death, such as Volatile Runners, or on certain bosses including Sprag and Ven'kra Tel.
Sometimes, corpses may yield no drops even if Desecrate's attempt at the extra loot roll was successful, because the enemy's loot table can include a chance to drop nothing.
Successfully desecrated corpses will glow with the chosen energy color and turn into smoke before fading away.
At the start of a desecration, there is a small time frame where corpses can be dismembered. The corpse (or bisected corpse) will then reappear, ready to be desecrated again.
Up to four Desecrate's attempts can be done on a single enemy with two well-timed dismemberments.
Initial activation of the ability has a cast time of 1.8 seconds.
Know the timespan for a body to completely disintegrate:
Grineer and Corpus corpses will disintegrate in 15 seconds.
Infested corpses and Avalanched enemies will disintegrate in 5 seconds.
Corpses from enemies affected with Molecular Prime will disintegrate in 3 seconds.
Corpses from enemies affected with Miasma will disintegrate within a second.
Enemies that do not leave bodies behind cannot be desecrated.
Most useful in Survival missions, due to the large amount of enemies.
Nekros can also desecrate personal life support from bodies.
Weapons with high Slash damage are likely to dismember enemies into multiple body parts.
Desecrate synergizes well with Equilibrium – every energy orb picked up will regenerate health and vice versa, allowing for Desecrate to be constantly active, regardless of whether the player has the Despoilaugment or not.
When using Equilibrium it is beneficial to take a controlled amount of damage, or use Despoil in order to fully benefit from being able to pick up Health orbs (also consider using Rage or Hunter Adrenaline to recover energy while taking damage) Alternatively, a companion with Synth Fiber allows for health orbs to be consumed continuously regardless of health for constant Equilibrium energy benefits. Using this, even a Flawed equilibrium mod can provide constant uptime with enough health orbs present.
Desecrate is also very effective in Excavation missions because it can be used on Power Carriers, possibly making them drop additional power cells.
Because Hydroid's Undertow preserves the bodies of enemies it kills, Desecrate synergizes very well with it if used properly, especially on Defense or Survival missions.
Khora's Strangledome almost guarantees dismembering enemies upon kill from its chains due to its high Slash, granting more body parts for Nekros to generate loot from.
Corpses are consumed upon Desecrate's attempt to roll extra loot, regardless of success or not.
Overlapping Desecrate using two or more Nekroses will not generate more loot. Only one Nekros can successfully Desecrate a given corpse.
Having multiple Desecrating Nekroses is still useful if the Nekroses themselves are spread out or if some corpses would disappear before Desecrate gets a chance.
This is especially useful when corpses are disintegrating faster than 3 per second (such as when an ability like Molecular Prime is being used, in infested missions, or if enemies are simply being killed at a rate of over 3 per second)
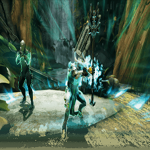
Oberon channels a field around him with radius of 10 / 15 / 20 / 25 meters. Ally players entering the field will receive a buff which will regenerate 15 / 20 / 25 / 40 health every second, while allied summoned units affected will regenerate 5 / 6.7 / 8.3 / 13.3 health every second (1/3rd the normal rate), for as long as Renewal remains active, regardless of range. Fully healed allies are additionally cleared of all negative Status Effects. Affected allies that enter Bleedout will have their timer slowed by 20% / 25% / 35% / 45%.
The duration of the expanding pulse is inversely affected by Ability Strength, meaning it reaches its total range faster the more Ability Strength is used.
Renewal will continue to heal all affected targets for the duration of the ability, even if all their health has been restored and regardless of distance. Buff will remain until skill is deactivated, Oberon runs out of energy, or Oberon/ally falls off the map.
Ability Synergy: If Oberon or any allies affected by Renewal stands on Hallowed Ground, they will receive the Iron Renewal buff, which grants 125 / 150 / 175 / 200 bonus armor for as long as Renewal is active. Once Renewal is deactivated, the armor buff will remain on all affected units for 20 more seconds.
Bonus armor is added after other armor increases (e.g. an Oberon with a maxed Steel Fiber and Intensify will have (185 × 2) + (200 × 1.3) = 630 armor).
As Link Fiber scales with the player's armor, companions with this mod benefit twice from Iron Renewal, as the companion links into the player's increased armor and then gets buffed by Iron Renewal.
Renewal costs 25energy to activate, then drains 2energy per second while active. When allied targets are below their maximum health, Renewal will drain an additional 3 energy per second for every allied player and 1 energy per second for every allied summoned unit affected by its healing; Renewal will end if Oberon runs out of energy, it is dispelled, or if deactivated manually by pressing the ability key again (default 3 ).
The number of allied targets currently being healed by Renewal is shown on the ability icon. If no allies targets are being healed at the time, the ability icon will only animate to indicate that Renewal is activated.
Multiple instances of Renewal's healing per second, and of Iron Renewal armor buff, do stack with each other.
Renewal's initial casting area will not expire unless Renewal is deactivated, allowing allies to receive the buff when they choose.
If Renewal is removed from Oberon or an Ally, (such as by falling/jumping out of bounds, or from the effects of a Nullifier or Nul Scrambus) they will not be able to regain the buff until Oberon re-casts Renewal. They can still gain the buff from another allied Oberon, though, as long as that Oberon's buff has not also been removed.
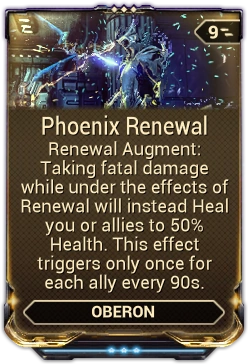
Phoenix Renewal is a Warframe Augment Mod for Oberon's Renewal. If a player takes fatal damage while under the effects of Renewal, instead of becoming incapacitated, the player is healed for a percentage of their health and granted 5 seconds of Invulnerability. Each player that triggers Phoenix Renewal's effects must individually undergo a 90-second cooldown before they can benefit again.
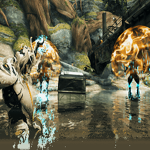
Oberon expends 100energy to lift all enemies within 8 / 10 / 12 / 15 meters up into the air and violently slams them to the ground, dealing 500 / 750 / 1000 / 1250 damage distributed evenly between Impact and Radiation with guaranteed Knockdown and Radiation status, plus an additional 100 / 225 / 400 / 625 damage to enemies already affected by Radiation status effect. An enemy that dies by the effect of this ability has a 25% / 35% / 45% / 50% chance of spawning a Health Orb.
Affected enemies that survive the impact will emit an intense flash of light, Blinding surrounding enemies within 2.5 / 3 / 3.5 / 4 meters that were unaffected by the initial cast, for 1 / 2 / 3 / 4 seconds.
Ability Synergy: Enemies that survive Reckoning while standing on Hallowed Ground will have their armor permanently reduced by 10% / 20% / 30% / 50%.
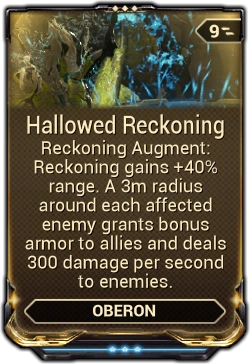
Hallowed Reckoning is a Warframe Augment Mod for Oberon's Reckoning that makes enemies hit drop patches on the ground, dealing Radiation damage over time to enemies and provide armor to allies standing on them. It also passively increases Reckoning's range.
With one player using Corrosive Projection, 100% armor strip can be achieved at 164% Ability Strength.
Use Reckoning when surrounded by a large group of enemies to maximize its offensive effects and health orb generation.
Similar to Smite, Reckoning's Impact / Radiation damage type is particularly effective vs Corpus Shields and Grineer Alloy Armor, while being less effective against most types of Infested units.
Reckoning's widespread Radiation proc can be used to tactically nullify the threat of a large area of enemies, relieving allies outside of the area (temporarily) from needing to deal with them.
Enemies blinded by Reckoning's outer flashes are vulnerable to melee finishers.
With the health-to-energy conversion of an equipped Equilibrium mod, dropped health orbs from Reckoning may meet or exceed the ability's energy cost.
Pair with the Health Conversion mod to gain additional armor from Reckoning's health orbs.
Against higher level enemies, Ability Strength benefits health orb generation by increasing Reckoning's potential to kill.
Using Smite and Hallowed Ground to confuse enemies before using Reckoning, successfully increasing damage output.
Reckoning already has a 100% chance to confuse targets, increasing its own damage with further casts.
Bugs
Occasionally, if Oberon is knocked down just as Reckoning is cast, enemies will be attacked as normal without Oberon doing the skill animation. Only upon standing up from being previously knocked down does Oberon then perform the animation.
Casting Smite then immediately casting Reckoning removes the casting animation of Reckoning, allowing for player movement while casting Reckoning.
Rarely, spamming the ability on a group of enemies will make some enemies hover permanently in the air, much to the effect of Bastille. This may be caused by an enemy that is being lifted is struck again by the ability but not brought down.
Create a well of life on an enemy. Allies near the target gradually regenerate health and are immune to Status Effects. Status Effect damage intended for nearby allies will be absorbed by the enemy. Allies gain additional health when they attack the enemy.
Trinity expends 25energy to imbue a single enemy target within 100 meters with life energy and suspends it in midair. The enemy is Invulnerable and incapacitated, lifted airborne, and emits an 10 / 12 / ? / 15 meter aura for 7 / 9 / 10 / 12 seconds. When Trinity or her allies stand within the aura, they are healed 25 / 50 / 75 / 100Health points per second and are immune to Status Effects. Damaging the target instantly heals the attacking ally for 0.25% / 0.5% / 0.75% / 1% of the damage dealt over infinite range, as well as applying the damage-converted healing to all allies standing within the aura. If a status effect is negated, the target takes 10% (5% on boss enemies) total health damage. While active, press the ability key again (default 1 ) to release the target early. A maximum of 1 target can be turned into a Well of Life.
Casting time of 2 seconds is affected by Casting Speed.
All damage suffered by the invulnerable enemy target is stored and dealt in full when the ability ends.
When negating a status effect, a wisp will spawn from the ally and seek out the lifted target.
Wisps are restricted to spawning at a rate of once per second.
Wisps do not deal any inherent damage type, bypassing any normal damage calculation steps.
Well of Life can effectively lock down a Synthesis Target for scanning.
Additionally, the invulnerability offers the target temporary protection from accidental death, but stored damage will be dealt in full when the ability ends.
Bugs
If Well of Life is cast on a Shockwave MOA readying to stomp the ground, it will still produce a shockwave, but it also will be suspended in midair for the duration of the skill.
In Corpus levels, if the player targets something outside of the above-mentioned range [clarification needed], the nearest turret (and possibly cameras) will be targeted.
Trinity expends 100energy to invokes potent restorative and defensive power from within for herself and all allies within Affinity Range, restoring 40% / 50% / 75% / 80% of her and her allies' maximum Shields and Health and granting them 25% / 30% / 40% / 50%Damage Reduction for 3 / 5 / 7 / 10 seconds.
Cast time of 0.5 seconds is affected by Casting Speed.
On Defense Objects, Blessing restores up to 500 health over 5 seconds which does not stack with similar restoration effects. The damage reduction is also capped at 50%.
Blessing is uninterruptable. Even if Trinity enters bleedout while casting, the healing and damage resistance will still be granted.
After life support has completely drained in Survival, losing all shields will prevent Blessing from restoring them similar to No Shields Nightmare mode.
Blessing's damage reduction increases the effectiveness of her Vampire Leech augment's overshields.
Fosfor flares greatly increase affinity range and Blessing range by 200m. Try them in open world Landscapes.
Narrow Minded does not decrease the range of Blessing, but does impact Trinity's other abilities.
125% Ability Strength or higher allows Blessing to completely restore shields from 0% and reliably reset shield gate invulnerability.
Bugs
Casting Blessing after a Nova casts Molecular Prime will cause the explosions to have your energy color.
Blessing's healing doesn't consistently heal Kavor Defectors within affinity range. This bug seems to be more prominent when the Defectors are buffed by mote(s) from Wisp's Reservoirs
Aside from the above abilities, Nyx is able to use Mind Control on Corrupted Ancients, enemies which can heal surrounding allies. Somewhat similarly, if a Nekros slays a Corrupted Ancient, it can be resurrected on the side of the Tenno by his ability, Shadows of the Dead.
Nekros expends 100energy to summon 4 / 5 / 6 / 7 shadow copies of his most recently slain enemies, prioritizing the strongest enemy groups among those killed to summon. The copies retain the level and stats of their original selves but will gain 25% / 50% / 75% / 150% damage, 15% / 35% / 65% / 100% shields and 15% / 35% / 65% / 100% health, with each copy losing 3% of their health per second while active. The copies spawn randomly within a 10 meter radius and will fight for Nekros until they die either to enemy fire or their own degenerating health.
Shadows of the Dead's damage, shield and health bonuses multiply a shadow copy's total damage, shield and health. For example, +30% Ability Strength will increase the damage and health bonuses to 1.5 × 1.3 = 195% and 1 × 1.3 = 130% respectively at max rank. A copy whose original had 200 total health and dealt 100 damage per attack will have 200 × (1 + 1.3) = 460 health when summoned and will inflict 100 × (1 + 1.95) = 295 damage per attack.
There is currently no way to prematurely kill shadows in order to refresh them, either the shadows or Nekros must die in order for this to happen.
The number of active Shadows is displayed on the ability icon.
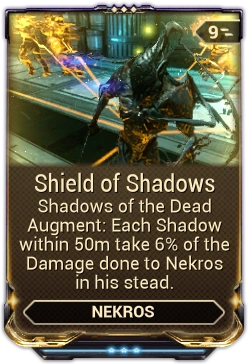
Shadows of enemies that summon additional units, like Drahk Masters, can summon Shadows of their respective minions. These can exceed the number of Shadows Nekros can normally summon, and will be reflected in the number on the ability icon. They also contribute extra damage reduction when Shield of Shadows is equipped.
Shadows can be healed with Rejuvenation, most Warframe healing abilities, and Sancti Magistar's charge attacks.
This can become a problem later on when the Nekros player needs to refresh their shadows to get higher level versions, but cannot do so until they die.
Casting the ability again (default 4 ) while there are Shadows still active performs additional functions:
Fully replenishes active Shadows' shields and health on each recast. If the number of active Shadows are at maximum capacity, Nekros will perform a shortened animation.
Shadows are not healed before the completion of the animation; as such, if recasting at maximum Shadows, some can die before getting healed, and more will not be spawned to compensate.
When the number of active Shadows falls below the maximum, Nekros performs the full summoning animation to create additional Shadows up to the maximum capacity. This function can only be performed when there are slain enemies in Nekros' recently-killed list (see Summoning Priority tab below).
Active Shadows that are more than 30 meters away from Nekros will teleport into Nekros' spawn radius.
Shadow copies are selectively summoned and possess unique properties:
While shadow copies can be different unit types, they possess common characteristics:
As the shadows appear, each one inflicts a small area knockdown which can only affect each enemy once.
Shadow copies have raised Threat Level, causing enemies to prioritize attacking copies over players.
Nekros and his allies are able to walk through shadow copies without being obstructed.
Shadow copies will take cover and organize, while occasionally seeking out to follow the player or the host around.
Enemies that spawn additional enemies (e.g. Drahk Master) can add to the number of shadows, even above the max shadow count.
Kills by a player's shadow copies grant that player 50% of the kill experience to their Warframe.
Shadow copies are black, and have a mist effect that is colored with Nekros' energy color. A pure black energy color will remove the mist effect and leave simply blackened forms.
If a shadow enters inside the sphere of a Nullifier Crewman or Corrupted Nullifier, or gets in contact with the disrupting aura of a Comba or Scrambus, the shadow will be drained of health while remaining inside the bubble or aura. If Nekros is the one making contact with one of the mentioned, his shadows will not die. (Only tested with Nullifier Crewman so far.)
Shadow copies are taken from the last 20 enemies killed by both Nekros and his Shadows; teammate and Companion kills do not count. Once a specific enemy has been copied it is removed from the player's "recently-killed" list. The game does not remember any kills past the 20th (e.g., if you kill 30 enemies and cast this ability four times without killing any more enemies this ability will create 7, 7, 6, and 0 copies). The game is optimized to selectively summon the strongest enemy types available in the list, see below for more information.
When using weapons with Syndicate mods, or weapons with built in syndicate effects, the radial blast will count as the player's kills, which will overwrite any current ones.
Shadows of the Dead summoning selection prioritizes the highest group of enemies first, the levels of enemies slain second, and the earliest available enemy on the recently-killed list third. The list below contains the highest to lowest priority group of enemies for each faction based on playtesting results:
Eximus variants for all factions can be spawned as shadows, often prioritized for spawning due to higher level difference than their normal counterparts.
Shadows of Eximus units possess Overguard, which isn't considered as a part of their health and will not be drained, making them far more resilient than their normal varients.
Despite some enemies like the Scorch being very powerful, they are not considered in the spawning hierarchy.
Ability Synergy: A target killed by Soul Punch summons a friendly Shadows Of The Dead Shadow copy of the enemy target. If the target survives, they become Marked for Harvest for 3 seconds, creating their Shadow copy if killed while marked.
If the max Shadows count is reached, all active Shadows are healed to full health instead.
Has a very long cast animation, during which shadow copies usually will not attack. Nekros is not immune to knockdown and takes full damage during this time.
Dying or experiencing a host migration will destroy any shadows you currently had stored.
Battalyst and Conculyst can be summoned as shadows with (usually) the highest priority.
Shadow copies attract attention from enemies, they are effective at defending objectives or areas of a map.
Actively target and focus your attacks on enemies you want to clone prior to casting the ability.
Because you still take full damage during the long summoning animation, it might be useful to cast Terrify just before using this skill.
Roller will often roll around aimlessly and get stuck, do not use these as your shadows.
Shadow Shield Ospreys will shield all of your shadows and your team, granting additional 200 shield when connected (as of Update 10.3). This buff is not increased by multiple Ospreys and you must be less than 10 meters from a Shield Osprey for it to connect. They will prioritize following your shadows or enemies if not in range of shadows. They will provide shield bonuses to Defense objectives or any other allied unit, including Mind Controlled enemies (besides Grineer heavy units).
Can be used as a temporary survival measure in Survival when the oxygen runs out, as disconnecting/connecting to osprey will instantly regenerate your shield and apply the bonus. It will not stop the draining of shield but can be used as a temporary measure to stay alive, such as waiting in extraction where you are very vulnerable to attacks.
In Void Defense it is recommended to spawn the shadows in the center zone with the cryo pods so that the AI will take cover and increase their survivability.
Oberon's Renewal will heal Shadows and can override their health decay; however, as Renewal's energy drain scales with the number of affected targets, and Shadows are both numerous and constantly under healing, they can very quickly drain all of Oberon's energy. Take this into consideration when playing with an Oberon in the team.
Trinity's Blessing, with at least 125% Ability Strength, can fully heal Shadows and can potentially keep them alive indefinitely.
Garuda's Blood Altar will heal shadows quickly, potentially allowing unlimited survivability. This works since Blood Altar heals by percentage of missing health, leading to a fast heal for more damaged shadows. A range build will be helpful here.
Rejuvenation will replenish shadows' health, which can offset the constant health decay. This is particularly useful with Nullifier Crewman, or other enemies that can avoid directly taking damage. Some numbers for Reference:
Rejuvenation restores +3 hp/sec, which means at a 3% health drain you will cancel the health drain of a mob with 100 hp. 4 Rejuvenation aura's will increase your heal rate to +12 hp/sec, which would cancel the health drain of a mob with 400 hp with a 3% health drain.
Rejuvenation restores +3 hp/sec, which means at a 1% health drain (near max duration) you will cancel the health drain of a mob with 300 hp. 4 Rejuvenation aura's will increase your heal rate to +12 hp/sec, which would cancel the health drain of a mob with 1200 hp with a 1% health drain.
Shadows of some enemies (e.g., Crewman) can hack into disabled Ambulas or Bursa, turning them into allies just as if the player had hacked them.
Bugs
Does not properly produce shadow copies when standing on boxes or crates, as the ability will spawn shadows at your current height in the casting range. If there are no surfaces around where you are standing that are close to the height you are at, very little or no shadows will spawn, but it would use energy and waste 'souls'.
Rarely, a shadow or two will not die when the duration ends, and will continue to exist until they die.
If a Corrupted Ancient is queued for your next shadow, casting the ability on solo missions will allow you to become downed instead of dying instantly, as the game recognizes the healer is about to be spawned. You will be revived with a small portion of your health once the Ancient pulses its healing wave. This is a quirk that only occurs if a Corrupted Ancient is queued to be spawned as you use the ability and will not happen in any other case.
A Sapping Osprey shadow's sapping field will not have Nekros' energy colour, and the orb can be destroyed by allies. The field will not damage allies, however.
In solo mode, dying just as the shadows are summoned can result in the shadows not losing health over time, thus existing until they are killed by hazards or enemies. These shadows do not contribute to the "summoned shadows" counter, allowing the player to have more than the usual maximum number of shadows allowed at one time. These shadows remain in this state even when more shadows are summoned.
For whatever reason, shadow Nullifier Crewman of either type decay slower than other enemies, to the point where a couple [Rejuvenation] auras can easily keep them alive (with a decent positive duration) until they are killed by enemies.
If this ability is used to revive a Grineer Prosecutor, the Lotus will prompt you that she is detecting an enemy one. Respectively, she will pronounce that they have been killed once they decay, or the ability ends.
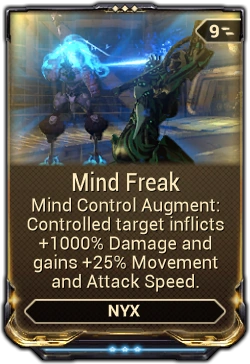
Nyx expends 25energy to fully inhabit the mind of a single enemy within a range of 20 / 40 / 50 / 60 meters, stunning it for 3 seconds then forcing it to fight for the Tenno faction for 15 / 20 / 25 / 45 seconds. While controlled, the affected target is enveloped within a psychic barrier that renders it completely Invulnerable to damage from allied and enemy factions. For the next 4 seconds after activation, any damage dealt by Nyx onto the controlled target is absorbed and converted into a percentage damage bonus for the target, lasting for the ability's remaining duration. Only 1 enemy can be controlled at a time; release the target early by pressing the ability key again (default 1 ).
Percent damage bonus conversion rate is given by:
Enemy armor is ignored, as well as the target's health, armor, and shield type damage modifiers.
Damage from physical and elemental damage mods is not taken into account.
Enemy weakspots are taken into account, including the critical multiplier weakspot bonus.
Damaging procs (e.g., Slash, Heat, and Toxin) applied to the target before casting Mind Control will contribute to the damage conversion.
The damage bonus from Viral and Magnetic are not taken into account.
Unalerted enemies that are Mind Controlled will be susceptible to Stealth Damage Multipliers from melee attacks over the ability's duration.
The mind-controlled target is immune to damage from all sources, but is still susceptible to negative Status Effects. During Mind Control, all damage dealt by Nyx and her allies on the target will be stored and inflicted in full once the ability ends. Damage dealt by enemies on the target is only nullified and not stored.
The damage bonus percentage from converted damage is displayed in the HUD beside Nyx's shield and health indicators.
The mind-controlled enemy will not hinder mission progress (e.g. block Interception nodes, stall Defense waves, etc.)
If the target dies before Nyx finishes her casting animation, energy used for Mind Control will be refunded.
Mind-controlled targets will teleport to Nyx's location if she gets too far away, except those on Ramparts.
Mind-controlled targets use their abilities to the benefit of the Tenno and to the detriment of their former allies. For example:
The mines dropped by Mine Ospreys (including mines placed before the ability was used) will not hurt Nyx and her allies, but will hurt the Osprey's former allies.
Security Cameras will ignore everything and never go into the alerted state. Turrets can behave unpredictably (using Mind Control on Turrets will make them fight for Nyx, but only when a camera activates them; in other words, Turrets can deactivate if the camera is destroyed or goes into the unalerted state.)
Shield Ospreys will project shields on allies and defense objectives.
Any active Comba and Scrambus disruption auras will remain active, though subsequent auras will not affect Nyx or her allies.
Fog Comba and Scrambus disruption auras will not remove mind-control from its target but will prevent the use of the ability until the disruption wears off.
While Nullifier Crewmen can be Mind Controlled after their nullification field is disabled, they will dispel themselves upon it regenerating; the Projector Drones should therefore be destroyed.
Mind Control will not work on bosses, excecpt for Captain Vor. However, the ability still applies a short duration stun.
This is also true for Syndicate hunters and Lynx Turrets.
Some mini bosses like Acolytes can be affected, though with significantly decreased duration and due to their innate DR stored damage dealt when it ends will be reduced.
Mind Control overrides the effect of Chaos on the selected target but will not be overridden by Chaos.
Eximus enemies under Mind Control will focus their attacks on enemies instead. They will still project their damaging special auras (such as a large fire wave) but these will not damage allies over the ability's duration. In particular useful terms, Arctic Eximus will slightly slow down all other enemies in range while also providing protection for itself with its snow-globe-like shield.
When Mind Control is cast, an energy tether briefly links Nyx to her target as a visual indicator. The mind-controlled target will be marked with symbols of the Lotus for the ability's duration along with waves of energy flowing over them, affected by Nyx's chosen energy colors.
Enemies under mind control can be healed by friendly sources, to the benefit or detriment to the team:
The Rejuvenation Aura can heal enemies that are currently mind controlled.
Blessing will fully heal the mind controlled target.
Rarely, Mind Control will reverse an enemies ability to set off alarms, and if by a rare chance the enemy decides to "activate" already activated alarms, the enemy will actually turn them off (including lifting a complete lockdown into a system wide alert instead). (not sure if this happens anymore as it was already rare before)
Mind Control can be used to both neutralize powerful enemies like Heavy Gunners and Techs, and use them as temporary allies.
Leech Eximus Enemies can make powerful allies as they can both (usually) deal large amounts of damage with their extended survivability, and withstand most damage taken that is returned after the ability expires.
In Defense missions, casting Mind Control on the last enemy in a wave will buy time for the objective's shields and health to regenerate; this is more useful with improved Ability Duration.
Mind Controlling any variant of Corpus Tech that has deployed ospreys will also make the Ospreys friendly, regardless of how many it has deployed.
Bugs
Mind Controlled targets will still complete Interception objectives, and will complete them for the enemy team.
Mind Controlled targets have reduced status chance. This can be seen easily with the Napalm as it's normally 100% status fireballs rarely proc heat status effects.
Shield Ospreys spawned from Mind Controlled enemies will stay friendly when the target dies.
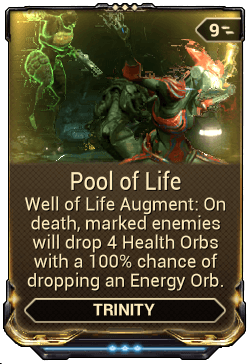
If Limbo has Haven or Hydroid has Curative Undertow installed, either one can act as a healer for the entire cell. Pool of Life increases the healing capabilities of Trinity's Well of Life power. Finally, Saryn can heal herself personally if she equips Regenerative Molt, reducing the burden she might place on their allies or else enabling her to solo better.
Equipment
There are some items that can be used in a mission to heal lost health.
There are PvP-only mods that allow for players to regain health based off their combat performance, and Syndicate-purchased mods that restore health after gaining enough affinity to meet the necessary thresholds. Lastly, Life Strike will restore health to the Tenno as a percentage of damage inflicted by the equipped melee weapon.
When health is reduced to 0, Warframes enter the Bleedout state. In bleedout, Warframes can barely move and are restricted to firing their sidearm. If they do not receive the appropriate attention from an ally within 20 seconds, they are killed in action. It is quite difficult to complete missions successfully when all players are dead, so players typically strive to keep health above 0 at all times.
Effective Health
Damage calculations get complicated when damage resistances are involved. Effective health is a common metagame concept which states that because each hit point you have actually absorbs more than one point of damage, you effectively have more hit points than indicated. In WARFRAME, effective health can be increased by armor, resistance mods, and health classes.
For example, if your Warframe has 300 health, and you are being attacked by an enemy that deals Script error: The function "Proc" does not exist. damage:
Script error: The function "Proc" does not exist. attacks deal 25% less damage to Flesh health. If they would normally strike for 100 damage in a single attack, they would only deal 75 damage to your Warframe.
Therefore, to deal 300 damage to your Warframe, they would have to output 400 total points of damage.
In reference to Script error: The function "Proc" does not exist. damage, your Warframe has 400 effective health even though it has only 300 nominal health. Effective health can only ever be considered in the context of damage, because its value depends on the bonuses and penalties of the incoming damage as much as it does on the resistance values of your armor, mods, and health. Depending on how you build your Warframe and use its abilities, you can experience a drastic difference in survival between different types of enemies. (A specific build of Valkyr has been shown to have ~3800 effective health against most Grineer but only ~850 effective health against typical Corpus enemies.)[1]
Effective health is a valuable metric because it allows you to compare different forms of survivability.
")
")


")
")
")
")
")
")
")
")
")
")
")
")
")
")
")
")
")
")
")