Death's Gate
- The less Health that Garuda has, the more damage she inflicts; Garuda gains up to 100% additional damage bonus for her abilities and weapons the closer she is to death.
- Damage bonus is proportionate to the missing percentage of Garuda's maximum health.
- Damage bonus increases or decreases immediately following any changes to Garuda's health.
- Maximum damage bonus is reached at 2 health points remaining.
- Damage bonus is displayed as a buff icon using Garuda's iconic symbol, shown beside the shield and health bars.
- Damage bonus is calculated independent of other damage sources.
- When no melee weapon is selected in the Arsenal loadout, Garuda's Talons become available in the Arsenal screen as an exclusive melee weapon that can be modified separately and equipped for combat during missions.
Unlike most frames, when Garuda ranks up she receives a special set of rank bonuses which are indicated at the top-left of the Warframe Upgrade screen:
- +13% / +25% / +38% / +50% / +63% / +75% / +88% / +100% / +113% / +125% Energy capacity at ranks 3 / 6 / 9 / 12 / 15 / 18 / 21 / 24 / 27 / 30 respectively.
Abilities
|
 1 |
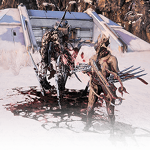
Dread Mirror Rip the life force from an enemy and use it as a shield that captures damage. Charge to channel the captured damage into an explosive projectile. Introduced in Update 24.0 (2018-11-08) |
|
6 / 7 / 8 / 10 m (explosion radius) | |||
|
Misc:
8 m (stagger radius) |
Info
- Garuda expends
 25 Energy to leap into the air to pounce at an enemy target within
  30 meters,
  Staggering all enemies within an 8 meter radius on landing while violently slashing the victim with her talons to inflict
  Knockdown. The victim is instantly killed if its health was at or below 40% when Dread Mirror was cast.
- Garuda must have sufficient space to land next to the victim to cast this ability.
- Garuda is invulnerable while charging.
- Dread Mirror's knockdown effect can forcefully interrupt some otherwise uninterruptible enemy attacks, such as the Battalyst's omnidirectional laser phase.
- Enemies with Overguard cannot be targeted until their Overguard is removed.
- Once Garuda strikes the victim, she rips its lifeforce out to conjure a Dread Mirror in front of her for 13 / 15 / 18 / 20 seconds. The mirror is a large hovering invulnerable frontal shield that reorients itself to face the player's camera direction. All incoming enemy ranged and melee attacks are blocked by the mirror on contact, while the damage is absorbed into the Dread Heart beating above the mirror's frame; incoming enemy damage is first multiplied by 1 / 1.5 / 1.75 / 2 times then absorbed by the heart. The heart lingers indefinitely until Garuda throws it.
- 10% of the victim's maximum health is absorbed as initial damage for the heart when Garuda strikes the target.
- Maximum health is considered from health classes (e.g. Cloned Flesh, Flesh, etc.), not shield/armor classes.
- If the victim is instantly killed, the health absorbed is increased to 20%.
- Minimum health threshold is 1000. Meaning, target's maximum health for damage capture will be considered as 1000 if the actual value is lower than this threshold.
- The victim receives damage equal to 10% of their maximum health as Slash damage, but these rules apply:
- The damage does not bypass Armor and Shield. It will be reduced by damage reduction from the Armor and deal to Shield before health, just like other typical damages.
- While the damage is calculated from Health, the instant kill threshold of 40% will be considered from a combination of Health and Shield, regardless of Armor.
- Enemies that touch the mirror will take 100 Impact damage and stagger backwards away from Garuda. Rolling towards enemies will Ragdoll them.
- Mirror contact damage is not affected by mods.
- This damage is also absorbed into the Dread Heart.
- The mirror hits once when Garuda strikes the victim, absorbing one instance of contact damage, unless they are instantly killed.
- Damage absorbed is displayed in a numeric value above the heart.
- Dread Mirror lasts until it expires or the Dread Heart is thrown, while the Dread Heart will persist until thrown, even after the mirror disappears, and can absorb damage from multiple Dread Mirrors indefinitely.
- The mirror can block some directional area of effect abilities, such as Profit-Taker's EMP Slam and Laser Sweep, but not others such as a Heavy Gunner's ground slam or any of the massive Eidolon area of effect attacks.
- Mirror can also prevent knockdown, but not knockback, from Profit-Taker's Repelling Shields.
- 10% of the victim's maximum health is absorbed as initial damage for the heart when Garuda strikes the target.
- While the Dread Heart is floating above Garuda, holding down the ability button (default 1 ) causes Garuda to grasp the heart in her talons and drain 50 Energy per second to continuously increase the absorbed damage by 100% of the currently stored damage value per second. Releasing the ability button or running out of energy causes Garuda to throw the heart as a high velocity explosive projectile toward the location on the aiming reticle. The heart bursts on impact with an enemy or a surface to inflict the amplified damage as Impact with 100% Status Chance and a 6 / 7 / 8 / 10 meter radius.
- Garuda cannot perform parkour Maneuvers (except for rolling and sliding) or general interactions while channeling the heart. However, she can still move.
- Charging in mid-air will allow Garuda to hover for a few seconds.
- The explosion bypasses obstacles in the environment and its damage does not decrease with distance.
- Can be recast while active to pounce at a target and refresh the mirror's duration.
- Can be cast while airborne.
- Casting Dread Mirror is full-body animation that relocates Garuda to her target. Charging the Dread Heart is an upper-body animation that reduces Garuda's movement speed and grounds her once landed, as well as preventing other actions until the heart is thrown.
- The Dread Heart visually drips blood constantly, beats faster when absorbing damage, and grows spikes when its stored damage is high enough.
- The maximum charged damage of the Dread Heart is displayed as 4.29+03eM, which likely represents the value 4,294,967,295. However, when used, it might instead deal no damage.
- The Dread Mirror's frame colors are affected by Garuda's chosen Appearance colors.
- Dread Mirror, Dread Heart and particle effects are affected by Garuda's chosen Energy color.
Augment

- Main article: Dread Ward
Dread Ward is a Warframe Augment Mod for ![]() Garuda that makes her unkillable when an enemy is instantly killed by
Garuda that makes her unkillable when an enemy is instantly killed by ![]() Dread Mirror.
Dread Mirror.
Tips & Tricks
- Synergizes well with Guardian Derision, making more enemies attack Garuda and her Dread Mirror, allowing quick, indefinite damage build-up for Dread Heart.
- The ability to instantly kill enemies solely relies on a percentage threshold, making it a potentially powerful tool to quickly dispatch otherwise tough high level enemies - including Steel Path-difficulty versions of Sentient fighters in Lua missions and Veil Proxima anomalies, and Thrax Centurions and Legates in the Zariman Ten Zero.
- Combined with Blood Altar, Garuda can effectively tank and shrug off most damage that comes her way.
- Considering how far Garuda can move with her pounce, it can make for an effective means to escape an encounter while defending yourself.
- Facing Dread Mirror outward while standing in the corner makes Garuda less vulnerable to direct attacks.
- Alternatively, positioning herself to face enemies within a tight corridor gives her virtually unparalleled survivability from the front, and at the same time racking a lot of damage for Dread Heart.
- Using the ability multiple times before unleashing the heart will ramp up the damage rapidly, eliminating the reliance on enemy aggro.
- The mirror can prevent some AoE damage like an explosion from a barrel, or even massive attacks from the Profit-Taker Orb, by facing the barrier directly along the path of these attacks.
- However, it can't block AoE stagger from self-damage weapons.
- It also can't block damage-over-time AoE attacks such as from Nox's toxic blobs or Napalm missiles.
- Dread Mirror can help Garuda avoid the energy-draining Magnetic proc from Profit-Taker's EMP Slam, as well as being knocked down by the field boss's Repelling Shields.
- While Dread Mirror cannot save Garuda from AoE sweeps by an Eidolon, it still helps her survive the incoming homing missiles.
- Dread Mirror can protect Garuda from Arc Traps, providing the Mirror is between her and the trap. The trap will self-destruct after 3 seconds as if it has been activated, but since there is no arc, no damage will be absorbed.
- Rolling into enemies with Dread Mirror active will ragdoll them, frequently drag them along for a brief moment, and send them flying for several meters. This is a good makeshift crowd control.
- Dread Heart, being a projectile, fully benefits from the buffs of Mutalist Quanta's alternate fire.
- Be aware that crossing Nullifier bubbles, falling out of bounds, or activating Archwing will remove Dread Heart, thus losing its accumulated damage.
Bugs
- There currently is a very frequent UI bug where you won't see the remaining duration at the ability icon.
|
 2 |
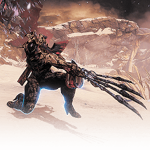
Blood Altar Impale an enemy on an altar of talons and siphon health for Garuda and her allies. Introduced in Update 24.0 (2018-11-08) |
|
4 / 4.5 / 6 / 8 m (heal radius) | |||
|
Misc:
8 m (stagger radius) | |||
| Subsumable to Helminth |
Info
- Garuda expends 50 Energy to charge to an enemy target within 30 meters, Staggering all enemies within a 8 meter radius on reaching her target, then slashing it with a spiraling uppercut that impales the victim upon an altar of talons for 10 / 15 / 15 / 20 seconds. While impaled, the enemy is completely disabled as it stays suspended above the altar helplessly, becomes Invulnerable to incoming damage, and bleeds profusely emitting an aura with a 4 / 4.5 / 6 / 8 meter radius; when Garuda or her allies stand within the aura, blood flows from the victim to them, restoring 15% / 17% / 20% / 25% of their missing Health per second, while draining 1% of maximum health per second from the victim.
- Up to a maximum of 3 altars can be created. When creating additional altars, the oldest target will automatically be released.
- Health per second is displayed as a buff icon beside the player's shield and health bars.
- Garuda must have sufficient space to land next to the victim to cast this ability.
- Garuda is invulnerable while charging.
- Affected allies includes all Warframes and their corresponding Operators, Companions, Necramechs, Eidolon Lures, summoned allied units such as Specters, allied Invasion units, Hostages, Kavor Defectors, and Sortie and Arbitrations Defense Operatives, but not Defense Objects.
- Health restored per second is a percentage of the difference between the current and maximum health of the player or NPC being healed. It is not dependent on the enemy's current or maximum health.
- Pressing the ability button (default 2 ) while aiming at an enemy impaled by Blood Altar will release the victim early before duration expires. Damage from outside sources inflicted on the victim while it was invulnerable will be dealt in full when it is released, and all Status Effects it received will resume their effects.
- Garuda does not leap to the target to release it from the altar, instead she performs the action from her current position.
- Casting Blood Altar is a full body animation that relocates Garuda to her target. Releasing a target does not play an animation on Garuda.
- The aura radius is constantly visible to Garuda and her allies.
- Enemies impaled on a Blood Altar visually appears to be covered in blood while they bleed constantly.
- Altar aura and blood stream colors are affected by Garuda's chosen Energy color.
- Subsuming Garuda to the Helminth will offer Blood Altar and its augments to be used by other Warframes.
Tips & Tricks
- Can be used to temporarily incapacitate enemies, excluding them from the battle, especially useful with heavy units.
- Due to the percentage health drain it will also make said heavy units easier to kill.
- Blood Altar can also impale Sentient enemies, making for effective CC.
- Blood Altars can heal players in Operator mode - including Garuda's own operator - making them potentially useful in circumstances that require prolonged action as an Operator, such as in Orphix runs (via an Altar near an Orphix field to heal the Operator out of his or her Necramech), while bringing down an Eidolon's shields, or many of the Operator-focused activities in the Zariman Ten Zero tilesets.
- The Altars can also impale the physical forms of Thrax Centurions and Legates, conveniently putting them out of the fight.
- Blood Altar can practically sustain the bonus Ability Strength from Archon Intensify especially when under heavy fire.
- Garuda players can opt to replace Blood Altar with Sevagoth's Gloom via Helminth infusion, to become an excellent crowd controller and mobile healer for the team especially in Excavation, Defection, and the various unique missions on the Zariman Ten Zero tileset. However, this comes at the cost of losing the ability to set up multiple healing areas around the playing field.
- Even though an enemy that is trapped on the blood altar is invulnerable, attacking them with a melee weapon will still raise a player's Melee Combo counter.
- Can be used to temporarily incapacitate enemies, excluding them from the battle, especially useful with heavy units.
|
 3 |
Bloodletting Garuda sacrifices her health to generate energy. Introduced in Update 24.0 (2018-11-08) |
|
18 / 22 / 30 / 40 % (energy gain) | |||
|
Misc:
-50% (health deducted) |
Info
- Garuda slashes herself with her talons as she spins into the air, sacrificing up to 50% of her maximum Health to cleanse all status effects and restore up to 18% / 22% / 30% / 40% of her maximum Energy capacity. Garuda cannot reduce her health below 2 health points using Bloodletting.
- Health cost is 50% of Garuda's maximum HP, including mods.
- Energy gain is the listed % of her maximum energy, including mods, Helminth invigorations and slotted Azure Archon Shards.
- Energy gain follows the formula:
- Total Energy Gain = Base Energy Gain ÷ (2 - Ability Efficiency).
- Bloodletting can be cast if Garuda has less than 50% of her maximum HP remaining, but will only restore energy proportionate to the amount of HP sacrificed. For example, if she has 25% of her health left (or 50% of 50%) when Bloodletting, the energy gain will be halved.
- Cannot be cast if Garuda has 2 or less health points.
- This ability does not trigger health damage into energy conversion mods like Rage or Hunter Adrenaline.
Augment
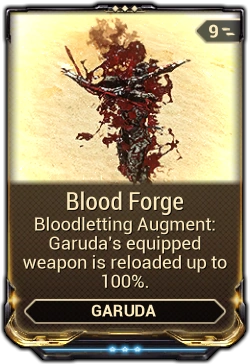
- Main article: Blood Forge
Blood Forge is a Warframe Augment Mod for ![]() Garuda's
Garuda's ![]() Bloodletting to reload her equipped weapon up to a percentage.
Bloodletting to reload her equipped weapon up to a percentage.
Tips & Tricks
- This ability gains no benefits from increasing health. Having lower max health allows flat HP regeneration such as health orbs or Oberon's Renewal to generate more energy more quickly.
- Synergizes with Blood Altar's continuous healing to give Garuda a near infinite supply of energy.
- Despite sacrificing HP, Bloodletting is an effective way of shedding off any harmful status effects (especially slowing effects and DoT procs from Slash and Toxin damage), possibly improving her survivability better than not removing the procs.
- Bloodletting is a powerful ability to combine with Helminth-infused toggled abilities that constantly drain energy, the most notable being Sevagoth's Gloom as it provides Garuda with another self-healing ability besides Blood Altar to constantly regenerate her energy reserves.
- The Gloom and Bloodletting combo makes Garuda viable at completing Steel Path missions alone, including missions not normally frequented by players such as the Rathuum nodes and the Zealoid Prelate battle in Deimos.
- Seeking Talons also synergize extremely well with this build as the damage-over-time of her quills also triggers Gloom healing and, subsequently, powers Bloodletting. The quills' homing ability also offers little chance for enemies to escape and can even track and hit hiding enemies, ensuring Garuda can be healed by Gloom as long as they stay within the aura.
- Equipping Blood Forge and using Bloodletting allows Garuda to quickly reload otherwise slow-reloading weapons (such as the Strun, Nagantaka, Tenet Envoy and Kuva Zarr) and increase their overall DPS potential. It comes at the risk of getting struck while already losing her Health to reload, thus she should consider safeguards such as a nearby Blood Altar or equipping Quick Thinking and/or Gladiator Finesse, the mods accounting for her replenished Energy while using Bloodletting.
- Slotting Azure Archon Shards for extra Energy while also equipping Quick Thinking will make Garuda deceptively durable due to the resulting increased efficiency of regaining Energy via Bloodletting.
- Slotting Azure Archon Shards for extra Armor instead of extra Energy grants Garuda more effective hitpoints since Quick Thinking benefits from Armor.
- Slotting
- If a Garuda player wishes to take advantage of the reworked passive to further amplify damage output, Helminth can replace Bloodletting with another damage-related self buff ability, such as Xaku's Xata's Whisper or Mirage's Eclipse, as these abilities synergize well with the damage buff and Garuda's own Seeking Talons, while still maintaining self-survival options with Dread Mirror and Blood Altar.
- In exchange for losing this ability to generate Energy, Garuda can equip Rage or Hunter Adrenaline so she gains Energy while taking damage - which will be offset by a nearby Blood Altar.
- In exchange for losing this ability to generate Energy, Garuda can equip
|
 4 |
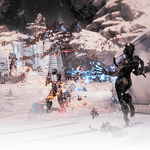
Seeking Talons Charge to expand the targeting area, release to send Garuda’s talons careening toward each target in area. Surviving enemies are prone to bleeding. Introduced in Update 24.0 (2018-11-08) |
75% ( |
|
Misc:
2 m (talon knockback radius) |
Info
- Garuda expends 100 Energy to channel her sanguine blood beneath herself as her talons quiver in anticipation, as a whirlwind of flying talons spanning a 2 meter radius encircles her. Enemies pierced by Garuda's talons will receive 150 / 200 / 250 / 300 Slash damage and be pushed away from Garuda.
- Channeling the talons expands a focus ring indicating the ranged area of effect of the ability. Initial field of view angle is 25 degrees, which can expand up to 95 degrees when fully charged; the range of ability can expand up to 60 meters based on the charge time. Upon release, Garuda unleashes 8 flying talons as homing projectiles, piercing through all enemies who are within the focus ring and in line of sight.
- Tapping the ability will automatically unleash the talons once fully charged. Holding the ability will sustain the whirlwind around Garuda until released, allowing her to aim carefully to maximize the talons' potential.
- Each enemy will always be pierced at least once by the projectiles. However, they can also be pierced multiple times in a single skill use.
- For an example, using Seeking Talon on a single enemy will damage said enemy 8 times in quick succession.
- Garuda is Invulnerable while casting the ability until it is fully charged.
- Enemies damaged by the flying talons are marked with Garuda's symbol for 10 seconds. Attacking marked enemies with weapons and abilities grants a 75% chance to cause a Slash Status Effect.
- Marked enemies will still receive status effects from other sources in addition to the Slash proc (if a weapon's status chance triggers and hits an enemy affected by Seeking Talons, the weapon's status will still be applied, the Slash proc is then added, resulting in the enemy receiving 2 status effects at the same time).
- Status chance is capped at 100%, achievable with 134% Ability Strength.
- All sources of damage are capable of inflicting Slash Status Effect. This includes, but not limited to: weapons, damage from abilities, special damaging effects from mods ( Concealed Explosives, Thunderbolt, Thermagnetic Shells, etc.) and Syndicate procs.
- Weapons do not need to have innate Slash damage in order to inflict Slash Status Effect.
- Marking of enemies will include special enemies such as Stalker.
- Slash statuses applied due to the mark are considered to be forced status procs and cannot stack with other sources of forced Slash statuses such as Hunter Munitions or Internal Bleeding. However forced Slash statuses can stack with a weapon's innate status chance.
- Duration of the mark cannot be refreshed if the ability is recast while the mark is active.
- Marked enemies will still receive status effects from other sources in addition to the
- Garuda cannot perform parkour Maneuvers (except for rolling and sliding) or general interactions while channeling this ability. However, she can still move.
- Can be cast while airborne, causing Garuda to hover for a few seconds.
- Garuda will leap a short distance upward upon release, causing the targeting ring to shift.
Augment
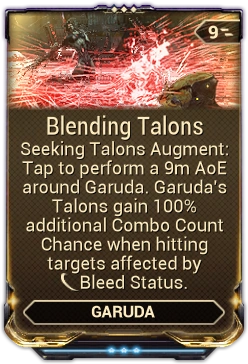
- Main article: Blending Talons
Blending Talons is an Warframe Augment Mod for ![]() Garuda's
Garuda's ![]() Seeking Talons that grants it the ability to create an area of effect explosion around Garuda as well as giving her
Seeking Talons that grants it the ability to create an area of effect explosion around Garuda as well as giving her ![]() Garuda Talons (
Garuda Talons (![]() Prime) a passive that grants it additional combo count upon hitting enemies affected by
Prime) a passive that grants it additional combo count upon hitting enemies affected by ![]() Slash procs.
Slash procs.
Tips & Tricks
- This ability has a long casting and recovery animation. However, this can be bypassed by casting Seeking Talons while airborne.
- Holding aimglide while releasing Seeking Talons will allow Garuda to hover after leaping and cancel the falling part of her animation. This does not work when used on the ground.
- While aimgliding, Garuda can continue staying airborne by recasting Seeking Talons again or charge and throw her Dread Mirror's Dread Heart.
- Each cast while airborne raises Garuda to be higher off the ground. Ground slams can be used to return back to ground level quickly to maintain mobility.
- While aimgliding, Garuda can continue staying airborne by recasting Seeking Talons again or charge and throw her
- Using melee immediately after releasing Seeking Talons while airborne can also be used to cancel the recovery animation. The recovery animation for this will be longer than if holding an aimglide, but is more useful for congested tilesets.
- A side effect of being above enemies while casting this ability is that it is able to hit headshots, making use of its increased damage multipliers, as well as Sharpshooter's Bounty and any Decree that activates on headshot in Duviri.
- Holding aimglide while releasing Seeking Talons will allow Garuda to hover after leaping and cancel the falling part of her animation. This does not work when used on the ground.
- As Seeking Talons bypass the need to have enemies within vision, bringing a companion equipped with a mod that detects enemies in the radar map (such as Animal Instinct) will help Garuda in finding the most number of enemies that can be hit without having to actually see them.
- Due to the forced Slash proc caused by Seeking Talons, it synergizes particularly well with weapons that have high damage burst potential such as the Kuva Zarr or Tenet Envoy to unleash heavy True damage per hit.
- The forced Slash proc is also effective against Sentient enemies, as True damage bypasses their adaptive damage resistance.
- The forced Slash proc is also effective against
- Equipping Blending Talons gives Garuda the potential to mark her symbol on more enemies than her standard charged up ability by deliberately running in the midst of the crowd and using short-tap Seeking Talons.
- Using Dread Mirror's Blood Ball into enemies hit by Seeking Talons will essentially do a very high scaling slash nuke, scaling further with a Primer.
Maximization

| Strength Mods
|
Duration Mods
|
Range Mods
|
|---|---|---|
|
|
|
|
|
|
|
|
|
|
|
|