(→Weapons with burst-fire: added pandero) |
m (→Fire Rate and Burst Weapons: minor) |
||
| (131 intermediate revisions by 17 users not shown) | |||
| Line 1: | Line 1: | ||
| + | {{Quote|Maximum number of projectiles that can be launched per second.|In-game Description}}'''Fire Rate''' is a base stat of all ranged weapons, denoting the number of times per second a weapon discharges a projectile, or applies a discrete instance of damage, which normally corresponds to units of ammo being spent (normally one round per shot, and for continuous weapons 0.5 rounds per tick). |
||
| − | '''Fire rate''' is the frequency at which projectiles are launched per second. Various [[mods]] can be used to increase or decrease the fire rate of [[:Category:Primary Weapons|primary]] and [[:Category:Secondary Weapons|secondary weapons]]. This applies to bullets, lasers, arrows, and hand thrown projectiles. |
||
| + | ==Mechanics== |
||
| − | Mods that increase fire rate also reduce the '''spin up time''' of spooling weapons which includes the [[Gorgon]], [[Deth Machine Rifle]], [[Soma]], [[Cestra]], and [[Supra]]. They also reduce the '''charge time''' of bows and other weapons with charge such as the [[Ogris]], [[Miter]], [[Stug]], [[Ballistica]] and [[Lanka]]. For '''burst-fire''' weapons, such as the [[Burston]] and [[Tiberon]], fire rate affects both the speed of the burst as well as the time between bursts from {{ver|17.4.3}} onwards. '''Continuous''' weapons such as [[Ignis]] and [[Flux Rifle]] have no additional '''visual''' effects from fire rate mods, however they still do damage at an increased rate. Increasing fire rate on '''semi-auto''' weapons increases the cap on how fast they can fire. |
||
| + | As a general principle, the '''Fire Rate bonus increases fire rate linearly, regardless of the [[Trigger Type]]''', which ensures that the effective damage increase from improving this stat will be the same for ''Automatic weapons'' (e.g. {{Weapon|Braton}}) and weapons with more complex trigger types – so on ''Burst weapons'' (e.g {{Weapon|Burston}}), it affects both the speed of the burst as well as the time between bursts. For the same reason, apart from increasing the weapon's fire rate in the narrowest sense, the Fire Rate bonus also affects '''Spool-up Time''' (a hidden stat of ''Auto-Spool weapons'', e.g. {{Weapon|Gorgon}}), and '''Charge Time''' (a base stat of bows and other ''Charged weapons'', e.g. {{Weapon|Opticor}}). |
||
| + | Increasing fire rate of ''Semi-auto weapons'' increases the cap on how quickly they can be fired. Likewise, for ''Duplex-trigger weapons'' (e.g {{Weapon|Zylok}}), fire rate increases the cap on how quickly each two-shot sequence can be initiated (while the interval between the shots in a sequence remains completely voluntary, i.e. player-determined). Notably, Semi-Auto weapons are capped at 10 rounds per second. |
||
| − | High fire rate exacerbates the effects of weapon [[recoil]]. For some weapons, lowering the fire rate can improve the player's overall accuracy. |
||
| + | On ''Continuous weapons'' (e.g. {{Weapon|Ignis}}), the Fire Rate bonus increases the frequency of "ticks" (damage instances). |
||
| − | ==Fire Rate Mods== |
||
| + | ===Shot Delay=== |
||
| − | <div class="tabbertab-borderless">{{#tag:tabber|Standard = |
||
| + | Another way of viewing fire rate is that it determines the time before shooting another shot or reloading when the magazine is empty. Taking the inverse of resultant fire rate will give the time between shots in seconds. |
||
| − | <gallery captionposition="below" hideaddbutton="true" spacing="small" navigation="true" position="center" bordersize="none" bordercolor="#FFFFFF"> |
||
| − | SpeedTriggerNew.png|link=Speed Trigger |
||
| − | ShotgunSpazzModU145.png|link=Shotgun Spazz |
||
| − | GunslingerModU145.png|link=Gunslinger |
||
| − | AutomaticTriggerMod.png|link=Automatic Trigger |
||
| − | </gallery> |
||
| − | {{!}}-{{!}}Nightmare = |
||
| − | Dual-stat fire rate mods are obtained from [[Nightmare Mode]] missions. These mods combine increased fire rate with another positive enhancement. These mods are often weaker than their basic counterparts, but are useful for '''stacking''' or diverse builds. |
||
| − | <gallery captionposition="below" hideaddbutton="true" spacing="small" navigation="true" position="center" bordersize="none" bordercolor="#FFFFFF"> |
||
| − | ShredNew.png|link=Shred |
||
| − | AcceleratedBlastModU145.png|link=Accelerated Blast |
||
| − | LethalTorrentModU145.png|link=Lethal Torrent |
||
| − | </gallery> |
||
| − | {{!}}-{{!}}Corrupt (Bonus) = |
||
| − | These mods are found within vaults of the [[Orokin Derelict]] missions, increasing fire rate at the expense of other weapon stats. |
||
| − | <gallery captionposition="below" hideaddbutton="true" spacing="small" navigation="true" position="center" bordersize="none" bordercolor="#FFFFFF"> |
||
| − | VileAccelerationNew.png|link=Vile Acceleration |
||
| − | FrailMomentum.png|link=Frail Momentum |
||
| − | AnemicAgilityMod.png|link=Anemic Agility |
||
| − | </gallery> |
||
| − | {{!}}-{{!}}Corrupt (Penalty) = |
||
| − | Found in Orokin Derelict missions, these negatively affect fire rate in exchange for other enhancements. Weapons with innate overbearing recoil can be made more effective at range by reducing the fire rate. |
||
| − | <gallery captionposition="below" hideaddbutton="true" spacing="small" navigation="true" position="center" bordersize="none" bordercolor="#FFFFFF" perrow="3"> |
||
| − | CriticalDelayNew.png|link=Critical Delay |
||
| − | CreepingBullseye.png|link=Creeping Bullseye |
||
| − | CriticalDeceleration.png|link=Critical Deceleration |
||
| − | VilePrecisionModU145.png|link=Vile Precision |
||
| − | TaintedShellModU145.png|link=Tainted Shell |
||
| − | </gallery> |
||
| − | {{!}}-{{!}}Acolyte = |
||
| − | These mods are dropped by Stalker's Acolytes during Operation: Shadow Debt. These mods increase fire rate while aiming for a short duration after reloading. |
||
| − | <gallery captionposition="below" hideaddbutton="true" spacing="small" navigation="true" position="center" bordersize="none" bordercolor="#FFFFFF"> |
||
| − | Spring-LoadedChamberMod.png|link=Spring-Loaded Chamber |
||
| − | RepeaterClipMod.png|link=Repeater Clip |
||
| − | PressurisedMagazineMod.png|link=Pressurized Magazine |
||
| − | </gallery> |
||
| − | {{!}}-{{!}}Set = |
||
| − | These mods are dropped by Grineer Commanders on the [[Plains of Eidolon]], and may also be awarded by completing Ostron Bounties available in [[Cetus]]. They provide additional bonuses based on the number of set mods presently equipped. |
||
| − | <gallery captionposition="below" hideaddbutton="true" spacing="small" navigation="true" position="center" bordersize="none" bordercolor="#FFFFFF"> |
||
| − | VigilanteFervorMod.png|link=Vigilante_Fervor |
||
| − | </gallery> |
||
| − | {{!}}-{{!}}Primed = |
||
| − | These mods are the [[Prime|primed]] variants of the normal fire-rate mods. |
||
| − | <gallery captionposition="below" hideaddbutton="true" spacing="small" navigation="true" position="center" bordersize="none" bordercolor="#FFFFFF"> |
||
| − | Primed_Shred.png|link=Primed Shred |
||
| − | </gallery> |
||
| − | }}</div> |
||
| + | :<math>\text{Shot Delay in Seconds} = \frac{1}{\text{Modded Fire Rate}}</math> |
||
| + | Note that the {{Weapon|Vectis}} and {{Weapon|Vectis Prime}} are not affected by this shot delay before [[Reload|reloading]] and reloads instantly after the last shot instead. |
||
| − | ==Charged Weapons== |
||
| − | For weapons that use a charge mechanic, fire rate mods will increase the '''charge rate'''. Note that this increases the speed at which these weapons charge, which is ''not'' the same as lowering the charge time directly: |
||
| − | + | ===Fire Rate and Charge Time=== |
|
| + | For some weapons, the effective fire rate is dependent on the '''Charge Time''' of the attack. Note that charge weapons mislabel the charge time of the attack as the '''Charge Rate'''. For example, the {{Weapon|Scourge}} lists its "Charge Rate" as 0.5, however that is actually the charge time (0.5 '''seconds'''). The actual charge rate of a weapon is as follows: |
||
| + | :<math>\text{Charge Rate} = \frac{1}{\text{Charge Time}}</math> |
||
| − | The charge |
+ | The charge time is the time it takes the charge circle to progress to full. Bonuses from fire rate mods works as so: |
| + | :<math>\text{Charge Time} = \frac{\text{Base Charge Time}}{1 + \text{Mod Bonus}}</math> |
||
| + | The charge rate is the speed at which the charge circle progresses to full. Bonuses from fire rate mods works as so: |
||
| − | {{MathText|Modded Charge Rate {{eql}} Charge Rate {{mul}} (1 + Mod Bonus)}} |
||
| + | :<math>\text{Charge Rate} = \text{Base Charge Rate} \times (1 + \text{Mod Bonus})</math> |
||
| + | For charged weapons, '''charge time cannot go above 10 times the base charge time''' (achieved by having at least -90% fire rate bonus). |
||
| − | For the resulting charge time (seconds per charge) this means: |
||
| + | <math> |
||
| − | {{MathText|Modded Charge Time {{eql}} Charge Time {{div}} (1 + Mod Bonus)}} |
||
| + | { |
||
| + | \begin{aligned} |
||
| + | \text{Effective Fire Rate} &= \frac{ 1 }{ \text{Modded Charge Time} + \frac{ 1 }{ \text{Modded Fire Rate} } } |
||
| + | \end{aligned} |
||
| + | } |
||
| + | </math> |
||
| + | :''Calculation for true fire rate for charge weapons with the exception of bows, {{Weapon|Epitaph}}, and {{Weapon|Lanka}}.'' |
||
| + | <math> |
||
| − | <!--All calculated numbers are rounded to 4 decimal places if not exact--> |
||
| + | { |
||
| + | \begin{aligned} |
||
| + | \text{Effective Fire Rate} &= \frac{ 1 }{ \text{Modded Charge Time} + { \text{Modded Reload Time} } } |
||
| + | \end{aligned} |
||
| + | } |
||
| + | </math> |
||
| + | :''Calculation for true fire rate for bow weapons.'' |
||
| + | <math> |
||
| − | <div class="tabbertab-borderless">{{#tag:tabber|Bow= |
||
| + | { |
||
| − | {{{!}} class="article-table" |
||
| + | \begin{aligned} |
||
| − | {{!}}+'''Charge times for bow weapons (x2 bonus applies)''' |
||
| + | \text{Effective Fire Rate} &= \frac{ 1 }{ \text{Modded Charge Time} } |
||
| − | {{!}}- |
||
| + | \end{aligned} |
||
| − | !Base Charge Time |
||
| + | } |
||
| − | !{{M|Shred}} (+60%) |
||
| + | </math> |
||
| − | !<!--{{M|Vilgilante Fervor}}--> [[Vigilante Fervor]] (+90%) |
||
| + | :''Calculation for true fire rate for {{Weapon|Lanka}} which does not have a delay between charged shots.'' |
||
| − | !{{M|Speed Trigger}} (+120%) |
||
| − | !{{M|Vile Acceleration}} (+180%) |
||
| − | !All (+450%) |
||
| − | {{!}}- |
||
| − | {{!}}0.25s ([[Rakta Cernos]]) |
||
| − | {{!}}0.15625s |
||
| − | {{!}}~0.1316s |
||
| − | {{!}}~0.1136s |
||
| − | {{!}}~0.0893s |
||
| − | {{!}}~0.0455s |
||
| − | {{!}}- |
||
| − | {{!}}0.5s (Most bows) |
||
| − | {{!}}0.3125s |
||
| − | {{!}}~0.2632s |
||
| − | {{!}}~0.2273s |
||
| − | {{!}}~0.1786s |
||
| − | {{!}}~0.0909s |
||
| − | {{!}}- |
||
| − | {{!}}1s ([[Artemis Bow (Weapon)]], [[Daikyu]]) |
||
| − | {{!}}0.625s |
||
| − | {{!}}0.5253s |
||
| − | {{!}}~0.4545s |
||
| − | {{!}}~0.3571s |
||
| − | {{!}}~0.1818s |
||
| − | {{!}}- |
||
| − | {{!}}1.2s ([[Lenz]]) |
||
| − | {{!}}0.75s |
||
| − | {{!}}~0.6316s |
||
| − | {{!}}~0.5455s |
||
| − | {{!}}~0.4286s |
||
| − | {{!}}~0.2182s |
||
| − | {{!}}} |
||
| + | ''The following is a list of Charge Times possessed by Charged weapons:'' |
||
| + | <div class="tabber-borderless">{{#tag:tabber|Bow = |
||
<gallery captionposition="below" captionalign="center" hideaddbutton="true" spacing="small" navigation="false" position="center" bordersize="none" bordercolor="#FFFFFF"> |
<gallery captionposition="below" captionalign="center" hideaddbutton="true" spacing="small" navigation="false" position="center" bordersize="none" bordercolor="#FFFFFF"> |
||
| − | + | ArtemisBowWeapon.png|link=Artemis Bow|{{Weapon|Artemis Bow}} (1.00 sec) |
|
| − | + | Cernos.png|link=Cernos|{{Weapon|Cernos}} (0.50 sec) |
|
| − | CernosPrime.png|link=Cernos Prime| |
+ | CernosPrime.png|link=Cernos Prime|{{Weapon|Cernos Prime}} (0.50 sec) |
| − | + | Daikyu.png|link=Daikyu|{{Weapon|Daikyu}} (1.00 sec) |
|
| − | + | Dread.png|link=Dread|{{Weapon|Dread}} (0.50 sec) |
|
| − | + | KuvaBramma.png|link=Kuva Bramma|{{Weapon|Kuva Bramma}} (0.40 sec) |
|
| − | + | Lenz.png|link=Lenz|{{Weapon|Lenz}} (1.20 sec) |
|
| − | + | PrismaLenz.png|link=Prisma Lenz|{{Weapon|Prisma Lenz}} (0.8 sec) |
|
| − | Paris.png|link=Paris| |
+ | Paris.png|link=MK1-Paris|{{Weapon|MK1-Paris}} (0.50 sec) |
| − | + | MutalistCernos.png|link=Mutalist Cernos|{{Weapon|Mutalist Cernos}} (0.50 sec) |
|
| − | + | Nataruk.png|link=Nataruk|{{Weapon|Nataruk}} (1.00 sec) |
|
| + | Paris.png|link=Paris|{{Weapon|Paris}} (0.50 sec) |
||
| + | ParisPrime.png|link=Paris Prime|{{Weapon|Paris Prime}} (0.50 sec) |
||
| + | ProboscisCernos.png|link=Proboscis Cernos|{{Weapon|Proboscis Cernos}} (0.70 sec) |
||
| + | RaktaCernos.png|link=Rakta Cernos|{{Weapon|Rakta Cernos}} (0.25 sec) |
||
</gallery> |
</gallery> |
||
| + | {{!}}-{{!}}Rifle = |
||
| − | |||
| − | {{!}}-{{!}}Rifles = |
||
| − | {{{!}} class="article-table" |
||
| − | {{!}}+'''Charge times for rifle weapons (x2 bonus does not apply)''' |
||
| − | {{!}}- |
||
| − | !Base Charge Time |
||
| − | !{{M|Shred}} (+30%) |
||
| − | !<!--{{M|Vilgilante Fervor}}--> [[Vigilante Fervor]] (+45%) |
||
| − | !{{M|Speed Trigger}} (+60%) |
||
| − | !{{M|Vile Acceleration}} (+90%) |
||
| − | !All (+225%) |
||
| − | {{!}}- |
||
| − | {{!}}0.3s ([[Javlok]], [[Ogris]]) |
||
| − | {{!}}~0.2308s |
||
| − | {{!}}~0.2069s |
||
| − | {{!}}0.1875s |
||
| − | {{!}}~0.1579s |
||
| − | {{!}}~0.0923s |
||
| − | {{!}}- |
||
| − | {{!}}0.5s ([[Ferrox]]) |
||
| − | {{!}}~0.3846s |
||
| − | {{!}}~0.3448s |
||
| − | {{!}}0.3125s |
||
| − | {{!}}~0.2632s |
||
| − | {{!}}~0.1538s |
||
| − | {{!}}- |
||
| − | {{!}}0.75s ([[Miter]]) |
||
| − | {{!}}~0.5769s |
||
| − | {{!}}~0.5172s |
||
| − | {{!}}0.46875s |
||
| − | {{!}}~0.3947s |
||
| − | {{!}}~0.2308s |
||
| − | {{!}}- |
||
| − | {{!}}1s ([[Lanka]]) |
||
| − | {{!}}~0.7692s |
||
| − | {{!}}~0.6897s |
||
| − | {{!}}0.625s |
||
| − | {{!}}~0.5263s |
||
| − | {{!}}~0.3077s |
||
| − | {{!}}- |
||
| − | {{!}}2s ([[Opticor]]) |
||
| − | {{!}}~1.5385s |
||
| − | {{!}}~1.3793s |
||
| − | {{!}}1.25s |
||
| − | {{!}}~1.0526s |
||
| − | {{!}}~0.6154s |
||
| − | {{!}}} |
||
| − | |||
<gallery captionposition="below" captionalign="center" hideaddbutton="true" spacing="small" navigation="false" position="center" bordersize="none" bordercolor="#FFFFFF"> |
<gallery captionposition="below" captionalign="center" hideaddbutton="true" spacing="small" navigation="false" position="center" bordersize="none" bordercolor="#FFFFFF"> |
||
| − | + | Battacor.png|link=Battacor|{{Weapon|Battacor}} (0.40 sec) |
|
| − | + | Ferrox.png|link=Ferrox|{{Weapon|Ferrox}} (0.50 sec) |
|
| − | + | Javlok.png|link=Javlok|{{Weapon|Javlok}} (0.30 sec, 0.50 sec) |
|
| − | + | Lanka.png|link=Lanka|{{Weapon|Lanka}} (1.00 sec) |
|
| − | + | Miter.png|link=Miter|{{Weapon|Miter}} (0.75 sec) |
|
| − | + | Ogris.png|link=Ogris|{{Weapon|Ogris}} (0.30 sec) |
|
| + | Opticor.png|link=Opticor|{{Weapon|Opticor}} (2.00 sec) |
||
| + | OpticorVandal.png|link=Opticor Vandal|{{Weapon|Opticor Vandal}} (0.60 sec) |
||
| + | Scourge.png|link=Scourge|{{Weapon|Scourge}} (0.50 sec) |
||
| + | Stahlta.png|link=Stahlta|{{Weapon|Stahlta}} (1.6 sec) |
||
| + | Tenora.png|link=Tenora|{{Weapon|Tenora}} (0.80 sec) |
||
| + | TenoraPrime.png|link=Tenora Prime|{{Weapon|Tenora Prime}} (0.80 sec) |
||
</gallery> |
</gallery> |
||
| + | {{!}}-{{!}}Shotgun = |
||
| − | |||
| − | {{!}}-{{!}}Shotguns = |
||
| − | {{{!}} class="article-table" |
||
| − | {{!}}+'''Charge times for shotgun weapons''' |
||
| − | !Base Charge Time |
||
| − | !{{M|Accelerated Blast}} (+60%) |
||
| − | !{{M|Shotgun Spazz}} (+90%) |
||
| − | !{{M|Frail Momentum}} (+90%) |
||
| − | !All (+240%) |
||
| − | {{!}}- |
||
| − | {{!}}0.5s ([[Drakgoon]]) |
||
| − | {{!}}0.3125s |
||
| − | {{!}}~0.2632s |
||
| − | {{!}}~0.2632s |
||
| − | {{!}}~0.1471s |
||
| − | {{!}}- |
||
| − | <!-- |
||
| − | {{!}}1.0s ([[Phantasma]]) |
||
| − | {{!}}0.625s |
||
| − | {{!}}~0.5263s |
||
| − | {{!}}~0.5263s |
||
| − | {{!}}~0.2941s--> |
||
| − | {{!}}} |
||
| − | |||
<gallery captionposition="below" captionalign="center" hideaddbutton="true" spacing="small" navigation="false" position="center" bordersize="none" bordercolor="#FFFFFF" perrow="3"> |
<gallery captionposition="below" captionalign="center" hideaddbutton="true" spacing="small" navigation="false" position="center" bordersize="none" bordercolor="#FFFFFF" perrow="3"> |
||
| − | + | Drakgoon.png|link=Drakgoon|{{Weapon|Drakgoon}} (0.50 sec) |
|
| + | KuvaDrakgoon.png||link=Kuva Drakgoon|{{Weapon|Kuva Drakgoon}} (0.30 sec) |
||
| − | RevenantShotgun.png|link=Phantasma|[[Phantasma]] (1.00 sec) (not affected by mods) |
||
| + | Phantasma.png|link=Phantasma|{{Weapon|Phantasma}} (1.00 sec) (not affected by mods) |
||
</gallery> |
</gallery> |
||
| − | |||
{{!}}-{{!}}Secondary = |
{{!}}-{{!}}Secondary = |
||
| − | {{{!}} class="article-table" |
||
| − | {{!}}+'''Charge time for pistol weapons (Excluding [[Angstrum]], as charge time differs with mag size.)''' |
||
| − | !Base Charge Time |
||
| − | !{{M|Lethal Torrent}} (+60%) |
||
| − | !{{M|Gunslinger}} (+72%) |
||
| − | !{{M|Anemic Agility}} (+90%) |
||
| − | !All (+222%) |
||
| − | {{!}}- |
||
| − | {{!}}0.8s ([[Ballistica Prime]]) |
||
| − | {{!}}0.5s |
||
| − | {{!}}~0.4671s |
||
| − | {{!}}~0.4211s |
||
| − | {{!}}~0.2484s |
||
| − | {{!}}- |
||
| − | {{!}}1s ([[Ballistica]], [[Rakta Ballistica{{!}}Rakta]]) |
||
| − | {{!}}0.625s |
||
| − | {{!}}~0.5814s |
||
| − | {{!}}~0.5263s |
||
| − | {{!}}~0.3106s |
||
| − | {{!}}- |
||
| − | {{!}}3s ([[Staticor]], [[Stug]]) |
||
| − | {{!}}1.875s |
||
| − | {{!}}~1.744s |
||
| − | {{!}}~1.578s |
||
| − | {{!}}~0.9316s |
||
| − | {{!}}} |
||
| − | |||
<gallery captionposition="below" captionalign="center" hideaddbutton="true" spacing="small" navigation="false" position="center" bordersize="none" bordercolor="#FFFFFF" perrow="3"> |
<gallery captionposition="below" captionalign="center" hideaddbutton="true" spacing="small" navigation="false" position="center" bordersize="none" bordercolor="#FFFFFF" perrow="3"> |
||
| + | Angstrum.png|link=Angstrum|{{Weapon|Angstrum}} (0.50/1.50 sec single/3 rocket(s), scales with magazine size) |
||
| − | DEBallistica.png|link=Ballistica|[[Ballistica]] (1.00 sec) |
||
| − | + | BalefireCharger.png|link=Balefire Charger|{{Weapon|Balefire Charger}} (2.00 sec) |
|
| − | + | Ballistica.png|link=Ballistica|{{Weapon|Ballistica}} (1.00 sec) |
|
| − | + | BallisticaPrime.png|link=Ballistica Prime|{{Weapon|Ballistica Prime}} (0.80 sec) |
|
| + | PrismaAngstrum.png|link=Prisma Angstrum|{{Weapon|Prisma Angstrum}} (0.20/0.60 sec single/3 rocket(s), scales with magazine size) |
||
| − | GrineerCrossbowGooGun.png|link=Stug|[[Stug]] (3.00 sec) |
||
| + | RaktaBallistica.png|link=Rakta Ballistica|{{Weapon|Rakta Ballistica}} (1.00 sec) |
||
| + | Staticor.png|link=Staticor|{{Weapon|Staticor}} (1.00 sec) |
||
| + | Stug.png|link=Stug|{{Weapon|Stug}} (3.00 sec) |
||
</gallery> |
</gallery> |
||
| + | {{!}}-{{!}}Robotic = |
||
| − | |||
| − | {{!}}-{{!}}Arch-gun= |
||
| − | {{{!}} class="article-table" |
||
| − | !Base Charge Time |
||
| − | !{{M|Shell Rush}} (+50%) |
||
| − | {{!}}- |
||
| − | {{!}}0.5s ([[Corvas]]) |
||
| − | {{!}}~0.3333s |
||
| − | {{!}}- |
||
| − | {{!}}1s ([[Velocitus]]) |
||
| − | {{!}}~0.6667s |
||
| − | {{!}}} |
||
| − | |||
<gallery captionposition="below" captionalign="center" hideaddbutton="true" spacing="small" navigation="false" position="center" bordersize="none" bordercolor="#FFFFFF" perrow="3"> |
<gallery captionposition="below" captionalign="center" hideaddbutton="true" spacing="small" navigation="false" position="center" bordersize="none" bordercolor="#FFFFFF" perrow="3"> |
||
| − | + | Vulcax.png|link=Vulcax|{{Weapon|Vulcax}} (1.00 sec) |
|
| + | </gallery> |
||
| − | ArchRailgun.png|link=Velocitus|[[Velocitus]] (1.00 sec) |
||
| + | {{!}}-{{!}}Archgun = |
||
| + | <gallery captionposition="below" captionalign="center" hideaddbutton="true" spacing="small" navigation="false" position="center" bordersize="none" bordercolor="#FFFFFF" perrow="3"> |
||
| + | Corvas.png|link=Corvas|{{Weapon|Corvas}} (0.50 sec) |
||
| + | Larkspur.png|link=Larkspur|{{Weapon|Larkspur}} (0.50 sec) |
||
| + | Mausolon.png|link=Mausolon|{{Weapon|Mausolon}} (0.80 sec) |
||
| + | Velocitus.png|link=Velocitus|{{Weapon|Velocitus}} (1.00 sec) |
||
</gallery> |
</gallery> |
||
}}</div> |
}}</div> |
||
| − | == |
+ | ===Fire Rate and Spool-up Time === |
| + | Some automatic weapons do not start out firing at the fire rate listed in the [[Codex]] or [[Arsenal]]. Instead, the first few shots are fired more slowly as the weapon 'spools up' to the maximum fire rate. Once the maximum fire rate is reached, the weapon will continue firing at that rate until either the wielder stops firing or runs out of ammo. The period during which the maximum fire rate has not yet been reached is called '''Spool-up Time'''. The number of shots needed to reach maximum fire rate, the starting (decrease in) fire rate, and the rate of increase per shot fired, is sometimes called the ''Spool cadence''. |
||
| − | |||
| − | Some automatic weapons don't start out firing at the fire rate listed in the Codex. Instead, the first few shots are fired more slowly as the weapon 'spools up' to the maximum fire rate. Once the maximum fire rate is reached, the weapon will continue firing at that rate until either the wielder stops firing or runs out of ammo. |
||
| − | |||
| − | ===Weapons with auto-spool:=== |
||
| + | ''The following is a list of Spool cadences possessed by Auto-Spool weapons (note: only the number of shots is listed; for a full description visit the weapon articles):'' |
||
| − | <div class="tabbertab-borderless">{{#tag:tabber|Primary={{{!}} class="article-table" |
||
| + | <div class="tabber-borderless">{{#tag:tabber|Rifle = |
||
<gallery captionposition="below" captionalign="center" hideaddbutton="true" spacing="small" navigation="false" position="center" bordersize="none" bordercolor="#FFFFFF"> |
<gallery captionposition="below" captionalign="center" hideaddbutton="true" spacing="small" navigation="false" position="center" bordersize="none" bordercolor="#FFFFFF"> |
||
| − | Gorgon.png|link=Gorgon| |
+ | Gorgon.png|link=Gorgon|{{Weapon|Gorgon}} (9 shots) |
| − | + | GorgonWraith.png|link=Gorgon Wraith|{{Weapon|Gorgon Wraith}} (6 shots) |
|
| + | PrismaGorgon.png|link=Prisma Gorgon|{{Weapon|Prisma Gorgon}} (7 shots) |
||
| − | GrineerSparkGun.png|link=Kohm|[[Kohm]] |
||
| + | Soma.png|link=Soma|{{Weapon|Soma}} (6 shots) |
||
| − | PrismaGorgon.png|link=Prisma Gorgon|[[Prisma Gorgon]] |
||
| − | + | SomaPrime.png|link=Soma Prime|{{Weapon|Soma Prime}} (4 shots) |
|
| − | + | Supra.png|link=Supra|{{Weapon|Supra}} (5 shots) |
|
| − | + | SupraVandal.png|link=Supra Vandal|{{Weapon|Supra Vandal}} (4 shots) |
|
| + | Tenora.png|link=Tenora|{{Weapon|Tenora}} (9 shots) |
||
| − | SupraVandal.png|link=Supra Vandal|[[Supra Vandal]] |
||
| − | + | TenoraPrime.png|link=Tenora Prime|{{Weapon|Tenora Prime}} (9 shots) |
|
</gallery> |
</gallery> |
||
| − | {{!}}-{{!}} |
+ | {{!}}-{{!}}Shotgun = |
<gallery captionposition="below" captionalign="center" hideaddbutton="true" spacing="small" navigation="false" position="center" bordersize="none" bordercolor="#FFFFFF"> |
<gallery captionposition="below" captionalign="center" hideaddbutton="true" spacing="small" navigation="false" position="center" bordersize="none" bordercolor="#FFFFFF"> |
||
| − | + | Kohm.png|link=Kohm|{{Weapon|Kohm}} |
|
| − | + | KuvaKohm.png|link=Kuva Kohm|{{Weapon|Kuva Kohm}} |
|
| − | DualCorpusMinigun.png|link=Dual Cestra|[[Dual Cestra]] |
||
| − | GrnWindUpPistol.png|link=Kohmak|[[Kohmak]] |
||
| − | PSDualCestra.png|link=Secura Dual Cestra|[[Secura Dual Cestra]] |
||
| − | DualKohmak.png|link=Twin Kohmak|[[Twin Kohmak]] |
||
</gallery> |
</gallery> |
||
| − | {{!}}-{{!}} |
+ | {{!}}-{{!}}Secondary = |
| + | <gallery captionposition="below" captionalign="center" hideaddbutton="true" spacing="small" navigation="false" position="center" bordersize="none" bordercolor="#FFFFFF"> |
||
| + | Aksomati.png|link=Aksomati|{{Weapon|Aksomati}} |
||
| + | AksomatiPrime.png|link=Aksomati Prime|{{Weapon|Aksomati Prime}} |
||
| + | Cestra.png|link=Cestra|{{Weapon|Cestra}} |
||
| + | Kohmak.png|link=Kohmak|{{Weapon|Kohmak}} |
||
| + | SecuraDualCestra.png|link=Secura Dual Cestra|{{Weapon|Secura Dual Cestra}} |
||
| + | TwinKohmak.png|link=Twin Kohmak|{{Weapon|Twin Kohmak}} |
||
| + | </gallery> |
||
| + | {{!}}-{{!}}Robotic= |
||
<gallery captionposition="below" captionalign="center" hideaddbutton="true" spacing="small" navigation="false" position="center" bordersize="none" bordercolor="#FFFFFF"> |
<gallery captionposition="below" captionalign="center" hideaddbutton="true" spacing="small" navigation="false" position="center" bordersize="none" bordercolor="#FFFFFF"> |
||
| − | + | DethMachineRifle.png|link=Deth Machine Rifle|{{Weapon|Deth Machine Rifle}} |
|
| + | DethMachineRiflePrime.png|link=Deth Machine Rifle Prime|{{Weapon|Deth Machine Rifle Prime}} |
||
</gallery> |
</gallery> |
||
| − | {{!}}-{{!}} |
+ | {{!}}-{{!}}Archgun= |
<gallery captionposition="below" captionalign="center" hideaddbutton="true" spacing="small" navigation="false" position="center" bordersize="none" bordercolor="#FFFFFF"> |
<gallery captionposition="below" captionalign="center" hideaddbutton="true" spacing="small" navigation="false" position="center" bordersize="none" bordercolor="#FFFFFF"> |
||
| − | + | Grattler.png|link=Grattler|{{Weapon|Grattler}} |
|
| + | ImperatorVandal.png|link=Imperator Vandal|{{Weapon|Imperator Vandal}} |
||
| + | Phaedra.png|link=Phaedra|{{Weapon|Phaedra}} |
||
</gallery> |
</gallery> |
||
}}</div> |
}}</div> |
||
| − | ==Burst Weapons== |
+ | ===Fire Rate and Burst Weapons=== |
| + | The effective Fire Rate for Burst Trigger weapons is a derived stat that is calculated on three factors: |
||
| + | *Burst Count: Number of shots per burst (hidden value) |
||
| + | *Burst Delay: Delay between shots fired in a single burst (hidden value) |
||
| + | *Fire Rate: Number of bursts per second if Burst Delay is 0 seconds. In other words, the reciprocal of this value is the delay before being able to fire another burst after completing a burst. This is the "Fire Rate" value listed in the arsenal. |
||
| + | These values are weapon dependent. |
||
| − | ===Weapons with burst-fire=== |
||
| + | *For example, {{Weapon|Burston}} has a Fire Rate of '''5''', a Burst Delay of '''0.061''', and a Burst Count of '''3'''. |
||
| + | *Note that for weapons with instantaneous bursts like {{Weapon|Quartakk}} (Burst Delay = 0), the Effective Fire Rate equals the arsenal Fire Rate. |
||
| + | The effective Fire Rate for Burst Trigger weapons is calculated by the following expression: |
||
| − | <div class="tabbertab-borderless">{{#tag:tabber|Primary={{{!}} |
||
| + | <!-- There will not be a Burst Delay at the end of burst so subtract 1 from Burst Count --> |
||
| − | <gallery captionposition="below" captionalign="center" hideaddbutton="true" spacing="small" navigation="false" position="center" bordersize="none" bordercolor="#FFFFFF"> |
||
| + | :<math>\text{Effective Fire Rate} = \frac{ \text{Burst Count} }{ \frac{1}{\text{Fire Rate}} + [ (\text{Burst Count} - 1) \cdot \text{Burst Delay} ] }</math> |
||
| − | Burston.png|link=Burston|[[Burston]] (3 round burst) |
||
| + | :<math>\text{Effective Fire Rate} = \frac{ \text{Burst Count} }{ \text{Burst Time In Seconds} + \text{Total Burst Delay In Seconds} }</math> |
||
| − | PrimeBurston.png|link=Burston Prime|[[Burston Prime]] (3 round burst) |
||
| + | |||
| − | DexSybaris.png|link=Dex Sybaris|[[Dex Sybaris]] (2 round burst) |
||
| + | Burst Delay is <u>not</u> affected by net negative Fire Rate bonuses. |
||
| − | GrnHarpoonGun.png|link=Harpak|[[Harpak]] (3 round burst) |
||
| + | |||
| − | Hind.png|link=Hind|[[Hind]] (5 round burst) |
||
| + | {| width=100% style="text-align:center;" |
||
| − | InfQuantaRifle.png|link=Paracyst|[[Paracyst]] (3 round burst) |
||
| + | |+ Bar visualization of single Burst firing event |
||
| − | GrnFourBarrelRifleWeapon.png|link=Quartakk|[[Quartakk]] (4 round burst) |
||
| + | |- |
||
| − | TnoLeverActionRifle.png|link=Sybaris|[[Sybaris]] (2 round burst) |
||
| + | | colspan=2 align="left" | ▾ 0 seconds elapsed |
||
| − | Sybaris_Prime.png|link=Sybaris Prime|[[Sybaris Prime]] (2 round burst) |
||
| + | | colspan=4 align="right" | Burst Time + Total Burst Delay seconds elapsed ▾ |
||
| − | Tiberon.png|link=Tiberon|[[Tiberon]] (3 round burst) |
||
| + | |- |
||
| − | TiberonPrime.png|link=Tiberon Prime|[[Tiberon Prime]] (3 round burst) |
||
| + | | style="background:white; color:black;" width=10% | Shot 1 (instant) |
||
| + | | style="background:lightgray; color:black;" width=15% | Burst Delay |
||
| + | | style="background:white; color:black;" width=10% | Shot 2 (instant) |
||
| + | | style="background:lightgray; color:black;" width=15% | Burst Delay |
||
| + | | style="background:white; color:black;" | ... |
||
| + | | style="background:white; color:black;" width=10% | Shot N (instant) |
||
| + | |- |
||
| + | | colspan=6 style="background:white; color:black;" | Single Fire Button Input = One Burst of N Shots |
||
| + | |- |
||
| + | |} |
||
| + | ---- |
||
| + | {| width=100% style="text-align:center;" |
||
| + | |+ Bar visualization of multiple Burst firing events |
||
| + | |- |
||
| + | | colspan=2 align="left" | ▾ 0 seconds elapsed |
||
| + | | colspan=7 align="right" | (Burst Time + Total Burst Delay) * 2 seconds elapsed ▾ |
||
| + | |- |
||
| + | | style="background:white; color:black;" width=10% | Burst 1, Shot 1 (instant) |
||
| + | | style="background:lightgray; color:black;" width=15% | Burst Delay |
||
| + | | style="background:white; color:black;" | ... |
||
| + | | style="background:white; color:black;" width=10% | Burst 1, Shot N (instant) |
||
| + | | style="background:lightgray; color:black;" width=15% | Delay (1 / Fire Rate) |
||
| + | | style="background:white; color:black;" width=10% | Burst 2, Shot 1 (instant) |
||
| + | | style="background:lightgray; color:black;" width=15% | Burst Delay |
||
| + | | style="background:white; color:black;" | ... |
||
| + | | style="background:white; color:black;" width=10% | Burst 2, Shot N (instant) |
||
| + | |- |
||
| + | | colspan=4 style="background:white; color:black;" | Burst 1 |
||
| + | | style="background:lightgray; color:black;" | Delay |
||
| + | | colspan=4 style="background:white; color:black;" | Burst 2 |
||
| + | |- |
||
| + | | colspan=9 style="background:white; color:black;" | Holding Fire Button Input For Two Bursts of N Shots |
||
| + | |- |
||
| + | |} |
||
| + | |||
| + | ==Sources of Fire Rate Bonus== |
||
| + | ===Abilities=== |
||
| + | ''The following Abilities affect Fire Rate positively:'' |
||
| + | <div class="tabber-borderless">{{#tag:tabber|Gauss = |
||
| + | {{:Redline}} |
||
| + | {{!}}-{{!}}Harrow = |
||
| + | {{:Penance}} |
||
| + | {{!}}-{{!}}Wisp = |
||
| + | {{:Reservoirs}} |
||
| + | {{!}}-{{!}} |
||
| + | }}</div> |
||
| + | |||
| + | ===Mods=== |
||
| + | ''The following Mods affect fire rate positively or negatively:'' |
||
| + | <div class="tabber-borderless">{{#tag:tabber|General = |
||
| + | <gallery captionposition="below" captionalign="center" hideaddbutton="true" spacing="small" navigation="true" position="center" bordersize="none" bordercolor="#FFFFFF"> |
||
| + | ArchgunAceMod.png|link=Archgun Ace|{{M|Archgun Ace}} |
||
| + | SpeedTriggerMod.png|link=Speed Trigger|{{M|Speed Trigger}} |
||
| + | ShotgunBarrageMod.png|link=Shotgun Barrage|{{M|Shotgun Barrage}} |
||
| + | GunslingerMod.png|link=Gunslinger|{{M|Gunslinger}} |
||
| + | AcceleratedIsotopeMod.png|link=Accelerated Isotope|{{M|Accelerated Isotope}} |
||
| + | AutomaticTriggerMod.png|link=Automatic Trigger|{{M|Automatic Trigger}} |
||
| + | Spring-LoadedChamberMod.png|link=Spring-Loaded Chamber|{{M|Spring-Loaded Chamber}} |
||
| + | RepeaterClipMod.png|link=Repeater Clip|{{M|Repeater Clip}} |
||
| + | PressurizedMagazineMod.png|link=Pressurized Magazine|{{M|Pressurized Magazine}} |
||
| + | AmalgamFuraxBodyCountMod.png|link=Amalgam Furax Body Count|{{M|Amalgam Furax Body Count}} |
||
| + | AmalgamShotgunBarrageMod.png|link=Amalgam Shotgun Barrage|{{M|Amalgam Shotgun Barrage}} |
||
</gallery> |
</gallery> |
||
| − | {{!}}-{{!}} |
+ | {{!}}-{{!}}Nightmare = |
| + | Dual-stat fire rate mods are obtained from [[Nightmare Mode]] missions. These mods combine increased fire rate with another positive enhancement. These mods are often weaker than their basic counterparts, but are useful for '''stacking''' or diverse builds. |
||
| − | <gallery captionposition="below" captionalign="center" hideaddbutton="true" spacing="small" navigation="false" position="center" bordersize="none" bordercolor="#FFFFFF"> |
||
| + | <gallery captionposition="below" captionalign="center" hideaddbutton="true" spacing="small" navigation="true" position="center" bordersize="none" bordercolor="#FFFFFF"> |
||
| − | DEBallistica.png|link=Ballistica|[[Ballistica]] (4 round burst) |
||
| + | ShredMod.png|link=Shred|{{M|Shred}} |
||
| − | PrimeBallistica.png|link=Ballistica Prime|[[Ballistica Prime]] (4 round burst) |
||
| + | AcceleratedBlastMod.png|link=Accelerated Blast|{{M|Accelerated Blast}} |
||
| − | Kraken.png|link=Kraken|[[Kraken]] (2 round burst) |
||
| + | LethalTorrentMod.png|link=Lethal Torrent|{{M|Lethal Torrent}} |
||
| − | TnBardPistol.png|link=Pandero|[[Pandero]] (8 round burst) |
||
| − | Sicarus.png|link=Sicarus|[[Sicarus]] (3 round burst) |
||
| − | DESicarus_Prime.png|link=Sicarus Prime|[[Sicarus Prime]] (3 round burst) |
||
</gallery> |
</gallery> |
||
| − | {{!}}-{{!}} |
+ | {{!}}-{{!}}Corrupt (Bonus) = |
| + | These mods are found within vaults of the [[Orokin Derelict]] missions, increasing fire rate at the expense of other weapon stats. |
||
| − | <gallery captionposition="below" captionalign="center" hideaddbutton="true" spacing="small" navigation="false" position="center" bordersize="none" bordercolor="#FFFFFF"> |
||
| + | <gallery captionposition="below" captionalign="center" hideaddbutton="true" spacing="small" navigation="true" position="center" bordersize="none" bordercolor="#FFFFFF"> |
||
| − | TnoGunbladeAuto.png|link=Sarpa|[[Sarpa]] (5 round burst) |
||
| + | VileAccelerationMod.png|link=Vile Acceleration|{{M|Vile Acceleration}} |
||
| + | FrailMomentumMod.png|link=Frail Momentum|{{M|Frail Momentum}} |
||
| + | AnemicAgilityMod.png|link=Anemic Agility|{{M|Anemic Agility}} |
||
</gallery> |
</gallery> |
||
| − | {{!}}-{{!}} |
+ | {{!}}-{{!}}Corrupt (Penalty) = |
| + | Found in Orokin Derelict missions, these negatively affect fire rate in exchange for other enhancements. Weapons with innate overbearing recoil can be made more effective at range by reducing the fire rate. |
||
| − | <gallery captionposition="below" captionalign="center" hideaddbutton="true" spacing="small" navigation="false" position="center" bordersize="none" bordercolor="#FFFFFF"> |
||
| + | <gallery captionposition="below" captionalign="center" hideaddbutton="true" spacing="small" navigation="true" position="center" bordersize="none" bordercolor="#FFFFFF" perrow="3"> |
||
| − | DESentinelBurstLaser.png|link=Burst Laser|[[Burst Laser]] (3 round burst) |
||
| + | CriticalDelayMod.png|link=Critical Delay|{{M|Critical Delay}} |
||
| − | PrismaSentinelBurstLaser.png|link=Prisma Burst Laser|[[Prisma Burst Laser]] (3 round burst) |
||
| + | CreepingBullseyeMod.png|link=Creeping Bullseye|{{M|Creeping Bullseye}} |
||
| + | CriticalDecelerationMod.png|link=Critical Deceleration|{{M|Critical Deceleration}} |
||
| + | VilePrecisionMod.png|link=Vile Precision|{{M|Vile Precision}} |
||
| + | TaintedShellMod.png|link=Tainted Shell|{{M|Tainted Shell}} |
||
</gallery> |
</gallery> |
||
| − | {{!}}-{{!}} |
+ | {{!}}-{{!}}Set = |
| + | These mods are dropped by Grineer Commanders on the [[Plains of Eidolon]], and may also be awarded by completing Ostron Bounties available in [[Cetus]]. They provide additional bonuses based on the number of set mods presently equipped. |
||
| − | <gallery captionposition="below" captionalign="center" hideaddbutton="true" spacing="small" navigation="false" position="center" bordersize="none" bordercolor="#FFFFFF"> |
||
| + | <gallery captionposition="below" captionalign="center" hideaddbutton="true" spacing="small" navigation="true" position="center" bordersize="none" bordercolor="#FFFFFF"> |
||
| − | ArchBurstGun.png|link=Cyngas|[[Cyngas]] (3 round burst) |
||
| + | VigilanteFervorMod.png|link=Vigilante Fervor|{{M|Vigilante Fervor}} |
||
</gallery> |
</gallery> |
||
| + | {{!}}-{{!}}Primed = |
||
| − | }}</div> |
||
| + | These mods are the [[Prime|primed]] variants of the normal fire-rate mods. |
||
| + | <gallery captionposition="below" captionalign="center" hideaddbutton="true" spacing="small" navigation="true" position="center" bordersize="none" bordercolor="#FFFFFF"> |
||
| + | PrimedShredMod.png|link=Primed Shred|{{M|Primed Shred}} |
||
| + | </gallery> |
||
| + | {{!}}-{{!}}Companion = |
||
| + | <gallery captionposition="below" captionalign="center" hideaddbutton="true" spacing="small" navigation="true" position="center" bordersize="none" bordercolor="#FFFFFF"> |
||
| + | ReinforcedBondMod.png|link=Reinforced Bond|{{M|Reinforced Bond}} |
||
| + | </gallery> |
||
| + | }} |
||
| + | </div> |
||
| − | == |
+ | ===Arcanes=== |
| + | ''The following Arcanes affect fire rate positively:'' |
||
| − | <gallery position=center widths=300px> |
||
| + | <gallery captionposition="below" captionalign="center" hideaddbutton="true" spacing="small" navigation="true" position="center" bordersize="none" bordercolor="#FFFFFF"> |
||
| − | Accelerated Blast |
||
| + | ArcaneAcceleration.png|link=Arcane Acceleration|{{Arcane|Arcane Acceleration}} |
||
| − | Warframe Fire Rate |
||
| + | ArcaneVelocity.png|link=Arcane Velocity|{{Arcane|Arcane Velocity}} |
||
| + | ArcaneTempo.png|link=Arcane Tempo|{{Arcane|Arcane Tempo}} |
||
</gallery> |
</gallery> |
||
| + | |||
| + | ===Other=== |
||
| + | <gallery captionposition="below" captionalign="center" hideaddbutton="true" spacing="small" navigation="true" position="center" bordersize="none" bordercolor="#FFFFFF"> |
||
| + | Afentis.png|link=Afentis|{{Weapon|Afentis}} passive |
||
| + | DualToxocyst.png|link=Dual Toxocyst|{{Weapon|Dual Toxocyst}} passive |
||
| + | </gallery> |
||
| + | |||
| + | ==Effective Fire Rate== |
||
| + | {{Community}} |
||
| + | {{UpdateMe|Elaborate on how to calculate}} |
||
| + | '''Effective Fire Rate''' is the ''true'' rate at which attacks happen per second. It is a derived stat that assumes perfect conditions and takes into account more stats and mechanics than the in-game arsenal's Fire Rate value. In other words, Effective Fire Rate may be a more accurate measure of how often a weapon attacks for theoretical DPS calculations. |
||
| + | |||
| + | ==Notes== |
||
| + | *Fire Rate cannot drop below 0.05 rounds per second. |
||
| + | *A higher Fire Rate on a weapon also shortens the time between a shot and: |
||
| + | **The automatic reload of the weapon when the magazine is empty. |
||
| + | **The manual reload of the weapon when the magazine is '''not''' empty. |
||
| + | **The ability to swap the weapon or use quick melee. |
||
| + | *Due to the principle of linear effects of fire rate, the relatively high number of shots-per-burst possessed by some weapons (e.g. {{Weapon|Hind}}), does not merely make them "shoot more bullets", when measured in an appropriate span of time (longer than a couple of bursts). |
||
| + | *Increasing Fire Rate has important side-effects regarding the ability to successfully land hits: |
||
| + | **Increasing fire rate exacerbates the effects of [[Recoil]]. When retaining their base rate of fire, low/moderate-recoil weapons, for which the crosshairs will have enough time to more or less re-zero after each shot, may be quite controllable; when modded for extra fire rate, the same weapons may start climbing or shaking unfavorably. Along the same lines, weapons already having strong recoil may become uncontrollable. |
||
| + | **Separately from recoil, increasing fire rate may have an unpredictable effect on [[Accuracy]]. Normally quite accurate weapons may become inaccurate this way, while weapons with mediocre accuracy may only lose a little bit of accuracy. ''To what extent accuracy is adversely affected by bonus Fire Rate'' is an undisclosed characteristic of each individual weapon (a hidden stat). |
||
| + | ***The compounding effects of worsened recoil ''and'' lower accuracy due to bonus fire rate are often thought to be unacceptable on a number of weapons that are particularly susceptible to these side-effects. |
||
| + | |||
| + | ==Trivia== |
||
| + | *Prior to {{ver|17.4.3}}, the principle that the Fire Rate bonus increases fire rate linearly hadn't yet been in application, so fire rate didn't affect the interval between the shots of a burst, leading to it having an overall diminished effect on Burst weapons. |
||
==See Also== |
==See Also== |
||
| + | *[[Trigger Type]], for more info on firing mechanisms of weapons. |
||
| − | {{MechNav}}[[es:Cadencia de fuego]] |
||
| + | *[[Attack Speed]], for the melee equivalent of fire rate. |
||
| − | __NOTOC__ |
||
| + | |||
| + | {{MechNav}} |
||
| + | [[es:Cadencia de fuego]] |
||
[[Category:Mechanics]] |
[[Category:Mechanics]] |
||
| + | [[fr:Cadence de Tir]] |
||
Latest revision as of 23:26, 18 April 2024
Fire Rate is a base stat of all ranged weapons, denoting the number of times per second a weapon discharges a projectile, or applies a discrete instance of damage, which normally corresponds to units of ammo being spent (normally one round per shot, and for continuous weapons 0.5 rounds per tick).
Mechanics[]
As a general principle, the Fire Rate bonus increases fire rate linearly, regardless of the Trigger Type, which ensures that the effective damage increase from improving this stat will be the same for Automatic weapons (e.g. ![]() Braton) and weapons with more complex trigger types – so on Burst weapons (e.g
Braton) and weapons with more complex trigger types – so on Burst weapons (e.g ![]() Burston), it affects both the speed of the burst as well as the time between bursts. For the same reason, apart from increasing the weapon's fire rate in the narrowest sense, the Fire Rate bonus also affects Spool-up Time (a hidden stat of Auto-Spool weapons, e.g.
Burston), it affects both the speed of the burst as well as the time between bursts. For the same reason, apart from increasing the weapon's fire rate in the narrowest sense, the Fire Rate bonus also affects Spool-up Time (a hidden stat of Auto-Spool weapons, e.g. ![]() Gorgon), and Charge Time (a base stat of bows and other Charged weapons, e.g.
Gorgon), and Charge Time (a base stat of bows and other Charged weapons, e.g. ![]() Opticor).
Opticor).
Increasing fire rate of Semi-auto weapons increases the cap on how quickly they can be fired. Likewise, for Duplex-trigger weapons (e.g ![]() Zylok), fire rate increases the cap on how quickly each two-shot sequence can be initiated (while the interval between the shots in a sequence remains completely voluntary, i.e. player-determined). Notably, Semi-Auto weapons are capped at 10 rounds per second.
Zylok), fire rate increases the cap on how quickly each two-shot sequence can be initiated (while the interval between the shots in a sequence remains completely voluntary, i.e. player-determined). Notably, Semi-Auto weapons are capped at 10 rounds per second.
On Continuous weapons (e.g. ![]() Ignis), the Fire Rate bonus increases the frequency of "ticks" (damage instances).
Ignis), the Fire Rate bonus increases the frequency of "ticks" (damage instances).
Shot Delay[]
Another way of viewing fire rate is that it determines the time before shooting another shot or reloading when the magazine is empty. Taking the inverse of resultant fire rate will give the time between shots in seconds.

Note that the ![]() Vectis and
Vectis and ![]() Vectis Prime are not affected by this shot delay before reloading and reloads instantly after the last shot instead.
Vectis Prime are not affected by this shot delay before reloading and reloads instantly after the last shot instead.
Fire Rate and Charge Time[]
For some weapons, the effective fire rate is dependent on the Charge Time of the attack. Note that charge weapons mislabel the charge time of the attack as the Charge Rate. For example, the ![]() Scourge lists its "Charge Rate" as 0.5, however that is actually the charge time (0.5 seconds). The actual charge rate of a weapon is as follows:
Scourge lists its "Charge Rate" as 0.5, however that is actually the charge time (0.5 seconds). The actual charge rate of a weapon is as follows:

The charge time is the time it takes the charge circle to progress to full. Bonuses from fire rate mods works as so:

The charge rate is the speed at which the charge circle progresses to full. Bonuses from fire rate mods works as so:

For charged weapons, charge time cannot go above 10 times the base charge time (achieved by having at least -90% fire rate bonus).


- Calculation for true fire rate for bow weapons.

- Calculation for true fire rate for
 Lanka which does not have a delay between charged shots.
The following is a list of Charge Times possessed by Charged weapons:
")
")
")
")
")
")
")
")
")
")
")
")
")
")
")
")
")
")
")
")
")
")
")
")
")
")
")
")
")
")
")
")
")
")
")
")
")
")
")
")
Fire Rate and Spool-up Time[]
Some automatic weapons do not start out firing at the fire rate listed in the Codex or Arsenal. Instead, the first few shots are fired more slowly as the weapon 'spools up' to the maximum fire rate. Once the maximum fire rate is reached, the weapon will continue firing at that rate until either the wielder stops firing or runs out of ammo. The period during which the maximum fire rate has not yet been reached is called Spool-up Time. The number of shots needed to reach maximum fire rate, the starting (decrease in) fire rate, and the rate of increase per shot fired, is sometimes called the Spool cadence.
The following is a list of Spool cadences possessed by Auto-Spool weapons (note: only the number of shots is listed; for a full description visit the weapon articles):
")
")
")
")
")
")
")
")
")
")
")
")
")
")
")
")
")
")
")
")
")
")
Fire Rate and Burst Weapons[]
The effective Fire Rate for Burst Trigger weapons is a derived stat that is calculated on three factors:
- Burst Count: Number of shots per burst (hidden value)
- Burst Delay: Delay between shots fired in a single burst (hidden value)
- Fire Rate: Number of bursts per second if Burst Delay is 0 seconds. In other words, the reciprocal of this value is the delay before being able to fire another burst after completing a burst. This is the "Fire Rate" value listed in the arsenal.
These values are weapon dependent.
- For example, Burston has a Fire Rate of 5, a Burst Delay of 0.061, and a Burst Count of 3.
- Note that for weapons with instantaneous bursts like Quartakk (Burst Delay = 0), the Effective Fire Rate equals the arsenal Fire Rate.
The effective Fire Rate for Burst Trigger weapons is calculated by the following expression:
![{\displaystyle {\text{Effective Fire Rate}}={\frac {\text{Burst Count}}{{\frac {1}{\text{Fire Rate}}}+[({\text{Burst Count}}-1)\cdot {\text{Burst Delay}}]}}}](https://services.fandom.com/mathoid-facade/v1/media/math/render/svg/950e6cf1a5de605242dcdb43f57a0a4d8ab2c162)

Burst Delay is not affected by net negative Fire Rate bonuses.
| ▾ 0 seconds elapsed | Burst Time + Total Burst Delay seconds elapsed ▾ | ||||
| Shot 1 (instant) | Burst Delay | Shot 2 (instant) | Burst Delay | ... | Shot N (instant) |
| Single Fire Button Input = One Burst of N Shots | |||||
| ▾ 0 seconds elapsed | (Burst Time + Total Burst Delay) * 2 seconds elapsed ▾ | |||||||
| Burst 1, Shot 1 (instant) | Burst Delay | ... | Burst 1, Shot N (instant) | Delay (1 / Fire Rate) | Burst 2, Shot 1 (instant) | Burst Delay | ... | Burst 2, Shot N (instant) |
| Burst 1 | Delay | Burst 2 | ||||||
| Holding Fire Button Input For Two Bursts of N Shots | ||||||||
Sources of Fire Rate Bonus[]
Abilities[]
The following Abilities affect Fire Rate positively:
|
 4 |
Redline Push Gauss' battery beyond the redline, supercharging his Abilities and setting Fire Rate, Attack Speed, Reload Speed, and Holster Rate into overdrive. When past the redline, bolts of arcing electricity dance periodically from Gauss, exploding en masse when the ability is deactivated. Introduced in Update 25.7 (2019-08-29) |
|
6 - 30% / 9 - 45% / 12 - 60% / 15 - 75% (fire rate buff) 5 - 25% / 6 - 30% / 7 - 35% / 8 - 40% (attack speed buff) 4 - 20% / 6 - 30% / 8 - 40% / 10 - 50% (reload speed buff) 4 - 20% / 6 - 30% / 8 - 40% / 10 - 50% (casting speed buff) | |||
|
Misc:
? m (activation knockback radius) |

|
 2 |
Penance Sacrifice shields to boost reload, and fire rate while converting damage inflicted on enemies into health for Harrow and nearby allies. Introduced in Update 21.0 (2017-06-29) |
5% (lifesteal on hit) 20% / 25% / 30% / 35% (fire rate bonus) 40% / 50% / 60% / 70% (reload speed bonus) |
1.25 / 1.33 / 1.43 / 1.54 s (bonus per 100 shields) | |||
|
Misc:
50 m (affinity range) |
|
 1 |
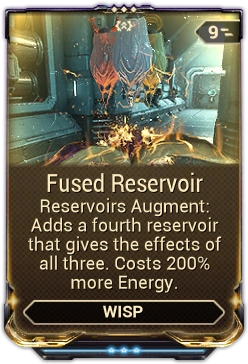
Reservoirs Choose and summon a Reservoir filled with Motes that attach to and aid Wisp and her allies. Haste Mote grants increased movement and attack speed. Vitality Mote increases maximum health and heals over time. Shock Mote stuns nearby enemies. Introduced in Update 25.0 (2019-05-22) |
| ||||||||||||
Mods[]
The following Mods affect fire rate positively or negatively:
")
")
")
")
")
")
")
")
")
")
")
Dual-stat fire rate mods are obtained from Nightmare Mode missions. These mods combine increased fire rate with another positive enhancement. These mods are often weaker than their basic counterparts, but are useful for stacking or diverse builds.
")
")
")
These mods are found within vaults of the Orokin Derelict missions, increasing fire rate at the expense of other weapon stats.
")
")
")
Found in Orokin Derelict missions, these negatively affect fire rate in exchange for other enhancements. Weapons with innate overbearing recoil can be made more effective at range by reducing the fire rate.
")
")
")
")
")
These mods are dropped by Grineer Commanders on the Plains of Eidolon, and may also be awarded by completing Ostron Bounties available in Cetus. They provide additional bonuses based on the number of set mods presently equipped.
")
")
")
Arcanes[]
The following Arcanes affect fire rate positively:
")
")
")
Other[]
")
")
Effective Fire Rate[]


Effective Fire Rate is the true rate at which attacks happen per second. It is a derived stat that assumes perfect conditions and takes into account more stats and mechanics than the in-game arsenal's Fire Rate value. In other words, Effective Fire Rate may be a more accurate measure of how often a weapon attacks for theoretical DPS calculations.
Notes[]
- Fire Rate cannot drop below 0.05 rounds per second.
- A higher Fire Rate on a weapon also shortens the time between a shot and:
- The automatic reload of the weapon when the magazine is empty.
- The manual reload of the weapon when the magazine is not empty.
- The ability to swap the weapon or use quick melee.
- Due to the principle of linear effects of fire rate, the relatively high number of shots-per-burst possessed by some weapons (e.g. Hind), does not merely make them "shoot more bullets", when measured in an appropriate span of time (longer than a couple of bursts).
- Increasing Fire Rate has important side-effects regarding the ability to successfully land hits:
- Increasing fire rate exacerbates the effects of Recoil. When retaining their base rate of fire, low/moderate-recoil weapons, for which the crosshairs will have enough time to more or less re-zero after each shot, may be quite controllable; when modded for extra fire rate, the same weapons may start climbing or shaking unfavorably. Along the same lines, weapons already having strong recoil may become uncontrollable.
- Separately from recoil, increasing fire rate may have an unpredictable effect on Accuracy. Normally quite accurate weapons may become inaccurate this way, while weapons with mediocre accuracy may only lose a little bit of accuracy. To what extent accuracy is adversely affected by bonus Fire Rate is an undisclosed characteristic of each individual weapon (a hidden stat).
- The compounding effects of worsened recoil and lower accuracy due to bonus fire rate are often thought to be unacceptable on a number of weapons that are particularly susceptible to these side-effects.
Trivia[]
- Prior to Hotfix 17.4.3 (2015-09-16), the principle that the Fire Rate bonus increases fire rate linearly hadn't yet been in application, so fire rate didn't affect the interval between the shots of a burst, leading to it having an overall diminished effect on Burst weapons.
See Also[]
- Trigger Type, for more info on firing mechanisms of weapons.
- Attack Speed, for the melee equivalent of fire rate.