m (→Notes: small adjust, maybe more clear now) |
|||
| (41 intermediate revisions by 6 users not shown) | |||
| Line 1: | Line 1: | ||
| − | '''Fire |
+ | {{Quote|Maximum number of projectiles that can be launched per second.|In-game Description}}'''Fire Rate''' is the frequency at which projectiles are launched per second. Various [[mods]] can be used to increase or decrease the fire rate of [[:Category:Primary Weapons|primary]] and [[:Category:Secondary Weapons|secondary weapons]]. This applies to bullets, lasers, arrows, and hand thrown projectiles. |
| − | Mods that increase fire rate also reduce the '''spin up time''' of spooling weapons which includes the |
+ | Mods that increase fire rate also reduce the '''spin up time''' of spooling weapons which includes the {{Weapon|Gorgon}}, {{Weapon|Deth Machine Rifle}}, {{Weapon|Soma}}, {{Weapon|Cestra}}, and {{Weapon|Supra}}. They also reduce the '''charge time''' of bows and other weapons with charge such as the {{Weapon|Ogris}}, {{Weapon|Miter}}, {{Weapon|Stug}}, {{Weapon|Ballistica}} and {{Weapon|Lanka}}. For '''burst-fire''' weapons, such as the {{Weapon|Burston}} and {{Weapon|Tiberon}}, fire rate affects both the speed of the burst as well as the time between bursts from {{ver|17.4.3}} onwards. '''Continuous''' weapons such as {{Weapon|Ignis}} and {{Weapon|Flux Rifle}} have no additional '''visual''' effects from fire rate mods, however they still do damage at an increased rate. Increasing fire rate on '''semi-auto''' weapons increases the cap on how fast they can fire and vice-versa. On '''duplex-fire''' weapons, fire rate mods affect the time between each 2 round burst, similar to burst-fire weapons. |
High fire rate exacerbates the effects of weapon [[recoil]]. For some weapons, lowering the fire rate can improve the player's overall accuracy. |
High fire rate exacerbates the effects of weapon [[recoil]]. For some weapons, lowering the fire rate can improve the player's overall accuracy. |
||
| Line 9: | Line 9: | ||
<div class="tabbertab-borderless">{{#tag:tabber|Standard = |
<div class="tabbertab-borderless">{{#tag:tabber|Standard = |
||
<gallery captionposition="below" hideaddbutton="true" spacing="small" navigation="true" position="center" bordersize="none" bordercolor="#FFFFFF"> |
<gallery captionposition="below" hideaddbutton="true" spacing="small" navigation="true" position="center" bordersize="none" bordercolor="#FFFFFF"> |
||
| + | Arch-GunAceMod.png|link=Arch-Gun Ace |
||
SpeedTriggerNew.png|link=Speed Trigger |
SpeedTriggerNew.png|link=Speed Trigger |
||
ShotgunSpazzModU145.png|link=Shotgun Spazz |
ShotgunSpazzModU145.png|link=Shotgun Spazz |
||
| Line 54: | Line 55: | ||
Primed_Shred.png|link=Primed Shred |
Primed_Shred.png|link=Primed Shred |
||
</gallery> |
</gallery> |
||
| + | }}</div> |
||
| + | |||
| + | |||
| + | ==Fire Rate Abilities== |
||
| + | The following powers affect Attack Speed positively, increasing a Melee Weapon's rate of attack: |
||
| + | |||
| ⚫ | |||
| + | Gauss= |
||
| + | {{:Redline|cardonly}} |
||
| + | {{!}}-{{!}} |
||
| + | |||
| + | Harrow= |
||
| + | {{:Penance|cardonly}} |
||
| + | {{!}}-{{!}} |
||
| + | |||
| + | Valkyr= |
||
| + | {{:Warcry|cardonly}} |
||
| + | {{!}}-{{!}} |
||
| + | |||
| + | Volt= |
||
| + | {{:Speed|cardonly}} |
||
| + | {{!}}-{{!}} |
||
| + | |||
| + | Wisp= |
||
| + | {{:Reservoirs|cardonly}} |
||
| + | {{!}}-{{!}} |
||
}}</div> |
}}</div> |
||
==Charged Weapons== |
==Charged Weapons== |
||
| − | For |
+ | For some weapons, the fire rate is dependent on the '''charge time''' of the attack. Note that charge weapons mislabel the charge time of the attack as the '''charge rate'''. For example, the {{Weapon|Scourge}} lists its "charge rate" as 0.5, however that is actually the charge time (0.5 '''seconds'''). The actual charge rate of a weapon is as follows: |
| + | :<math>\text{Charge Rate} = \frac{1}{\text{Charge Time}}</math> |
||
| − | {{MathText|Charge Rate {{eql}} 1 {{div}} Charge Time}} |
||
| − | The charge |
+ | The charge time is the time it takes the charge circle to progress to full. Bonuses from fire rate mods works as so: |
| + | :<math>\text{Charge Time} = \frac{\text{Base Charge Time}}{1 + \text{Mod Bonus}}</math> |
||
| − | {{MathText|Modded Charge Rate {{eql}} Charge Rate {{mul}} (1 + Mod Bonus)}} |
||
| + | The charge rate is the speed at which the charge circle progresses to full. Bonuses from fire rate mods works as so: |
||
| − | For the resulting charge time (seconds per charge) this means: |
||
| + | :<math>\text{Charge Rate} = \text{Base Charge Rate} \times (1 + \text{Mod Bonus})</math> |
||
| − | {{MathText|Modded Charge Time {{eql}} Charge Time {{div}} (1 + Mod Bonus)}} |
||
| − | <!--All calculated numbers are rounded to 4 decimal places if not exact--> |
||
<div class="tabbertab-borderless">{{#tag:tabber|Bow= |
<div class="tabbertab-borderless">{{#tag:tabber|Bow= |
||
| Line 78: | Line 104: | ||
!Base Charge Time |
!Base Charge Time |
||
!{{M|Shred}} (+60%) |
!{{M|Shred}} (+60%) |
||
| − | ! |
+ | !{{M|Vigilante Fervor}} (+90%) |
!{{M|Speed Trigger}} (+120%) |
!{{M|Speed Trigger}} (+120%) |
||
!{{M|Vile Acceleration}} (+180%) |
!{{M|Vile Acceleration}} (+180%) |
||
!All (+450%) |
!All (+450%) |
||
{{!}}- |
{{!}}- |
||
| − | {{!}}0.25s ( |
+ | {{!}}0.25s ({{Weapon|Rakta Cernos}}) |
{{!}}0.15625s |
{{!}}0.15625s |
||
{{!}}~0.1316s |
{{!}}~0.1316s |
||
| Line 89: | Line 115: | ||
{{!}}~0.0893s |
{{!}}~0.0893s |
||
{{!}}~0.0455s |
{{!}}~0.0455s |
||
| + | {{!}}- |
||
| + | {{!}}0.4s ({{Weapon|Kuva Bramma}}) |
||
| + | {{!}}0.25s |
||
| + | {{!}}~0.2105s |
||
| + | {{!}}~0.1818s |
||
| + | {{!}}~0.1429s |
||
| + | {{!}}~0.0727s |
||
{{!}}- |
{{!}}- |
||
{{!}}0.5s (Most bows) |
{{!}}0.5s (Most bows) |
||
| Line 97: | Line 130: | ||
{{!}}~0.0909s |
{{!}}~0.0909s |
||
{{!}}- |
{{!}}- |
||
| − | {{!}}1s ( |
+ | {{!}}1s ({{Weapon|Artemis Bow}}, {{Weapon|Daikyu}}) |
{{!}}0.625s |
{{!}}0.625s |
||
{{!}}0.5253s |
{{!}}0.5253s |
||
| Line 104: | Line 137: | ||
{{!}}~0.1818s |
{{!}}~0.1818s |
||
{{!}}- |
{{!}}- |
||
| − | {{!}}1.2s ( |
+ | {{!}}1.2s ({{Weapon|Lenz}}) |
{{!}}0.75s |
{{!}}0.75s |
||
{{!}}~0.6316s |
{{!}}~0.6316s |
||
| Line 113: | Line 146: | ||
<gallery captionposition="below" captionalign="center" hideaddbutton="true" spacing="small" navigation="false" position="center" bordersize="none" bordercolor="#FFFFFF"> |
<gallery captionposition="below" captionalign="center" hideaddbutton="true" spacing="small" navigation="false" position="center" bordersize="none" bordercolor="#FFFFFF"> |
||
| − | EWArtemisBow.png|link=Artemis Bow| |
+ | EWArtemisBow.png|link=Artemis Bow|{{Weapon|Artemis Bow}} (1.00 sec) |
| − | DECernos.png|link=Cernos| |
+ | DECernos.png|link=Cernos|{{Weapon|Cernos}} (0.50 sec) |
| − | CernosPrime.png|link=Cernos Prime| |
+ | CernosPrime.png|link=Cernos Prime|{{Weapon|Cernos Prime}} (0.50 sec) |
| − | AsymmetricBow.png|link=Daikyu| |
+ | AsymmetricBow.png|link=Daikyu|{{Weapon|Daikyu}} (1.00 sec) |
| − | Dread2.png|link=Dread| |
+ | Dread2.png|link=Dread|{{Weapon|Dread}} (0.50 sec) |
| − | + | Kuva_Bramma.png|link=Kuva Bramma|{{Weapon|Kuva Bramma}} (0.40 sec) |
|
| − | + | Lenz.png|link=Lenz|{{Weapon|Lenz}} (1.20 sec) |
|
| − | + | Paris.png|link=MK1-Paris|{{Weapon|MK1-Paris}} (0.50 sec) |
|
| − | + | InfCernos.png|link=Mutalist Cernos|{{Weapon|Mutalist Cernos}} (0.50 sec) |
|
| − | + | Paris.png|link=Paris|{{Weapon|Paris}} (0.50 sec) |
|
| − | + | PrimeBowM.png|link=Paris Prime|{{Weapon|Paris Prime}} (0.50 sec) |
|
| + | SyndicateRVCernos.png|link=Rakta Cernos|{{Weapon|Rakta Cernos}} (0.25 sec) |
||
</gallery> |
</gallery> |
||
| Line 132: | Line 166: | ||
!Base Charge Time |
!Base Charge Time |
||
!{{M|Shred}} (+30%) |
!{{M|Shred}} (+30%) |
||
| − | ! |
+ | !{{M|Vigilante Fervor}} (+45%) |
!{{M|Speed Trigger}} (+60%) |
!{{M|Speed Trigger}} (+60%) |
||
!{{M|Vile Acceleration}} (+90%) |
!{{M|Vile Acceleration}} (+90%) |
||
!All (+225%) |
!All (+225%) |
||
{{!}}- |
{{!}}- |
||
| − | {{!}}0.3s ( |
+ | {{!}}0.3s ({{Weapon|Javlok}}, {{Weapon|Ogris}}) |
{{!}}~0.2308s |
{{!}}~0.2308s |
||
{{!}}~0.2069s |
{{!}}~0.2069s |
||
| Line 144: | Line 178: | ||
{{!}}~0.0923s |
{{!}}~0.0923s |
||
{{!}}- |
{{!}}- |
||
| − | {{!}}0. |
+ | {{!}}0.4s ({{Weapon|Battacor}}) |
| + | {{!}}~0.3077s |
||
| + | {{!}}~0.2759s |
||
| + | {{!}}0.25s |
||
| + | {{!}}~0.2105s |
||
| + | {{!}}~0.1231s |
||
| + | {{!}}- |
||
| + | {{!}}0.5s ({{Weapon|Ferrox}}, {{Weapon|Scourge}}) |
||
{{!}}~0.3846s |
{{!}}~0.3846s |
||
{{!}}~0.3448s |
{{!}}~0.3448s |
||
| Line 151: | Line 192: | ||
{{!}}~0.1538s |
{{!}}~0.1538s |
||
{{!}}- |
{{!}}- |
||
| − | {{!}}0. |
+ | {{!}}0.6 ({{Weapon|Opticor Vandal}}) |
| + | {{!}}~0.4615s |
||
| + | {{!}}~0.4138s |
||
| + | {{!}}0.375s |
||
| + | {{!}}~0.3158s |
||
| + | {{!}}~0.1846s |
||
| + | {{!}}- |
||
| + | {{!}}0.75s ({{Weapon|Miter}}) |
||
{{!}}~0.5769s |
{{!}}~0.5769s |
||
{{!}}~0.5172s |
{{!}}~0.5172s |
||
| Line 158: | Line 206: | ||
{{!}}~0.2308s |
{{!}}~0.2308s |
||
{{!}}- |
{{!}}- |
||
| − | {{!}} |
+ | {{!}}0.8s ({{Weapon|Tenora}}) |
| + | {{!}}~0.6154s |
||
| + | {{!}}~0.5517s |
||
| + | {{!}}0.5s |
||
| + | {{!}}~0.4211s |
||
| + | {{!}}~0.2462s |
||
| + | {{!}}- |
||
| + | {{!}}1s ({{Weapon|Lanka}}) |
||
{{!}}~0.7692s |
{{!}}~0.7692s |
||
{{!}}~0.6897s |
{{!}}~0.6897s |
||
| Line 165: | Line 220: | ||
{{!}}~0.3077s |
{{!}}~0.3077s |
||
{{!}}- |
{{!}}- |
||
| − | {{!}} |
+ | {{!}}1.6s ({{Weapon|Stahlta}}) |
| + | {{!}}~1.231s |
||
| + | {{!}}~1.103s |
||
| + | {{!}}1s |
||
| + | {{!}}~0.8421s |
||
| + | {{!}}~0.4923s |
||
| + | {{!}}- |
||
| + | {{!}}2s ({{Weapon|Opticor}}) |
||
{{!}}~1.5385s |
{{!}}~1.5385s |
||
{{!}}~1.3793s |
{{!}}~1.3793s |
||
| Line 174: | Line 236: | ||
<gallery captionposition="below" captionalign="center" hideaddbutton="true" spacing="small" navigation="false" position="center" bordersize="none" bordercolor="#FFFFFF"> |
<gallery captionposition="below" captionalign="center" hideaddbutton="true" spacing="small" navigation="false" position="center" bordersize="none" bordercolor="#FFFFFF"> |
||
| − | + | Battacor.png|link=Battacor|{{Weapon|Battacor}} (0.40 sec) |
|
| − | + | Ferrox.png|link=Ferrox|{{Weapon|Ferrox}} (0.50 sec) |
|
| − | + | GrnFlameSpear.png|link=Javlok|{{Weapon|Javlok}} (0.30 sec) |
|
| − | + | Lanka2.png|link=Lanka|{{Weapon|Lanka}} (1.00 sec) |
|
| − | + | Miter.png|link=Miter|{{Weapon|Miter}} (0.75 sec) |
|
| − | + | OgrisNew.png|link=Ogris|{{Weapon|Ogris}} (0.30 sec) |
|
| + | CrpBFG.png|link=Opticor|{{Weapon|Opticor}} (2.00 sec) |
||
| + | OpticorVandal.png|link=Opticor Vandal|{{Weapon|Opticor Vandal}} (0.60 sec) |
||
| + | PriestSpearGun.png|link=Scourge|{{Weapon|Scourge}} (0.50 sec) |
||
| + | Stahlta.png|link=Stahlta|{{Weapon|Stahlta}} (1.6 sec) |
||
| ⚫ | |||
</gallery> |
</gallery> |
||
| Line 191: | Line 258: | ||
!All (+240%) |
!All (+240%) |
||
{{!}}- |
{{!}}- |
||
| − | {{!}}0.5s ( |
+ | {{!}}0.5s ({{Weapon|Drakgoon}}) |
| − | {{!}}0.3125s |
+ | {{!}}~0.3125s |
{{!}}~0.2632s |
{{!}}~0.2632s |
||
{{!}}~0.2632s |
{{!}}~0.2632s |
||
{{!}}~0.1471s |
{{!}}~0.1471s |
||
| + | {{!}}- |
||
| + | {{!}}0.3s ({{Weapon|Kuva Drakgoon}}) |
||
| + | {{!}}{{#expr: 0.3 / (1 + 0.6) round 4}}s |
||
| + | {{!}}{{#expr: 0.3 / (1 + 0.9) round 4}}s |
||
| + | {{!}}{{#expr: 0.3 / (1 + 0.9) round 4}}s |
||
| + | {{!}}{{#expr: 0.3 / (1 + 0.6 + 0.9 + 0.9) round 4}}s |
||
{{!}}- |
{{!}}- |
||
<!-- |
<!-- |
||
| − | {{!}}1.0s ( |
+ | {{!}}1.0s ({{Weapon|Phantasma}}) |
{{!}}0.625s |
{{!}}0.625s |
||
{{!}}~0.5263s |
{{!}}~0.5263s |
||
| Line 206: | Line 279: | ||
<gallery captionposition="below" captionalign="center" hideaddbutton="true" spacing="small" navigation="false" position="center" bordersize="none" bordercolor="#FFFFFF" perrow="3"> |
<gallery captionposition="below" captionalign="center" hideaddbutton="true" spacing="small" navigation="false" position="center" bordersize="none" bordercolor="#FFFFFF" perrow="3"> |
||
| − | GrineerFlakCannon.png|link=Drakgoon| |
+ | GrineerFlakCannon.png|link=Drakgoon|{{Weapon|Drakgoon}} (0.50 sec) |
| − | RevenantShotgun.png|link=Phantasma| |
+ | RevenantShotgun.png|link=Phantasma|{{Weapon|Phantasma}} (1.00 sec) (not affected by mods) |
</gallery> |
</gallery> |
||
{{!}}-{{!}}Secondary = |
{{!}}-{{!}}Secondary = |
||
{{{!}} class="article-table" |
{{{!}} class="article-table" |
||
| − | {{!}}+'''Charge time for pistol weapons (Excluding |
+ | {{!}}+'''Charge time for pistol weapons (Excluding {{Weapon|Angstrum}}, as charge time differs with mag size.)''' |
!Base Charge Time |
!Base Charge Time |
||
!{{M|Lethal Torrent}} (+60%) |
!{{M|Lethal Torrent}} (+60%) |
||
| Line 219: | Line 292: | ||
!All (+222%) |
!All (+222%) |
||
{{!}}- |
{{!}}- |
||
| − | {{!}}0.8s ( |
+ | {{!}}0.8s ({{Weapon|Ballistica Prime}}) |
{{!}}0.5s |
{{!}}0.5s |
||
{{!}}~0.4671s |
{{!}}~0.4671s |
||
| Line 225: | Line 298: | ||
{{!}}~0.2484s |
{{!}}~0.2484s |
||
{{!}}- |
{{!}}- |
||
| − | {{!}}1s ( |
+ | {{!}}1s ({{Weapon|Ballistica}}, [[Rakta Ballistica{{!}}Rakta]], {{Weapon|Staticor}}) |
{{!}}0.625s |
{{!}}0.625s |
||
{{!}}~0.5814s |
{{!}}~0.5814s |
||
| Line 231: | Line 304: | ||
{{!}}~0.3106s |
{{!}}~0.3106s |
||
{{!}}- |
{{!}}- |
||
| − | {{!}}3s ( |
+ | {{!}}3s ({{Weapon|Stug}}) |
{{!}}1.875s |
{{!}}1.875s |
||
{{!}}~1.744s |
{{!}}~1.744s |
||
| Line 239: | Line 312: | ||
<gallery captionposition="below" captionalign="center" hideaddbutton="true" spacing="small" navigation="false" position="center" bordersize="none" bordercolor="#FFFFFF" perrow="3"> |
<gallery captionposition="below" captionalign="center" hideaddbutton="true" spacing="small" navigation="false" position="center" bordersize="none" bordercolor="#FFFFFF" perrow="3"> |
||
| − | CorpusHandRocket.png|link=Angstrum| |
+ | CorpusHandRocket.png|link=Angstrum|{{Weapon|Angstrum}} (0.50/1.50 sec single/3 rocket(s), scales with magazine size) |
| − | DEBallistica.png|link=Ballistica| |
+ | DEBallistica.png|link=Ballistica|{{Weapon|Ballistica}} (1.00 sec) |
| − | PrimeBallistica.png|link=Ballistica Prime| |
+ | PrimeBallistica.png|link=Ballistica Prime|{{Weapon|Ballistica Prime}} (0.80 sec) |
| − | PrismaAngstrum.png|link=Prisma Angstrum| |
+ | PrismaAngstrum.png|link=Prisma Angstrum|{{Weapon|Prisma Angstrum}} (0.20/0.60 sec single/3 rocket(s), scales with magazine size) |
| − | RVBallistica.png|link=Rakta Ballistica| |
+ | RVBallistica.png|link=Rakta Ballistica|{{Weapon|Rakta Ballistica}} (1.00 sec) |
| − | CrpElectroMag.png|link=Staticor| |
+ | CrpElectroMag.png|link=Staticor|{{Weapon|Staticor}} (1.00 sec) |
| − | GrineerCrossbowGooGun.png|link=Stug| |
+ | GrineerCrossbowGooGun.png|link=Stug|{{Weapon|Stug}} (3.00 sec) |
</gallery> |
</gallery> |
||
| Line 253: | Line 326: | ||
!{{M|Shell Rush}} (+50%) |
!{{M|Shell Rush}} (+50%) |
||
{{!}}- |
{{!}}- |
||
| − | {{!}}0.5s ( |
+ | {{!}}0.5s ({{Weapon|Corvas}}) |
{{!}}~0.3333s |
{{!}}~0.3333s |
||
{{!}}- |
{{!}}- |
||
| − | {{!}} |
+ | {{!}}0.5s ({{Weapon|Larkspur}}) |
| + | {{!}}~0.3333s |
||
| + | {{!}}- |
||
| + | {{!}}1s ({{Weapon|Velocitus}}) |
||
{{!}}~0.6667s |
{{!}}~0.6667s |
||
{{!}}} |
{{!}}} |
||
<gallery captionposition="below" captionalign="center" hideaddbutton="true" spacing="small" navigation="false" position="center" bordersize="none" bordercolor="#FFFFFF" perrow="3"> |
<gallery captionposition="below" captionalign="center" hideaddbutton="true" spacing="small" navigation="false" position="center" bordersize="none" bordercolor="#FFFFFF" perrow="3"> |
||
| − | ArchLaunchGrenade.png|link=Corvas| |
+ | ArchLaunchGrenade.png|link=Corvas|{{Weapon|Corvas}} (0.50 sec) |
| − | + | Larkspur.png|link=Larkspur|{{Weapon|Larkspur}} (0.50 sec) |
|
| + | ArchRailgun.png|link=Velocitus|{{Weapon|Velocitus}} (1.00 sec) |
||
</gallery> |
</gallery> |
||
}}</div> |
}}</div> |
||
| + | |||
==Auto-Spool Weapons== |
==Auto-Spool Weapons== |
||
| Line 270: | Line 348: | ||
Some automatic weapons don't start out firing at the fire rate listed in the Codex. Instead, the first few shots are fired more slowly as the weapon 'spools up' to the maximum fire rate. Once the maximum fire rate is reached, the weapon will continue firing at that rate until either the wielder stops firing or runs out of ammo. |
Some automatic weapons don't start out firing at the fire rate listed in the Codex. Instead, the first few shots are fired more slowly as the weapon 'spools up' to the maximum fire rate. Once the maximum fire rate is reached, the weapon will continue firing at that rate until either the wielder stops firing or runs out of ammo. |
||
| + | <div class="tabbertab-borderless">{{#tag:tabber|Primary={{{!}} |
||
| − | ===Weapons with auto-spool:=== |
||
| − | |||
| ⚫ | |||
<gallery captionposition="below" captionalign="center" hideaddbutton="true" spacing="small" navigation="false" position="center" bordersize="none" bordercolor="#FFFFFF"> |
<gallery captionposition="below" captionalign="center" hideaddbutton="true" spacing="small" navigation="false" position="center" bordersize="none" bordercolor="#FFFFFF"> |
||
| − | Gorgon.png|link=Gorgon| |
+ | Gorgon.png|link=Gorgon|{{Weapon|Gorgon}} |
| − | WraithGorgon.png|link=Gorgon Wraith| |
+ | WraithGorgon.png|link=Gorgon Wraith|{{Weapon|Gorgon Wraith}} |
| − | GrineerSparkGun.png|link=Kohm| |
+ | GrineerSparkGun.png|link=Kohm|{{Weapon|Kohm}} |
| − | + | KuvaKohm.png|link=Kuva Kohm|{{Weapon|Kuva Kohm}} |
|
| + | PrismaGorgon.png|link=Prisma Gorgon|{{Weapon|Prisma Gorgon}} |
||
| − | U10DesignCouncilTennoAR.png|link=Soma|[[Soma]] |
||
| − | + | U10DesignCouncilTennoAR.png|link=Soma|{{Weapon|Soma}} |
|
| + | PrimeSoma.png|link=Soma Prime|{{Weapon|Soma Prime}} |
||
| − | CorpusMachineGun.png|link=Supra|[[Supra]] |
||
| − | + | CorpusMachineGun.png|link=Supra|{{Weapon|Supra}} |
|
| + | SupraVandal.png|link=Supra Vandal|{{Weapon|Supra Vandal}} |
||
| ⚫ | |||
| + | TnBardRifle.png|link=Tenora|{{Weapon|Tenora}} |
||
</gallery> |
</gallery> |
||
{{!}}-{{!}}Secondary= |
{{!}}-{{!}}Secondary= |
||
<gallery captionposition="below" captionalign="center" hideaddbutton="true" spacing="small" navigation="false" position="center" bordersize="none" bordercolor="#FFFFFF"> |
<gallery captionposition="below" captionalign="center" hideaddbutton="true" spacing="small" navigation="false" position="center" bordersize="none" bordercolor="#FFFFFF"> |
||
| − | AkimboSomaPistols.png|link=Aksomati| |
+ | AkimboSomaPistols.png|link=Aksomati|{{Weapon|Aksomati}} |
| − | CorpusMinigun.png|link=Cestra| |
+ | CorpusMinigun.png|link=Cestra|{{Weapon|Cestra}} |
| − | DualCorpusMinigun.png|link=Dual Cestra| |
+ | DualCorpusMinigun.png|link=Dual Cestra|{{Weapon|Dual Cestra}} |
| − | GrnWindUpPistol.png|link=Kohmak| |
+ | GrnWindUpPistol.png|link=Kohmak|{{Weapon|Kohmak}} |
| − | PSDualCestra.png|link=Secura Dual Cestra| |
+ | PSDualCestra.png|link=Secura Dual Cestra|{{Weapon|Secura Dual Cestra}} |
| − | DualKohmak.png|link=Twin Kohmak| |
+ | DualKohmak.png|link=Twin Kohmak|{{Weapon|Twin Kohmak}} |
</gallery> |
</gallery> |
||
| − | {{!}}-{{!}} |
+ | {{!}}-{{!}}Robotic= |
<gallery captionposition="below" captionalign="center" hideaddbutton="true" spacing="small" navigation="false" position="center" bordersize="none" bordercolor="#FFFFFF"> |
<gallery captionposition="below" captionalign="center" hideaddbutton="true" spacing="small" navigation="false" position="center" bordersize="none" bordercolor="#FFFFFF"> |
||
| − | DESentinelDethMachineRifle.png|link=Deth Machine Rifle| |
+ | DESentinelDethMachineRifle.png|link=Deth Machine Rifle|{{Weapon|Deth Machine Rifle}} |
</gallery> |
</gallery> |
||
{{!}}-{{!}}Arch-gun= |
{{!}}-{{!}}Arch-gun= |
||
<gallery captionposition="below" captionalign="center" hideaddbutton="true" spacing="small" navigation="false" position="center" bordersize="none" bordercolor="#FFFFFF"> |
<gallery captionposition="below" captionalign="center" hideaddbutton="true" spacing="small" navigation="false" position="center" bordersize="none" bordercolor="#FFFFFF"> |
||
| − | + | GrnAntiAirGun.png|link=Grattler|{{Weapon|Grattler}} |
|
| + | ImperatorVandal.png|link=Imperator Vandal|{{Weapon|Imperator Vandal}} |
||
| + | ArchLongRifle.png|link=Phaedra|{{Weapon|Phaedra}} |
||
</gallery> |
</gallery> |
||
}}</div> |
}}</div> |
||
| − | ==Burst Weapons== |
||
| − | == |
+ | ==Burst-Fire Weapons== |
| + | There are three types of burst-fire weapons. There are normal burst-fire weapons that fire a set number of rounds per burst, with each round shot one after the other; these are the most common out of all the burst-fire weapons. The second least common are simultaneous burst-fire weapons that shoot the number of bullets in its burst count simultaneously (similar to shotguns). Automatic burst-fire weapons are automatic versions of normal burst-fire weapons, holding the trigger will continue to shoot rounds in normal bursts until the trigger is released. The following weapons have burst-fire as its primary trigger mode or as an alternate trigger: |
||
<div class="tabbertab-borderless">{{#tag:tabber|Primary={{{!}} |
<div class="tabbertab-borderless">{{#tag:tabber|Primary={{{!}} |
||
<gallery captionposition="below" captionalign="center" hideaddbutton="true" spacing="small" navigation="false" position="center" bordersize="none" bordercolor="#FFFFFF"> |
<gallery captionposition="below" captionalign="center" hideaddbutton="true" spacing="small" navigation="false" position="center" bordersize="none" bordercolor="#FFFFFF"> |
||
| − | + | Battacor.png|link=Battacor|{{Weapon|Battacor}} (2 round automatic burst) |
|
| − | + | Burston.png|link=Burston|{{Weapon|Burston}} (3 round burst) |
|
| − | + | PrimeBurston.png|link=Burston Prime|{{Weapon|Burston Prime}} (3 round burst) |
|
| − | + | DexSybaris.png|link=Dex Sybaris|{{Weapon|Dex Sybaris}} (2 round burst) |
|
| − | + | GrnHarpoonGun.png|link=Harpak|{{Weapon|Harpak}} (3 round burst) |
|
| − | + | InfestedBurstRifle.png|link=Hema|{{Weapon|Hema}} (3 round burst) |
|
| − | + | Hind.png|link=Hind|{{Weapon|Hind}} (5 round burst) |
|
| − | + | KuvaHind.png|link=Kuva Hind|{{Weapon|Kuva Hind}} (5 round burst) |
|
| − | + | KuvaQuartakk.png|link=Kuva Quartakk|{{Weapon|Kuva Quartakk}} (4 round simultaneous burst) |
|
| − | + | Nagantaka.png|link=Nagantaka|{{Weapon|Nagantaka}} (9 round burst, scales with magazine size) |
|
| − | + | InfQuantaRifle.png|link=Paracyst|{{Weapon|Paracyst}} (3 round burst) |
|
| + | GrnFourBarrelRifleWeapon.png|link=Quartakk|{{Weapon|Quartakk}} (4 round simultaneous burst) |
||
| + | TnoLeverActionRifle.png|link=Sybaris|{{Weapon|Sybaris}} (2 round burst) |
||
| + | Sybaris_Prime.png|link=Sybaris Prime|{{Weapon|Sybaris Prime}} (2 round burst) |
||
| + | Tiberon.png|link=Tiberon|{{Weapon|Tiberon}} (3 round burst) |
||
| + | TiberonPrime.png|link=Tiberon Prime|{{Weapon|Tiberon Prime}} (3 round burst) |
||
</gallery> |
</gallery> |
||
{{!}}-{{!}}Secondary= |
{{!}}-{{!}}Secondary= |
||
<gallery captionposition="below" captionalign="center" hideaddbutton="true" spacing="small" navigation="false" position="center" bordersize="none" bordercolor="#FFFFFF"> |
<gallery captionposition="below" captionalign="center" hideaddbutton="true" spacing="small" navigation="false" position="center" bordersize="none" bordercolor="#FFFFFF"> |
||
| − | + | Akarius.png|link=Akarius|{{Weapon|Akarius}} (2 round simultaneous burst) |
|
| − | + | TnoBladedPistols.png|link=Akjagara|{{Weapon|Akjagara}} (2 round simultaneous burst) |
|
| − | + | AkjagaraPrime.png|link=Akjagara Prime|{{Weapon|Akjagara Prime}} (2 round simultaneous burst) |
|
| − | + | DEBallistica.png|link=Ballistica|{{Weapon|Ballistica}} (4 round burst) |
|
| − | + | PrimeBallistica.png|link=Ballistica Prime|{{Weapon|Ballistica Prime}} (4 round burst) |
|
| − | + | Cyanex.png|link=Cyanex|{{Weapon|Cyanex}} (11 round burst, scales with magazine size) |
|
| − | + | Kraken.png|link=Kraken|{{Weapon|Kraken}} (2 round burst) |
|
| + | KuvaKraken.png|link=Kuva Kraken|{{Weapon|Kuva Kraken}} (3 round burst and 21 round burst, scales with magazine size) |
||
| + | TnBardPistol.png|link=Pandero|{{Weapon|Pandero}} (8 round burst, scales with magazine size) |
||
| + | Quatz.png|link=Quatz|{{Weapon|Quatz}} (4 round simultaneous burst) |
||
| + | RVBallistica.png|link=Rakta Ballistica|{{Weapon|Rakta Ballistica}} (4 round burst) |
||
| + | Sicarus.png|link=Sicarus|{{Weapon|Sicarus}} (3 round burst) |
||
| + | DESicarus_Prime.png|link=Sicarus Prime|{{Weapon|Sicarus Prime}} (3 round burst) |
||
</gallery> |
</gallery> |
||
{{!}}-{{!}}Melee= |
{{!}}-{{!}}Melee= |
||
<gallery captionposition="below" captionalign="center" hideaddbutton="true" spacing="small" navigation="false" position="center" bordersize="none" bordercolor="#FFFFFF"> |
<gallery captionposition="below" captionalign="center" hideaddbutton="true" spacing="small" navigation="false" position="center" bordersize="none" bordercolor="#FFFFFF"> |
||
| − | TnoGunbladeAuto.png|link=Sarpa| |
+ | TnoGunbladeAuto.png|link=Sarpa|{{Weapon|Sarpa}} (5 round burst) |
</gallery> |
</gallery> |
||
| − | {{!}}-{{!}} |
+ | {{!}}-{{!}}Robotic= |
<gallery captionposition="below" captionalign="center" hideaddbutton="true" spacing="small" navigation="false" position="center" bordersize="none" bordercolor="#FFFFFF"> |
<gallery captionposition="below" captionalign="center" hideaddbutton="true" spacing="small" navigation="false" position="center" bordersize="none" bordercolor="#FFFFFF"> |
||
| − | DESentinelBurstLaser.png|link=Burst Laser| |
+ | DESentinelBurstLaser.png|link=Burst Laser|{{Weapon|Burst Laser}} (3 round burst) |
| − | PrismaSentinelBurstLaser.png|link=Prisma Burst Laser| |
+ | PrismaSentinelBurstLaser.png|link=Prisma Burst Laser|{{Weapon|Prisma Burst Laser}} (3 round burst) |
</gallery> |
</gallery> |
||
{{!}}-{{!}}Arch-gun= |
{{!}}-{{!}}Arch-gun= |
||
<gallery captionposition="below" captionalign="center" hideaddbutton="true" spacing="small" navigation="false" position="center" bordersize="none" bordercolor="#FFFFFF"> |
<gallery captionposition="below" captionalign="center" hideaddbutton="true" spacing="small" navigation="false" position="center" bordersize="none" bordercolor="#FFFFFF"> |
||
| − | ArchBurstGun.png|link=Cyngas| |
+ | ArchBurstGun.png|link=Cyngas|{{Weapon|Cyngas}} (3 round burst) |
</gallery> |
</gallery> |
||
}}</div> |
}}</div> |
||
| + | |||
| + | ==Notes== |
||
| + | *A higher Fire Rate on a weapon also shortens the time between a shot and: |
||
| + | **The automatic reload of the weapon when the magazine is empty. |
||
| + | **The manual reload of the weapon when the magazine is '''not''' empty. |
||
| + | **The ability to swap the weapon or use quick melee. |
||
==Media== |
==Media== |
||
| Line 353: | Line 449: | ||
==See Also== |
==See Also== |
||
| + | *[[Trigger Type]], for more info on firing mechanisms of weapons. |
||
*[[Attack Speed]], for the melee equivalent of fire rate. |
*[[Attack Speed]], for the melee equivalent of fire rate. |
||
| − | {{MechNav}} |
+ | {{MechNav}} |
| + | [[es:Cadencia de fuego]] |
||
__NOTOC__ |
__NOTOC__ |
||
[[Category:Mechanics]] |
[[Category:Mechanics]] |
||
Revision as of 02:03, 8 September 2020
Fire Rate is the frequency at which projectiles are launched per second. Various mods can be used to increase or decrease the fire rate of primary and secondary weapons. This applies to bullets, lasers, arrows, and hand thrown projectiles.
Mods that increase fire rate also reduce the spin up time of spooling weapons which includes the ![]() Gorgon,
Gorgon, ![]() Deth Machine Rifle,
Deth Machine Rifle, ![]() Soma,
Soma, ![]() Cestra, and
Cestra, and ![]() Supra. They also reduce the charge time of bows and other weapons with charge such as the
Supra. They also reduce the charge time of bows and other weapons with charge such as the ![]() Ogris,
Ogris, ![]() Miter,
Miter, ![]() Stug,
Stug, ![]() Ballistica and
Ballistica and ![]() Lanka. For burst-fire weapons, such as the
Lanka. For burst-fire weapons, such as the ![]() Burston and
Burston and ![]() Tiberon, fire rate affects both the speed of the burst as well as the time between bursts from Hotfix 17.4.3 (2015-09-16) onwards. Continuous weapons such as
Tiberon, fire rate affects both the speed of the burst as well as the time between bursts from Hotfix 17.4.3 (2015-09-16) onwards. Continuous weapons such as ![]() Ignis and
Ignis and ![]() Flux Rifle have no additional visual effects from fire rate mods, however they still do damage at an increased rate. Increasing fire rate on semi-auto weapons increases the cap on how fast they can fire and vice-versa. On duplex-fire weapons, fire rate mods affect the time between each 2 round burst, similar to burst-fire weapons.
Flux Rifle have no additional visual effects from fire rate mods, however they still do damage at an increased rate. Increasing fire rate on semi-auto weapons increases the cap on how fast they can fire and vice-versa. On duplex-fire weapons, fire rate mods affect the time between each 2 round burst, similar to burst-fire weapons.
High fire rate exacerbates the effects of weapon recoil. For some weapons, lowering the fire rate can improve the player's overall accuracy.
Fire Rate Mods
")
Dual-stat fire rate mods are obtained from Nightmare Mode missions. These mods combine increased fire rate with another positive enhancement. These mods are often weaker than their basic counterparts, but are useful for stacking or diverse builds.
These mods are found within vaults of the Orokin Derelict missions, increasing fire rate at the expense of other weapon stats.
")
")
Found in Orokin Derelict missions, these negatively affect fire rate in exchange for other enhancements. Weapons with innate overbearing recoil can be made more effective at range by reducing the fire rate.
")
")
These mods are dropped by Stalker's Acolytes during Operation: Shadow Debt. These mods increase fire rate while aiming for a short duration after reloading.
")
")
These mods are dropped by Grineer Commanders on the Plains of Eidolon, and may also be awarded by completing Ostron Bounties available in Cetus. They provide additional bonuses based on the number of set mods presently equipped.
")
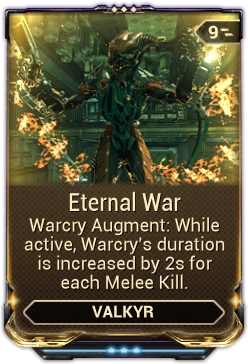
Fire Rate Abilities
The following powers affect Attack Speed positively, increasing a Melee Weapon's rate of attack:
|
 4 |
Redline Push Gauss' battery beyond the redline, supercharging his Abilities and setting Fire Rate, Attack Speed, Reload Speed, and Holster Rate into overdrive. When past the redline, bolts of arcing electricity dance periodically from Gauss, exploding en masse when the ability is deactivated. Introduced in Update 25.7 (2019-08-29) |
|
6 - 30% / 9 - 45% / 12 - 60% / 15 - 75% (fire rate buff) 5 - 25% / 6 - 30% / 7 - 35% / 8 - 40% (attack speed buff) 4 - 20% / 6 - 30% / 8 - 40% / 10 - 50% (reload speed buff) 4 - 20% / 6 - 30% / 8 - 40% / 10 - 50% (casting speed buff) | |||
|
Misc:
? m (activation knockback radius) |

|
 2 |
Penance Sacrifice shields to boost reload, and fire rate while converting damage inflicted on enemies into health for Harrow and nearby allies. Introduced in Update 21.0 (2017-06-29) |
5% (lifesteal on hit) 20% / 25% / 30% / 35% (fire rate bonus) 40% / 50% / 60% / 70% (reload speed bonus) |
1.25 / 1.33 / 1.43 / 1.54 s (bonus per 100 shields) | |||
|
Misc:
50 m (affinity range) |
|
 2 |
Warcry Valkyr lets out a rallying cry that bolsters her allies melee speed while slowing down nearby enemies. Introduced in Update 11.0 (2013-11-20) |
25 / 35 / 45 / 50 % (armor buff) 15 / 20 / 25 / 30 % (slow) |
|
Misc: 75 % (slow cap) | |||
| Subsumable to Helminth |
|
 2 |
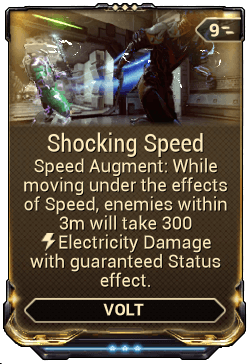
Speed Volt energizes his body and nearby Warframes, giving them increased speed and dexterity for a short time. Introduced in Update 5.3 (2013-01-10) |
?% / ?% / ?% / 25% (reload speed buff) |
|
 1 |
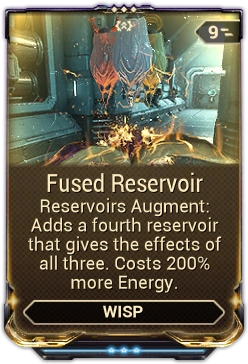
Reservoirs Choose and summon a Reservoir filled with Motes that attach to and aid Wisp and her allies. Haste Mote grants increased movement and attack speed. Vitality Mote increases maximum health and heals over time. Shock Mote stuns nearby enemies. Introduced in Update 25.0 (2019-05-22) |
| ||||||||||||
Charged Weapons
For some weapons, the fire rate is dependent on the charge time of the attack. Note that charge weapons mislabel the charge time of the attack as the charge rate. For example, the ![]() Scourge lists its "charge rate" as 0.5, however that is actually the charge time (0.5 seconds). The actual charge rate of a weapon is as follows:
Scourge lists its "charge rate" as 0.5, however that is actually the charge time (0.5 seconds). The actual charge rate of a weapon is as follows:

The charge time is the time it takes the charge circle to progress to full. Bonuses from fire rate mods works as so:

The charge rate is the speed at which the charge circle progresses to full. Bonuses from fire rate mods works as so:

| Base Charge Time | All (+450%) | ||||
|---|---|---|---|---|---|
| 0.25s ( |
0.15625s | ~0.1316s | ~0.1136s | ~0.0893s | ~0.0455s |
| 0.4s ( |
0.25s | ~0.2105s | ~0.1818s | ~0.1429s | ~0.0727s |
| 0.5s (Most bows) | 0.3125s | ~0.2632s | ~0.2273s | ~0.1786s | ~0.0909s |
| 1s ( |
0.625s | 0.5253s | ~0.4545s | ~0.3571s | ~0.1818s |
| 1.2s ( |
0.75s | ~0.6316s | ~0.5455s | ~0.4286s | ~0.2182s |
")
")
")
| Base Charge Time | All (+225%) | ||||
|---|---|---|---|---|---|
| 0.3s ( |
~0.2308s | ~0.2069s | 0.1875s | ~0.1579s | ~0.0923s |
| 0.4s ( |
~0.3077s | ~0.2759s | 0.25s | ~0.2105s | ~0.1231s |
| 0.5s ( |
~0.3846s | ~0.3448s | 0.3125s | ~0.2632s | ~0.1538s |
| 0.6 ( |
~0.4615s | ~0.4138s | 0.375s | ~0.3158s | ~0.1846s |
| 0.75s ( |
~0.5769s | ~0.5172s | 0.46875s | ~0.3947s | ~0.2308s |
| 0.8s ( |
~0.6154s | ~0.5517s | 0.5s | ~0.4211s | ~0.2462s |
| 1s ( |
~0.7692s | ~0.6897s | 0.625s | ~0.5263s | ~0.3077s |
| 1.6s ( |
~1.231s | ~1.103s | 1s | ~0.8421s | ~0.4923s |
| 2s ( |
~1.5385s | ~1.3793s | 1.25s | ~1.0526s | ~0.6154s |
")
")
")
")
")
| Base Charge Time | "Shotgun Spazz" wasn't found in Module:Mods/data (+90%) | All (+240%) | ||
|---|---|---|---|---|
| 0.5s ( |
~0.3125s | ~0.2632s | ~0.2632s | ~0.1471s |
| 0.3s ( |
0.1875s | 0.1579s | 0.1579s | 0.0882s |
| Base Charge Time | All (+222%) | |||
|---|---|---|---|---|
| 0.8s ( |
0.5s | ~0.4671s | ~0.4211s | ~0.2484s |
| 1s ( |
0.625s | ~0.5814s | ~0.5263s | ~0.3106s |
| 3s ( |
1.875s | ~1.744s | ~1.578s | ~0.9316s |
")
| Base Charge Time | |
|---|---|
| 0.5s ( |
~0.3333s |
| 0.5s ( |
~0.3333s |
| 1s ( |
~0.6667s |
")
Auto-Spool Weapons
Some automatic weapons don't start out firing at the fire rate listed in the Codex. Instead, the first few shots are fired more slowly as the weapon 'spools up' to the maximum fire rate. Once the maximum fire rate is reached, the weapon will continue firing at that rate until either the wielder stops firing or runs out of ammo.
")
")
")
")
")
Burst-Fire Weapons
There are three types of burst-fire weapons. There are normal burst-fire weapons that fire a set number of rounds per burst, with each round shot one after the other; these are the most common out of all the burst-fire weapons. The second least common are simultaneous burst-fire weapons that shoot the number of bullets in its burst count simultaneously (similar to shotguns). Automatic burst-fire weapons are automatic versions of normal burst-fire weapons, holding the trigger will continue to shoot rounds in normal bursts until the trigger is released. The following weapons have burst-fire as its primary trigger mode or as an alternate trigger:
")
")
")
")
")
")
")
")
")
")
")
")
")
")
")
")
")
")
Notes
- A higher Fire Rate on a weapon also shortens the time between a shot and:
- The automatic reload of the weapon when the magazine is empty.
- The manual reload of the weapon when the magazine is not empty.
- The ability to swap the weapon or use quick melee.
Media
")
")
See Also
- Trigger Type, for more info on firing mechanisms of weapons.
- Attack Speed, for the melee equivalent of fire rate.