Reduces damage to Health by [Damage Reduction Value]%. Shields are not affected by Armor.
—In-game Description
Armor is an attribute that reduces damage taken to health but not to shields. Not all enemies possess armor; Warframes, most bosses, and all Grineer do, but normal Corpus and Infested enemies do not have any. For a given Warframe, its armor value can be found in the Arsenal. Armored enemies have their base armor values listed in the Codex but this value increases when they spawn with higher levels due to Enemy Level Scaling.
In combat, enemies with more than one point of armor have their health bars displayed yellow instead of red. It is possible to strip away armor value through certain abilities or damage Status Effects, turning those enemies' health bars back to red.
In the current Damage system, health bars always have a health class (Flesh, Cloned Flesh, etc.) which decrease or increase incoming damage depending on the damage type being inflicted (Slash, etc.); armored entities have an additional class on their health called their armor class (either Ferrite Armor or Alloy Armor) that further decreases or increases incoming damage. This additional armor class is removed if the armor is stripped.
Effects[]
When damage is inflicted to an armored target, there are two related calculations made.
The working armor value of the target is increased or decreased based on the damage type, armor class, and health class of the weapons and entities involved.
Incoming damage is reduced by the type-modified armor value according to a damage reduction formula.
*Tenno Armor has no resistances or vulnerabilities
Damage type modifiers will affect the effectiveness of the target's armor value. They are given by the following equation:
Armor is your armor value before considering damage types.
Armor Class Modifier can be found on the nearby charts.
To illustrate, Slash damage against a target with Ferrite Armor would effectively be mitigated by an additional 15% of the target's total armor (). On the other hand, Puncture damage against a target with Ferrite Armor would effectively ignore 50% of the target's total armor ().
Apart from this armor value modification, type damage modifiers against the armor and health classes of the target also plainly multiply the damage. Modifiers against the health also work through armor. For example, the 75% modifier of Viral damage against Cloned Flesh will still affect the enemy even if it has armor. There is a more accurate total damage calculation further down the page, but this section covers the armor value modification.
Damage Reduction Formula[]
The damage reduction from armor is as follows:
A net armor value of 300 will reduce incoming damage by 300 ÷ 600 = 50%, so only half of the weapon's damage is inflicted in total. At 600, you receive only 33% (reduction is 600 ÷ 900 = 66.6667%) of a weapon's outgoing damage. At 900 armor, inflicted damage is only 25% (reduction 900 ÷ 1200 = 75%), and so on.
When damage is reduced from armor, each damage type has a minimum damage of 1.
E.g. a Braton will always do a minimum of 3 damage against an armored target regardless of how high their armor value is, as it has 3 different damage types.
Non-Armor sources of damage reduction do not have such a behavior.
Effective health is the concept that each single point of health you have actually absorbs more than one point of damage, so you effectively have more hit points than indicated. Therefore, there are two ways that armor functionality can be imagined: either as a reduction to damage, or as an increase of effective health and incoming heals.
An alternative way to think of armor transforms the above equation to the following:
Nominal Health means "health in name", referring to the Health points in your screen's upper right corner.
Effective Health is your "health in effect", reflecting a "truer" measurement of survivability.
Or in terms of armor:
Example 1: If you have 1000 Nominal Health and 100 armor, your Effective Health would be:
Or
Example 2: If you have 1000 Nominal Health and 600 armor, your Effective Health would be:
Steel Fiber and Armored Agility increase armor value when equipped. As a percentage modifier, Warframes with higher base armor values have a higher benefit from it. Like with most other stats, armor gains from mods stack additively together before being multiplied with the Warframe's base armor:
Mod Multiplier refers to the value on the mods equipped. It is 1.0 at max rank Steel Fiber, 0.45 at max rank Armored Agility, and 1.55 with both equipped.
When killed, petrified enemies and Atlas' Rumblers drop a resource called Rubble that grants Atlas bonus armor if he is at full health. Bonus armor caps at 1,500 points. This bonus armor decays over time at a rate of 5 armor points per second.
Chroma expends 50Energy to emit an aura of elemental energy, empowering himself and nearby allies within 6 / 8 / 10 / 12 meters for 10 / 15 / 20 / 25 seconds, providing both offensive and defensive buffs.
Elemental Ward exhibits different effects depending on Chroma's current elemental alignment, determined by Chroma's primary emission color or the selected element of Spectral Scream.
Generates a flame aura around Chroma and affected allies that increases base Health by 15% / 20% / 30% / 55% and inflicts 25 / 50 / 75 / 100Heat damage per second within a radius of 5 meters with a 2% / 5% / 7% / 10%status chance.
The health bonus stacks additively with base health modifiers, and the amount of health gained is determined by the affected Warframe's base health at rank 0. Since Chroma has 270 health at rank 0, a rank-3 Elemental Ward with a maxed Vitality and Intensify will increase Chroma's health at rank 30 to 270 × (1 + 2 + 1 + 0.55 × 1.3) = 1,273.05.
Damage bypasses obstacles in the environment and decreases with distance.
Electricity
Infuses Chroma and affected allies with an electric current that increases base Shields by 10% / 15% / 20% / 30% and converts incoming damage into arc discharges. An arc discharge inflicts 250% / 300% / 500% / 1,000% incoming damage as Electricity damage to a single target within 5 / 6 / 8 / 10 meters with a 10% / 15% / 20% / 25%status chance. Arc discharges will inflict a minimum of 50 / 60 / 100 / 200Electricity damage.
The shield bonus stacks additively with base shield modifiers, and the amount of shields gained is determined by the affected Warframe's base shields at rank 0. Since Chroma has 270 shields at rank 0, a rank-3 Elemental Ward with a maxed Redirection and Intensify will increase Chroma's shield capacity at rank 30 to 270 × (1 + 2 + 1 + 0.3 × 1.3) = 1,185.3.
Arc damage bypasses obstacles in the environment.
The final damage of an arc discharge is determined by the amount of shields and/or health lost by incoming damage. For example with a maxed Intensify, losing 100 shields from a single instance of damage will produce an arc that inflicts 100 × 10 × 1.3 = 1,300Electricity damage at rank 3 to a single target as long as it's within range.
When infused into Hildryn by the Helminth, the Shield drained by skills is also converted into damage, but the base multiplier is 1x instead of 10x.
Damage from environmental hazards can also be converted into arc discharges.
Arcs can strike the same target multiple times, and arcs can be produced in quick succession should Chroma and allies receive multiple instances of damage that exceed the minimum threshold.
Toxin
Emits an aura of noxious fumes around Chroma and affected allies that increases base Reload Speed by 15% / 25% / 30% / 35%, as well as weapon damage when Holstering by 15% / 25% / 30% / 35% for ? / ? / 3 / 3 seconds. Within a radius of 5 meters, the noxious fumes also have a 25% / 35% / 40% / 50% chance per second to deal 5% of an enemy's maximum health as Toxin damage with a 100%status chance.
The Toxin damage will only be applied to an enemy if it is not already affected by a Toxin proc, but can occur as soon as an existing Toxin proc expires. As such, its effect cannot stack with itself but can refresh itself every 7 seconds.
Damage bypasses obstacles in the environment and does not decrease with distance.
Cold
Encases Chroma and affected allies in a layer of frost that increases base Armor by 25% / 70% / 90% / 145% and creates an ice shield that reflects incoming fire back to its source. Reflected damage is increased by 150% / 200% / 250% / 300% and has a 10% / 15% / 20% / 25%status chance.
The armor bonus stacks additively with base armor modifiers, and the amount of armor gained is determined by the affected Warframe's base armor, according to the following formula: Base Armor × (1 + Armor Mods + Ability Modifier × (1 + Strength Mods)).
Since Chroma has 370 base armor, a rank-3 Elemental Ward with a maxed Steel Fiber and Intensify will increase Chroma's armor to 370 × (1 + 1 + 1.45 × (1 + 0.3)) = 1,437.45.
As with all other additive armor bonuses, Elemental Ward's bonus is applied before multiplicative armor bonuses.
Incoming hitscan and non-hitscan projectiles are physically redirected after hitting Chroma. As such, obstacles in the environment can prevent reflected damage from hitting enemies.
Hitscan projectiles are reflected directly to the source enemy regardless of distance from Chroma. Melee attacks are not reflected.
Non-hitscan projectiles are reflected in the direction of the source enemy.
Does not prevent damage to Chroma aside from the additional armor bonus and other damage reduction rules; Chroma will be hit normally before reflecting weapons fire.
Elemental Auras of any type from two or more Chromas do not stack and only the first aura will apply its benefits as long as the player is within buff range. For example, two Heat auras do not increase damage nor health values, and possessing a Heat aura will negate receiving a Cold aura.
Has a casting delay of 1 second. The animation interrupts movement and other actions.
Elemental Ward cannot be recast while active.
Elemental Ward does not work on Nekros' Shadows.
Subsuming Chroma to the Helminth will offer Elemental Ward and its augments to be used by other Warframes. The Ward's effects are determined by the Warframe's primary emission color.
Everlasting Ward is a Warframe Augment Mod for Chroma that allows allies to retain Elemental Ward's effects upon moving out of its range, lasting for a percentage of Elemental Ward's remaining duration.
In a pinch, the bonus Health provided by the Ward can be used as a quick heal, as the Health granted is automatically added to your remaining health and is not reduced from your remaining health when Elemental Ward wears off.
The Ward is capable of damaging containers and hazards, albeit fairly slowly. Combining Elemental Ward with Spectral Scream and range mods will make for a useful farming tool so long as you have the energy to maintain it.
Electricity
Can be used to great effect on Survival and Exterminate missions where enemies approach you from all directions and are often difficult to locate or target. At maximum Ability Strength, the damage reflected can easily finish off weaker enemies and potentially stun any survivors.
Toxin
Works very well with weapons that require you to reload frequently or have long reload times.
Its dmg increase is considered as a Universal base dmg increase, same as Vex Armor and Arcane Arachne
Can reduce recharge delay for Cycron or a Kitgun equipped with Pax Charge, however, it does not affect recharge rate.
Cold
Properly modded, a Cold-oriented Ward can provide an armor bonus high enough that can counteract the armor penalty generated when casting Effigy.
The damage reflection is calculated using the damage before any damage reduction.
Bugs
Allies who enter, leave, then re-enter the radius of Heat-oriented Ward will not regain the buff on the same cast of Elemental Ward. This results in an empty space where the bonus health should have been, even if they took no damage at all.
This causes Medi-Ray and other healing abilities to attempt to heal the player, but if the player gets out of Elemental Ward's range, their health will return to normal again, wasting the health restored in the process.
The in-game UI shows the armor bonus from the Cold aura as a flat bonus rather than a percentage.
Chroma fortifies squad Armor when his Shields are damaged or he kills an enemy with a melee weapon. He increases squad Weapon Damage when he loses Health or kills an enemy with a ranged weapon, double the effect on weak point kills.
Chroma expends 75Energy and enters a state of primal rage, sustaining an Armor and damage buffing aura with a radius of 8 / 10 / 15 / 18 meters for 10 / 15 / 20 / 25 seconds. While active, Chroma and his allies within aura range gain the Scorn armor buff once Chroma's Shields are hit or performs a melee kill, and the Fury damage buff once his Health is damaged or performs a ranged weapon kill.
Scorn increases Warframe Armor by 0.5% / 0.625% / 0.75% / 0.875% for every point of shields lost or ? / ? / ? / 15% per melee kill, up to a maximum of 200% / 250% / 300% / 350%.
Fury increases weapon and Chroma's abilities' base damage by 2% / 2.25% / 2.5% / 2.75% for every point of health lost or ? / ? / ? / 15% per ranged weapon kill (doubled for weakspot kills), up to a maximum of 200% / 225% / 250% / 275%.
Scorn, Fury, and conversion percentages are linearly affected by Ability Strength.
E.g., with Intensify, Steel Fiber and maximum Scorn at rank 3, Chroma's armor will be at:
Both Scorn and Fury are additive multipliers that function the same as (and add together with) mods like Steel Fiber and base-damage-increasing mods like Serration. If these mods are present, all the multipliers are added together before any further calculations such as elemental damage mods, critical hit mods, or multishot mods.
Scorn and Fury are tracked from 0% to their maximum increase in the HUD next to Chroma's shield and health indicators.
Scorn and Fury will gradually increase each time shields or health are hit, and each time Chroma gets a melee or ranged weapon kill, until they reach their maximum percentages. 400 shield points must be lost to maximize Scorn, and 100 health points must be lost to maximize Fury.
Alternatively, 24 Enemies must be killed with Melee to maximize Scorn, and 19 Enemies must be killed with Ranged Weapons to maximize Fury.
Hits on overshields count towards Scorn accumulation.
Shield drain from a Hijack payload counts towards Scorn accumulation.
Multiple Chromas' Scorn and Fury buffs will stack together.
Effigy will only maintain the damage increase from Fury so long as Chroma's Effigy is within range of Vex Armor.
Vex Armor is a one-handed action. As such, it can be used while performing various maneuvers and actions without interruption.
Vex Armor can be recast while active, retaining the existing buffs.
When recast with a higher power strength than the current active buff, the max Scorn and Fury limits will only be increased if Chroma has not already reached their respective limits.
E.g., If Vex Armor is casted with 100% power strength, then recast while it's still active with the Energy Conversion buff, the Scorn and Fury buffs max limit will be increased to 525% (350 * 1.5) and 412% (275 * 1.5) only if the buffs weren't at the existing limit of 350% and 275% respectively. If Scorn has reached the limit but Fury has not when recast with a higher power strength, then only Fury will benefit from the increased power strength, and vice versa.
Vexing Retaliation is a PvEWarframe Augment for Chroma that makes Vex Armor detonate an area-of-effect attack upon receiving 150 incoming damage, dealing procs on enemies.
Equipping a rank 4 or higher Vigor mod will allow you to maximize Scorn armor bonus without requiring shields to recharge, as well as provide additional health.
Using an electric element Elemental Ward will allow you to maximize the Scorn armor bonus without having to equip any mods increasing your shields.
Equipping a Decaying Dragon Key to lower your shields can increase the likelihood of health damage at the loss of some of the Scorn Armor bonus due to the reduction of your shields.
Using Energy to Shield conversion mods, like Brief Respite and Augur mod set effect, to generate shields/overshields when casting Vex Armor will help you maximize the Scorn armor bonus without having to equip any mods increasing your shields.
As shields are depleted while Vex Armor is active, Chroma's armor is increased by 350%. This is a total of 1250 before considering the effect of mods.
Grendel gains 250 additional armor (400 with Gourmand) for every enemy swallowed via Feast and can hold up to a maximum of 5 enemies, for a total of 1,250 bonus armor (2,000 with Gourmand).
Plunder Armor from nearby enemies and increase Corrosive Damage on your Abilities and weapons. Enemies affected by Corrosion Status offer a greater increase.
Hydroid expends 75energy to siphon the armor from all seen enemies within 25 meters, Staggering them and consuming any active Corrosive status to permanently remove their armor. For 10 / 15 / 20 / 25 seconds, Hydroid gains a 20 / 25 / 30 / 40 bonus armor per enemy and per consumed Corrosive status effect to a cap of 750 bonus armor, and a Corrosive damage bonus to all abilities and weapons by 5% / 6% / 7.5% / 10% per enemy and per consumed Corrosive status effect to a cap of 200%Corrosive damage bonus.
Does not require line-of-sight from Hydroid; enemies only need to be within view of the camera to be affected.
While the bonus is active, a stylized armor and damage bonus counter appears above the ability icons.
If Plunder affects enemies on recast, the bonus values are replaced by the new values. If no enemies are affected, the bonus values will not change but the duration will not be refreshed.
Summon a Scarab Swarm to attack enemies with guaranteed Corrosion Status. Damage scales with Inaros' Health. Enemies killed while immersed in the swarm summon a Swarm Kavat that fights alongside Inaros and guides the scarabs to other enemies.
Inaros expends 100energy to hurl ? swarms of scarabs that travel up to 20 / 22 / 25 / 30 meters away, infesting all enemies in their path. Swarmed enemies will flail in panic and receive ? / ? / ? / 241 plus 10% of Inaros' max health as Corrosive damage with a guaranteed status effect per 0.5~ seconds for 6 / 10 / 12 / 15 seconds, during which they are completely disabled. While active, Scarab Swarm splits a flying swarm every ? seconds to spread to an unaffected enemy within a ? / ? / ? / 12 meter radius from a swarm host for 100% of its remaining duration.
Launching a Scarab Swarm on an enemy that is still under the effects of another Scarab Swarm, will not refresh the debuff.
Scarab Swarm's projectile possesses innate punch through but does not bypass obstacles in the environment.
When an enemy affected by Scarab Swarm dies, they spawn a friendly Swarm Kavat that scratches enemies to spread Scarab Swarm. A maximum of 3 Swarm Kavats can spawn, each lasting 20 seconds.
Number of active Swarm Kavats are tracked as a buff icon beside Inaros' hitpoints indicator.
Swarm Kavat-inflicted Scarab Swarm does not spread flying swarms.
Ability Synergy: Swarm Kavat claw swipes contribute as hits toward Inaros' revival via his Passive.
Negation Armor is a Warframe Augment Mod for Inaros that sacrifices an active Scarab Shell to prevent Inaros from entering Bleedout, but receives a Slash status effect once its invulnerability period expires.
It is more energy efficient to cast a Scarab Swarm attack on a single enemy in the middle of a large, clustered group, and allowing the swarm spreading effect to infect all nearby enemies. This is particularly effective against Infested that naturally tend to clump together in groups.
Indefinitely increases Inaros' armor by up to 100%. This bonus is additive to armor mods and is not affected by Ability Strength.
Oberon channels a field around him with radius of 10 / 15 / 20 / 25 meters. Ally players entering the field will receive a buff which will regenerate 15 / 20 / 25 / 40 health every second, while allied summoned units affected will regenerate 5 / 6.7 / 8.3 / 13.3 health every second (1/3rd the normal rate), for as long as Renewal remains active, regardless of range. Fully healed allies are additionally cleared of all negative Status Effects. Affected allies that enter Bleedout will have their timer slowed by 20% / 25% / 35% / 45%.
The duration of the expanding pulse is inversely affected by Ability Strength, meaning it reaches its total range faster the more Ability Strength is used.
Renewal will continue to heal all affected targets for the duration of the ability, even if all their health has been restored and regardless of distance. Buff will remain until skill is deactivated, Oberon runs out of energy, or Oberon/ally falls off the map.
Ability Synergy: If Oberon or any allies affected by Renewal stands on Hallowed Ground, they will receive the Iron Renewal buff, which grants 125 / 150 / 175 / 200 bonus armor for as long as Renewal is active. Once Renewal is deactivated, the armor buff will remain on all affected units for 20 more seconds.
Bonus armor is added after other armor increases (e.g. an Oberon with a maxed Steel Fiber and Intensify will have (185 × 2) + (200 × 1.3) = 630 armor).
As Link Fiber scales with the player's armor, companions with this mod benefit twice from Iron Renewal, as the companion links into the player's increased armor and then gets buffed by Iron Renewal.
Renewal costs 25energy to activate, then drains 2energy per second while active. When allied targets are below their maximum health, Renewal will drain an additional 3 energy per second for every allied player and 1 energy per second for every allied summoned unit affected by its healing; Renewal will end if Oberon runs out of energy, it is dispelled, or if deactivated manually by pressing the ability key again (default 3 ).
The number of allied targets currently being healed by Renewal is shown on the ability icon. If no allies targets are being healed at the time, the ability icon will only animate to indicate that Renewal is activated.
Multiple instances of Renewal's healing per second, and of Iron Renewal armor buff, do stack with each other.
Renewal's initial casting area will not expire unless Renewal is deactivated, allowing allies to receive the buff when they choose.
If Renewal is removed from Oberon or an Ally, (such as by falling/jumping out of bounds, or from the effects of a Nullifier or Nul Scrambus) they will not be able to regain the buff until Oberon re-casts Renewal. They can still gain the buff from another allied Oberon, though, as long as that Oberon's buff has not also been removed.
Phoenix Renewal is a Warframe Augment Mod for Oberon's Renewal. If a player takes fatal damage while under the effects of Renewal, instead of becoming incapacitated, the player is healed for a percentage of their health and granted 5 seconds of Invulnerability. Each player that triggers Phoenix Renewal's effects must individually undergo a 90-second cooldown before they can benefit again.
If Oberon or any allies affected by Renewal stands on or moves onto his Hallowed Ground, they will receive the Iron Renewal buff, which grants 125 / 150 / 175 / 200 bonus armor for as long as Renewal is active, which can be increased by Ability Strength to 598 bonus armor. Once Renewal is deactivated, the armor buff will remain on all affected units for 20 more seconds. Bonus armor is added after other armor increases. An Oberon with a maxed Steel Fiber and Intensify under the effect of the Iron Renewal buff has armor equaling:
Grants buffs to those who consistently perform actions in time to Octavia’s music. Timed jumps offer the Vivace speed buff. Crouching on the beat grants cloaking with the Nocturne buff. Firing rhythmically bestows Opera multishot buff. Timed melee swings give the Forte damage buff.
Octavia expends 75energy to produce a melodic musical aura with a radius of 6 / 8 / 10 / 12 meters for 8 / 12 / 16 / 20 seconds. Octavia and her allies gain an 10% / 15% / 20% / 35%Armor bonus while inside the melodic aura.
Metronome's music is in tune with the Melody section of the Mandachord, drawing from the preset musical notes to determine the melodic aura's note intervals.
While the player and allies can hear the melody, Metronome's aura is considered silent to enemies.
While inside the melodic aura, Octavia and her allies can perform specific actions in sync to the melodic music to gain various Sync Buffs that can be active simultaneously:
Each line of Melody notes is visually represented as a concentric ring of light, which begins at the edge of the melodic aura and shrinks toward Octavia’s feet, where the ring disappears as the sound of the notes are played.
In order to gain buffs, players must time their actions to sync with the moment a concentric ring is centered on Octavia, as the sound of the notes are played. A flash of light will appear below the player upon a successful sync.
Synchronize percentages are listed between 0% and 100%, and will raise or lower depending on the player's timing. Once the percentage reaches 100%, the player gains the corresponding buff.
Synchronize percentage is displayed as an icon with the current stored percentage beside the health and shield indicators on the HUD. Once synchronized, the corresponding buff icon will also be displayed with the remaining buff duration beneath and bonus percentage at the top-right of the icon.
Each player must perform actions individually to gain buffs. Sync buffs are gained per-player and are not shared between allies in range.
If a player does not perform an action when the ring disappears, their existing synchronize percentage does not decrease. however, if they do perform an action at the wrong time, their synchronize percentage resets; Meaning that players can skip certain beats and focus on precision if they cannot keep up with the Mandachord's rapid pace. This is particularly important for weapons with low fire rate / attack speed and with the vivace (movement speed) buff.
The amount of notes on one line of the Melody section on the Mandachord determines the brightness of the concentric rings.
By synchronizing with jumps (default Space ), Octavia and her allies can gain the Vivace buff which increases Movement Speed by 10% / 15% / 20% / 30% for 5 / 8 / 12 / 15 seconds.
Double jump (default press Space twice), wall climb (face wall and press Space ), and wall jump (face wall + W + Space ) can also be used to synchronize.
By synchronizing with crouching (default Ctrl ) or sliding (default W + Ctrl ), Octavia and her allies can gain the Nocturne buff which grants Invisibility for 5 / 8 / 12 / 15 seconds.
By synchronizing with ranged weapon fire (default LMB ), Octavia and her allies can gain the Opera buff, granting 12% / 20% / 25% / 30% ranged weapon Multishot for 5 / 8 / 12 / 15 seconds.
Multishot bonus stacks additively with multishot mods such as Split Chamber.
Alternate-fire or secondary attacks on select weapons are not known to be able to gain multishot from Opera (requires testing).
By synchronizing with melee weapons (default E ), Octavia and her allies can gain the Forte buff, granting 20% / 25% / 25% / 30% bonus melee weapon damage for 5 / 8 / 12 / 15 seconds.
Damage bonus stacks additively with base damage mods like Pressure Point.
Metronome can be recast while active to refresh its duration. On recast, existing synchronize percentages will not carry over and will be reset to 0%.
Casting Metronome is not a One-Handed Action and interrupts other actions, but allows movement.
When Octavia is standing on higher elevations or objects, the concentric rings of light from the melodic aura will partially fade depending on the surrounding terrain to allow better visibility.
Concentric ring color and Nocturne cloak effect are affected by Octavia’s chosen Warframe energy color.
Metronome affects the visuals and audio of any nearby Mallet and Resonator belonging to Octavia herself.
Tips & Tricks
Having the mandachord's melody set to a consistent rhythm makes it much easier to sync up your buffs.
Similar to Octavia's other abilities, without a melody this skill will do nothing.
The longer the pause is between notes, the higher is the percentage gained per successful action.
The intensity of light rings is determined by the number of notes in a particular column.
Valkyr expends 75energy to let out a rallying cry, affecting her allies and enemies within 15 / 20 / 22 / 25 meters. Affected allies will gain 15% / 20% / 25% / 50%Attack Speed and 25% / 35% / 45% / 50%Armor, while affected enemies are Slowed15% / 20% / 25% / 30%. The effects last for 7 / 10 / 12 / 15 seconds.
Attack Speed bonus is additive to mods (e.g., Fury).
A maxed Fury and Intensify with a rank-3 Warcry will increase Valkyr's attack speed by: Attack Speed Mods + Warcry Modifier × (1 + Strength Mods) = 0.3 + 0.5 × (1 + 0.3) = 95%
The armor buff is based off of the affected Warframe's base armor value, and therefore stacks additively with other armor bonuses.
For example, a Valkyr with a max rank Steel Fiber, 130% Ability Strength, and while using Warcry increases her armor to: Base Armor × (1 + Armor Mods + Warcry Modifier × (1 + Strength Mods)) = 600 × (1 + 1.1 + 0.5 × (1 + 0.3)) = 1,650
Allies affected by Warcry will not have its buffs dispelled upon entering the field of a Nullifier Crewman. However, if Valkyr herself enters a Nullifier field or falls out-of-bounds, Warcry will be dispelled from the entire squad.
Subsuming Valkyr to the Helminth will offer Warcry and its augments to be used by other Warframes.
However, Subsumed Warcry's attack speed bonus is reduced to 9% / 12% / 15% / 30%.
By combining a fully ranked Warcry with a Sentinel with Coolant Leak, melee enemies (particularly the melee-focused Infested) will be severely slowed down.
Very useful in Defense missions, as enemies are slowed down and the Artifact's armor is greatly enhanced.
Valkyr'sWarcry (2 ) increases the armor of all friendly units within range by 50%, or up to 142% with maximized Ability Strength. This bonus is calculated additively with other base armor multipliers, such as Steel Fiber. A Valkyr with a max rank Steel Fiber and unmodified Ability Strength increases her armor according to the following equation:
Wukong and his twin become invulnerable and defy enemies to attack. All damage is captured, stored, and dealt back in a single furious strike of Wukong's staff.
Bonus Armor is then granted relative to the damage captured.
Wukong expends 50energy to engage a defiant stance while priming his Iron Staff, becoming Invulnerable to damage and new Status Effects, increasing his Threat Level to taunt enemies into attacking him, and reducing his Movement Speed by 50% for 2 seconds. Any damage Wukong takes while in this stance is absorbed and multiplied by 4 / 5 / 6 / 7.5, then stored. After the invulnerability period expires, Wukong cleanses himself of any negative Status Effects, spins in place while elongating his staff and deals ? / ? / ? / 250Impact damage plus the stored damage and Ragdoll to all enemies within a radius of 7 / 8 / 10 / 12 meters. The spin can be executed earlier by pressing the ability key again (default 3 ) or using melee attack.
After executing his spin, Wukong gains a variable Armor bonus lasting for 15 / 18 / 20 / 25 seconds or until Defy is recast; Defy armor bonus value depends on the damage absorbed during the taunt, with the stored amount multiplied by 0.8 / 1 / 1.2 / 1.5 times to grant a minimum of 50 armor points, up to a maximum of 1,500 armor points.
Armor bonus is removed if Defy is recast before it expires.
While the armor bonus is active, a stylized armor bonus counter appears above the ability icons.
Ability Synergy: When activating Defy with an active Celestial Twin, the twin engages in Defy, gaining the same increased Threat Level, invulnerability, damage absorption attack, and armor bonus.
Wukong cannot cast other abilities, perform parkour Maneuvers or general interactions while channeling this ability.
Subsuming Wukong to the Helminth will offer Defy and its augments to be used by other Warframes.
However, Subsumed Defy's armor bonus is capped at 750.
Wukong gains an armor bonus based on how much damage he absorbs. Minimum armor bonus is 50 while the maximum is 1,500, not affected by mods.
Oberon's Reckoning (4 ) can be modified with the Hallowed Reckoningability augment, which increases armor by a fixed value of 250 at max rank. Because this is a fixed value and not a percentage, it provides a greater protection to frames with minimal armor.
Rhino'sRhino Charge (1 ) can be modified with the Ironclad Chargeability augment, which increases his armor by 50%, or 142% with maximized Ability Strength, for each enemy hit. This bonus is calculated multiplicatively with other armor modifiers, such as Steel Fiber. A Rhino with a max rank Steel Fiber and unmodified Ability Strength that has charged through 5 enemies increases the armor according to the following equation:
In the above example, using Ironclad Charge against 5 enemies increases Rhino's damage reduction from 57.08% at 399 armor to 82.32% at 1396.5 armor.
Neglecting damage type modifiers, the relative increase in effective health from this mod is exactly proportional to the armor increase. Let us call the effective health, nominal health, armor, and effective health multiplier, and use to denote the discrete increase in some variable , then:
Now we first find the change in as a result of a change in , and then the change in as a result of the change in . The total change in is the sum of these two changes:
Now ignoring any increases in the nominal health (i.e. ):
Since is a constant we end up with effective health being proportional to armor:
Where most algebraic simplification was omitted and to make the notation cleaner, we have set:
It is also worth noting that this is only including individual, independent variations in and . If we were to vary them at the same time, a different and much more involved analysis has to be carried out.
In-Depth Analysis
Let us begin by redefining our variation in the arbitrary variable as . This is purely due to convention and is just a "relabeling".
Given as a function of and (written more compactly as ) we need to find . Therefore, we carry on by considering the sum of and its variation in terms of and with their respective variations and then isolating the variations
This equation is the variation equation we wanted; it is the same as the one obtained in the first analysis but with the extra correction term .
When varying the terms independently, this term will evaluate to zero (since one of the variations would be zero) and we recover the equation from the previous analysis, and all the results that follow from it. It is good to note that at the moment, this equation is currently unnecessary for most of the applications it has in-game since the preceding equation is pretty much always sufficient. At the moment, the game has no circumstances where the nominal health is a function of its armor and vice versa, this is more for mathematical rigor.
For example, for Warframes with the common base armor value of 125, a maxed Steel Fiber increases effective health by only about +32.4%, whereas the benefit of a maxed Vitality at level 30 is +246.7%. Valkyr, at 600 base armor, still only gets +73.3% out of a maxed Steel Fiber. However, the effective health increases from Steel Fiber apply as gains from sources of healing—that is to say, increasing armor increases the effective healing received, whereas simply increasing max nominal health does not.
Metal Fiber is the equivalent mod for Sentinels and MOAs, while Kavats and Kubrows can increase armor via Link Fiber, as well as via the Kavasa Prime Collar for the latter. Link Fiber increases their armor by a percentage of the Warframe's total armor, which means that equipping Steel Fiber or Armored Agility on a Warframe directly increases the armor of its Kavat or Kubrow companion; the Kavasa Prime Collar gives a flat +100 armor bonus.
Warframe Armor and Effective Health[]
Unlike health and shield, a Warframe's base armor doesn't change as it advances from Rank 0 to Rank 30, with the exception of Nidus, Lavos, and Kullervo.
This calculator feature is sunsetted on the wiki thus some of these calculations may be depreciated. Stats are stored on MediaWiki:Calculator.js. It may not see further updates, but will be present on articles for the time being since some people still find use for them. See User blog:Cephalon Scientia/Sunsetting of Maximization Calculators for more details.
Error: JS unable to load. If you can read this consider activating javascript or changing to a device that supports javascript.
Abilities Benefiting from Armor[]
Some abilities have values which are increased by the armor of the Warframe casting them. These are outlined below:
Rhino expends 50energy to harden his skin, receiving Overguard with 400 / 600 / 800 / 1200 base health. Rhino's total armor multiplied by ? / 125% / 175% / 250% is also added to Overguard. Upon activation, Iron Skin is invulnerable for 1.5 / 2 / 3 / 3 seconds, during which all incoming damage is absorbed and added to the Overguard.
During the 3 seconds period Rhino is still vulnerable to crowd control effects.
Iron Skin's health uses the following expression: Modified Health = (Base Health + (Armor Multiplier × Base Armor × (1 + Armor Mods))) × (1 + Ability Strength) + Absorbed Damage.
Note that the base armor value is different between Rhino and Rhino Prime; while Rhino has 240 Base Armor, Rhino Prime has 290 Base Armor.
As an example for Rhino:
With a maxed Steel Fiber and Intensify, a Rank 3 Iron Skin cast by Rhino will have an initial health of (1200 + (2.5 × 240 × 2)) × 1.3 = 3,120 before absorbing damage.
Modifying that equation for Rhino Prime:
With a maxed Steel Fiber and Intensify, a Rank 3 Iron Skin cast by Rhino Prime will have an initial health of (1200 + (2.5 × 290 × 2)) × 1.3 = 3,445 before absorbing damage.
Ability Synergy: While Iron Skin is active, damage from Rhino Charge will have a 100% status chance for Blast effects.
For Rhino Prime, Iron Skin's visual effects will take into account the chosen accent color.
Iron Shrapnel is a Warframe Augment Mod usable in both PvE and Conclave for Rhino's Iron Skin that when active allows it to be detonated by pressing the ability key (default 2 ), unleashing a radial AoE attack that deals a portion of its remaining health as Puncture damage.
With a Streamline or Fleeting Expertise mod, Rhino can cast Iron Skin immediately after the first Energy Drain tick in order to give himself a "shield" of sorts.
It is possible to gain a significant amount of health for Iron Skin by standing in the path of a Death Orb beam during the invulnerability phase. Be warned however, as the beam can quickly deplete said health if the player does not move out of the way once the invulnerability phase ends.
Using Rhino Charge with Ironclad Charge installed before casting Iron Skin can significantly boost its health by boosting the armor.
By this method, you can easily reach over 50k of Iron Skin health by charging into a group of enemies when invested in armor and ability strength.
Ironclad Charge's armor bonus is applied to Iron Skin as long as Iron Skin's casting was started in the duration of the buff.
Iron Shrapnel can help by providing the ability to re-cast Iron Skin at any given time, even with extremely lowered ability duration as long as you cast Iron Skin right after a Rhino Charge.
Arcane Tanker can significantly provide armor boost, effectively increasing Iron Skin's health by roughly over 100%.
Bugs
Migrating hosts will completely remove Iron skin, regardless of the level it was at.
If Rhino manages to activate Iron Skin as he falls backwards and enters bleedout, his bleedout timer will reach zero and he will never die. He will remain in bleedout until he is revived.
Using Iron Skin while in a conveyor would make Rhino immovable.
Base health and armor multiplier are affected by Ability Strength.
Iron Skin's health uses the following expression when accounting for Ability Strength: Modified Health = (Base Health + (Armor Multiplier × Base Armor × (1 + Armor Bonus))) × (1 + Ability Strength) + Absorbed Damage.
Note that the base armor value is different between Rhino and Rhino Prime; while Rhino has 190 Base Armor, Rhino Prime has 275 Base Armor.
As an example for Rhino:
With a maxed Steel Fiber and Intensify, a Rank 3 Iron Skin cast by Rhino will have an initial health of (1200 + (2.5 × 190 × 2.1)) × 1.3 = 2,856.75 before absorbing damage.
Frost expends 50Energy to creates a protective globe of ice with a radius of 5 meters, a base health of 1500 / 2500 / 3000 / 3500, and additional health equal to 500% of Frost's base armor bonuses. Upon activation, the globe is invulnerable for 1 / 2 / 3 / 4 seconds. Incoming damage that is absorbed during the invulnerability period is converted into health and added to the globe's health.
Snow Globe's health uses the following expression when accounting for Ability Strength: Modified Health = { Base Health + Armor Multiplier × [ Frost's Base Armor × (1 + Base Armor Bonus) + Additional Armor) ] } × (1 + Ability Strength) + Absorbed Damage
For example, with a maxed Steel Fiber and Intensify, rank-3 Snow Globe will have an initial health of { 3500 + 5 × [ 300 × (1 + 1.1) ] } × (1 + 0.3) = 8,645 before converting absorbed damage.
While active, a health counter becomes visible on the ability icon that tracks the health percentage of the most recently placed Snow Globe from 100% to 0%.
Frost and his allies do not contribute to Snow Globe's health gain by shooting the globe during the invulnerability period.
Upon activation, Snow Globe freezes enemies within its radius over a duration of 3 seconds while violently pushing them outwards. If the enemies hit obstacles, they can be dealt as much as 50% of their maximum health as True damage. Enemies that enter the globe will have their attack/movement speed reduced by 40% / 50% / 60% / 67%.
Most gunfire, both friendly and hostile, is blocked from entering the globe (gunfire can exit the globe normally). Abilities that are not area-of-effect in nature (e.g., Shuriken) are blocked as well.
Snow Globe can be recast multiple times, but there are restrictions on the number of globes that can be created in the environment.
A maximum of 4 separate Snow Globes can be cast at any given time. Casting Snow Globe after reaching the maximum will remove the oldest globe.
Casting Snow Globe while inside an existing globe will remove the older globe and combine the total remaining health values of both globes for the newer one. The invulnerability period is reactivated for each cast.
Snow Globes created inside existing globes do not count toward the maximum number of instances, and Snow Globe's health can stack with repeated casts until reaching a maximum combined health of 1,000,000.
Ability Synergy: Casting Freeze onto the exterior of a globe will destroy it, triggering an icy explosion that deals Freeze's base Cold area damage in an area of effect.
The damage does not diminish with distance and bypasses obstacles in the environment.
Place over a cryopod in defense missions to shield it from all incoming fire.
Maximized Ability Duration will reduce the globe's radius to 1.7 meters, allowing the globe to protect a cryopod without obstructing friendly fire.
Maximized Ability Range will create a snow globe that can cover large areas, making it ideal for slowing down large numbers of enemy units or melee-oriented Bosses. Bear in mind however that this strategy runs the risk of incapacitating players wielding explosive weapons, and generally makes it difficult for players outside the globe from attacking enemies inside it. As such, use this strategy at your own discretion.
When a teammate is downed, place a Snow Globe over them to protect you while reviving.
When facing a boss with ranged attacks, do not place a Snow Globe on it. Instead, place it where your team is to protect them from incoming damage.
The particle effect inside the globe can distract players' vision. Having a black energy color will remove this particle effect entirely, allowing better vision inside the globe.
Recasting the ability after 4 seconds while remaining inside the Snow Globe will allow to sustain an impenetrable Snow Globe, that will grow stronger and stronger. This is due to the fact that it absorbs the enemy fire into its health and adds this health to the next Globe, as long as it is cast inside the first one.
Particularly useful in T4 Defense, since the enemies will quickly reach a level where it does not matter how much base health your Snow Globe has.
Snow Globe's ability to temporarily freeze and push away enemies can be an effective way to rapidly clear a large safe area to revive teammates or remove enemies attacking a defense objective.
Using Freeze to detonate a Snow Globe can also be done while inside another globe. This will not affect the globe you are in. If multiple globes overlap, it is possible to shatter a globe which protrudes into another globe by aiming at the part inside your globe.
It is possible to detonate the Snow Globe that you are in in some Corpus or Void missions by bouncing Freeze off the Bubble of a Nullifier Crewman.(Results May be unpleasant)
Bugs
While using Helios, the Deconstructor projectile can be caught outside the globe and will not return to Helios unless Helios exits the globe.
The globe can sometimes push enemies through walls and could soft-lock the game if the target is required. This has a higher chance of happening if the enemy is touching a wall.
Base health and armor multiplier are affected by Ability Strength.
Snow Globe's health uses the following expression when accounting for Ability Strength: Modified Health = (Base Health + 5 × Frost's Base Armor × Base Armor Bonus) × (1 + Ability Strength) + Absorbed Damage.
For example, with a maxed Steel Fiber and Intensify, rank-3 Snow Globe will have an initial health of (5000 + 5 × 300 × 2.1) × (1 + 0.3) = 10,595 before converting absorbed damage.
Nezha expends 75energy to summon a fiery ring that encircles him, granting immunity to Status Effects and 90%Damage Redirection towards the ring's health pool. The ring starts with 500 / 650 / 800 / 1000 base health, to which 115% / 125% / 175% / 250% of Nezha's total armor is added as bonus health. Upon activation, the ring is invulnerable for 3 seconds, during this time all incoming damage it takes is multiplied by 250% and added to its total health. Enemies that wander within 1.25 / 1.5 / 1.75 / 2 meters of Nezha are continuously Staggered and dealt 50 / 75 / 100 / 125Slash damage every second. Warding Halo cannot be refreshed while it is active, and only expires when its health is depleted or when it is dispelled.
Warding Halo's health uses the following expression: Modified Health = (Base Health + Armor Multiplier × (Health Conversion Armor + Nezha's Base Armor × (1 + Armor Bonus)) + Absorbed Damage × Absorption Multiplier) × (1 + Ability Strength)
As an example, with a maxed Steel Fiber and Intensify, and one stack on Health Conversion, a rank-3 Warding Halo will have an initial health of (1000 + (2.5 × (450 + 190 × (1 + 1.1)))) × (1 + 0.3) = 4,059.25 before absorbing damage.
While active, a health counter is displayed on the lower-right of the HUD, above the ability icons, indicating how much damage absorption is left.
Slash damage instances immediately affect enemies as they enter the stun radius.
Cast animation of ~1 second, affected by Casting Speed.
Casting this ability makes Nezha stop all other actions, including movement. However, players can perform a running slide and hold it before casting in order to maintain momentum during the animation.
Upon expiring, Warding Halo releases, inflicting all surrounding enemies with a guaranteed Heatstatus effect, and making Nezha invulnerable for 1 second.
Warding Halo cannot be cast while active, but can be recast during this expiry invulnerability period.
Damage taken from the last hit which exceeds the health of Warding Halo will still transfer over in full to Nezha's health, potentially killing him (if strong enough), before the 1 second invulnerability can take effect.
Blocking with a melee weapon will not reduce damage taken to Warding Halo's Health, but will reduce damage taken from the 10% that is not absorbed by Warding Halo.
Using Health Conversion to gain armor stacks before casting Warding Halo, greatly increases its base health without requiring as much Power Strength.
Be careful against enemies like Mutalist Osprey. Their toxin cloud for example deals damage to your Warding Halo and to your HP, bypassing your shield. This can kill you very easily, even with a full Warding Halo.
Base health, armor multiplier, absorption multiplier and damage per second, are affected by Ability Strength.
Warding Halo's health uses the following expression when accounting for Ability Strength: Modified Health = (Base Health + Armor Multiplier × Nezha's Base Armor × (1 + Base Armor Bonus)) × (1 + Ability Strength) + Absorbed Damage.(More testing and confirmation needed)
As an example, with a maxed Steel Fiber and Intensify, a rank-3 Warding Halo will have an initial health of (900 + 2.5 × 175 × 2.1) × 1.3 = 2,364.375 before absorbing damage.
Reshaping the surrounding terrain, Atlas expends 50energy to erect a Bulwark made of stone with a base health of 2850 / 3150 / 3450 / 3750 and additional health equal to 500% of Atlas' modded armor. Upon activation, the bulwark is Invulnerable for 1 / 2 / 3 / 4 seconds; incoming damage that is absorbed during the invulnerability period is converted and added to the bulwark's health. After the invulnerability phase, whenever the Bulwark receives damage, the amount of health lost multiplied by 1 times is converted into Slash damage and inflicted on all enemies within ? meters from the Bulwark. Atlas can maintain only 1 bulwark at a time.
The bulwark's health uses the following expression when accounting for Ability Strength: Modified Health = (Base Health + 5 × (Atlas' Base Armor × (1 + Armor Mods)) × (1 + Strength Mods) + Additive Armor) + Absorbed Damage.
For example, with a maxed Steel Fiber and Intensify, rank-3 Tectonics will produce a bulwark with an initial health of (3750 + 5 × 450 × 2.1) × (1 + 0.3) = 11,017.5 before converting absorbed damage.
While active, a health counter becomes visible on the ability icon that tracks the bulwark's health percentage from 100% to 0%. Placing the HUD's targeting reticle over the bulwark will also display its health bar.
Atlas and his allies do not contribute to a bulwark's health gain by shooting it during the invulnerability period.
Reactivating the ability will cause the bulwark to compact into a Boulder that rolls towards the current direction of aim, dealing 150 / 300 / 450 / 600Impact damage per second to enemies that are dragged along its path. After rolling 15 meters or hitting an environmental object, the boulder will explode and inflict 250 / 300 / 350 / 500Puncture damage to enemies within a radius of 3 / 3 / 4 / 5 meters.
Enemies affected by the rolling damage are ragdolled.
The explosion damage does not bypass obstacles in the environment and diminishes with distance.
Ability Synergy: Casting Petrify on the Bulwark hardens it into a Petrified Bulwark. Boulders created from Petrified Bulwarks gain 200% rolling velocity and have their rolling distance increased to 30 meters. They also inflict 200% bonus damage on rolling and explosion damage.
Bulwarks and Boulders become silver-colored and metallic when petrified.
As the 3 bulwarks created by Tectonic Fracture cannot become boulders, Petrify has no effect on them.
Casting Petrify on a moving boulder will not grant it bonuses.
While the bulwark is capable of blocking most hostile gunfire, it does not provide cover from area of effect damage, including the explosive attacks of Grineer Bombards and Napalms.
Bulwarks and Boulders have collision detection for enemies only. Atlas and allies can move through Tectonics' objects unobstructed.
Enemies will attack the Bulwark if it obstructs their path. Though some enemies may simply run up against it.
Upon transforming the Bulwark into a Boulder, Tectonics can be recast immediately to create a new Bulwark.
The Bulwark will spawn on the same elevation as Atlas, but the bulwark does have gravity and will fall down if created in the air or without a surface directly underneath it.
Tectonic Fracture is a Warframe Augment Mod for Atlas that modifies Tectonics to allow additional simultaneous walls, but sacrifices the ability to turn them into offensive boulders.
Can completely block off narrow enough areas or chokepoints from enemies without limiting the movement of allies.
The Boulder can be used to push down long corridors, but care should be taken when aiming as the Boulder will detonate when it hits a side wall or standing obstacle.
The Bulwark's cover can assist in reviving allies who have fallen to a frontal threat.
Note that Bulwark's protection is less effective against enemy AoE attacks.
Enemies will not change their motion to sidestep a rolling Boulder. This makes the boulder very effective against lines of charging foes.
Although it does not boast above average threat level, The Bulwark can be used to draw fire away from the player as long as it is closer to the enemy than the player is.
This is most effective against fast and threatening melee attackers like Thrax Centurions or many infested, which can often force the player into the air to avoid them. Placing a Bulwark can completely halt this attack provided these enemies get close enough to start attacking it instead.
Thrax Centurions specifically can be completely neutralized by placing a wall as, for unknown reasons, they will focus on the wall but not attack it. This potentially means they can be indefinitely taken out of the fight as long as the wall is not destroyed or recast.
The bulwark's health uses the following expression when accounting for Ability Strength: Modified Health = (Base Health + 5 × (Atlas' Base Armor × (1 + Armor Mods)) × (1 + Strength Mods) + Additive Armor) + Absorbed Damage.
For example, with a maxed Steel Fiber and Intensify, rank-3 Tectonics will produce a bulwark with an initial health of (3750 + 5 × 450 × 2.1) × (1 + 0.3) = 11,017.5 before converting absorbed damage.
Summon two elemental stone brawlers to the melee. Summoning petrifies enemies in close proximity to Atlas. When finished, Rumblers collapse into a pile of healing Rubble.
Misc:
2 (number of Rumblers) 10 s (stone duration) 0.5 to 1.5 m/s (min-max speeds) 1 (Rubble dropped on death per Rumbler) ≤ 50 (Rubble health/armor given)
Atlas expends 100energy to summon his 2 earthly elemental golems as he instantly petrifies all enemies into stone within a 3 / 4 / 5 / 6 meter radius for 10 seconds. Once summoned, the Rumblers will roam the battlefield seeking nearby enemies to attack. They last for 15 / 20 / 30 / 45 seconds unless they are killed or manually detonated.
Petrifying occurs instantly when Atlas begins his casting animation.
Each Rumbler possesses 500 / 750 / 1000 / 1200Health, 50 / 150 / 250 / 500Armor, and a speed multiplier of 1. Rumblers inflict 800 / 1000 / 1400 / 2000Impact damage and stagger the target backwards with each melee attack; they can occasionally throw stones that home in on enemies to inflict 200 / 250 / 350 / 500Impact damage and ragdoll enemies hit.
Physical size of each Rumbler along with their health, armor, and all sources of damage are affected by Ability Strength. Health and armor are also affected by Warframe health, shield, and armor mods.
Rumbler health uses the following expression when accounting for Ability Strength: Modified Health = Health × (1 + Health Gain From Leveling + Health Mods + Shield Gain From Leveling + Shield Mods + Strength Mods).
For example, with Vitality, Redirection, Intensify, and Atlas all at max rank, rank-3 Rumblers will have a modified health of 1200 × (1 + 2 + 4.4 + 2 + 4.4 + 0.3) = 16,920.
Atlas' rank influences Rumbler health as the "Health Gain" and "Shield Gain" in the expression are referring to bonuses applied to Atlas' respective base stats. As Atlas at max rank will have 300 health and 300 shields (from 100 health and shields at rank 0), the +200% health and shield increase will also apply to the Rumblers' health.
Rumbler armor uses the following expression when accounting for Ability Strength: Modified Armor = Armor × (1 + Armor Multiplier + Ability Strength) + Additional Armor.
For example, with a maxed Steel Fiber and Intensify, rank-3 Rumblers will have a modified armor value of 500 × (1 + 1.1 + 0.3) = 1,200.
Speed multiplier can not fall below 0.5 or exceed 1.5 under any circumstances.
If the ability is reactivated or if Atlas becomes incapacitated, active Rumblers will self-destruct and inflict 500 / 750 / 1000 / 1250Blast damage to enemies within 3 / 4 / 5 / 6 meters.
Damage does not bypass obstacles in the environment and diminishes with distance.
Ability Synergy:
Killing petrified enemies or self-destructing Rumblers will drop 1 piece of Rubble for Atlas to pick up, restoring 50 health or provides 50 bonus armor.
Rumbler Rubble provides reduced amounts of health or armor if Rumblers sustained damage to their health before expiring.
Casting Petrify on injured Rumblers will instantly restore their health to 100%.
While melee kills by the Rumblers are considered melee kills by Atlas, they do not contribute to the Melee Combo Counter.
Rumblers have collision detection for enemies only. Atlas and allies can move through Rumblers unobstructed.
The number of active Rumblers is displayed in the HUD beside Atlas' shield and health indicators, and waypoints are displayed onscreen for each active Rumbler.
If a Rumbler enters a Nullifier bubble, it will have its health drained.
Titanic Rumbler is a Warframe Augment Mod for Atlas that modifies Rumblers to make one larger Rumbler with more health, damage, and melee range, and will occasionally increase its Threat Level, instead of the normal two Rumblers. The recast ability to remove Rumblers is replaced by the taunt and a slam attack that knocks down all enemies within 15 meters.
Create an expanding ring of molten glass that slowly crystallizes enemies who enter. When the expansion is complete, the ring hardens to block weapons fire. The ring draws extra strength from the health and shields of crystallized enemies. Use Shattered Lash to smash the ring and send razor-sharp glass flying outward.
Gara expends 75Energy and coats herself in a shell of hardened glass, becoming immobile and Invulnerable to damage as she unleashes a radial ring of molten glass that expands outward and downward. The molten glass ring's initial horizontal radius from Gara is 2 meters, which expands horizontally at a rate of 3 meters per second over 2 / 2.25 / 2.75 / 3 seconds, up to a maximum horizontal radius of 8 / 8.75 / 10.25 / 11 meters. Ring expansion initially drains 3 energy per second, which ramps up to 5 energy per second over the course of expansion. The molten glass ring's initial height is 3 meters high, which expands downward up to a maximum height of 12 meters.
Molten glass bypasses all entities, obstacles, and terrain as it expands.
When the molten glass ring is created, its base is aligned with Gara's feet to ensure that the initial ring height is about Warframe height.
Ring height expands downward much faster than ring horizontal radius, reaching full height before expansion time completes.
Mass Vitrify's glass undergoes two distinct phases with diverse effects on Gara, allies, and enemies:
Enemies that contact the molten glass are crystallized over 3 seconds, slowing in movement and attack speed until completely solidified in place for 10 / 12 / 14 / 16 seconds. Crystallized enemies receive 20% / 30% / 40% / 50%Damage Vulnerability. Each enemy crystallized contributes extra health to the barrier formation phase, based on a portion of their maximum Shields and Health.
Crystallize converted health is affected by both Ability Strength and Armor mods such as Steel Fiber equipped on Gara.
If Gara or allies are affected by a Radiation proc, allies may also be vitrified. This includes Sortie Defense Operatives, Syndicates Operatives, and Kavor Defectors in addition to fellow Tenno.
On death, crystallized enemies shatter into glass with visual and sound effects.
Upon pressing the ability key again (default 4 ), when maximum horizontal radius is reached, or when Gara runs out of Energy, Gara sheds her glass shell as the molten glass ring solidifies into a hardened glass barrier.
The glass barrier consists of a circle made out of 12 individual segments, each possessing 500 / 750 / 1000 / 1600 base health, plus Gara's armor value multiplied by 500%. For each enemy affected by the crystallization phase, Mass Vitrify also converts a portion of their maximum shields and health into extra health for the glass barrier segments. When a segment's health is depleted, it explodes outward and damages all enemies for 500 / 600 / 700 / 800 damage in a range of 5 / 6 / 7 / 8 meters. Glass barrier lasts until all segments are destroyed or when Mass Vitrify is recast.
Barrier segment health uses the following expression: Modified Health = (Base Health + 5 × (Base Armor × (1 + Armor Mods) + Additional Armor)) × (1 + Strength Mods) + Absorbed Health
With a maxed Steel Fiber and Intensify a wall segment would have (1600 + 5 × (150 × (1 + 110%))) × (1 + 30%) = 4,127.5 Health before accounting for converted health from crystallized enemies (values resulting from intermediate calculations are rounded down to the nearest whole number).
Minimum Health added from each enemy affected by the crystallization phase is Health Added = (320 + 5 × (Base Armor × (1 + Armor Mods) + Additional Armor)) × (1 + Strength Mods)
Maximum Health added is Health Added = (Max Enemy Health + Max Enemy Shields) ÷ 10
Whichever formula results in a greater value is used for health added.
During the crystallization phase, the number of total crystallize converted health is displayed beside the shield and health indicators on the HUD, as a buff icon with the number of converted health below the icon.
The number of intact glass barrier segments is shown on the ability icon while at least 1 segment exists.
Player and AI interaction with the glass barrier have notable differences:
Ally players, allied AI, ally weapon fire, and Warframe abilities can pass through unhindered. However, some friendly projectile-based weapons are deflected when striking either side of the wall, such as Miter and Arca Plasmor.
Some allies such as hacked Eidolon Lures and Sortie Defense Operatives cannot pass through.
Most enemies are blocked by the glass barrier from moving and attacking through it, including Kuva Clouds. However, most bosses and the Eidolon Teralyst can pass through unhindered.
Area of effect attacks (e.g., Shockwave MOAs and Bombards) and weapons with innate punch through (e.g. Tusk Grineer units) can hit through the glass barrier.
Ability Synergy:
Gara's Passive allows casting abilities to have a 15% chance to Blind enemies within 12 meters for 10 seconds, exposing them to Melee Finisher attacks. Blind chance increases by 20% until the blind triggers.
If Gara strikes her own Mass Vitrify glass barrier with Shattered Lash's glass longsword, the barrier is shattered and destroyed in an explosion of glass fragments that inflicts Shattered Lash's damage and500 / 600 / 700 / 800 damage to all enemies within 8 / 10 / 12 / 15 meters from the barrier's exterior surface, as well as all enemies inside the barrier.
Shattered Lash's damage is affected by equipped melee mods including:
Shattered Lash is not affected by the equipped melee weapon's stats and innate effects.
Resulting explosion has infinite punch through throughout its entire effective range and can hit enemies behind walls.
Mass Vitrify's total damage uses the following expression when accounting for Ability Strength: Total Damage = [Shattered Lash Base Damage × (1 + Base Damage Bonus) × (1 + Ability Strength)] + [Mass Vitrify Explosion Damage × (1 + Ability Strength)].
As an example, with a maxed Steel Charge, Pressure Point, and Intensify, a rank-3 Mass Vitrify will have (800 × 2.8 × 1.3) = 2,912Puncture or Slash damage + (800 × 1.3) = 1,040 damage = 3,952 total damage before resistances.
Explosion is radial and not dependent on the direction Gara strikes Mass Vitrify with Shattered Lash. Gara must strike a currently intact part of the barrier, but the explosion will occur even around broken segments.
Casting Mass Vitrify will also refresh the duration of Splinter Storm on Gara, as well as any affected allies that contact the molten glass during its expansion.
If Mass Vitrify's barrier is destroyed by Shattered Lash and Splinter Storm is within the explosion radius of the barrier, 50% of the glass fragments' damage is permanently added to Splinter Storm's damage per second until its duration expires.
Absorbed damage is also affected by equipped melee mods including:
Base damage (e.g., Steel Charge), elemental damage, and physical damage mods.
As Shattered Lash's damage is not comprised of Impact damage, physical damage mods that affect Impact have no effect on absorbed damage for Splinter Storm.
Absorbed damage is calculated after additional damage from mods.
Absorbed damage can stack from repeated Mass Vitrify explosions inside Splinter Storm's radius.
Splinter Storms on Gara herself and allies can absorb damage from Mass Vitrify's explosion, while storms on affected enemies do not.
Initial casting animation and release animation are affected by casting speed, from mods such as Natural Talent and Speed Drift.
Can be recast while active to expand molten glass and create a new barrier. Only 1 barrier may remain active per player.
Molten glass, hardened glass, and crystal tint color and particle effects energy color are affected by Gara's chosen Warframe energy color.
As with most abilities, if a Nullifier Crewman bubble touches the glass, it will end the ability prematurely if casting, and instantly shatter it without dealing any damage to surrounding enemies if already hardened. However, enemies hardened with glass will only harden prematurely if the nullifier touches them.
Tips & Tricks
While Mass Vitrify is a potent defensive tool, Gara players can convert it into an offensive tool by investing in Ability Range and Efficiency, to increase the effective range of the resulting shrapnel explosion and reduce casting cost for repeated use. Equipping a melee damage boosting Arcane such as Arcane Blade Charger, Arcane Fury, Arcane Arachne and Mods like Steel Charge and Vigorous Swap can further power up the resulting shrapnel explosion from Shattered Lash's damage, boosted by melee weapon mods like Proton Snap, Boreal's Contempt, and Nira's Contempt, Syndicate mods Blade of Truth, Justice Blades, and Toxic Blight, Corrupted Mods Spoiled Strike and Corrupt Charge, also Melee damage buffs from Melee weapons like the Lesion synergizing with Mass Vitrify.
A defensive play style with Gara can be effective taking into consideration that Mass Vitrify scales with enemy armor values. The more enemies caught inside the ring, the stronger the glass walls and effectively CC'ing a large area. This can be strong enough to stop very high level Demolisher and Acolytes if enough enemies are vitrified inside the ring. The Armor value of Mass Vitrify is displayed with an icon onscreen, and can be boosted with Armor boosting Arcanes Arcane Ultimatum, Arcane Tanker,Arcane Guardian, Operator Focus skill Stone Skin Helminth ability Parasitic Armor, Chroma's Cold Elemental Ward and Vex Armor, Oberon's Renewal synergy with Hallowed Ground, Wukong's Defy, Mods like Mecha Pulse.
Synergizes well with Magus Anomaly to bring in a group of enemies to vitrify and build stronger walls. Scaling infinitely. Perfect for choke points.
Enemies Vitrified, take 50% more damage from all sources.
Mass Vitrify will refresh Allies Splinter Storm timers if they are passing through while Mass Vitrify is cast.
Bugs
Casting Mass Vitrify in the air often delays the effect of refreshing Splinter Storm's duration until Gara lands on the ground, or if done from extreme heights, not refresh it at all.
Interrupting the expansion quickly after casting might sometimes result in a "fake" barrier which does not block damage and can not be detonated with Shattered Lash. This can also occasionally happen without voluntarily stopping the expansion.
Operators that come into contact with the ring while it's expanding are slowed down.
Barrier segment base health and segment explosion damage are affected by Ability Strength, while crystallize converted health is affected by both Ability Strength and Armor mods such as Steel Fiber equipped on Gara.
Barrier segment health uses the following expression: Modified Health = (Base Health + (5 × Base Armor × (1 + Armor Mods))) × (1 + Strength Mods)
With a maxed Steel Fiber and Intensify a wall segment would have [2225 + (5 × 125 × (1 + 1.1))] × (1 + 0.3) = 4,598.75 Health before accounting for converted health from crystallized enemies (values resulting from intermediate calculations are rounded down to the nearest whole number).
Enemy base armor values are displayed under the codex and infobox, but scale to the enemy's level. Generally, only Grineer and boss enemies have armor, while the only Corpus and Infested units to possess armor are Bursa units, Oxium Osprey, and the Juggernaut. When the enemy health bars are yellow, armor is in effect and damage will be reduced.
For armor, the ranges of level differences at which scaling transitions from exponential growth to a plateau is between 70 & 80. The formula by which enemy armor scales is as follows:
For Eximus enemies the same curves are used for scaling with smoothstep interpolation between level difference 70 and 80, but the base armor is also increased between certain breakpoints. Note that because base armor changes with level, this also means that the number of Shattering Impact hits needed to strip armor will change with level too.
Where the Armor Multiplier is the value that multiplies an enemy's base armor to its current armor.
Current armor scaling at Base Level = 1.
Removing Enemy Armor (Armor Stripping)[]
Most armor strip effects removes a percentage of the maximum value. For Heat and Corrosive, it is based on the current value, and thus has diminishing returns. Warframe abilities are based on the total; for example, an ability that strips 50% armor will remove it in just two casts.
Enemies cannot regenerate armor if all or a portion of their armor was permanently stripped. However, if their armor is reduced to 0, they completely lose their Ferrite Armor/Alloy Armor/Infested Sinew, which in turn removes their vulnerability to the +75% Corrosive / +75% Radiation / +50% RadiationDamage Type Modifier bonus respectively.
Percentage From Total Armor[]
Mods[]
Corrosive Projection is an Aura mod that decreases armor by 18%, up to 72% when paired with a full squad.
Sharpened Claws is a Kavat mod that allows the Kavat to perform a highly damaging strike while removing 120% armor.
Vicious Bond is a Companion mod that allows the Companion to remove 15% armor with melee attacks
This ability augment makes Shuriken find weaknesses in the target's armor, temporarily reducing its armor values by 70% for 8 seconds at max rank. Ability Strength increases debuff percentage, removing all armor if Ability Strength is increased above 143%.
This ability augment makes Sonic Boom strain the targets' armor, permanently reducing their armor values by 70%. Ability Strength increases debuff percentage, removing all armor if Ability Strength is increased above 143%.
Converge three streams of raw energy upon a single point, causing a massive reactive blast. The fallout from the blast will strip the armor and shields from all enemies that touch it.
Caliban expends 100Energy to expel 3 concentrated streams of pure energy from his chest core and hands, carving a swathe of energized destruction over a range of 15 / 20 / 25 / 30 meters as he converges them into one toward the location on the aiming reticle. Each stream inflicts 2,500 / 3,000 / 4,000 / 5,000Blast damage to all enemies it contacts. Upon full convergence, the streams collapse into an explosion that inflicts 2,500 / 3,000 / 4,000 / 5,000Blast damage and violently pulls in enemies within a radius of 5 / 6 / 8 / 10 meters and in direct line-of-sight, while leaving behind a field of fallout that envelops the targeted area spanning the same radius as the explosion and lingers for 6 / 9 / 12 / 15 seconds; all enemies that wander within the fallout field lose 20% / 25% / 35% / 50% of their Armor and Shields permanently.
Enemy armor and shields are fully removed at 200%Ability Strength.
Shield strip removes a percentage of the current maximum value, as such it has diminishing returns on subsequent casts against the same enemies. Armor strip, however, is a percentage of an enemy's total, requiring only two casts at base strength to fully strip.
Enemy shields can still regenerate with natural shield regeneration (such as Armis Ulta, Kuva Lich, or Sisters of Parvos) or while affected by regeneration buffs (such as Shield Ospreys), even while inside the fallout field.
Damage from the streams only applies once per cast to enemies. Multiple streams hitting the same enemy will not inflict double or triple the listed damage.
Explosion's line of sight restriction is centered on the middle of the fallout field, regardless if Caliban himself sees the enemy or not. Explosion damage diminishes with distance from the center.
Caliban can freely reorient his aiming reticle during the convergence to sweep the streams along damaging more enemies, then create the fallout field at the end of the casting animation.
Fallout field is created at the first contact point with a solid surface within the stream range, or at the maximum stream range. Fields can be created without a surface and hovering in midair.
Ability Synergy:
Sentient Wrath's damage vulnerability on enemies increases Fusion Strike's damage.
Can be recast while active to create new fallout fields.
Casting Fusion Strike is a full-body animation that stops Caliban's grounded movement and other actions, except reticle and camera movement.
Nullifiers cannot nullify the fields by passing over them or Caliban, and they cannot nullify the effects inflicted by the field.
Tips & Tricks
With one player using Corrosive Projection, 100% armor strip can be achieved at 168% Ability Strength.
Bugs
Fallout zone visual effects are not visible to Caliban when playing as client.
This ability converges three beams that implodes, leaving a field that permanently strips the target's armor by 50%. Ability Strength increases debuff percentage, removing all armor if Ability Strength is increased above 200%.
Dagath expends 100Energy to summon 5 spectral remnants of Rakhali's soul in a cavalry charge formation 5 meters away. During the casting time of 1.5 seconds, Dagath becomes Invulnerable then commands the cavalry of phantom Kaithes to continuously charge forward for 2 / 2 / 3 / 3 seconds. Each spectral Kaithe inflicts 15,000 / 20,000 / 25,000 / 30,000Viral damage and Stagger per 0.15 seconds to all enemies in its path; damage is dealt in full on each interval and continues for as long as enemies remain in physical contact with the phantom Kaithes.
All effects apply to enemies in contact with Kaithes during the summoning animation.
Enemies touched by Kaithes emit a burst of ghostly light on every hit.
Phantom Kaithes charge in a V formation, with the leading Kaithe in the center. Each Kaithe has a sizable hitbox to strike multiple enemies, aided by the stagger effect.
When cast while Dagath is on the ground, phantom Kaithes' formation is aligned with the leading Kaithe summoned on the nearest available horizontal surface, regardless of Dagath's own elevation.
When cast from the air, the Kaithes align toward the exact direction of Dagath's aiming reticle and can fly through the air. If they touch the ground, they charge forward wherever their head is facing and run along the surface, adhering to any changes in the terrain.
Phantom Kaithes will phase through vertical terrain and obstacles as they travel, by visually passing through a ghostly portal aligned with the wall.
Phantom Kaithes damage and break destructible Objects such as crates and resource caches.
Ability Synergy:
Stampede Doomed foes with Rakhali's Cavalry to trigger Phantom Wrath, and induce 20% / 25% / 30% / 35% permanent Shields and Armor reduction. Defense reduction on Doomed foes occurs on everyViral damage instance from individual Kaithes.
Defenses are fully removed at 286% Ability Strength from a single hit. However, because the Cavalry deals multiple instances of damage, far less Strength is necessary, with 143% Ability Strength fully removing defenses after two hits.
Can be recast while active to summon all Kaithes toward a new direction. Previous cavalry charge is removed on recast.
This ability sends forth five spectral horses that charge forward; enemies affected by Doom are permanently stripped of their armor by 35% per hit. Ability Strength increases debuff percentage, removing all armor if Ability Strength is increased above 286%; however because the ability strikes multiple times, far less Strength is needed, with 145% removing all armor from just two hits.
Ember expends 75Energy to slam the ground, creating a wave of fire that expands outwards to a radius of 25 meters. Enemies in direct line of sight of Ember and within range are dealt 66 / 100 / 141 / 200Heat damage with a 100%status chance, have their Armor permanently reduced by 50% - 100%, and suffer Knockdown and are violently pushed back.
Armor reduction per cast is capped at 50% - 100%, achievable with 100%Ability Strength. As such only values below 100% will have effect.
Ability Synergy:
Each cast of Fire Blast decreasesImmolation's rate of heat generation by 2% per second, while also removing50% heat.
Fire Blast's enemy armor reduction scales linearly with Immolation's heat level, with 0 percent heat resulting in the minimum value being removed and 100 percent heat resulting in the maximum.
Has a cast delay of about 0.7 seconds.
Subsuming Ember to the Helminth will offer Fire Blast and its augments to be used by other Warframes.
Armor reduction per cast is capped at 75%, achievable with 100%Ability Strength.
Acolytes will never have their armor reduced by the ability.
This ability creates a wave of fire that expands outwards and permanently reduces the armor of enemies hit by 50% - 100%. The armor reduction depends linearly on the Immolation gauge. A filled gauge will result in the maximum armor reduction.
It will also apply a Heat status effect on enemies, further reducing armor.
Frost expends 100Energy to crash an avalanche down around him, striking all surrounding enemies within 8 / 10 / 12 / 15 meters with a 600%Coldstatus chance. Shortly after, an icy pulse rapidly expands over the area, freezing enemies in place for 5 / 6 / 7 / 8 seconds and permanently reducing their total armor by ? / ? / ? / 60%. When the pulse dissipates, frozen enemies are immediately dealt 800 / 1000 / 1200 / 1500Cold damage. If an enemy dies from the sheer cold, they violently shatter upon death, dealing 100 / 200 / 300 / 400Cold damage to enemies in a 3 / 3.5 / 4 / 4.5 meter radius.
Shatter damage diminishes with distance and bypasses obstacles in the environment.
The armor reduction is applied after ~1 second of the casting animation has passed, but before the damage is dealt.
Recasting on frozen enemies multiple times refreshes the freeze duration.
While frozen, enemies are unable to regenerate Shields.
While the avalanche does not affect Storage Containers, the explosion from frozen enemies does.
Casting Freeze on a target frozen by Avalanche will extend the freeze duration. The effect will expire when Freeze ends or when Freeze's health threshold is reached.
With one player using Corrosive Projection, 100% armor strip can be achieved at 137% Ability Strength.
Avalanche can be used to immobilize large groups of enemies, as even if it does not kill enemies outright it lowers their armor, allowing players to finish off any survivors.
Avalanche staggers enemies back a small distance when cast, this may result in them being out of range for the freeze and subsequent damage when at the edge of the area of effect, so it is important to make sure you group enemies effectively before casting.
This ability can damage enemies through walls. Using Avalanche while pressed against a wall can clear a room without even entering.
Avalanche can hit enemies who are above or below Frost's position.
Scales well against Corpus as freeze does 50% more damage against shields, useful for destroying Corpus being protected by Shield Ospreys.
Avalanche can still serve as crowd control even with low Ability Duration, as the Cold status effects are not affected by mods and will stay on the target even when unfreezing (if the freeze duration is shorter than 6 seconds, that is).
This ability freezes enemies and permanently reduces their armor by 60% for the duration of the effect. Ability Strength increases debuff percentage; at 168% Ability Strength, Avalanche can remove all armor from affected enemies.
Siphon kinetic energy from the area, charging the battery and inflicting Cold Status on nearby enemies. Hold reverses the process, draining the battery and inflicting Heat Status on nearby enemies.
Gauss expends 50energy to manipulate the kinetic energy around him to create an area of extreme temperatures with an initial radius of 6 / 8 / 10 / 12 meters, which gradually shrinks to a final radius of 3 / 4 / 5 / 6 meters and lasts for 6 / 9 / 12 / 15 seconds.
Tap the ability key (default 3 ) to absorb kinetic energy, charging battery power by 10% to inflict a Cold proc on all enemies within range, lasting for a minimum duration of 2.5 / 3 / 3.5 / 4 seconds on empty battery, up to a maximum duration of 5 / 6 / 7 / 8 seconds on full battery. Enemies caught in the area creation receive a minimum of 75 / 100 / 125 / 150Cold damage on empty battery, up to a maximum of 375 / 500 / 625 / 750Cold damage on full battery; enemies lingering inside the area also receive damage per second, which diminishes in amount with the size of the area. When cast on enemies already affected by Cold proc, they are instantly frozen solid for the full status duration.
Hold down the ability key to expend kinetic energy, draining battery power by 10% to inflict a Heat proc on all enemies in range, lasting for a minimum duration of 2.5 / 3 / 3.5 / 4 seconds on empty battery, up to a maximum duration of 5 / 6 / 7 / 8 seconds on full battery. Enemies caught in the area creation receive a minimum of 150 / 200 / 250 / 300Heat damage on empty battery, up to a maximum of 750 / 1000 / 1250 / 1500Heat damage on full battery; enemies lingering inside the area also receive damage per second, which diminishes in amount with the size of the area. When cast on enemies already affected by Heat proc, Thermal Sunder deals its normal damage plus the damage of the current Heat proc[1].
Damage per second has a moderate chance to stagger light enemy units within the area.
Enemies already afflicted with a status effect of the same type will have it reapplied; its status duration uses the battery power level at the time of the new Thermal Sunder cast.
Casting Thermal Sunder of the opposite damage type on enemies already afflicted with Cold or Heat procs, combines the damage type into Blast. Affected enemies first have the initial status effect removed, receive the new status effect, they also receive a Blast proc and deals damage based on the mode being used plus the damage of the canceled status.
Remaining Proc Duration is based on the duration of the proc on the enemy being canceled, i.e. casting a Heat Thermal Sunder on an enemy affected by a Cold will use the remaining duration of the Cold proc.
For example: Casting a Heat Thermal Sunder at 80% battery followed by a Cold Thermal Sunder at 70% battery with 6 seconds left on the Heat proc will deal: [300 + 0.8 * (1500 - 300)] * 6 + [150 + 0.7 * (750 - 150)] = 8,130 damage.
At 100% battery with Redline, this formula can be simplified if the ability is recasted immediately: (12000 * Ability Duration + 750) * Ability Strength
The order in which the elemental procs are combined changes the direction in which enemies within the ability area are knocked back by the Blast proc. Casting Cold first then Heat will knock enemies outwards, while casting Heat first then Cold will pull enemies in towards the player.
When casting both elements, the elemental proc cast second will override and replace the first element already present, e.g. if enemies were affected by the Cold area first, casting Heat proc on them will remove the Cold proc and replace it with Heat.
Ability Synergy:
Mach Rush through a Thermal Sunder area to add its Cold or Heat damage to Mach Rush's knockdown and shockwave explosion.
Thermal Sunder gains bonuses to its status effects when Redline is active and above the redline battery charge (>80%):
Heat mode's damage is doubled. This doubling is applied after the bonus damage from active heat procs on a target, allowing consecutive casts to do double the previous cast's damage.
The Blast proc permanently reduces enemy's current amount of armor based off of battery power level, up to a maximum of 100% with a full battery charge, before inflicting its damage.
Armor reduction scales linearly from 0% armor reduction at 80% battery to 100% armor reduction at 100% battery.
Can be recast while active to create new Cold or Heat sunder areas. Gauss may create up to 4 distinct areas of either element, resulting in only 8 total distinct areas active at once. Casting Thermal Sunder in a new area after reaching the maximum of Heat or Cold areas will remove the oldest area of corresponding element.
Subsuming Gauss to the Helminth will offer Thermal Sunder and its augments to be used by other Warframes.
The damage dealt by Subsumed Thermal Sunder is equivalent to 50% of Gauss's battery: 225 / 300 / 375 / 450Cold damage and 450 / 600 / 750 / 900Heat damage.
However, the damage scaling from Heat status is capped to 10x of the ability's damage.
This ability creates a field of Cold when ability tapped or a field of Heat when ability held. When used while Redline is active and the battery gauge is above 80%, stacking the two fields creates a Blast zone that instantly and permanently strips armor on cast, equal to the battery gauge up to 100% at full battery.
Grendel curls into a ball. He heals over time as he rolls, knocking over anyone in his path. Jumping slams Grendel into the ground and generates a damaging shockwave.
Grendel curls up into a roving sphere that changes his movement controls into a directional physics-based roll. As he roves, Grendel gorges upon enemies inside his stomach, inflicting 25Toxin damage per second while healing him 50 / 100 / 150 / 200 health per second over 5 seconds which slowly diminishes to half its value after another 5 seconds.
Grendel can only perform a limited selection of parkour Maneuvers, such as sprint, jump, double jump, and wall jump during Pulverize.
Grendel is unable to utilize weapons and cannot cast any Helminth subsumed abilities during Pulverize.
Activating the ability to enter the sphere form will cause Grendel to automatically drop carriables, such as datamasses.
Grendel will accelerate faster when rolling downhill and ricochet off of terrain obstacles.
Grendel tramples over his enemies with varying levels of power and reach, depending on the techniques he uses and the fuel within.
In sphere form, Grendel constantly emits a kinetic field with a 2.5 - 5 meter scaling radius, which reacts to his movement to inflict 250 - 1,000 / 250 - 1,200 / 500 - 1,500 / 500 - 2,000Impact damage and permanently removes 20% / 30% / 40% / 50%armor against enemies coming into range. Enemies colliding with Grendel receive damage and are knocked away from his path.
Impact damage on collision benefits from Ability Strength and amount of enemies stored, increasing by +60% per stored enemy, up to 400% effect with 5 stored enemies.
With a maxed Intensify, 5 eaten enemies, Grendel will deal 500 × (1 + 5 × 60%) × (1 + 0.3) = 2,600Impact damage.
Armor is fully removed at 200% Ability Strength.
Impact damage on collision does not occur if Grendel is stationary.
Damage and radius changes as enemies enter and exit Grendel's stomach. His sphere model also enlarges and shrinks based on the eaten enemy count.
Landing on surfaces from midair causes Grendel to slam into the ground, inflicting 50 - 200 / 100 - 300 / 100 - 400 / 150 - 500Impact damage to enemies within a 2 - 6 / 3 - 8 / 4 - 10 / 5 - 15 meter scaling radius, including those in his gut.
Enemies within the slam radius have their armor reduced by 20% / 30% / 40% / 50%, however enemies in his gut will not have their armor reduced.
Impact damage on ground slam benefits from Ability Strength and amount of enemies stored, increasing by +70Impact (+46.6%) per stored enemy up to 500Impact damage (333% effect).
With a maxed Intensify, 5 eaten enemies, Grendel will deal (150 + 5 × 70) × (1 + 0.3) = 650Impact damage.
Damage and radius change as enemies enter and exit Grendel's stomach.
Pulverize costs 0energy to activate. While active, Pulverize drains 3 energy per second on an empty stomach to maintain his sphere form until deactivated manually by pressing the ability key again (default 3 ) or automatically when Grendel runs out of energy, reduced to 0 energy per second if Grendel has at least one enemy in his stomach. Should Grendel run out of energy during Pulverize, he will automatically unfurl and become stunned in a dizziness animation for 2 seconds.
While Pulverize is active, but not draining energy, Grendel can replenish energy using Rally Point, Energy Siphon, and Wellspring. If Grendel has no more enemies in his stomach the energy replenishment from these effects will halt until he refills his belly.
Ability Synergy: Pulverize drains 0 energy when Feast stores enemies in his stomach. The sphere also enlarges with engorged enemies, increasing the collision and ground slam's damage and radius.
This ability transforms Grendel into a mobile sphere that damage enemies on contact. Enemies impacted permanently lose 50% of their armor. Ability Strength increases debuff percentage; at 200% Ability Strength, Pulverize can remove all armor from affected enemies.
Grendel convulses his stomach as his maw snaps open, expending 50energy to violently expel out an eaten enemy soaked in acidic bile from inside his gut. The enemy is Ragdolled and launched toward the aiming reticle as a living projectile, traveling at a speed of ? meters per second in an arcing trajectory. On direct collision with other enemies, obstacles or surfaces, the launched enemy and all targets within a radius of 3 / 4 / 5 / 6 meters around the impact point suffers 1,000 / 1,250 / 1,600 / 2,000 damage plus 10% of the launched enemy's current health as Toxin damage with 100%Toxin status chance, are slowed by 80% which slowly diminishes over 6 seconds, and permanently removes 75% of their armor.
Regurgitate's damage on enemy impact and radial Toxin damage benefits from Ability Strength and enemy health using the following expression:
Total Toxin Damage = Toxin Damage × (1 + Ability Strength) + 10% × Current Enemy Health
With a maxed Intensify and an eaten enemy with 38,670 health, Regurgitate will deal 2,000 × (1 + 0.3) + 10% × 38,670 = 6,467Toxin damage.
Armor is fully removed at 134% Ability Strength.
Ability Synergy: Regurgitate expels out the next available enemy swallowed by Feast, requiring at least 1 enemy inside Grendel's gut to be cast.
This ability augment spits out one enemy swallowed by Feast as a projectile, dealing damage over a wide radius. Enemies impacted permanently lose 75% of their armor. Ability Strength increases debuff percentage; at 134% Ability Strength, Regurgitate can remove all armor from affected enemies.
Hildryn expends 150shields or overshields to emit a radial pulse with an initial radius of 5 / 6 / 7 / 8 meters, which follows her as an aura and rapidly expands outward by ? / ? / 6 / 20 meters per second over a duration of 2 seconds. Hildryn and allies touched by the expanding pulse are instantly cleansed of all negative Status Effects. Enemies in direct line of sight of Hildryn and within range of her aura are marked for pillage, reducing their current Shields or total Armor by 10% / 15% / 20% / 25%. When Pillage expires or when the ability key (default 2 ) is pressed again while the ability is active, the pulse instantly retracts to Hildryn to restore her missing shields and produce Overshields based on the amount of shields and/or armor stolen from all pillaged enemies.
Roar, Magnetic procs, and enemy weakspots on the "chest" area will increase the shield strip, but not shield return or armor strip.
Defenses are fully removed at 400% Ability Strength. When using Corrosive Projection, it only requires 328% Ability Strength to fully strip armor.
Shield strip removes a percentage of the current maximum value, as such it has diminishing returns on subsequent casts against the same enemies. Armor strip, however, is a percentage of an enemy's total, requiring four casts at base strength to fully strip.
Does not steal from enemies without shields or armor stats.
Enemies that possess both shields and armor will need to have their shields broken before armor can be pillaged.
Pillaged enemies leaving Pillage's pulse and/or Hildryn's line of sight will still return shields to her.
Casting Pillage is a full body animation that stops Hildryn's grounded movement and other actions.
Pillage cannot be cast while Aegis Storm is active.
Hildryn's shoulder-mounted shield pads briefly become visible when Pillage is cast.
Enemies affected by Pillage glow in an upward stream of energy particles. Pillaged shields return to Hildryn as energy missiles once the ability expires or is recast while active.
Pulse, energy stream, and energy missiles are affected by Hildryn's chosen Warframe energy color.
Subsuming Hildryn to the Helminth will offer Pillage and its augments to be used by other Warframes.
Subsumed Pillage uses 50 energy instead of shields.
Similar to Molecular Prime, ability duration is far more effective at increasing this ability's range than ability range itself. Increasing duration also provides more time for Hildryn to move around and tag enemies with the aura.
Modding for Corrosive Projection or Shield Disruption is useful in certain scenarios, as the armor/shield strips are additive with Pillage. For example, the 18% reduced armor from Corrosive Projection equates to 72% power strength that is no longer needed, bringing down the power strength requirement for a full armor strip from 400% to 328%.
Bugs
Visually, the ability only expands at 17-17.5 meters/second, but actually expands at 20 meters/second
This ability releases a pulse that temporarily removes shields and permanently removes armor by 25% to all enemies hit by the pulse. Ability Strength increases debuff percentage. If the affected enemy has both shield and armor, shield is removed first.
Plunder consumes all Corrosive status affecting the target to permanently remove armor while also granting a Corrosive damage bonus to Hydroid's abilities and weapons.
This ability augment makes Crush strain the targets' armor, permanently reducing armor by 75%. Ability Strength increases increases debuff percentage; at 134% Ability Strength, Fracturing Crush can remove all armor from affected enemies.
Emit an energy pulse that depletes enemy shields and armor as it restores ally shields. Debris left over from the pulse becomes Polarize Shards. Nearby Polarize Shards orbit Mag and cut enemies, inflicting bleed status.
Mag expends 75energy to emit a spherical pulse of magnetic energy from herself with an initial radius of 8 meters. The pulse expands outwards for 5 seconds, at a constant rate of 5.9 meters per second, reaching a total radius of 37.5 meters. If the pulse comes into contact with an enemy that has shields, the pulse will drain up to 250 / 300 / 350 / 400 of them. If the enemy has armor, it will be permanently drained by up to 250 / 300 / 350 / 400 points with the enemy additionally suffering True damage equal to the amount removed. Any allies that come into contact with the pulse will have their shields restored by up to 250 / 300 / 350 / 400.
Initial radius and traveled distance are summed to: Total Radius = (1 + Ability Range) × 8 + (1 + Ability Duration) × 5 × 5.9.
With maxed Stretch and Continuity, rank-3 Polarize will have a total radius of (1 + 0.45) × 8 + (1 + 0.3) × 29.5 = 49.95 meters.
Cast animation of 1 second, affected by Casting Speed.
Shields must be completely drained from a target before a new Polarize cast can deplete armor as well.
All drained enemies will produce a violent outburst of magnetic energy inflicting 100% / 150% / 200% / 250% of the drained shields or armor as Magnetic damage to all other enemies within a 2.5 / 3 / 3.5 / 4 meter radius of them.
Explosion damage diminishes with distance.
Damage bypasses obstacles in the environment.
Explosion radius is increased by 0.5̅5 meters for each meter the pulse grows outwards after the initial radius.
Explosion can hit objects, such as Containers and Resource Nodes.
Enemies who have been drained are not damaged by their own explosion, but they can be damaged by nearby enemies who were also drained.
All drained enemies drop one Polarize Shard that lingers for 30 seconds, with a 50% chance to drop two. These Shards are automatically picked up by Mag once she is within 3 meters of them, and will rapidly orbit her to attack enemies within 1 meter. Polarize Shards inflict 50 damage distributed evenly between Puncture and Slash, scaling with the total shields or armor drained, and with a guaranteed status effect.[2]
Shard damage is affected by total shields or armor drained, gaining 25% of the total drained value as damage.
Magnetize will absorb Polarize Shards, trapping the Shards within and allowing them to do immense damage.
Shards will return to their previous state when Magnetize ends.
Polarize's visual effects, including shards, are affected by Mag's chosen energy color.
Casting Polarize is a One-Handed Action that can be done while performing many actions without interrupting them, including reloading, charging, shooting, and moving (either sprinting or sliding).
Can be used in mid-air, but not while on a zipline.
Can be used to restore shields to stationary defense objectives such as Cryopods and Excavators.
Explosions can damage or break objects such as Containers, Resource Nodes, Laser Plates, and Rotation Plates in the Orokin Tower, given a drained enemy was close enough to them.
Shards can inflict high amounts of Slash procs, if used in conjunction with Magnetize they can cause immense Bleed damage.
Pairing this combo with Nourish will grant Shards Viral damage and status, allowing you increase their Bleed damage even further.
The damage portion of Polarize is useless in missions where enemies completely lack shields and armor.
Due to the high base shield replenishment, using Catalyzing Shields will drop down your shields to 111 on max rank, making negative strength still fully replenish at percentages as low as 30% strength.
This ability releases a pulse that permanently removes armor by 400 points. Ability Strength increases removed armor. If the affected enemy has both shield and armor, shield is removed first.
Nekros expends 75energy to release a psychic blast that causes up to 7 / 12 / 15 / 20 enemies within 5 / 10 / 12 / 15 meters to enter a state of panic for 10 / 15 / 20 / 25 seconds. While panicked, enemies will not attack and will haphazardly flee, exposing themselves and temporarily reducing their Armor by ?% / ?% / ?% / 60%.
Armor is fully removed at 167%Ability Strength. If using a single Corrosive Projection, full armor strip can be achieved at 137% Ability Strength.
Enemies unaffected by Terrify are prioritized upon subsequent casts.
Can be used to scare enemies off when the Cryopod is hoarded by enemies or used when you need to revive teammates stranded in a horde.
Fully works on Drones in the sense that the AI will attempt to turn away for its duration and also does not trigger alarms even when within their line of sight.
With a low Power Strength build, it is still possible to affect a large room of enemies, it requires only the appropriate amount of casts.
This ability causes affected enemies to flee and temporarily reduces their armor by 60% for the duration of the effect. Ability Strength increases debuff percentage; at 168% Ability Strength, Terrify can remove all armor from affected enemies.
Nyx expends 50energy to launch 3 / 4 / 5 / 6 flying bolts of telekinetic energy toward her aiming reticle, which psychically seek out nearby enemies within her Line of Sight and 60 meters. Each psychic bolt dissipates and applies a Stagger on successful hit, temporarily removing enemy Armor and Shields by 20% / 40% / 60% / 80% and SlowingInfested by 5% / 10% / 15% / 20% for 5 / 7 / 9 / 11 seconds.
Shield strip removes a percentage of the current maximum value, as such it has diminishing returns on subsequent casts against the same enemies. Armor strip, however, is a percentage of an enemy's total.
Enemies can still gain bonus shield buffs (such as from Shield Ospreys), which are added after the shield strip value. This bonus shield buff can not be removed by Psychic Bolts.
Bolts will disappear after traveling for a few seconds if they do not strike targets.
Number of bolts in flight is shown on the ability icon. Once the bolts expire, the number on the ability icon will indicate how many enemies are currently debuffed.
Can be recast while enemies are still debuffed. Recasting will cancel the effect on previous remaining target(s).
Targeted enemies will briefly radiate energy as a visual indicator, and an audio cue will be played.
Psychic Bolts is a one-handed action. As such, it can be used while performing various maneuvers and actions without interruption.
With one player using Corrosive Projection, 100% armor strip can be achieved at 103% Ability Strength.
Psychic Bolts synergizes well with damage types that are effective against health classes (e.g. Cloned Flesh and Flesh), like Slash and/or Viral.
On the other hand, Corrosive or Magnetic, which is effective against armor/shield classes, gains less benefit from Psychic Bolts' full debuff.
A max rank Augur Secrets will put your Ability Strength at 124%, stripping defenses by 99% without removing their damage weaknesses to Corrosive, Radiation, and Magnetic.
This ability releases 6 telekinetic bolts that temporarily removes armor by 80% from up to 6 enemies in a single cast. Ability Strength increases debuff percentage; at 125%, Psychic Bolts can remove all armor.
Psychic Bolts will be active for its duration until all affected enemies die. It can be recasted at any time but doing so will cancel debuff on currently affected enemies.
Oberon expends 100energy to lift all enemies within 8 / 10 / 12 / 15 meters up into the air and violently slams them to the ground, dealing 500 / 750 / 1000 / 1250 damage distributed evenly between Impact and Radiation with guaranteed Knockdown and Radiation status, plus an additional 100 / 225 / 400 / 625 damage to enemies already affected by Radiation status effect. An enemy that dies by the effect of this ability has a 25% / 35% / 45% / 50% chance of spawning a Health Orb.
Affected enemies that survive the impact will emit an intense flash of light, Blinding surrounding enemies within 2.5 / 3 / 3.5 / 4 meters that were unaffected by the initial cast, for 1 / 2 / 3 / 4 seconds.
Ability Synergy: Enemies that survive Reckoning while standing on Hallowed Ground will have their armor permanently reduced by 10% / 20% / 30% / 50%.
Hallowed Reckoning is a Warframe Augment Mod for Oberon's Reckoning that makes enemies hit drop patches on the ground, dealing Radiation damage over time to enemies and provide armor to allies standing on them. It also passively increases Reckoning's range.
With one player using Corrosive Projection, 100% armor strip can be achieved at 164% Ability Strength.
Use Reckoning when surrounded by a large group of enemies to maximize its offensive effects and health orb generation.
Similar to Smite, Reckoning's Impact / Radiation damage type is particularly effective vs Corpus Shields and Grineer Alloy Armor, while being less effective against most types of Infested units.
Reckoning's widespread Radiation proc can be used to tactically nullify the threat of a large area of enemies, relieving allies outside of the area (temporarily) from needing to deal with them.
Enemies blinded by Reckoning's outer flashes are vulnerable to melee finishers.
With the health-to-energy conversion of an equipped Equilibrium mod, dropped health orbs from Reckoning may meet or exceed the ability's energy cost.
Pair with the Health Conversion mod to gain additional armor from Reckoning's health orbs.
Against higher level enemies, Ability Strength benefits health orb generation by increasing Reckoning's potential to kill.
Using Smite and Hallowed Ground to confuse enemies before using Reckoning, successfully increasing damage output.
Reckoning already has a 100% chance to confuse targets, increasing its own damage with further casts.
Bugs
Occasionally, if Oberon is knocked down just as Reckoning is cast, enemies will be attacked as normal without Oberon doing the skill animation. Only upon standing up from being previously knocked down does Oberon then perform the animation.
Casting Smite then immediately casting Reckoning removes the casting animation of Reckoning, allowing for player movement while casting Reckoning.
Rarely, spamming the ability on a group of enemies will make some enemies hover permanently in the air, much to the effect of Bastille. This may be caused by an enemy that is being lifted is struck again by the ability but not brought down.
This ability knockdowns affected enemies and if used along with Hallowed Ground, will permanently reduce their armor by 50%. Ability Strength increases debuff percentage; at 200% Ability Strength, Reckoning can remove all armor from affected enemies.
Summon Tharros, the shield of Styanax. Swing Tharros to repel enemies and reduce their shields and armor. Styanax regenerates health for every enemy struck.
Styanax expends 25energy to sweep his shield Tharros before him to release a horizontal fan of 9 shield projections, which travels a distance of 9 meters toward the reticle, bashing away enemies within a 135 degrees horizontal spread and 160 degrees vertical spread. With a heavy shove, Styanax also knocks back enemies within a 2.5 meter radius around him.
According to the actual test, 9 shield projectiles are only visual effects. The real hit range is a cone shape with a horizontal direction of about 135° and a vertical direction of about 160°. The radius is the skill range.
Each shield projectile is 15° apart horizontally. The strike edge overlaps with the shield projectile on the right side and extends an additional 15° on the left side.
Shield projections possess infinite Punch Through, hitting enemies along their flight path until they fade away at maximum distance.
Styanax's shove and the shield projections inflict pushback for 5 meters, stun for 2 seconds prompting melee Finisher (default X ), 50%Armor and Shields permanent defense reduction, and 250 / 500 / 750 / 1,000Impact damage on enemies. For each enemy struck, Styanax restores 50 / 65 / 80 / 100Health points.
Shield strip removes a percentage of the current maximum value, as such it has diminishing returns on subsequent casts against the same enemies. Armor strip, however, is a percentage of an enemy's total, requiring only two casts at base strength to fully strip.
Defense reduction, Health restore, and damage affect enemies protected by Overguard, but pushback does not, nor are they opened to Finishers.
Casting Tharros Strike is a full-body animation that interrupts Styanax's grounded movement and other actions.
Subsuming Styanax to the Helminth will offer Tharros Strike and its augments to be used by other Warframes.
Tips & Tricks
With one player using Corrosive Projection, 100% armor strip can be achieved at 164% Ability Strength.
Tharros Strike opens enemies to finishers briefly. Taking advantage of this requires using the ability at point blank or enemies pinned against a wall.
Axios Javelin's vortex assists Tharros Strike in en-masse enemy defense reduction and rapid health recovery for Styanax.
Rally Point taunts enemies to aggressively approach Styanax, potentially grouping inside Tharros Strike's area of effect. Energy regen recovers Tharros Strike's low cost quickly. Tharros Strike's defense reduction permanently cripples enemies for Styanax and rallied allies to kill them for shield recovery.
Final Stand's Slash and Blast damage effectiveness are enhanced by Tharros Strike's defense reduction.
This ability hurls shields in a cone in front of Styanax that temporarily strips the target's shields and permanently strips the target's armor by 50% permanently. Ability Strength increases debuff percentage, removing all shields and armor if Ability Strength is increased above 200%.
This ability augment makes Link drain the targets' armor, temporarily reducing their armor values by 60% for the ability's duration. Ability Strength increases debuff percentage; at 168% Ability Strength, Abating Link can remove all armor from affected enemies.
Erect a containment field to capture enemies and suspended them in stasis, stripping their armor. Hold to collapse all Bastilles into a single damaging vortex.
Vauban expends 100energy to throws a modular device in an arcing trajectory toward the aiming reticle. Upon striking an enemy, the device inflicts 15Blast damage with a ?% status chance. Upon contact with a surface, the device erects a Bastille energy containment field that suspends up to 6 / 8 / 10 / 12 enemies into the air within a 5 / 7 / 8 / 10 meter radius. Armored enemies suspended by Bastille permanently lose 2.5% / 5% / 7.5% / 10% of their total Armor points per second, while unarmored enemies are simply held captive; simultaneously, Vauban and allies standing inside the containment field gain an armor bonus up to 1,000 armor points, based on the amount stripped from the suspended armored and unarmored enemies within. Bastille armor bonus lasts indefinitely while inside the field and remains active for 10 seconds once outside.
Bastille still grants Vauban and his allies an armor bonus if the suspended enemies are unarmored. The armor bonus is gained at a reduced rate compared to directly stripping armor from armored enemies.
Bastille armor bonus duration is reset to full when moving into any Bastille containment fields.
Suspended enemies are lifted into the air and completely immobilized, allowing headshots to hit their mark without resistance.
Bastille containment field will continue to capture enemies up to the max target count throughout its duration, in the event captured enemies are killed and new enemies come into range.
After 8 / 10 / 12 / 15 seconds have elapsed, the containment field automatically collapses into a Vortex singularity for 3 seconds. The Vortex constantly Ragdolls and draws in all enemies within the same radius toward the device, inflicting 50Magnetic damage per second with ?% status chance.
Hold down the ability key (default 4 ) without any containment fields active to throw a new device set to Vortex mode. Hold down the ability key to collapse all active Bastille containment fields into Vortexes. Both methods of manually creating Vortexes resets the new and existing devices to last for 10 / 12 / 13 / 15 seconds.
If Bastille fields are in range of each other, manually collapsing them into vortexes causes them to converge on the location of the first active Bastille, based on the order of creation. Enemies and pickups captured by the vortexes will be dragged along toward the new destination.
Vortex also draws in Pickups within its radius for convenient collection.
Ability Synergy:
Enemies suspended by Bastille or pulled by Vortex passively receive 25% increased damage from Vauban's weapons and abilities.
Minelayer's Tether Coil and Vector Pad can bring enemies into range of Bastille. Enemies tied to Tether Coils are released into Bastille's containment field for suspension, freeing the coils to seek new targets.
Coils are not freed if enemies tied to Tether Coil are pulled into Bastille's vortex mode, however.
Photon Strike's targeting beacon is attracted to Bastille's vortex mode, causing the beacon to home in on the device with the laser striking all enemies within range.
Can be used while performing many actions without interrupting them, including reloading.
Can be cast multiple times while active.
If cast while in midair, the casting animation changes with Vauban hovering briefly in the air as he throws the device.
Bastille is a one-handed action. As such, it can be used while performing various maneuvers and actions without interruption.
Repelling Bastille is a Warframe Augment Mod for Vauban's Bastille that repels new enemies when it reaches the maximum amount of enemies it can contain, and increases Vortex's duration for every additional Vortex thrown into it.
When used in narrow hallways or choke-points, enemies that are held up in the field block the path of others behind, negating the enemy limit and blocking all the enemies from advancing.
Bastille spawns from a ball that Vauban throws in an arc, so it can be deployed where aimed.
Bugs
If Vauban is playing as client, Photon Strike's beacon will not be attracted to Bastille's vortex even when thrown into its suction range.
Vortex will slow down allied specters such as the Corrupted Lancer specter.
Enemies suspended by Bastille will be permanently stripped of their armor at a rate of 10% per second. Ability Strength increases debuff percentage.
Heeding the voices within to harness their powers, Xaku selectively casts one of three abilities originating from the three fallen Warframes. Tapping the ability key freely cycles the selection wheel between the Accuse, Gaze, and Deny sub-abilities. Holding down the ability key (default 3 ) expends 75energy to cast the selected power.
Tap/hold cast can be inverted in the Settings menu.
The Lost's cycle selection wheel appears above Xaku's ability icons. Each ability's duration timer is displayed below their associated sub-ability icons in the wheel.
Channel the Void to access their lost components' unique powers:
Distorting reality with Accuse, Xaku manifests a Void fissure at the targeted location on the aiming reticle over infinite range. Up to 5 / 6 / 7 / 8 enemies within 5 / 7 / 9 / 11 meters from the fissure become corrupted by Void energy for 4 / 8 / 12 / 16 seconds, stunning them in place then causing them to fight for Xaku and turn on their former allies.
Xaku does not require Line of Sight to enemies to corrupt them with Accuse.
While Accused enemies are briefly allied with Tenno, they can still be damaged by most sources and affected by some Warframe abilities.
Accused enemies appear on the minimap as allied blue dots.
The number of active Accused units is displayed as an icon beside Xaku's shield and health indicators.
Accused enemies do count toward mission progression (e.g. Defense). They must be slain or their ability duration ended to progress.
Can be recast while active if under the max targets cap. Recasting on new enemies adds them to the existing number of Accused units up to the cap. Each new Accused unit has its own separate full ability duration.
Cannot be recast while at max targets count.
Casting Accuse is a full-body animation that restricts movement and other actions.
Xaku's shoulder and arm pieces visually detach and return to position, as Xaku reaches out with their right hand sending the right side pieces into the Void fissure forming at the targeted location. As the Void fissure forms, Void lightning strikes nearby enemies as the ability's area radius becomes briefly visible then fades with the breach's closing, while Xaku's pieces return to their positions on their body.
Enemies affected by Accuse glow with an upward stream of Void energy that resembles the Vengeful Trickster Ephemera, as well as emitting a Void energy cloud around the shoulders.
Gaze
Screeching in anguish with voices long lost, Xaku's Gaze freezes an enemy target within 10 / 15 / 20 / 25 meters and a ?° angle cone centered on the aiming reticle. Gazed target becomes entangled in Void tendrils, during which it is disabled, immobile, and Invulnerable to damage for 5 / 8 / 11 / 14 seconds; while captive, the victim stores all damage prevented by its invulnerability and receives it in full when the ability expires. Gazed target also emits a defense reduction aura with a ? / 8 / ? / 12 meter radius, which weakens other enemies' current maximum Shields and Armor by 20% / 30% / 40% / 50% while within range. Up to 2 Gazed targets may exist at once.
Defense reduction is capped at 100% at 200% Ability Strength.
While invulnerable, the Gazed target is still susceptible to Status Effects, with exception of the inability to proc Void status.
Gaze defense reduction auras stack their effects with diminishing returns if overlapping on enemies, due to affecting the current amount of shields and armor (e.g. first Gaze reduces 50%, second Gaze reduces 50% of the new armor or shield total value)
Enemies regain their reduced shields and armor once they move outside of Gaze's aura.
If the enemy target dies before Gaze's entanglement fully takes effect, the casting energy cost is refunded to Xaku.
If an enemy that has both shields and armor wanders into Gaze's aura, such as an Oxium Osprey, then shields will be prioritized over armor.
Holding down the ability key (default 3 ) while aiming directly at a Gazed target releases the victim early, causing it to receive all accumulated damage prevented by its brief invulnerability.
Gazed enemies do not count towards mission progression.
Can be recast while active to entangle a new enemy, freeing the oldest affected enemy if cast at max number of targets.
Casting Gaze is a full-body animation that restricts movement and other actions.
Xaku's head, face, chest, shoulder and arm pieces visually detach, as Xaku screams into the air above while blob-like substances fly out from their torso. The enemy target is frozen in place as it becomes entangled in a mass of rapidly growing Void tendrils.
While affected, the enemy target emits a radial aura visual effect and emits a Void energy cloud around the shoulders.
Deny
Discharging a torrent of Void energy, Xaku unleashes a ray of piercing light toward the aiming reticle with infinite body Punch Through that travels up to ? / 30 / ? / 40 meters away. Enemies struck directly or within a ? meters radius from the beam receive 1,000 / 2,000 / 3,000 / 4,000Void damage, reset damage resistances if used against Sentient faction, and become suspended in aerial stasis for 5 / 8 / 11 / 14 seconds.
At ability rank 3 with a maxed Intensify equipped, stolen 6 Void replicas, against an enemy affected by The Vast Untime, Xaku will deal 4,000 × (1 + 0.3) × (6 + 1) × 1.5 = 54,600Void damage.
Deny's damage can be further amplified by Enemy Body Parts multipliers.
Enemies with selective crowd control effect immunity such as the Battalyst and Conculyst are unaffected by Deny's aerial stasis.
Can be recast while active to strike new targets, or damage and refresh all effects on already affected enemies.
Casting Deny is an upper-body animation that allows reticle repositioning and movement, while restricting other actions.
Xaku's shoulder and arm pieces visually shiver then detach to hover above Xaku, as a beam of Void energy travels forward from Xaku's left hand, after which the pieces return to their positions.
Enemies affected by Deny are suspended in the air by an upward stream of Void energy that resembles the Lifted status effect.
Ability Synergy:
Xata's Whisper does not grant additional Void damage to The Lost's sub-abilities.
Grasp of Lohk can disarm and steal the weapons of enemies affected by all sub-abilities of The Lost.
Void replicas will not attack enemies corrupted by Accuse, unless affected by Radiation status effect or other faction modifier abilities (e.g. Chaos)
Void replicas will not attack an enemy trapped by Gaze.
Void replicas amplify Deny's damage, based on the number of stolen weapons hovering around Xaku.
The Lost's sub-abilities interact with each other in various ways:
Accuse can corrupt enemies into allies while they are lifted by Deny. However, it cannot corrupt a Gazed enemy target. Accused units will attack a Gazed enemy target, storing damage to inflict to the victim once released from the Void tendrils.
Gaze may be cast on an enemy affected by either Accuse or Deny. Gaze reduces the defenses of Accused units in range. Gazing an Accused unit creates an invulnerable decoy that draws enemy aggro until Accuse expires.
Deny does not affect Accused units, but will contribute damage to Gazed enemy targets.
The Vast Untime renders enemies 50% more vulnerable to Deny's beam and pauses all sub-abilities' ability duration timers while active.
Each active sub-ability is a separate instance from Xaku. As such, the ability nullifying effects of special enemies (e.g. Nullifier Crewman) will not dispel The Lost's sub-abilities if only Xaku is affected.
With one player using Corrosive Projection, 100% armor strip can be achieved at 164% Ability Strength.
Cast Accuse on a nearby surface or the ground below you to quickly corrupt surrounding enemies to help fight alongside you, or cast on a group of enemies off in the distance to create a distraction when faced with ranged threats.
Accused enemies are allied units to the Tenno, therefore their special auras (such as those of Shield Osprey, Ancient Healer, Eximus, etc) or abilities will be used to briefly benefit you and your team.
Cast Accuse on or near a mission objective to enlist the enemy to defend them for you.
Cast Gaze on up to two enemies to completely disable them for the duration, while emitting an aura that reduces the defenses of other enemies in range.
All damage prevented by the Gazed target's invulnerability will be dealt in full when the ability ends.
Gazed targets do not halt mission progression such as Defense waves, allowing your defense reduction auras to persist in an area until you release the targets.
Gazed targets are still susceptible to status effects. Inflict Radiation procs to create an invulnerable distraction for nearby enemies.
Cast on enemies in different locations to encompass a larger area with the defense reduction auras, or close to each other to stack the defense reduction on enemies within the overlapping auras if the modded amount is below 100% defense strip, a full armor strip otherwise can be achieved with approx. 200% ability strength.
Gaze is cast within a cone centered on the aiming reticle. The closest enemy near the sides of the reticle will be automatically targeted by the ability.
During an Interception mission, when an enemy is using a control console to regain control of the point, cast Gaze upon them. Doing so will keep the control console occupied without giving the enemy control of the tower.
Continuously cast The Vast Untime to keep this enemy in stasis nearly indefinitely. If/when the tower is recaptured, to prevent conflict on the point, look at the suspended enemy and cast Gaze on them again to release them.
Cast Deny against enemies packed in a tight line to maximize its effect.
Deny's damage is greatly amplified by the number of stolen weapons from Grasp of Lohk. Steal and maintain a large amount of weapons to deal devastating damage with Deny's Void beam.
Enemies lifted by Deny are made easy targets for headshots from your weapons.
Activate The Vast Untime to freeze all sub-abilities' duration timers. Accused enemies will remain on your side, Gazed targets stay trapped and emit their auras, and Denied enemies stay lifted airborne for an extended period of time. Strike enemies hit by the Void blast with Deny's Void beam to deal increased damage. This ability also slows enemies, making them easier to keep inside of Gaze's aura radius.
Gaze binds one enemy to produce an aura that temporarily reduces enemy shields and armor by 50% while they are within its aura. Ability Strength increases debuff percentage, removing all shields and armor if Ability Strength is increased above 200%. Enemies will regain their shields and armor if they leave the debuff field or the ability ends.
Second Ability launches an energy bomb that explodes with a 5 / 6 / 7 / 8m radius, stripping 40 / 60 / 80 / 100% of enemy armor. Tap 2 again to detonate in-flight.
Corrosive status effects remove 26% of a target's armor amount for 8 seconds. This stacks up to 10 times, with each subsequent proc removing 6% armor for a total of 80%.
Flat Value From Base Armor[]
Sources that armor strip based on the base armor value of an enemy will remove a flat value from the base armor. This will affect the total armor an enemy will have.
Changing Impact and Magnetic Damage to Corrosive Damage and Status
Previously, Tempest Barrage and Tidal Surge both dealt Impact damage, while Tentacle Swarm dealt Magnetic Damage. These have been changed to Corrosive Damage, which can apply Corrosive Status. Corroding Barrage has been a widely used Augment Mod by Hydroid players, which caused Corrosive Status for Tempest Barrage, and due to its popularity, we looked to incorporate its effect into Hydroid at a base level.
We felt changing Damage to Corrosive Damage in Hydroid’s abilities makes them more thematic to the sea while also incorporating Corroding Barrage’s current effect in a meaningful way. With this change in mind, Corroding Barrage will now apply Viral Status instead of Corrosive - more details on that below.
Passive Changes
Hydroid’s previous Passive had a chance to spawn a tentacle when performing a melee slam attack. We have removed that passive entirely and replaced it with an entirely new effect.
The nature of Hydroid’s previous Passive pushed players to a very specific playstyle (regular usage of melee slam attacks), while not guaranteeing anything useful from each individual slam. We wanted to make the passive feel more reliable and impactful.
New Passive: Enemies damaged by Hydroid are more vulnerable to Corrosion Status, with initial status reducing armor by 50%.
Hydroid’s new Passive affects an enemy once Hydroid damages them, lasting until their death. It makes the first instance of Corrosive Status on an enemy remove 50% of their Armor rather than 26%. Not only does this make the first Corrosive Status stronger, but it also means Corrosion Status can reach 100% Armor Reduction with full stacks!
To clarify, this means Hydroid does not need to apply all, or even any, of the Corrosive Status Effects on an enemy. As long as Hydroid has damaged the enemy, the Corrosive Status Effects can be applied from any source and will receive the benefit.
Ability Changes
Tempest Barrage:
The Corroding Barrage Augment Mod has been renamed Viral Tempest and now has a chance to apply a Viral Status Effect, rather than Corrosive Status Effect. It also no longer grants Ability Strength.
Changing the Impact Damage of Tempest Barrage to Corrosive Damage meant the Corrosive Status Effect from the Augment was already included. We changed this to Viral to maintain its relevance with the other changes. In light of the punch Corrosive and Viral packs in comparison to Corrosive and Impact, the Ability Strength buff was removed for balance purposes.
Tidal Surge:
Tidal Surge now applies Corrosive Status Effects to enemies based on how long they are carried by its waves.
Plunder:
A new ability added to Hydroid’s third ability slot.
All enemies in range will have Corrosive Status Effects remove their armor permanently, increasing Hydroid’s armor and granting bonus Corrosive damage to weapons.
This ability is stronger based on the number of Corrosive Status Effects applied to the enemies affected by Plunder.
This means with a full stack of Corrosive Status Effects, their Armor will be removed permanently.
Replaced the Armor Reduction with 2% of their total Shields and Health overtime (does not scale).
Pulverize
Added a 50% Armor Reduction (at max rank) to enemies struck by Pulverize (scales with Ability Strength Mods).
Regurgitate
Added 75% Armor Reduction on Regurgitated enemies (scalable with Ability Strength Mods).
HUD Improvements:
The following changes have been made to better communicate an enemy’s state to players via HUD improvements.
Added a new Armor icon indicator next to enemy Health bars in the HUD.
This new icon not only better indicates that an enemy has Armor protection (in addition to their Health bar being yellow), but more specifically how much Armor they have. The icon changes based on three different thresholds to better communicate Armor values to players:
1-499 Armor: No more than ~60% Damage Reduction from Armor
500-2700 Armor: No more than ~90% Damage Reduction from Armor
2700+: More than 90% Damage Reduction from Armor
Additionally, as enemy’s Armor is stripped, the icon’s meter changes at 3 stages:
Armor is a fundamental part of Warframe’s balance, but the act of stripping armor has always been somewhat hard to gauge. Currently, when an armor stripping Ability is cast it uses the target’s current armor as the base for its calculation. This means that you may have to cast that Ability several times on the same enemy in order to strip their armor completely.
Players have adapted to this system by maximizing Ability Strength to the point where the armor stripping effect is as close to 100% as possible - thus reducing the number of casts required to strip armor to one.
In the effort of encouraging build diversity and streamlining the way that armor stripping abilities work, we are making the following changes:
ALL Armor Stripping Warframe abilities now apply to the TOTAL armor value.
How it worked before: You cast an ability that strips 50% Armor. The first cast will reduce the foe’s Armor to 50%, the second cast will reduce the armor to 25%, taking half of the existing 50%. This was the case for every ability except Oberon’s Reckoning, and special exceptions like Shattering Impact.
How it works now: Casting an ability that strips 50% Armor will reduce their Armor to 50% on the first cast, and 0% on the second cast.
This applies to every single Armor removal ability in the game. We have also buffed a few of these abilities in the process to bring them up to a usable level in light of these changes:
Increased Frost's Avalanche armor reduction from 40% to 60% and changed the armor reduction to be permanent.
Frost’s Avalanche can also now reduce armor from targets even if they are immune to crowd control abilities.
Increase Nekros' Terrify armor reduction from 20% to 60%.
Increase Oberon's Reckoning armor reduction from 30% to 50%.
Changed Banshee's Sonic Fracture (Augment) armor reduction to be permanent.
Increase Mag's Fracturing Crush (Augment) armor reduction from 50% to 75%, remove the 80% cap per cast and change the armor reduction to be permanent.
Increase Trinity's Abating Link (Augment) armor reduction from 45% to 60%.


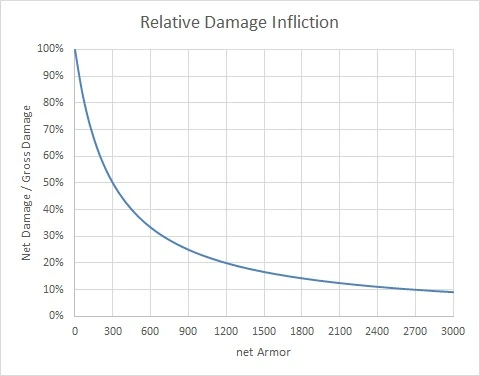


")
")
")
")
")
")
")
")
")
")
")
")
")
")
")
")
")


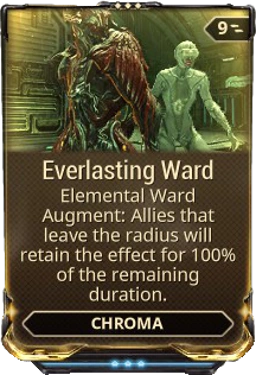

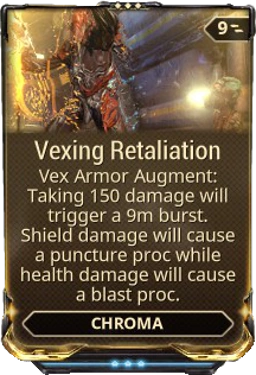


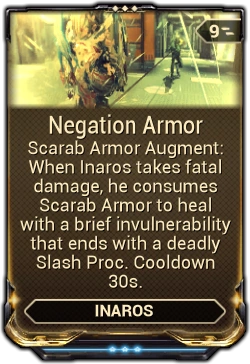


")
")
")
")
")
")


 Steel Fiber and


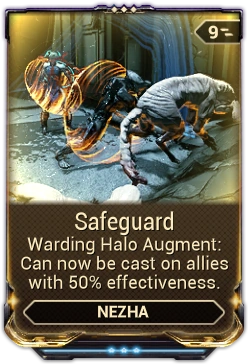


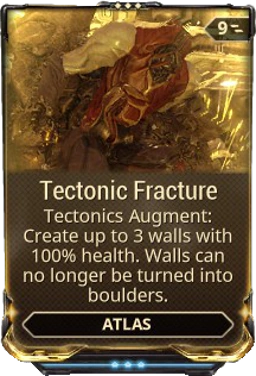


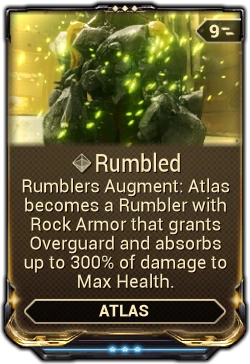
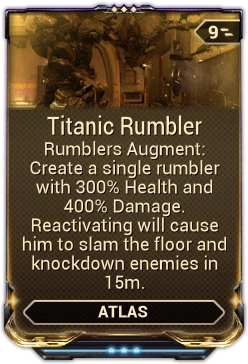


![{\displaystyle {\begin{aligned}{\text{Armor Multiplier}}=[f_{1}({\text{Current Level}})\times (1-S_{1}({\text{Current Level}})]\\+[f_{2}({\text{Current Level}})\times S_{1}({\text{Current Level}})]\end{aligned}}}](https://services.fandom.com/mathoid-facade/v1/media/math/render/svg/c64ecdb27fb4ebb95d485978cb5ce3c72034730d)
![{\displaystyle {{\text{Armor Multiplier}}={\begin{cases}f_{1}(x),\;&x\leq 25\\(1+0.0125*(x-25))*f_{1}(x),\;&25<x\leq 35\\(1.125+0.06667*(x-35))*f_{1}(x),\;&35<x\leq 50\\(1.375+0.005*(x-50))*[f_{1}(x)\times (1-S_{1}(x))+f_{2}(x)\times S_{1}(x)],\;&50<x\leq 100\\1.625*f_{2}(x),\;&x>100\\\end{cases}}}}](https://services.fandom.com/mathoid-facade/v1/media/math/render/svg/0e8a0b4f28cc1fb4a60b92d806528c27fd0796c1)
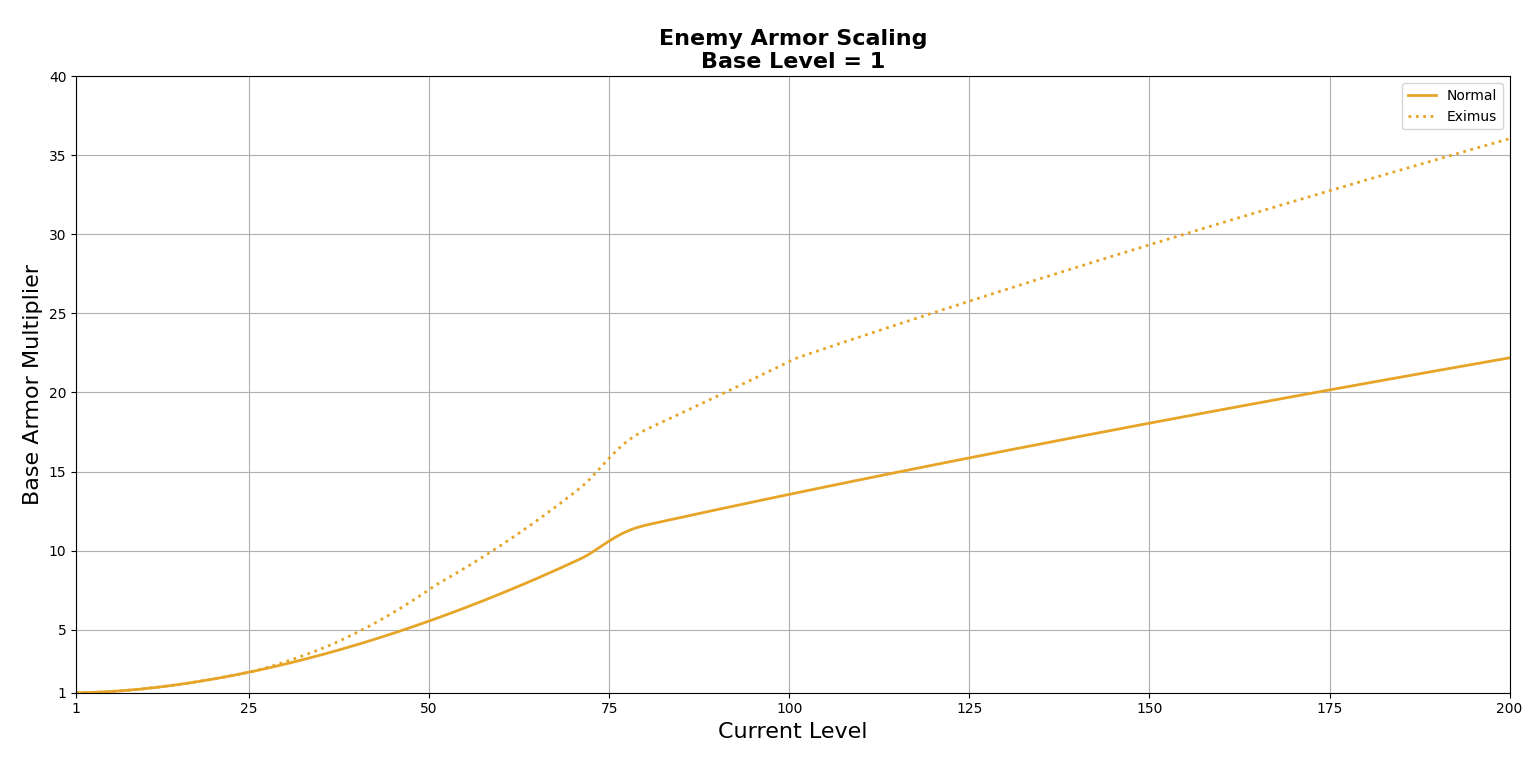
")
")
")


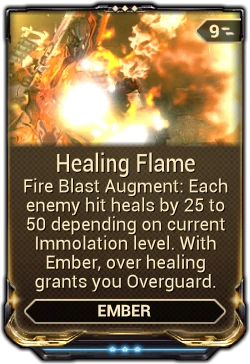


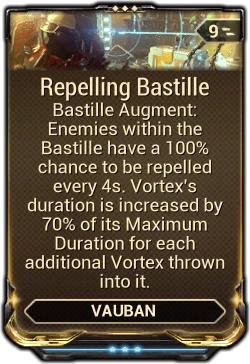

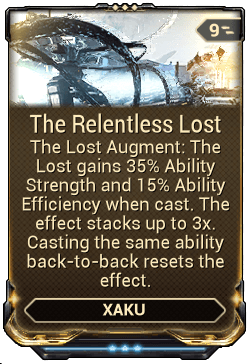

 Operator
")
")