No edit summary |
m (→Trivia: added trivia item related to eidolon synovias with Wikipedia link) |
||
| (41 intermediate revisions by 19 users not shown) | |||
| Line 1: | Line 1: | ||
| − | {{Spoiler}} |
||
| − | {{UpdateMe}} |
||
{{Top|Lotus|Factions|Factions|Enemy|Sentient|Sentient}} |
{{Top|Lotus|Factions|Factions|Enemy|Sentient|Sentient}} |
||
{{Enemy |
{{Enemy |
||
| − | |name = |
+ | |name = {{PAGENAME}} |
|image = TeralystBig.png |
|image = TeralystBig.png |
||
|notes = A massive, lumbering, brute of an Eidolon. |
|notes = A massive, lumbering, brute of an Eidolon. |
||
| Line 9: | Line 7: | ||
|planet = [[Earth]] |
|planet = [[Earth]] |
||
|tileset = [[Plains of Eidolon]] |
|tileset = [[Plains of Eidolon]] |
||
| − | |type = |
+ | |type = Grand Boss |
| − | |weapon = |
+ | |weapon = Laser Cannon Arm |
|abilities = Ground Stomp<br> |
|abilities = Ground Stomp<br> |
||
Ground Smash<br> |
Ground Smash<br> |
||
| Line 22: | Line 20: | ||
Gantulyst Shield<br> |
Gantulyst Shield<br> |
||
Knockback Pulses<br> |
Knockback Pulses<br> |
||
| − | |robotic = |
+ | |robotic = 10000 |
| − | |shield = |
+ | |shield = 1800 |
| − | |alloyarmor = |
+ | |alloyarmor = 130 |
| − | |procresistance = [[Damage |
+ | |procresistance = [[Damage|All]] |
|specialbodyparts = Head: 1.0x |
|specialbodyparts = Head: 1.0x |
||
|baseexperience = 500 |
|baseexperience = 500 |
||
| Line 33: | Line 31: | ||
|other_drops = '''Limbs'''<br> |
|other_drops = '''Limbs'''<br> |
||
6x [[Exceptional Sentient Core]]s<br> |
6x [[Exceptional Sentient Core]]s<br> |
||
| + | |||
'''Killed'''<br> |
'''Killed'''<br> |
||
3x [[Eidolon Shard]]s<br> |
3x [[Eidolon Shard]]s<br> |
||
| Line 43: | Line 42: | ||
{{Arcane|Arcane Acceleration}} 10.20%<br> |
{{Arcane|Arcane Acceleration}} 10.20%<br> |
||
{{Arcane|Arcane Precision}} 7.02%<br> |
{{Arcane|Arcane Precision}} 7.02%<br> |
||
| + | |||
'''Captured'''<br> |
'''Captured'''<br> |
||
| + | [[Flawless Sentient Core]]<br /> |
||
3x [[Eidolon Shard]]s<br> |
3x [[Eidolon Shard]]s<br> |
||
[[Brilliant Eidolon Shard]]<br> |
[[Brilliant Eidolon Shard]]<br> |
||
| Line 58: | Line 59: | ||
{{Arcane|Arcane Pulse}} 5.29% <br> |
{{Arcane|Arcane Pulse}} 5.29% <br> |
||
{{Arcane|Arcane Ultimatum}} 5.29%<br> |
{{Arcane|Arcane Ultimatum}} 5.29%<br> |
||
| − | {{Arcane|Arcane Aegis}} 5.29% |
+ | {{Arcane|Arcane Aegis}} 5.29%<br> |
| + | '''Sigil'''<br> |
||
| + | Gantulyst Sigil 10% |
||
}} |
}} |
||
{{Quote|Legends say the Gantulyst wields an enormous boulder for an arm and radiates powerful beams of Sentient energy. The Ostrons built a shrine in its honor hoping to gain its favor.|}} |
{{Quote|Legends say the Gantulyst wields an enormous boulder for an arm and radiates powerful beams of Sentient energy. The Ostrons built a shrine in its honor hoping to gain its favor.|}} |
||
| − | <section begin= |
+ | <section begin=gantulystintro /> |
| − | + | The '''{{PAGENAME}}''' is an enormous spectral [[Sentient]] [[Eidolon]] creature that can be summoned on the [[Plains of Eidolon]] at night, acting as one of the [[Grand Boss]]es of the [[landscape]]. This is the second of the 3 night bosses of [[Plains of Eidolon]], preceded by [[Eidolon Teralyst]] and followed by [[Eidolon Hydrolyst]]. Much larger than the preceding [[Eidolon Teralyst]], this one has replaced its right arm with an elongated boulder, and its massive weight creates shockwaves with every step. |
|
All Eidolons are remnants of a Sentient that was defeated in a battle against the [[Tenno]] during the Old War, whose remains now wander the plains perpetually searching for their lost components. These fragments are, however, still formidable creatures armed with powerful attacks and near-impenetrable defenses, and are hostile to both Tenno and [[Grineer]] alike. |
All Eidolons are remnants of a Sentient that was defeated in a battle against the [[Tenno]] during the Old War, whose remains now wander the plains perpetually searching for their lost components. These fragments are, however, still formidable creatures armed with powerful attacks and near-impenetrable defenses, and are hostile to both Tenno and [[Grineer]] alike. |
||
| + | It is important to note players that have not unlocked [[Transference]] from [[The War Within]] won't have any means to properly fight the {{PAGENAME}}. |
||
| ⚫ | |||
| ⚫ | |||
| − | ==Statistics== |
||
| − | As this enemy spawns at a set level of '''55 '''regardless of the [[Bounty]] present in the instance, according to [[ Level Scaling]], the '''Eidolon Gantulyst '''has a fixed attributes of: |
||
| − | *'''Health:''' 671,100 |
||
| − | *'''Shield:''' 57,175 |
||
| − | *'''Armor:''' 1,275.69 (80.96% Damage Reduction) |
||
| − | == |
+ | ==Summoning== |
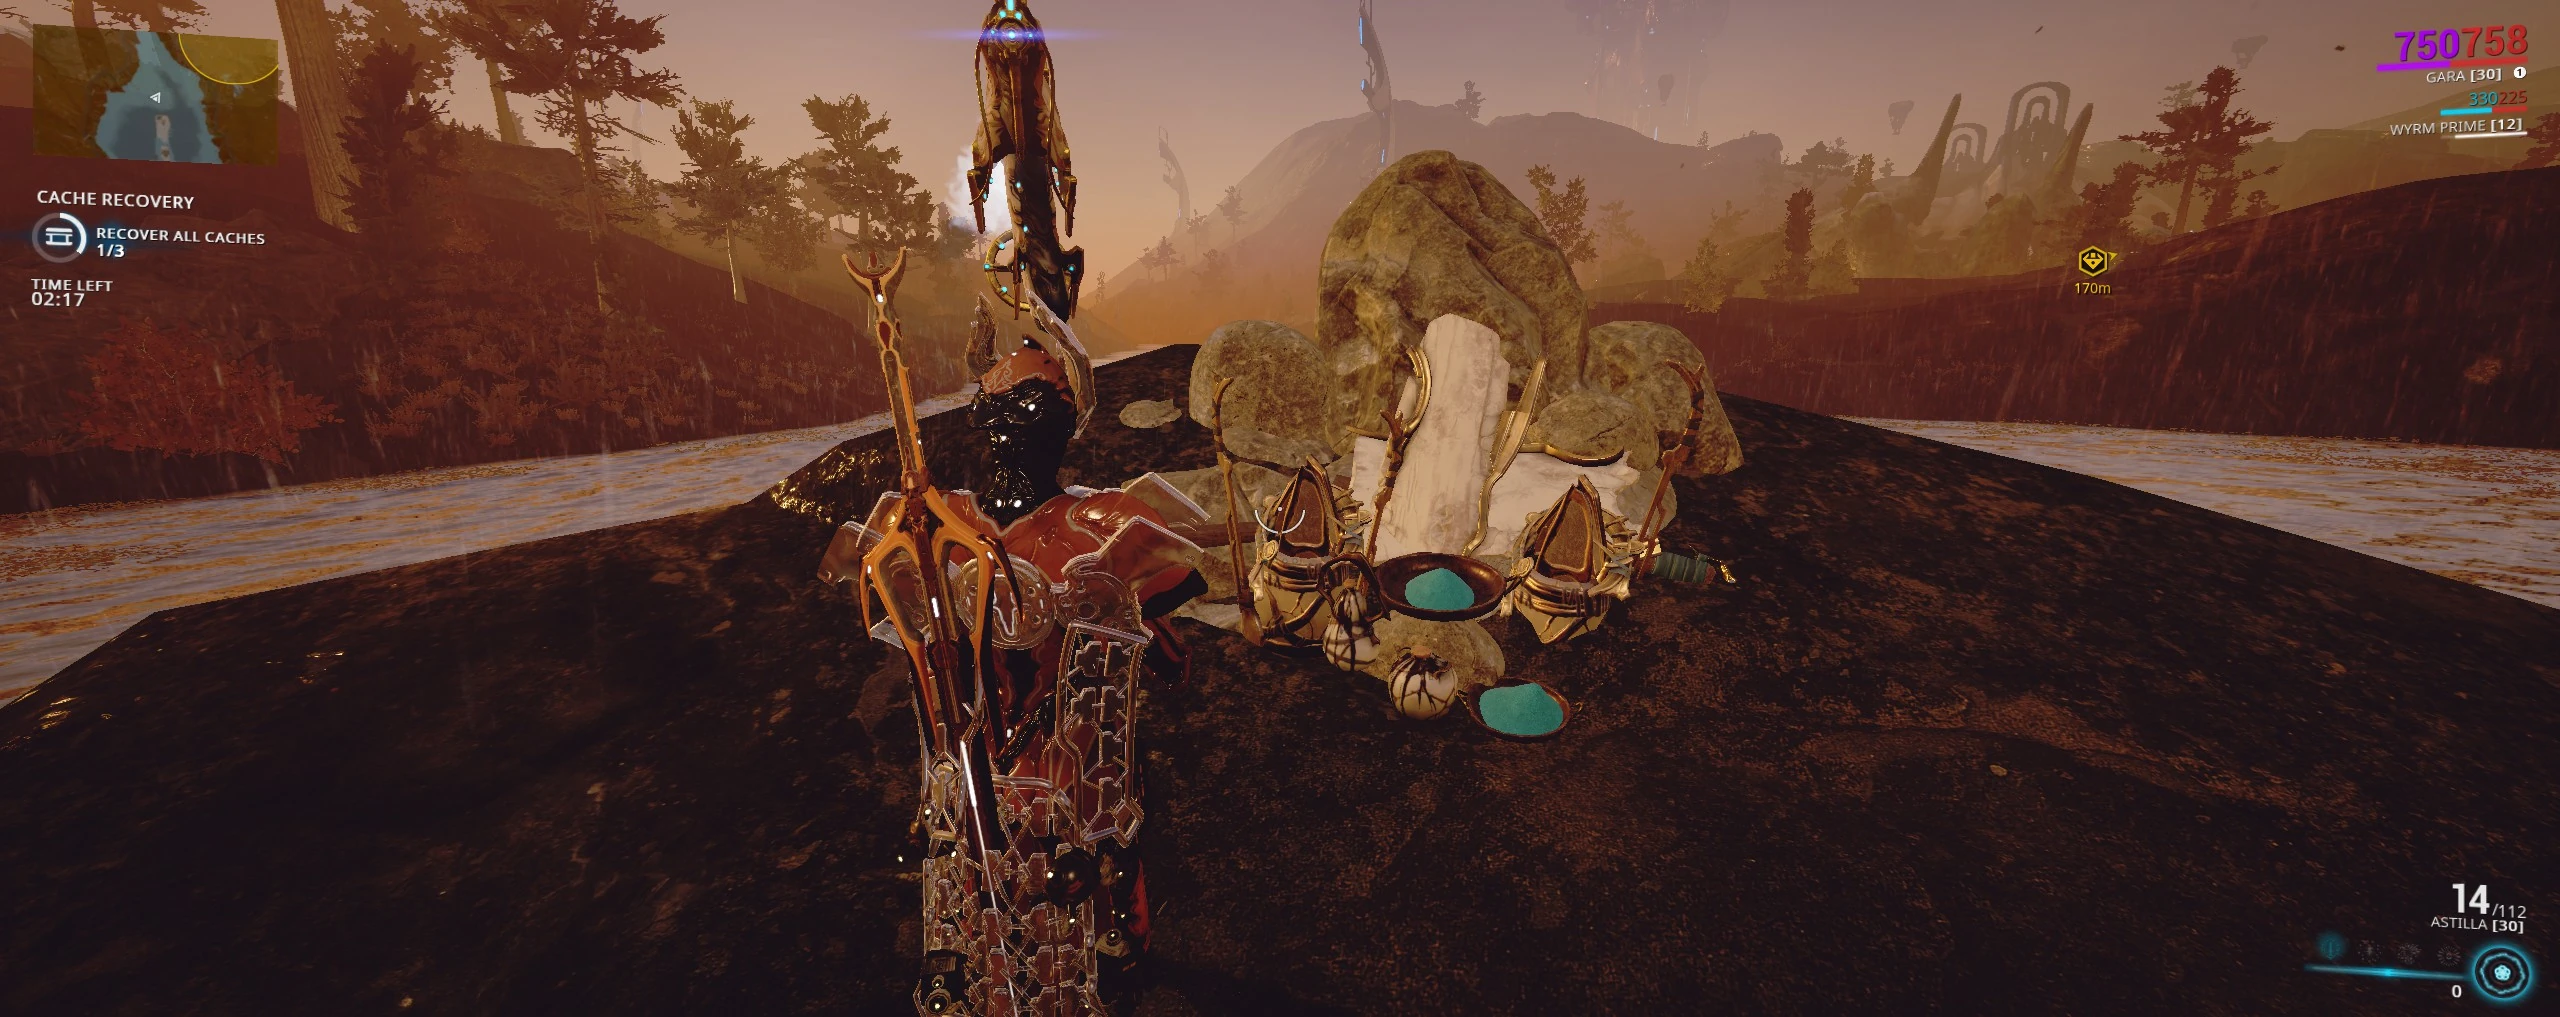
[[File:20180209212421 1.jpg|thumb|220x220px|The shrine located in the middle of Gara Toht lake.]] |
[[File:20180209212421 1.jpg|thumb|220x220px|The shrine located in the middle of Gara Toht lake.]] |
||
After Tenno capture the [[Eidolon Teralyst]] they must offer their [[Brilliant Eidolon Shard]]s on the Eidolon shrine located on the Sentient fossil in the middle of '''Gara Toht Lake'''. |
After Tenno capture the [[Eidolon Teralyst]] they must offer their [[Brilliant Eidolon Shard]]s on the Eidolon shrine located on the Sentient fossil in the middle of '''Gara Toht Lake'''. |
||
==Behavior== |
==Behavior== |
||
| ⚫ | '''Gantulysts''' emerge from the '''Gara Toht Lake''' on the Plains after being summoned by the altar. Their location is marked with a column of orange light. They generally walk in one direction, even if the Tenno are nearby, though their attention can be drawn to specific locations by using Eidolon Lures found throughout the Plains at night. The Gantulyst has many different attacks and several do extremely high damage, and while most of those attacks are telegraphed, they may remain quite hard to dodge, even with extensive use of the [[Operator]]'s Void Mode. |
||
| − | |||
| ⚫ | |||
| ⚫ | '''Gantulysts |
||
| ⚫ | |||
*'''Summoning Scream:''' The Gantulyst glows green and screeches into the air. This will summon and buff Vomvalysts around it. |
*'''Summoning Scream:''' The Gantulyst glows green and screeches into the air. This will summon and buff Vomvalysts around it. |
||
| − | *'''Gantulyst Shields: |
+ | *'''Gantulyst Shields:''' After a '''Summoning Scream''' or a '''Regenerating Scream '''The Gantulyst deploys a large orange dome covering the area around it, which blocks enemy fire coming from outside the dome. The dome moves with the Gantulyst, who acts as its center, forcing Tenno to get much closer to the Eidolon in order to damage it. Additionally, the dome emits pulses of energy that sap the health of anything outside it in a wide radius (300m). The lures are extremely vulnerable to those pulses. |
| − | *'''Ground Stomp:''' Stomps the ground, sending out a ground shockwave that |
+ | *'''Ground Stomp:''' Stomps the ground, sending out a ground shockwave that knocks back any Tenno in its path a great distance (100 meter radius). |
**'''Knockback Pulses:''' If '''Gantulyst Shields''' are active, '''Ground Stomp''' is followed by 4 shockwaves with very powerful knockback. It can be dodged by jumping over them. |
**'''Knockback Pulses:''' If '''Gantulyst Shields''' are active, '''Ground Stomp''' is followed by 4 shockwaves with very powerful knockback. It can be dodged by jumping over them. |
||
| − | **'''Energy Pillars: ''' If '''Gantulyst Shields''' are not present, '''Ground Stomp''' is |
+ | **'''Energy Pillars: ''' If '''Gantulyst Shields''' are not present, '''Ground Stomp''' is followed by several pillars of light emerged from the ground, dealing heavy damage to anything coming in contact with them. Small patches of yellow smoke and teal-colored ground briefly indicate where the pillars will emerge. |
| − | *'''Ground Smash:''' Smashes the ground, sending out a series of high-damaging, homing quakes to the Tenno's position. These homing quakes can |
+ | *'''Ground Smash:''' Smashes the ground, sending out a series of high-damaging, homing quakes to the Tenno's position. These homing quakes can stagger the Tenno and are 25m high. |
| − | *'''Rock Swing:''' Swings its rock arm inflicting damage to |
+ | *'''Rock Swing:''' Swings its rock arm inflicting damage to Tenno struck by it. |
*'''Laser Swing: '''Similar to the [[Teralyst]]'s Gun Swing, the Gantulyst swings its gun arm while firing a continuous beam of light in a wide arc. The laser leaves behind a trail of fire, which explodes shortly after. |
*'''Laser Swing: '''Similar to the [[Teralyst]]'s Gun Swing, the Gantulyst swings its gun arm while firing a continuous beam of light in a wide arc. The laser leaves behind a trail of fire, which explodes shortly after. |
||
*'''Regenerating Scream:''' The Gantulyst glows green and screeches. This will cause surrounding Vomvalysts (that are not affected by Summoning Scream) to link to the Gantulyst and begin to regenerate its shield. Additionally, this will render it invulnerable to all damage until all linked Vomvalysts are destroyed. |
*'''Regenerating Scream:''' The Gantulyst glows green and screeches. This will cause surrounding Vomvalysts (that are not affected by Summoning Scream) to link to the Gantulyst and begin to regenerate its shield. Additionally, this will render it invulnerable to all damage until all linked Vomvalysts are destroyed. |
||
| − | *'''Sentient Residue:''' The Gantulyst will "bleed" teal blood on the ground after losing at least one of its Synovia, dealing |
+ | *'''Sentient Residue:''' The Gantulyst will "bleed" teal blood on the ground after losing at least one of its Synovia, dealing damage over time to those standing on it. |
*'''Star Prism:''' Fires a prism into the sky, which then explodes into multiple lasers firing in all directions, dealing heavy damage. |
*'''Star Prism:''' Fires a prism into the sky, which then explodes into multiple lasers firing in all directions, dealing heavy damage. |
||
| − | *'''Energy Spike: '''The attack Gantulyst uses upon the destruction of one of |
+ | *'''Energy Spike: '''The attack Gantulyst uses upon the destruction of one of its limbs. This will emit five pulses of highly damaging Magnetic damage. It will repeat this five times. |
==Strategy== |
==Strategy== |
||
| Line 99: | Line 97: | ||
Dealing with the Gantulyst is essentially the same as dealing with the Teralyst, with a few key differences: |
Dealing with the Gantulyst is essentially the same as dealing with the Teralyst, with a few key differences: |
||
*The Gantulyst possesses '''6''' Synovia, compared to the Teralyst's four, thus requiring the use of '''3''' charged lures if players wish to capture it. These are located on each of its knees, elbows, and the back of its "armpits". |
*The Gantulyst possesses '''6''' Synovia, compared to the Teralyst's four, thus requiring the use of '''3''' charged lures if players wish to capture it. These are located on each of its knees, elbows, and the back of its "armpits". |
||
| − | *The Gantulyst is much bigger, and moves much faster than its smaller counterpart |
+ | *The Gantulyst is much bigger, and moves much faster than its smaller counterpart. Because of this, hitting its weak points becomes more challenging. |
| − | Players who have control over the lures should stay as close to the Gantulyst as possible, in the event that the latter deploys |
+ | Players who have control over the lures should stay as close to the Gantulyst as possible, in the event that the latter deploys its '''Gantulyst Shields''' (the orange dome). Lures outside the dome will ''not'' link to the Gantulyst's broken limbs and seemingly take fatal damage from the pulses the dome emits. |
| − | Capturing an Eidolon Gantulyst reimburses the previously sacrificed [[Brilliant Eidolon Shard]], and yields 3 [[Eidolon Shard]]s, 1 Brilliant Eidolon Shard, 1 [[Radiant Eidolon Shard]], one mod from the drop list and a generous amount of sentient cores of all types. The Gantulyst may also drop an Eidolon Gantulyst Articula, which can be placed in the orbiter for decoration. |
||
| ⚫ | |||
===Summary=== |
===Summary=== |
||
| − | * |
+ | *'''Preparation Phase:''' Damage an [[Eidolon Lure]] and [[Hacking|hack]] it to take control of it. The Lure can then be charged by either letting it absorb a nearby [[Eidolon Vomvalyst]]'s spectral form, or by picking up the energy orb they drop (indicated by a blue beacon) and passing it onto the Lure. Each lure needs the energy of three Vomvalysts to fully charge. It is recommended to have three lures under control by the end of the hunt. |
| − | * |
+ | *'''Phase 1:''' The {{PAGENAME}}'s shield can only be damaged with {{Icon|Proc|Void|Text}} damage; this can be done with the [[Operator]]'s power (unlocked only after The War Within). The Synovia weak points will be vulnerable once its shields have been depleted. |
| − | * |
+ | *'''Phase 2:''' Destroy a Synovia; this will trigger an energy spike of 5 {{Icon|Proc|Magnetic|Text}} waves in a 65-meter radius and yield an Exceptional [[Sentient Core]] for each one destroyed. |
| − | ** |
+ | **'''With no charged Lure:''' The Gantulyst will teleport away, regenerating 75% of its shield. |
| − | ** |
+ | **'''With at least 1 charged Lure:''' The Gantulyst will not teleport away, regenerating only half of its shield. |
| − | * |
+ | *'''Phase 3:''' Once all Synovia have been destroyed, the Gantulyst will call upon surrounding Vomvalysts to heal it. Destroy these with the Operator. |
| − | * |
+ | *'''Phase 4:''' The Gantulyst's entire body will finally be vulnerable to damage. At this point it can be defeated. |
| − | ** |
+ | **'''With 0-2 charged Lures (Killed):''' The Gantulyst will collapse to the ground, yielding only three [[Eidolon Shard]]s and an [[Arcane Enhancement]]. |
| − | ** |
+ | **'''With 3 charged Lures (Capture):''' The Gantulyst will be absorbed and dissolve into the ground, the Lures tethered to it will explode, additionally yielding a generous amount of [[Sentient Core]]s, one [[Brilliant Eidolon Shard|Brilliant]] and [[Radiant Eidolon Shard]] each and drawing from a different drop-pool of Arcane Enhancements. |
| + | **Capturing an {{PAGENAME}} reimburses the previously sacrificed [[Brilliant Eidolon Shard]]. |
||
| + | **When captured, the Gantulyst may also drop an {{PAGENAME}} [[Articula]], which can be placed in the orbiter for decoration. |
||
| ⚫ | |||
==Tips== |
==Tips== |
||
| + | *{{M|Shattering Impact}} can remove the Gantulyst's armor, even while it's shielded; 22 hits will remove the Gantulyst's armor entirely, though doing so will also remove its weakness to {{Icon|Proc|Radiation|Text}} damage. It is advised to hit it only 21 times to allow for {{Icon|Proc|Radiation|Text}} damage to deal bonus damage to the [[Alloy Armor]] that it has. |
||
*The Operator's Void Mode is the best way to avoid damage from all of the Gantulyst's area of effect attacks, as Void Mode renders the Operator immune to all forms of damage, while leaving the Warframe similarly invulnerable to attack while the Operator is out as long as they're not channeling an ability. Companions remain vulnerable however, so using Void Dash to escape attacks and exiting Transference to teleport your warframe, as well as your vulnerable companions away, might be a better solution. |
*The Operator's Void Mode is the best way to avoid damage from all of the Gantulyst's area of effect attacks, as Void Mode renders the Operator immune to all forms of damage, while leaving the Warframe similarly invulnerable to attack while the Operator is out as long as they're not channeling an ability. Companions remain vulnerable however, so using Void Dash to escape attacks and exiting Transference to teleport your warframe, as well as your vulnerable companions away, might be a better solution. |
||
*The Eidolon Lures do ''not'' take damage from the Gantulyst's energy spike. |
*The Eidolon Lures do ''not'' take damage from the Gantulyst's energy spike. |
||
| Line 122: | Line 122: | ||
*Due to the larger size of the Gantulyst, the Granmu Prism often becomes more viable than the Shwaak Prism which loses its ability to deal multiple counts of damage in one hit on the Gantulyst because of its relatively short range. The Klebrik Scaffold can be used as a complement to dispatch the Vomvalysts with ease. |
*Due to the larger size of the Gantulyst, the Granmu Prism often becomes more viable than the Shwaak Prism which loses its ability to deal multiple counts of damage in one hit on the Gantulyst because of its relatively short range. The Klebrik Scaffold can be used as a complement to dispatch the Vomvalysts with ease. |
||
*It is recommended that players with Eidolon Lures following them should not be the main source of damage in the squad, as the lures seem to frequently drift in front of the player, blocking shots and preventing the player from damaging the Gantulyst. |
*It is recommended that players with Eidolon Lures following them should not be the main source of damage in the squad, as the lures seem to frequently drift in front of the player, blocking shots and preventing the player from damaging the Gantulyst. |
||
| − | *The Gantulyst tends to spawn directly in front of the Eidolon Shrine after being summoned. The Tenno can use this to their advantage by finding nearby lures before the fight. |
||
| − | *Using the mod Shattering Impact is an efficent way to destroy all of the Eidolon's armor. (''32''''' '''''hits ''recommended to preserve Radiation damage bonus) |
||
==Trivia== |
==Trivia== |
||
*''[[wikipedia:Eidolon (apparition)|Eidolon]]'' in Greek literature are spirit like images of a living or dead person. |
*''[[wikipedia:Eidolon (apparition)|Eidolon]]'' in Greek literature are spirit like images of a living or dead person. |
||
| + | *Eidolon Synovias are a direct reference to [https://en.m.wikipedia.org/wiki/Synovial_joint synovial joints], which are compound joints found throughout the body. |
||
| + | *The {{PAGENAME}} was placeholder-named as "Bigalyst" during development and is still referred to as such in the game's files. |
||
| + | *{{PAGENAME}} is sometimes referred to by the community as "Garry". |
||
| + | *The 3 night bosses of [[Plains of Eidolon]] together are sometimes referred to by the community as "Tridolons" (i.e. "Three Eidolons" - [[Eidolon Teralyst]], followed by [[Eidolon Gantulyst]], and finally by [[Eidolon Hydrolyst]]). |
||
==Bugs== |
==Bugs== |
||
*Even with charged lures the Gantulyst may still teleport away. |
*Even with charged lures the Gantulyst may still teleport away. |
||
| + | *Occasionally, the Gantulyst's Knockback Pulse stomp will emit additional pulses which may be erratically timed. |
||
| + | *If the Gantulyst is staggered while casting Star Prism (as when a Synovia is destroyed), its gun will wave erratically and may fire the projectile downward, making its lasers extremely difficult to avoid on flat ground. If on a slope, it is advised to move up-slope from the prism, avoiding it entirely. |
||
==Patch History== |
==Patch History== |
||
{{Scrollbox/Article| |
{{Scrollbox/Article| |
||
| + | {{ver|27.3.15}} |
||
| + | *Fixed an issue where an Eidolon Wail could hit players in Limbo’s Rift after a Host migration. |
||
| + | *Fixed a script error that could occur when fighting Eidolons if an energy wave was still propagating as the Eidolon died. |
||
| + | |||
| + | {{ver|25.7.6}} |
||
| + | *Fixed Teralysts (and other Eidolons) taking more damage to weak points than they should be. |
||
| + | |||
| + | {{ver|25.7.3}} |
||
| + | *Fixed certain Amps no longer applying multiple instances of damage to Eidolons. This resulted in the Shwaak Prism feeling like it lacked punchthrough, when in fact it was the Eidolon who was not registering hits. |
||
| + | |||
| + | {{ver|25.1.1}} |
||
| + | *Fixed the Gantulyst being affected by abilities that the Teralyst is immune to (e.g. Magus Anomaly). |
||
| + | |||
{{ver|22.16}} |
{{ver|22.16}} |
||
*Based on feedback we are making some changes to the intensity of Visual Effects in Warframe, especially in the context of Eidolon fights! |
*Based on feedback we are making some changes to the intensity of Visual Effects in Warframe, especially in the context of Eidolon fights! |
||
| Line 143: | Line 160: | ||
| − | {{ver|22.13.2 |
+ | {{ver|22.13.2}} |
*Teralyst, Gantulyst and Hydrolyst now all drop Arcanes! |
*Teralyst, Gantulyst and Hydrolyst now all drop Arcanes! |
||
**All 3 Teralysts have a 100% chance of dropping an Arcane. |
**All 3 Teralysts have a 100% chance of dropping an Arcane. |
||
| Line 149: | Line 166: | ||
**How you choose to defeat the Teralyst variants also attributes to the Arcane type/chance. |
**How you choose to defeat the Teralyst variants also attributes to the Arcane type/chance. |
||
| − | {{ver|22.13.1 |
+ | {{ver|22.13.1}} |
*Fixed a potential script error when fighting the Teralyst that would break Eidolon Lure functionality. |
*Fixed a potential script error when fighting the Teralyst that would break Eidolon Lure functionality. |
||
*Fixed smaller than intended collision shapes on the Teralysts, especially noticeable on the Gantulyst and Hydrolyst. This did not affect their "damage hitboxes", only player collision. |
*Fixed smaller than intended collision shapes on the Teralysts, especially noticeable on the Gantulyst and Hydrolyst. This did not affect their "damage hitboxes", only player collision. |
||
| Line 155: | Line 172: | ||
{{ver|22.12}} |
{{ver|22.12}} |
||
*Introduced. |
*Introduced. |
||
| + | }} |
||
| − | }}<div align="right">''Last update: {{ver|22.16.1|fix}}''</div> |
||
| + | {{ver/Lu|22.16.1}} |
||
==See also== |
==See also== |
||
| Line 167: | Line 185: | ||
{{SentientNav}} |
{{SentientNav}} |
||
{{BossNav}} |
{{BossNav}} |
||
| + | __NOTOC__ |
||
| ⚫ | |||
[[de:Eidolon Gantulyst]] |
[[de:Eidolon Gantulyst]] |
||
| ⚫ | |||
| + | [[pt:Eidolon Gantulyst]] |
||
[[ru:Эйдолонский Гантулист]] |
[[ru:Эйдолонский Гантулист]] |
||
[[Category:Plains of Eidolon]] |
[[Category:Plains of Eidolon]] |
||
[[Category:Sentient]] |
[[Category:Sentient]] |
||
[[Category:Update 22]] |
[[Category:Update 22]] |
||
| − | [[Category: |
+ | [[Category:Grand Boss]] |
Revision as of 15:36, 12 June 2020
The Eidolon Gantulyst is an enormous spectral Sentient Eidolon creature that can be summoned on the Plains of Eidolon at night, acting as one of the Grand Bosses of the landscape. This is the second of the 3 night bosses of Plains of Eidolon, preceded by Eidolon Teralyst and followed by Eidolon Hydrolyst. Much larger than the preceding Eidolon Teralyst, this one has replaced its right arm with an elongated boulder, and its massive weight creates shockwaves with every step.
All Eidolons are remnants of a Sentient that was defeated in a battle against the Tenno during the Old War, whose remains now wander the plains perpetually searching for their lost components. These fragments are, however, still formidable creatures armed with powerful attacks and near-impenetrable defenses, and are hostile to both Tenno and Grineer alike.
It is important to note players that have not unlocked Transference from The War Within won't have any means to properly fight the Eidolon Gantulyst.
Summoning
The shrine located in the middle of Gara Toht lake.
After Tenno capture the Eidolon Teralyst they must offer their Brilliant Eidolon Shards on the Eidolon shrine located on the Sentient fossil in the middle of Gara Toht Lake.
Behavior
Gantulysts emerge from the Gara Toht Lake on the Plains after being summoned by the altar. Their location is marked with a column of orange light. They generally walk in one direction, even if the Tenno are nearby, though their attention can be drawn to specific locations by using Eidolon Lures found throughout the Plains at night. The Gantulyst has many different attacks and several do extremely high damage, and while most of those attacks are telegraphed, they may remain quite hard to dodge, even with extensive use of the Operator's Void Mode.
- Seeking Sphere: A sphere of light emitted from the Gantulyst's back which slowly travels to its target while firing somewhat inaccurate bullets. These are very slow, and the sphere can either be dodged or destroyed with the Operator's amp.
- Summoning Scream: The Gantulyst glows green and screeches into the air. This will summon and buff Vomvalysts around it.
- Gantulyst Shields: After a Summoning Scream or a Regenerating Scream The Gantulyst deploys a large orange dome covering the area around it, which blocks enemy fire coming from outside the dome. The dome moves with the Gantulyst, who acts as its center, forcing Tenno to get much closer to the Eidolon in order to damage it. Additionally, the dome emits pulses of energy that sap the health of anything outside it in a wide radius (300m). The lures are extremely vulnerable to those pulses.
- Ground Stomp: Stomps the ground, sending out a ground shockwave that knocks back any Tenno in its path a great distance (100 meter radius).
- Knockback Pulses: If Gantulyst Shields are active, Ground Stomp is followed by 4 shockwaves with very powerful knockback. It can be dodged by jumping over them.
- Energy Pillars: If Gantulyst Shields are not present, Ground Stomp is followed by several pillars of light emerged from the ground, dealing heavy damage to anything coming in contact with them. Small patches of yellow smoke and teal-colored ground briefly indicate where the pillars will emerge.
- Ground Smash: Smashes the ground, sending out a series of high-damaging, homing quakes to the Tenno's position. These homing quakes can stagger the Tenno and are 25m high.
- Rock Swing: Swings its rock arm inflicting damage to Tenno struck by it.
- Laser Swing: Similar to the Teralyst's Gun Swing, the Gantulyst swings its gun arm while firing a continuous beam of light in a wide arc. The laser leaves behind a trail of fire, which explodes shortly after.
- Regenerating Scream: The Gantulyst glows green and screeches. This will cause surrounding Vomvalysts (that are not affected by Summoning Scream) to link to the Gantulyst and begin to regenerate its shield. Additionally, this will render it invulnerable to all damage until all linked Vomvalysts are destroyed.
- Sentient Residue: The Gantulyst will "bleed" teal blood on the ground after losing at least one of its Synovia, dealing damage over time to those standing on it.
- Star Prism: Fires a prism into the sky, which then explodes into multiple lasers firing in all directions, dealing heavy damage.
- Energy Spike: The attack Gantulyst uses upon the destruction of one of its limbs. This will emit five pulses of highly damaging Magnetic damage. It will repeat this five times.
Strategy
General
Dealing with the Gantulyst is essentially the same as dealing with the Teralyst, with a few key differences:
- The Gantulyst possesses 6 Synovia, compared to the Teralyst's four, thus requiring the use of 3 charged lures if players wish to capture it. These are located on each of its knees, elbows, and the back of its "armpits".
- The Gantulyst is much bigger, and moves much faster than its smaller counterpart. Because of this, hitting its weak points becomes more challenging.
Players who have control over the lures should stay as close to the Gantulyst as possible, in the event that the latter deploys its Gantulyst Shields (the orange dome). Lures outside the dome will not link to the Gantulyst's broken limbs and seemingly take fatal damage from the pulses the dome emits.
Summary
- Preparation Phase: Damage an Eidolon Lure and hack it to take control of it. The Lure can then be charged by either letting it absorb a nearby Eidolon Vomvalyst's spectral form, or by picking up the energy orb they drop (indicated by a blue beacon) and passing it onto the Lure. Each lure needs the energy of three Vomvalysts to fully charge. It is recommended to have three lures under control by the end of the hunt.
- Phase 1: The Eidolon Gantulyst's shield can only be damaged with Script error: The function "Proc" does not exist. damage; this can be done with the Operator's power (unlocked only after The War Within). The Synovia weak points will be vulnerable once its shields have been depleted.
- Phase 2: Destroy a Synovia; this will trigger an energy spike of 5 Script error: The function "Proc" does not exist. waves in a 65-meter radius and yield an Exceptional Sentient Core for each one destroyed.
- With no charged Lure: The Gantulyst will teleport away, regenerating 75% of its shield.
- With at least 1 charged Lure: The Gantulyst will not teleport away, regenerating only half of its shield.
- Phase 3: Once all Synovia have been destroyed, the Gantulyst will call upon surrounding Vomvalysts to heal it. Destroy these with the Operator.
- Phase 4: The Gantulyst's entire body will finally be vulnerable to damage. At this point it can be defeated.
- With 0-2 charged Lures (Killed): The Gantulyst will collapse to the ground, yielding only three Eidolon Shards and an Arcane Enhancement.
- With 3 charged Lures (Capture): The Gantulyst will be absorbed and dissolve into the ground, the Lures tethered to it will explode, additionally yielding a generous amount of Sentient Cores, one Brilliant and Radiant Eidolon Shard each and drawing from a different drop-pool of Arcane Enhancements.
- Capturing an Eidolon Gantulyst reimburses the previously sacrificed Brilliant Eidolon Shard.
- When captured, the Gantulyst may also drop an Eidolon Gantulyst Articula, which can be placed in the orbiter for decoration.
- Capturing the Gantulyst is required to summon the Eidolon Hydrolyst, as it is the only way to obtain the Radiant Eidolon Shard necessary for the summoning.
Tips
 Shattering Impact can remove the Gantulyst's armor, even while it's shielded; 22 hits will remove the Gantulyst's armor entirely, though doing so will also remove its weakness to Script error: The function "Proc" does not exist. damage. It is advised to hit it only 21 times to allow for Script error: The function "Proc" does not exist. damage to deal bonus damage to the Alloy Armor that it has.
- The Operator's Void Mode is the best way to avoid damage from all of the Gantulyst's area of effect attacks, as Void Mode renders the Operator immune to all forms of damage, while leaving the Warframe similarly invulnerable to attack while the Operator is out as long as they're not channeling an ability. Companions remain vulnerable however, so using Void Dash to escape attacks and exiting Transference to teleport your warframe, as well as your vulnerable companions away, might be a better solution.
- The Eidolon Lures do not take damage from the Gantulyst's energy spike.
- Remember to keep the Eidolon Vomvalyst count around the Gantulyst to a minimum, as they can be a threat if ignored and enables the boss to regenerate their shields via the Vomvalysts.
- Due to the larger size of the Gantulyst, the Granmu Prism often becomes more viable than the Shwaak Prism which loses its ability to deal multiple counts of damage in one hit on the Gantulyst because of its relatively short range. The Klebrik Scaffold can be used as a complement to dispatch the Vomvalysts with ease.
- It is recommended that players with Eidolon Lures following them should not be the main source of damage in the squad, as the lures seem to frequently drift in front of the player, blocking shots and preventing the player from damaging the Gantulyst.
Trivia
- Eidolon in Greek literature are spirit like images of a living or dead person.
- Eidolon Synovias are a direct reference to synovial joints, which are compound joints found throughout the body.
- The Eidolon Gantulyst was placeholder-named as "Bigalyst" during development and is still referred to as such in the game's files.
- Eidolon Gantulyst is sometimes referred to by the community as "Garry".
- The 3 night bosses of Plains of Eidolon together are sometimes referred to by the community as "Tridolons" (i.e. "Three Eidolons" - Eidolon Teralyst, followed by Eidolon Gantulyst, and finally by Eidolon Hydrolyst).
Bugs
- Even with charged lures the Gantulyst may still teleport away.
- Occasionally, the Gantulyst's Knockback Pulse stomp will emit additional pulses which may be erratically timed.
- If the Gantulyst is staggered while casting Star Prism (as when a Synovia is destroyed), its gun will wave erratically and may fire the projectile downward, making its lasers extremely difficult to avoid on flat ground. If on a slope, it is advised to move up-slope from the prism, avoiding it entirely.
Patch History
Hotfix 27.3.15 (2020-04-17)
- Fixed an issue where an Eidolon Wail could hit players in Limbo’s Rift after a Host migration.
- Fixed a script error that could occur when fighting Eidolons if an energy wave was still propagating as the Eidolon died.
Hotfix 25.7.6 (2019-09-18)
- Fixed Teralysts (and other Eidolons) taking more damage to weak points than they should be.
Hotfix 25.7.3 (2019-09-03)
- Fixed certain Amps no longer applying multiple instances of damage to Eidolons. This resulted in the Shwaak Prism feeling like it lacked punchthrough, when in fact it was the Eidolon who was not registering hits.
Hotfix 25.1.1 (2019-06-06)
- Fixed the Gantulyst being affected by abilities that the Teralyst is immune to (e.g. Magus Anomaly).
Update 22.16 (2018-03-15)
- Based on feedback we are making some changes to the intensity of Visual Effects in Warframe, especially in the context of Eidolon fights!
- Reduced some visual noise/lens flares on numerous Warframe abilities.
- Reduced some visual noise/lens flares on the Operator Amp explosions/melee burst.
- Greatly toned down lens flare brightness and durations of Teralyst abilities (and variants) to help with visual clutter
- Fixed an extra "0" damage number popping up for every instance of damage dealt to a Teralyst Synovia. Shotguns will therefore no longer shower the Teralyst with a confetti of zeroes when hitting a weak-point.
- Fixed dealing slightly less damage to Eidolon Synovias due to obscured hitboxes.
- Fixed a script error when being attacked by certain abilities from the Gantulyst or Hydrolyst.
Hotfix 22.13.2 (2018-02-16)
- Teralyst, Gantulyst and Hydrolyst now all drop Arcanes!
- All 3 Teralysts have a 100% chance of dropping an Arcane.
- The variety of Arcanes have been spread out across all 3 variants and weighted according to the rarity of the Arcane and difficulty of the Teralyst variant.
- How you choose to defeat the Teralyst variants also attributes to the Arcane type/chance.
Hotfix 22.13.1 (2018-02-15)
- Fixed a potential script error when fighting the Teralyst that would break Eidolon Lure functionality.
- Fixed smaller than intended collision shapes on the Teralysts, especially noticeable on the Gantulyst and Hydrolyst. This did not affect their "damage hitboxes", only player collision.
Update 22.12 (2018-02-09)
- Introduced.
Last updated: Hotfix 22.16.1 (2018-03-16)
See also
- Plains of Eidolon
- Eidolon Teralyst
- Eidolon Hydrolyst
- Eidolon Vomvalyst
- Eidolon Shard
- Brilliant Eidolon Shard
| Drone | Aerolyst • Anu Mantalyst • Anu Pyrolyst • Battalyst • Brachiolyst • Conculyst • Eradicyst • Membroid • Mimic • Oculyst • Ortholyst • Summulyst • Symbilyst |
| Spectral | Anu Interference Drone • Choralyst • Spectralyst • Vomvalyst |
| Amalgam | Amalgam Arca Heqet • Amalgam Arca Kucumatz • Amalgam Cinder Machinist • Amalgam Phase MOA • Amalgam Swarm Satyr |
| Ships | Condrix • Gyrix • Ionyx • Murex • Orphix • Splintrix |
| Bosses | |
| Teralyst • Gantulyst • Hydrolyst • Ropalolyst • Condrix • Suda-Hunhow • Wolf of Saturn Six (Amalgamized) • Typholyst | |