(→Notes) |
Tag: Visual edit |
||
| (18 intermediate revisions by 6 users not shown) | |||
| Line 1: | Line 1: | ||
| + | {{Top}} |
||
{{Infobox |
{{Infobox |
||
|Box title = Defense |
|Box title = Defense |
||
|image = Defense.png |
|image = Defense.png |
||
}} |
}} |
||
| − | {{quote|Defend an important target against waves of enemy units. If the defense target is destroyed, the mission automatically fails. Every '''5''' waves choose to stay and fight or extract from the mission.|In-Game Description |
+ | {{quote|Defend an important target against waves of enemy units. If the defense target is destroyed, the mission automatically fails. Every '''5''' waves choose to stay and fight or extract from the mission.|In-Game Description}} |
| + | {{clr}} |
||
| ⚫ | |||
| + | {{tocright}} |
||
| ⚫ | |||
Every 5 waves each player will receive an option to either leave the mission individually and receive a displayed reward or to continue for more rewards against progressively harder enemies for an additional 5 waves. The mission is considered completed when players accept the offer to claim a reward and exit. |
Every 5 waves each player will receive an option to either leave the mission individually and receive a displayed reward or to continue for more rewards against progressively harder enemies for an additional 5 waves. The mission is considered completed when players accept the offer to claim a reward and exit. |
||
If you decide not to extract but subsequently fail to clear the next set of waves, you lose any rewards accrued for the waves already cleared, fail the mission and leave with nothing. |
If you decide not to extract but subsequently fail to clear the next set of waves, you lose any rewards accrued for the waves already cleared, fail the mission and leave with nothing. |
||
| − | |||
==Defense Types== |
==Defense Types== |
||
| − | There are a total of |
+ | There are a total of 18 unique Defense maps for fifteen [[Tile Sets]] available. |
Nine of them are mostly specific to the [[Grineer]]: |
Nine of them are mostly specific to the [[Grineer]]: |
||
*[[Media:2013-06-08 00007.jpg|A]]: [[Grineer Galleon]]; Defend a cryopod at an elevator platform in a galleon's ventilation complex. |
*[[Media:2013-06-08 00007.jpg|A]]: [[Grineer Galleon]]; Defend a cryopod at an elevator platform in a galleon's ventilation complex. |
||
*[[Media:2013-06-08 00004.jpg|B]]: [[Grineer Asteroid]], Cave; Defend a cylindrical Orokin reactor in a dark cave. |
*[[Media:2013-06-08 00004.jpg|B]]: [[Grineer Asteroid]], Cave; Defend a cylindrical Orokin reactor in a dark cave. |
||
| + | **Under normal circumstances, only Infested units will be fought here. |
||
| − | *[[Media: |
+ | *[[Media:Grindeer 3.png|G]]: [[Grineer Settlement]], Shelter; Defend a cryopod within a metallic shelter, with entrances all around. |
*[[Media:GrineerShipyard.png|I]]: [[Grineer Shipyard]]s; Defend a cryopod sitting on a tram in a multi-decked shipyard, the tram may move after every wave. |
*[[Media:GrineerShipyard.png|I]]: [[Grineer Shipyard]]s; Defend a cryopod sitting on a tram in a multi-decked shipyard, the tram may move after every wave. |
||
*J: [[Grineer Forest]], Shelter; Similar to the Grineer Settlement, with an open roof. |
*J: [[Grineer Forest]], Shelter; Similar to the Grineer Settlement, with an open roof. |
||
| Line 25: | Line 28: | ||
*Q: [[Grineer Asteroid Fortress]]; Defend a Kuva injector in a Grineer fortress. This area has traps that can harm the player: turrets, tesla coils that electrify the floor around the injector, flamethrowers and toxic gas sprays in the corridors. |
*Q: [[Grineer Asteroid Fortress]]; Defend a Kuva injector in a Grineer fortress. This area has traps that can harm the player: turrets, tesla coils that electrify the floor around the injector, flamethrowers and toxic gas sprays in the corridors. |
||
| − | Six are mostly specific to the [[Corpus]]: |
+ | Six (and two which were removed from the game) are mostly specific to the [[Corpus]]: |
| − | *[[Media:2013-06-08 00012.jpg|C]]: [[Corpus Ship]], Cargo Bay; Defend a cryopod on a raised platform, with two main avenues of approach and 2 approaches from behind. |
+ | *[[Media:2013-06-08 00012.jpg|C]]: [[Corpus Ship (Old)]], Cargo Bay; Defend a cryopod on a raised platform, with two main avenues of approach and 2 approaches from behind. [Superseded by Temple defense when the Corpus Ship tileset was remastered.] |
| − | * |
+ | *S: [[Corpus Ship]], Temple; Defend a cryopod on an elevator platform in the middle of a large square room. [Supersedes Cargo Bay defense.] |
| + | *[[Corpus Outpost]]: |
||
| − | *[[Media:2013-06-08 00015.jpg|E]]: [[Corpus Outpost]], Courtyard; Defend a cryopod in a courtyard in a frigid Corpus outpost. |
||
| − | *[[Media: |
+ | **[[Media:Defense map D.jpg|D]]: Ravine; Defend a cryopod out in the open, surrounded by snowy caves and cliffs. |
| − | *[[Media: |
+ | **[[Media:2013-06-08 00015.jpg|E]]: Courtyard; Defend a cryopod in a courtyard in a frigid Corpus outpost. |
| + | **[[Media:2013-06-08 00019.jpg|F]]: Dam; Defend a cryopod in a frozen dam complex, with enemies storming across two bridges. |
||
| + | *[[Media:Defense Map H.jpg|H]]: [[Corpus Gas City (Old)]], Deck; Defend a cryopod on the multi-level deck of a gas city ship, with enemies approaching from three ascents. [Superseded by Dynamo defense when the Corpus Gas City tileset was remastered.] |
||
| + | *T: [[Corpus Gas City]], Dynamo; Defend a cryopod on top of a lightning harvester. A console beneath the cryopod can be activated once every few minutes to electrify the cryopod platform for several seconds, dealing heavy damage to anyone standing on it. [Supersedes Deck defense.] |
||
*N: [[Corpus Ice Planet]], Shipwreck; Defend a cryopod just outside of a landed shipwreck. |
*N: [[Corpus Ice Planet]], Shipwreck; Defend a cryopod just outside of a landed shipwreck. |
||
Two are specific to the [[Infested]]: |
Two are specific to the [[Infested]]: |
||
*K: [[Orokin Derelict]]; Featuring walkways and man entrances towards a cryopod on at the center of a stand |
*K: [[Orokin Derelict]]; Featuring walkways and man entrances towards a cryopod on at the center of a stand |
||
| − | *L: [[Infested Ship]]; |
+ | *L: [[Infested Ship]]; Defend a cryopod inside an infested Corpus ship with narrow paths towards a large room |
The last one is specific to the [[Orokin Void|Orokin]] |
The last one is specific to the [[Orokin Void|Orokin]] |
||
| Line 41: | Line 47: | ||
When an [[Infested|Infestation]] outbreak is occurring on a defense mission, the infested use the original tile set. |
When an [[Infested|Infestation]] outbreak is occurring on a defense mission, the infested use the original tile set. |
||
| − | The maps '''A''', '''B''', '''E''', '''G''', '''L''', '''N''',''' P''', '''Q''', and ''' |
+ | The maps '''A''', '''B''', '''E''', '''G''', '''L''', '''N''',''' P''', '''Q''', '''R''' and '''S''' have the objective in the center where enemies come from every direction, while the maps '''C''', '''F''', '''H''', '''I''' and '''T''' are not so open to approach and have the defense objective near the edge of the map where enemies can't spawn and thus making them often more easy to defend. Maps '''A''' and '''S''' also have a moving objective, where the elevator platform can randomly raise or lower the objective to a different position every wave. |
Map '''D''' has 3 different locations where a cryopod can randomly spawn: one is in the lower area of the map, one is in the upper area of the map, and one is up on the raised platform above the upper area. |
Map '''D''' has 3 different locations where a cryopod can randomly spawn: one is in the lower area of the map, one is in the upper area of the map, and one is up on the raised platform above the upper area. |
||
| Line 61: | Line 67: | ||
Currently there are several planet-exclusive defense maps: |
Currently there are several planet-exclusive defense maps: |
||
*Grineer map G is available only on [[Mars]]. |
*Grineer map G is available only on [[Mars]]. |
||
| − | *Corpus map |
+ | *Corpus map T is available only on [[Jupiter]]. |
*Grineer map I is available only on [[Ceres]]. |
*Grineer map I is available only on [[Ceres]]. |
||
*Grineer map J is only available on [[Earth]]. |
*Grineer map J is only available on [[Earth]]. |
||
*Corpus map N is only available on [[Europa]]. |
*Corpus map N is only available on [[Europa]]. |
||
| − | *Grineer |
+ | *Grineer maps O and R are only available on [[Uranus]]. |
*Grineer map P is only available on [[Lua]]. |
*Grineer map P is only available on [[Lua]]. |
||
*Grineer map Q is only available on the [[Kuva Fortress]]. |
*Grineer map Q is only available on the [[Kuva Fortress]]. |
||
| + | *Infested map K is only available on [[Deimos]]. |
||
| + | *Orokin map M is only available in the [[Void]]. |
||
==Locations== |
==Locations== |
||
| ⚫ | |||
| − | {{DisplayMissiontype|Defense}}<!---To modify the content of this table please refer to: (You will have to replace Planetname with the name of the Planet that mission is on!) |
||
| − | http://warframe.wikia.com/wiki/Template:Database/Planetname |
||
| − | To change additional details (difficulty, map, tier) about Defense missions refer to |
||
| − | http://warframe.wikia.com/wiki/Template:Database/Defense |
||
| − | Modifing the display-routine is not advised, unless you are an advanced user and know a computer-language or two.---> |
||
| − | |||
{{clr}} |
{{clr}} |
||
| Line 83: | Line 86: | ||
At the end of each round, the decision screen indicates what each individual player intends to do, with undecided players continuing to battle. It is not a vote and extraction occurs for individual players, not the group; these players will appear to disconnect. It is normally advised to decide on a leaving wave before entering the mission or alternatively shortly after it starts. If not, then everyone should leave at the same time as soon as one of the party members decides to extract. |
At the end of each round, the decision screen indicates what each individual player intends to do, with undecided players continuing to battle. It is not a vote and extraction occurs for individual players, not the group; these players will appear to disconnect. It is normally advised to decide on a leaving wave before entering the mission or alternatively shortly after it starts. If not, then everyone should leave at the same time as soon as one of the party members decides to extract. |
||
| − | Significant lag may prevent this option from appearing entirely for clients if the latency is from the host of the match, and the players will be forced to stay and have a host migrate. Keep this in mind if you join a match and notice an unusually high amount of latency. |
+ | Significant lag may prevent this option from appearing entirely for clients if the latency is from the host of the match, and the players will be forced to stay and have a host migrate. Keep this in mind if you join a match and notice an unusually high amount of latency. |
==Composition== |
==Composition== |
||
'''[[Corpus]]''' |
'''[[Corpus]]''' |
||
*Waves 1-4 consist of [[MOA]]s, [[Crewman|Crewmen]], [[Prod Crewman|Prod Crewmen]], and [[Oxium Osprey]]s. |
*Waves 1-4 consist of [[MOA]]s, [[Crewman|Crewmen]], [[Prod Crewman|Prod Crewmen]], and [[Oxium Osprey]]s. |
||
| − | *Waves 5-9 consist of [[Shockwave MOA]]s, [[Shield Osprey]]s, [[Elite Crewman|Elite Crewmen]], [[Crewman|Detron Crewmen]], [[Sniper Crewman|Sniper Crewmen]], [[Corpus Tech| |
+ | *Waves 5-9 consist of [[Shockwave MOA]]s, [[Shield Osprey]]s, [[Elite Crewman|Elite Crewmen]], [[Crewman|Detron Crewmen]], [[Sniper Crewman|Sniper Crewmen]], [[Corpus Tech|Techs]], [[Sapping Osprey]]s, and [[Leech Osprey]]s in addition to previous waves. |
*Waves 10+ consist of [[Railgun MOA]]s, [[Fusion MOA]]s, [[Mine Osprey]]s, [[Nullifier Crewman|Nullifier Crewmen]], [[Anti MOA]]s, and [[Scavenger Drone]]s in addition to previous waves. |
*Waves 10+ consist of [[Railgun MOA]]s, [[Fusion MOA]]s, [[Mine Osprey]]s, [[Nullifier Crewman|Nullifier Crewmen]], [[Anti MOA]]s, and [[Scavenger Drone]]s in addition to previous waves. |
||
*On Io, [[Jupiter]], near the end of every 5th wave, two or three [[Eximus]] [[Amalgam]] units will spawn. |
*On Io, [[Jupiter]], near the end of every 5th wave, two or three [[Eximus]] [[Amalgam]] units will spawn. |
||
| Line 114: | Line 117: | ||
<!---To modify the content of this table please refer to: |
<!---To modify the content of this table please refer to: |
||
http://warframe.wikia.com/wiki/Defense/Rewards--> |
http://warframe.wikia.com/wiki/Defense/Rewards--> |
||
| − | {{CustomCollapsible|Rewards|Rewards}} |
||
{{:Defense/Rewards}} |
{{:Defense/Rewards}} |
||
| − | {{CustomCollapsible/End}} |
||
==Dark Sector Defense== |
==Dark Sector Defense== |
||
| − | Defense missions that take place in [[Dark Sectors]] always involve the [[Infested]]. These Defense missions have a higher level range (and thus, higher difficulty) than the planet they're found on, but give out larger quantities of experience, including the experience bonuses inherent in Dark Sectors. |
+ | Defense missions that take place in [[Dark Sectors]] always involve the [[Infested]]. These Defense missions have a higher level range (and thus, higher difficulty) than the planet they're found on, but give out larger quantities of experience, including the experience bonuses inherent in Dark Sectors, and have a chance to reward melee mods which cannot be obtained outside of Dark Sectors. |
| ⚫ | |||
==Wave Defense== |
==Wave Defense== |
||
'''Wave Defense''' is a variation of the normal Defense rules, commonly found in [[Nightmare Mode]], [[Invasion]]s, and previously [[Alert]]s. Instead of starting at wave 1 and counting up until the players extract or leave, the waves start at a predetermined number and count down to 1, after which the mission ends automatically. There are no mission rewards until all waves are completed. This mission type was first introduced in the [[Artifact Defense Event]]. |
'''Wave Defense''' is a variation of the normal Defense rules, commonly found in [[Nightmare Mode]], [[Invasion]]s, and previously [[Alert]]s. Instead of starting at wave 1 and counting up until the players extract or leave, the waves start at a predetermined number and count down to 1, after which the mission ends automatically. There are no mission rewards until all waves are completed. This mission type was first introduced in the [[Artifact Defense Event]]. |
||
| + | |||
| + | The following Defense variants, organized by the number of waves, operate by Wave Defense rules: |
||
| + | *'''15 Waves:''' Icefields of Riddah ([[Grendel]] Chassis Locator) |
||
| + | *'''10 Waves:''' [[Syndicate]], [[Baro Void-Signal|Void Raider]], [[Nightmare Mode]], [[Sortie]], [[Alert]] |
||
| + | *'''5 Waves:''' [[Invasion]], [[Kuva Lich]] Controlled Territory |
||
==Healing Interactions With Defense Objects== |
==Healing Interactions With Defense Objects== |
||
{{Main|Defense Objects}} |
{{Main|Defense Objects}} |
||
| + | |||
{{#lsth:Defense Objects|Interactions With Sources of Healing and Damage Reduction}} |
{{#lsth:Defense Objects|Interactions With Sources of Healing and Damage Reduction}} |
||
==Notes== |
==Notes== |
||
*Defense missions are considered some of the best missions for mod farming due to the unlimited amount of enemies and the ability to easily leave after each 5 rounds. |
*Defense missions are considered some of the best missions for mod farming due to the unlimited amount of enemies and the ability to easily leave after each 5 rounds. |
||
| − | *As of {{ver|9}}, enemies will now swarm the pod or reactor much more aggressively, with more enemies running up to the defense objective and attempting to destroy it. Also due to update 9, enemies will increase in level with each wave faster |
+ | *As of {{ver|9}}, enemies will now swarm the pod or reactor much more aggressively, with more enemies running up to the defense objective and attempting to destroy it. Also due to update 9, enemies will increase in level with each wave faster than before. |
[[File:CBring.png|right|200px]] |
[[File:CBring.png|right|200px]] |
||
*The first wave will start when one of the players have reached the activation "ring" around the objective, or when 3 minutes have passed. Players are free to loot all the resources around the map before activating the first wave by stepping into the ring. |
*The first wave will start when one of the players have reached the activation "ring" around the objective, or when 3 minutes have passed. Players are free to loot all the resources around the map before activating the first wave by stepping into the ring. |
||
| Line 137: | Line 143: | ||
*Update 9.7 also made it possible for enemies to walk onto and across the large railbox (top left of the picture) providing another (and quicker) way for enemies to reach the pod, and that pathway is more difficult to defend. |
*Update 9.7 also made it possible for enemies to walk onto and across the large railbox (top left of the picture) providing another (and quicker) way for enemies to reach the pod, and that pathway is more difficult to defend. |
||
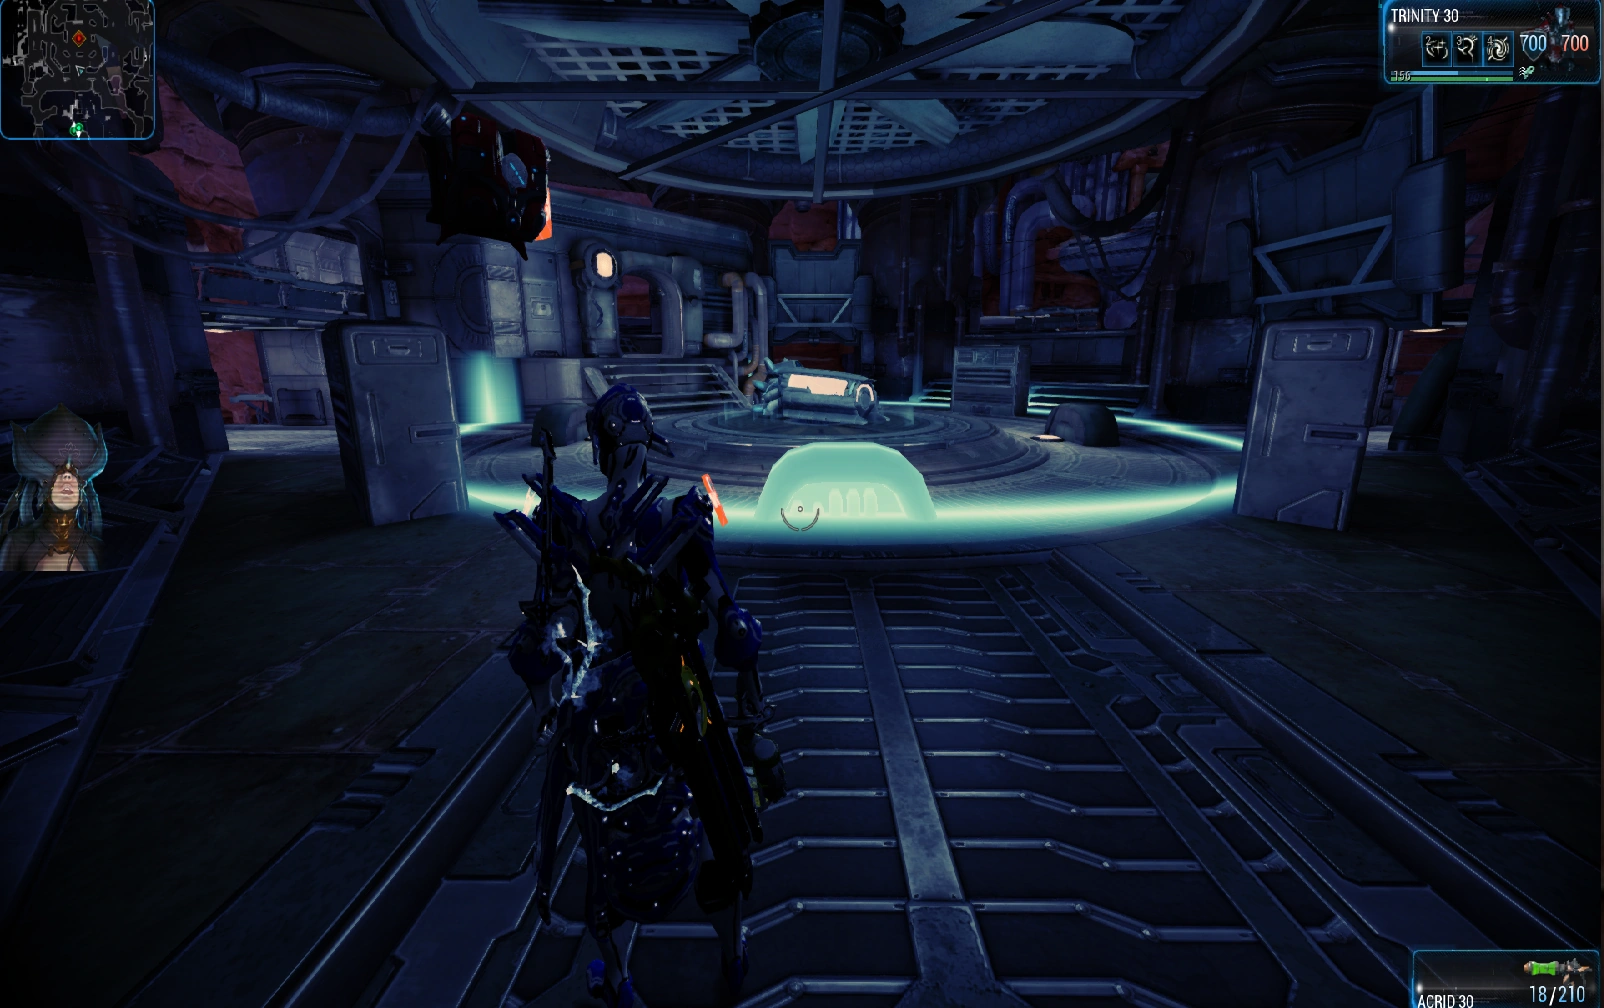
*As of {{ver|12}}, the being inside any cryopods has changed from a human to a humanoid wearing a gold and black suit, similar to the color scheme of primes. |
*As of {{ver|12}}, the being inside any cryopods has changed from a human to a humanoid wearing a gold and black suit, similar to the color scheme of primes. |
||
| − | *Allegedly after a long enough period of time spent in a mission all the units will be eximus. |
||
==Bugs== |
==Bugs== |
||
| Line 149: | Line 154: | ||
==Media== |
==Media== |
||
| − | <gallery |
+ | <gallery widths="300" position="center" spacing="small"> |
File:-Warframe_Defense.png|Endless Defense as seen in the lobby (U9) |
File:-Warframe_Defense.png|Endless Defense as seen in the lobby (U9) |
||
File:HighestLevelEndlessDefense.jpg|Level: 541<br/>Participants: iizoell1029, wink46, lefthandshoot, 41rd13 |
File:HighestLevelEndlessDefense.jpg|Level: 541<br/>Participants: iizoell1029, wink46, lefthandshoot, 41rd13 |
||
| − | inside.jpg| |
+ | inside.jpg|Naked Nick inside the cryopod |
| − | U12 Cryopod.jpg|Cryopod after |
+ | U12 Cryopod.jpg|Cryopod after Update 12 |
Cryopod.PNG|An unknown script upon the top of the cryopod (as seen in Earth Defense) |
Cryopod.PNG|An unknown script upon the top of the cryopod (as seen in Earth Defense) |
||
</gallery> |
</gallery> |
||
| Line 159: | Line 164: | ||
==Patch History== |
==Patch History== |
||
{{Scrollbox/Article| |
{{Scrollbox/Article| |
||
| + | {{ver|30.7}} |
||
| + | *Fixed a crash that could occur if a Client player aborted after a Host migration in a Defense mission. |
||
| + | |||
| + | {{ver|30.5}} |
||
| + | *Fixed objects floating outside the Defense pod in the Stephano, Uranus Defense mission. |
||
| + | *Fixed an issue where the endless Defense checkpoint wouldn’t clear between missions. |
||
| + | *Fixed a few nooks missing collisions in the Corpus Gas City Defense missions. |
||
| + | |||
| + | {{ver|29.10.4}} |
||
| + | *Fixed Defense alarm repeating playback on each Defense wave. Defense alarm sound will now only play when the Defense objective is activated the first time. |
||
| + | |||
| + | {{ver|29.10}} |
||
| + | *Fixed using enemy control abilities on enemies that spawn units preventing the next wave in Defense missions from starting. |
||
| + | |||
{{ver|28.3}} |
{{ver|28.3}} |
||
*The Defense alarm will now sound at the start of every Wave in Orokin Defense missions. |
*The Defense alarm will now sound at the start of every Wave in Orokin Defense missions. |
||
| Line 210: | Line 229: | ||
*The progression of enemy types in all defense missions has been tuned. |
*The progression of enemy types in all defense missions has been tuned. |
||
*For more information these changes, please see our Developer Workshop here: https://forums.warframe.com/index.php?/topic/495562-defense-experiments/ |
*For more information these changes, please see our Developer Workshop here: https://forums.warframe.com/index.php?/topic/495562-defense-experiments/ |
||
| + | |||
| + | {{ver|16.9}} |
||
| + | *Players joining an Defense Mission mid-progress will now only be able to join before the start of the 4th enemy wave- after then the mission is considered 'objective complete'. |
||
{{ver|15}} |
{{ver|15}} |
||
| Line 216: | Line 238: | ||
{{ver|14}} |
{{ver|14}} |
||
*Added Eximus/Leader spawn scaling to Defense missions. |
*Added Eximus/Leader spawn scaling to Defense missions. |
||
| + | |||
| + | {{ver|12}} |
||
| + | *Void Defense missions are now Endless, they no longer have a set number of waves to complete. |
||
| + | *Replaced “Naked Nick” with a tinted Tenno Prisoner for the casket defense mode. |
||
{{ver|11.6}} |
{{ver|11.6}} |
||
Revision as of 17:27, 24 November 2021
Defense is an Endless Mission type in which the players must defend the assigned primary objective or objectives from being destroyed by attacking waves of enemies. The wave will be considered cleared when all the enemies in the wave have been killed.
Every 5 waves each player will receive an option to either leave the mission individually and receive a displayed reward or to continue for more rewards against progressively harder enemies for an additional 5 waves. The mission is considered completed when players accept the offer to claim a reward and exit.
If you decide not to extract but subsequently fail to clear the next set of waves, you lose any rewards accrued for the waves already cleared, fail the mission and leave with nothing.
Defense Types
There are a total of 18 unique Defense maps for fifteen Tile Sets available.
Nine of them are mostly specific to the Grineer:
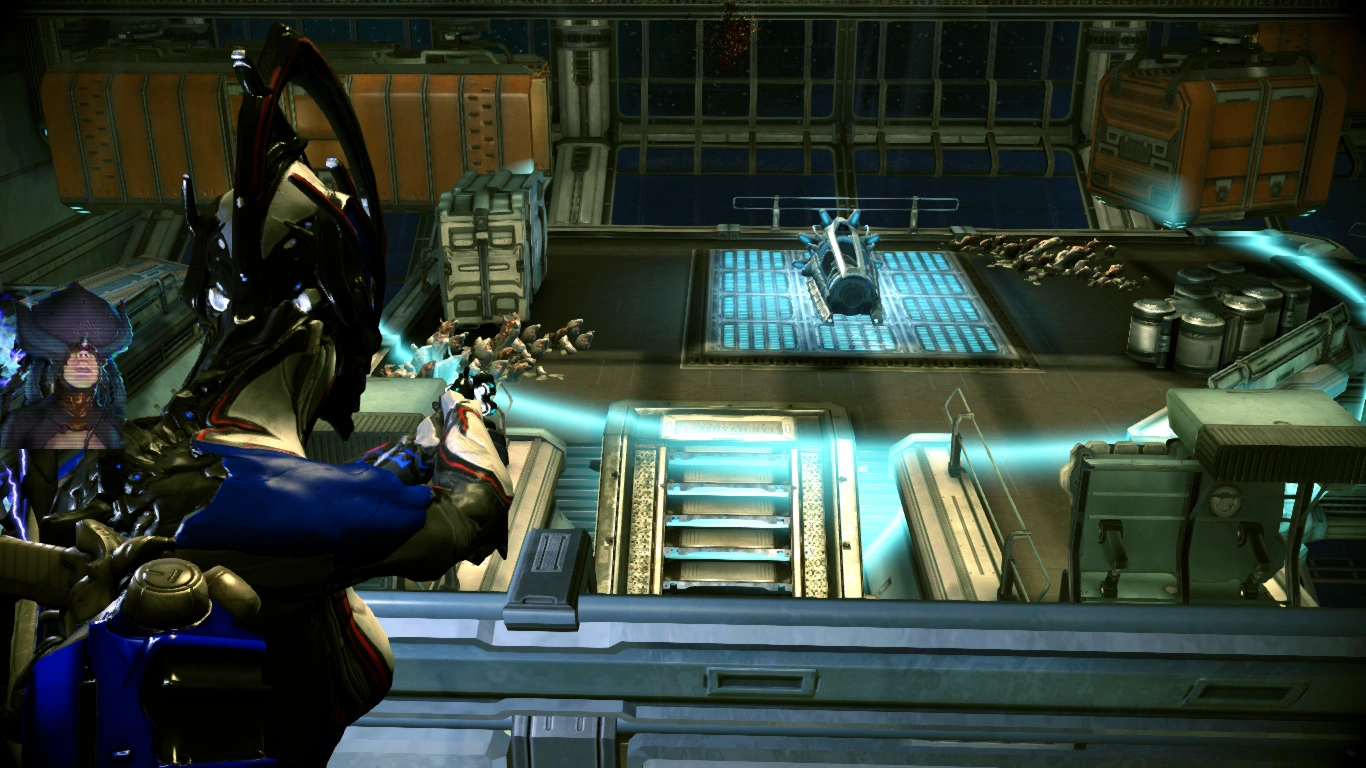
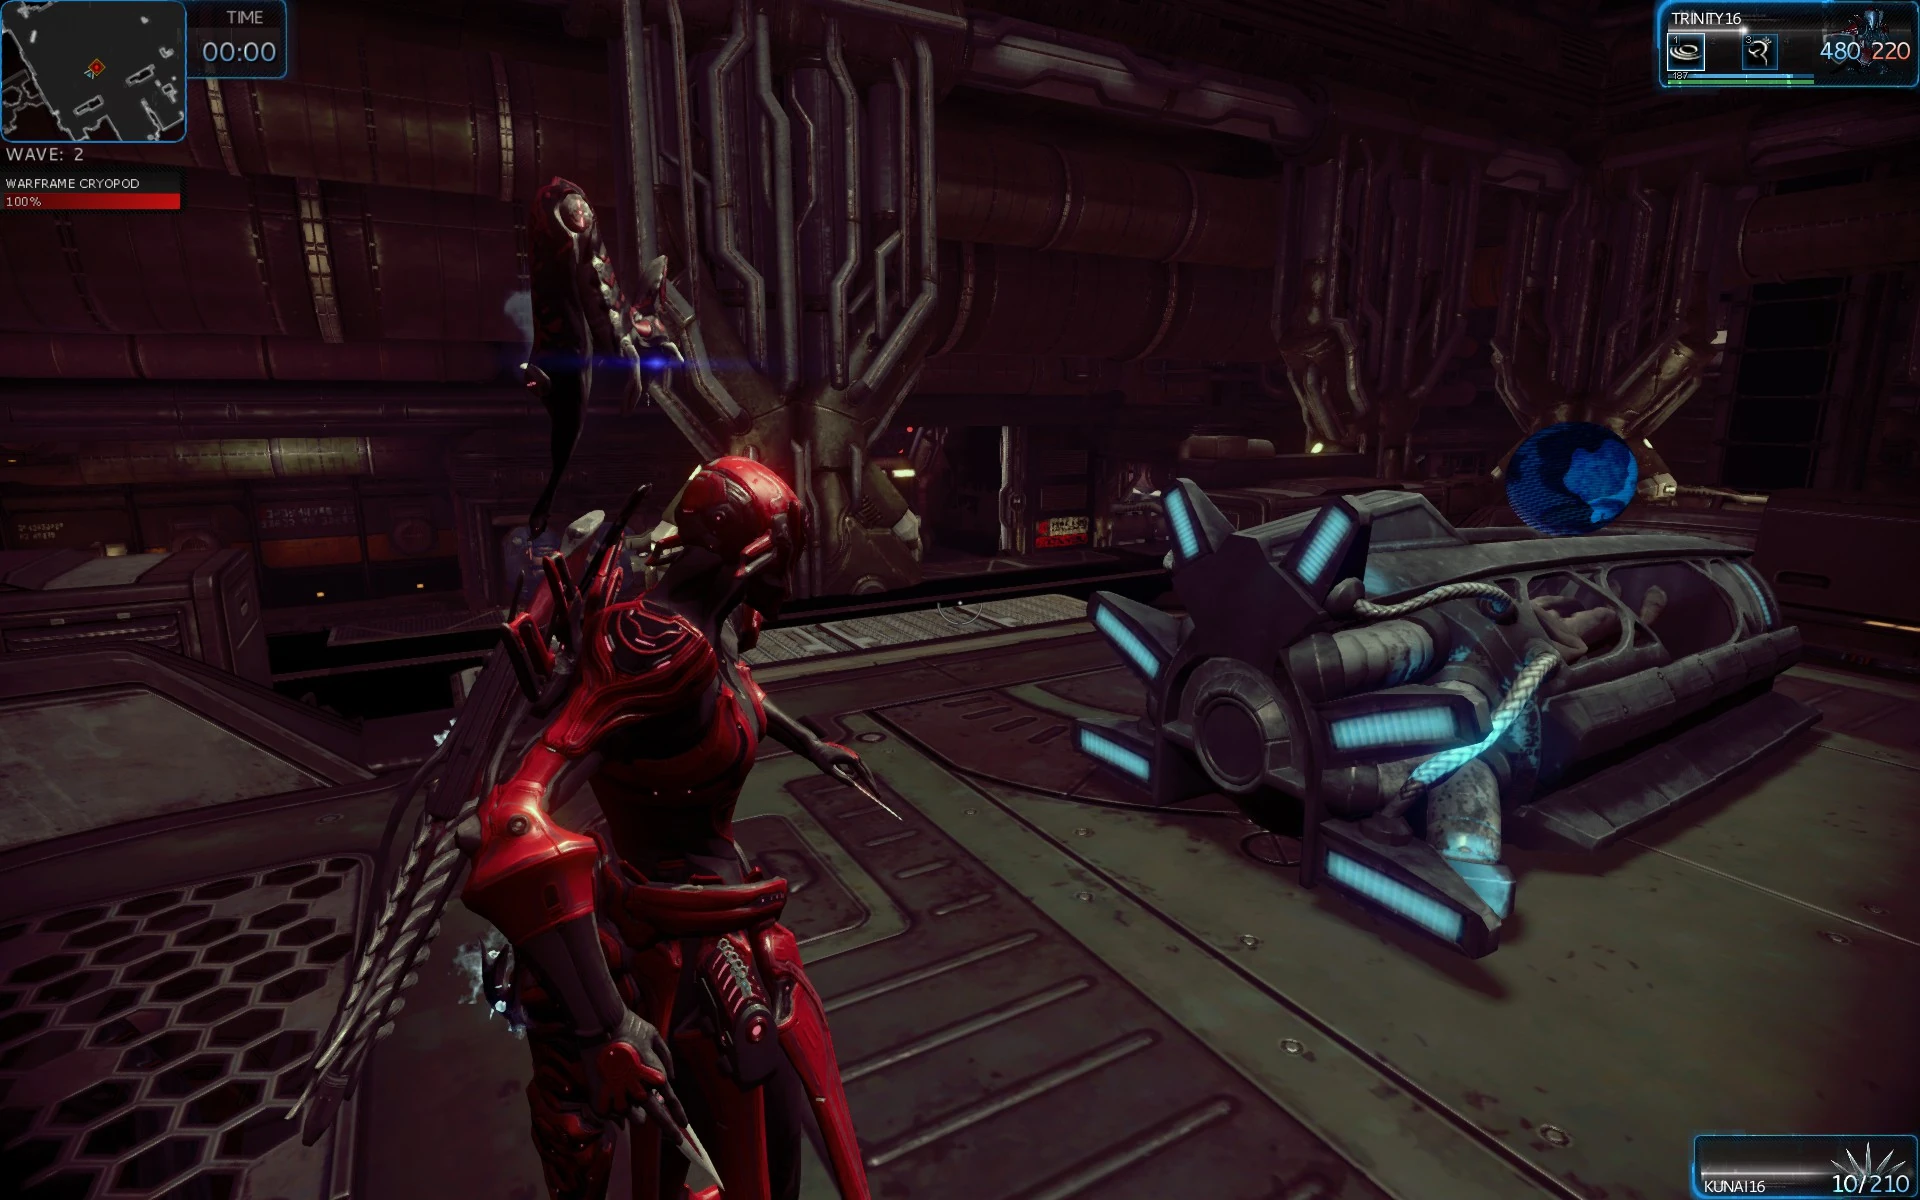
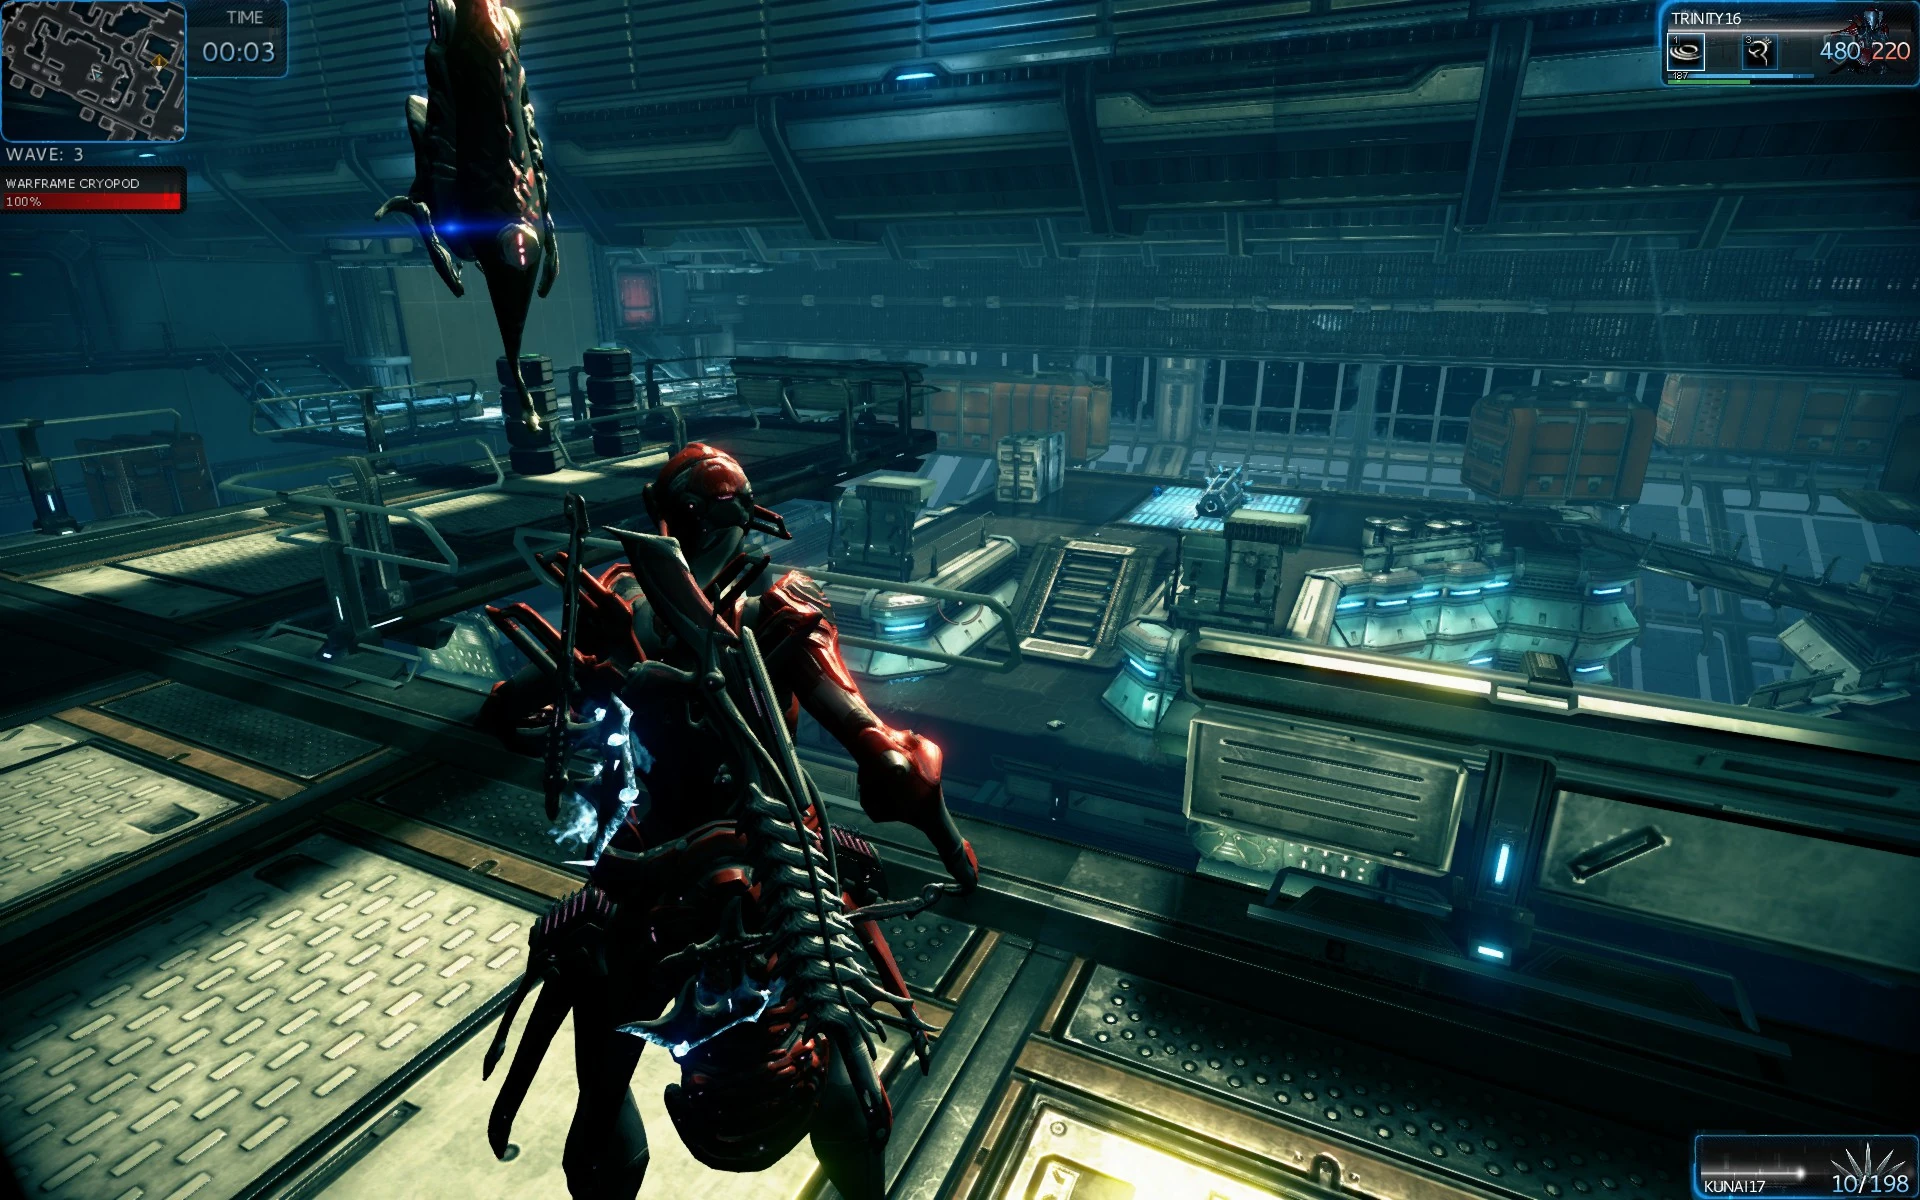
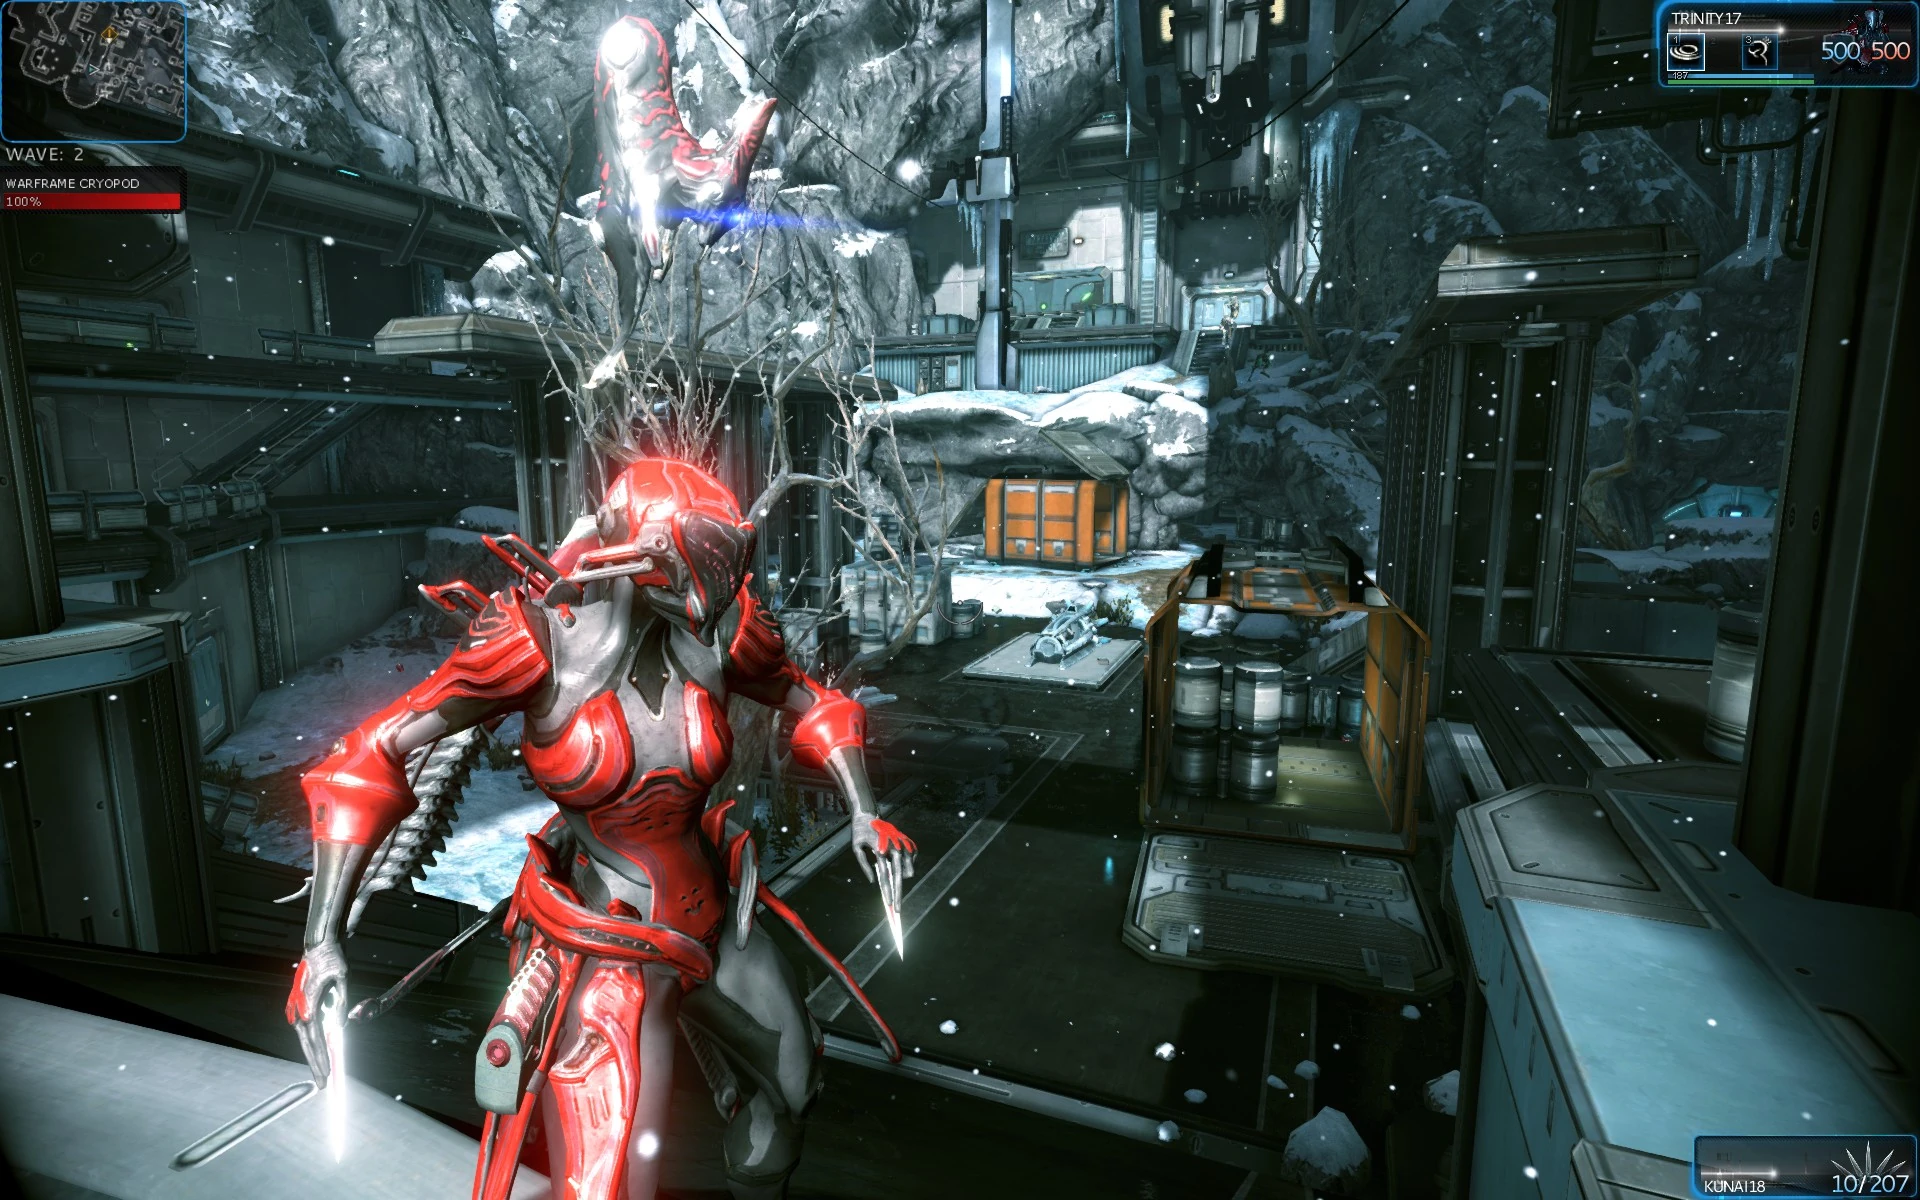
- A: Grineer Galleon; Defend a cryopod at an elevator platform in a galleon's ventilation complex.
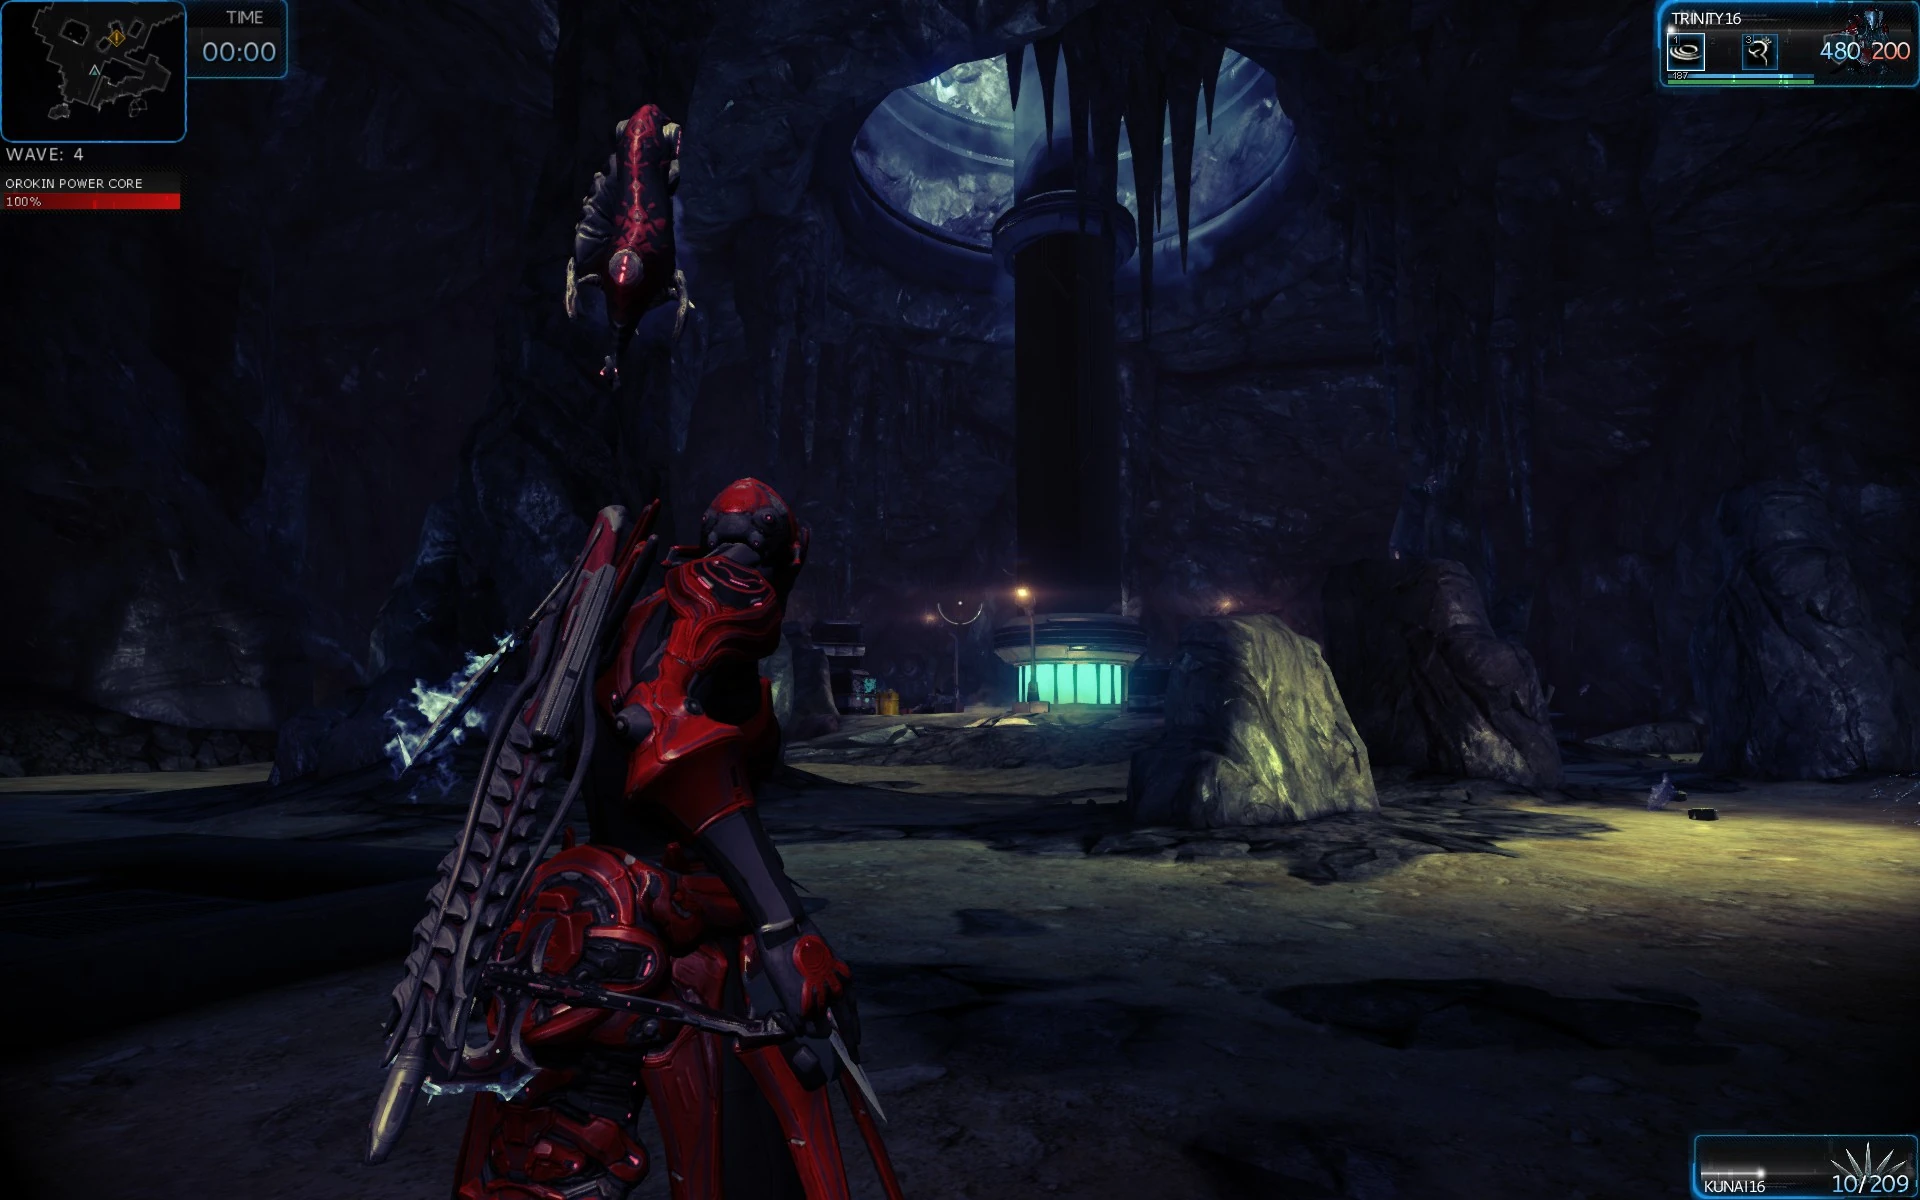
- B: Grineer Asteroid, Cave; Defend a cylindrical Orokin reactor in a dark cave.
- Under normal circumstances, only Infested units will be fought here.
- G: Grineer Settlement, Shelter; Defend a cryopod within a metallic shelter, with entrances all around.
- I: Grineer Shipyards; Defend a cryopod sitting on a tram in a multi-decked shipyard, the tram may move after every wave.
- J: Grineer Forest, Shelter; Similar to the Grineer Settlement, with an open roof.
- Grineer Sealab
- O: Excavation Site; Defend 4 cryopods located in different corners of an Orokin excavation site.
- R: Defend an embryonic injector within a cloning lab.
- P: Orokin Moon; Defend a cryopod on an Orokin platform in the middle of a crater on the moon.
- Q: Grineer Asteroid Fortress; Defend a Kuva injector in a Grineer fortress. This area has traps that can harm the player: turrets, tesla coils that electrify the floor around the injector, flamethrowers and toxic gas sprays in the corridors.
Six (and two which were removed from the game) are mostly specific to the Corpus:
- C: Corpus Ship (Old), Cargo Bay; Defend a cryopod on a raised platform, with two main avenues of approach and 2 approaches from behind. [Superseded by Temple defense when the Corpus Ship tileset was remastered.]
- S: Corpus Ship, Temple; Defend a cryopod on an elevator platform in the middle of a large square room. [Supersedes Cargo Bay defense.]
- Corpus Outpost:
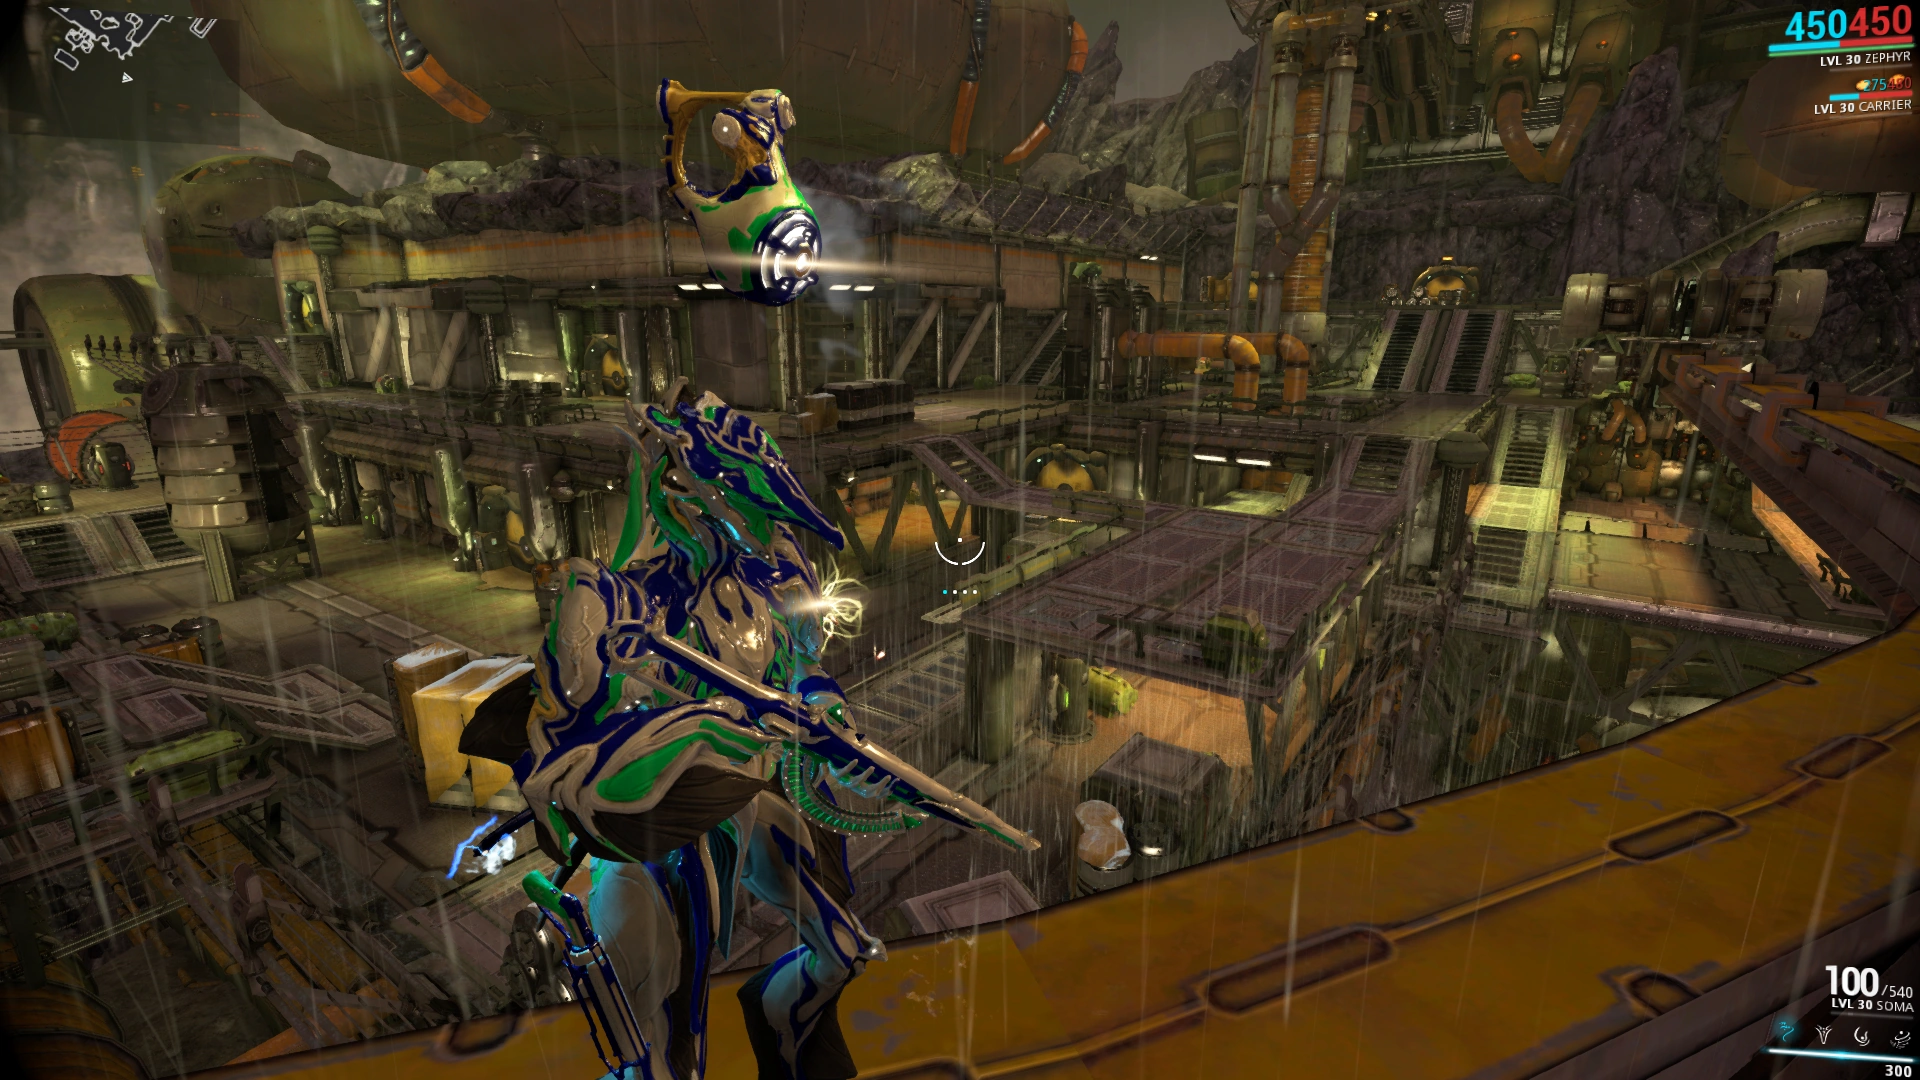
- H: Corpus Gas City (Old), Deck; Defend a cryopod on the multi-level deck of a gas city ship, with enemies approaching from three ascents. [Superseded by Dynamo defense when the Corpus Gas City tileset was remastered.]
- T: Corpus Gas City, Dynamo; Defend a cryopod on top of a lightning harvester. A console beneath the cryopod can be activated once every few minutes to electrify the cryopod platform for several seconds, dealing heavy damage to anyone standing on it. [Supersedes Deck defense.]
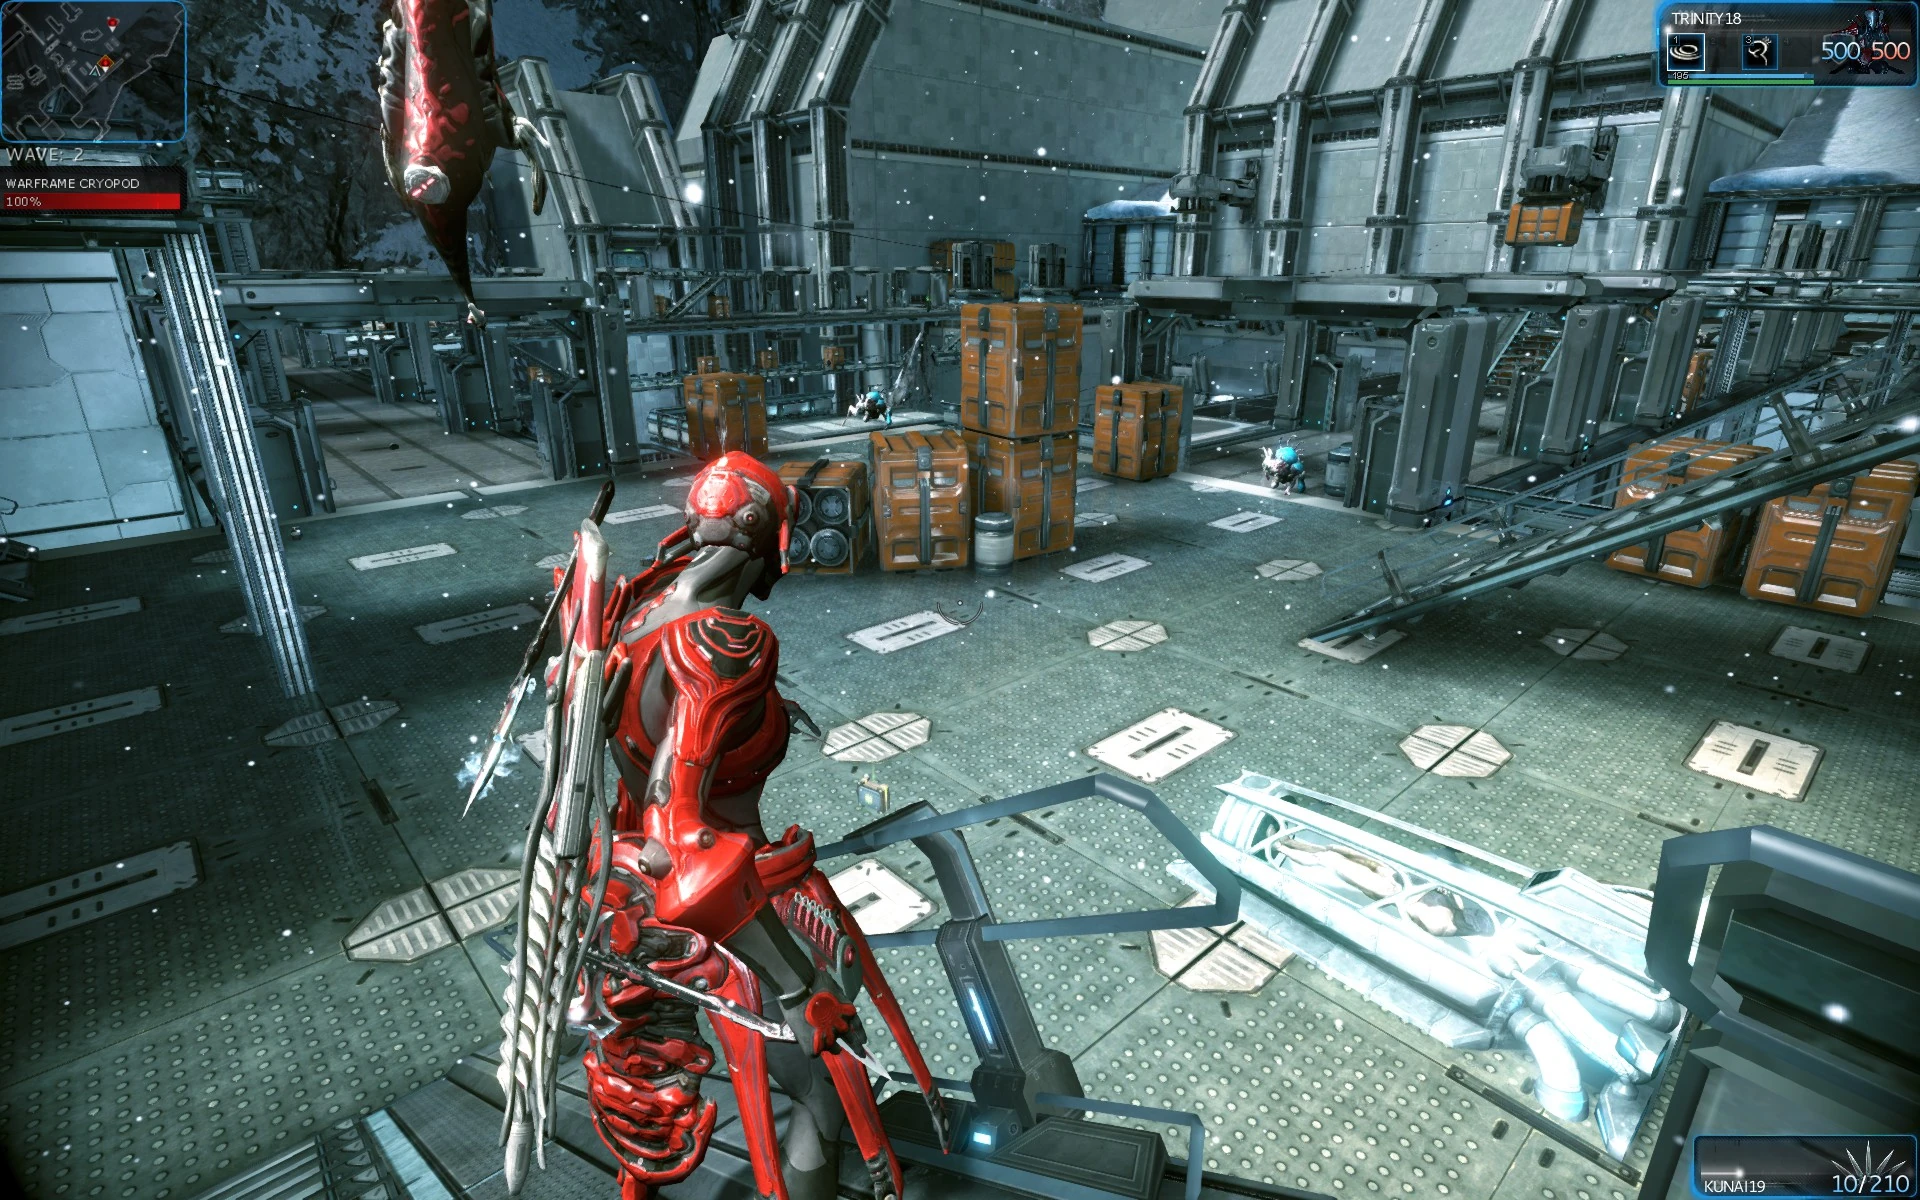
- N: Corpus Ice Planet, Shipwreck; Defend a cryopod just outside of a landed shipwreck.
Two are specific to the Infested:
- K: Orokin Derelict; Featuring walkways and man entrances towards a cryopod on at the center of a stand
- L: Infested Ship; Defend a cryopod inside an infested Corpus ship with narrow paths towards a large room
The last one is specific to the Orokin
- M: Orokin Void; featuring a large room with laser defenses that will instantly kill anybody, Tenno included. 4 distinct paths converge down towards the cryopod.)
When an Infestation outbreak is occurring on a defense mission, the infested use the original tile set.
The maps A, B, E, G, L, N, P, Q, R and S have the objective in the center where enemies come from every direction, while the maps C, F, H, I and T are not so open to approach and have the defense objective near the edge of the map where enemies can't spawn and thus making them often more easy to defend. Maps A and S also have a moving objective, where the elevator platform can randomly raise or lower the objective to a different position every wave.
Map D has 3 different locations where a cryopod can randomly spawn: one is in the lower area of the map, one is in the upper area of the map, and one is up on the raised platform above the upper area.
- The lower area has 3 avenues of approach (the vast majority of enemies only come from 1 direction - this is the easiest location to defend on this map).
- The upper area has 4 avenues of approach (enemies are more spread out among the 4 - this is generally the hardest location to defend).
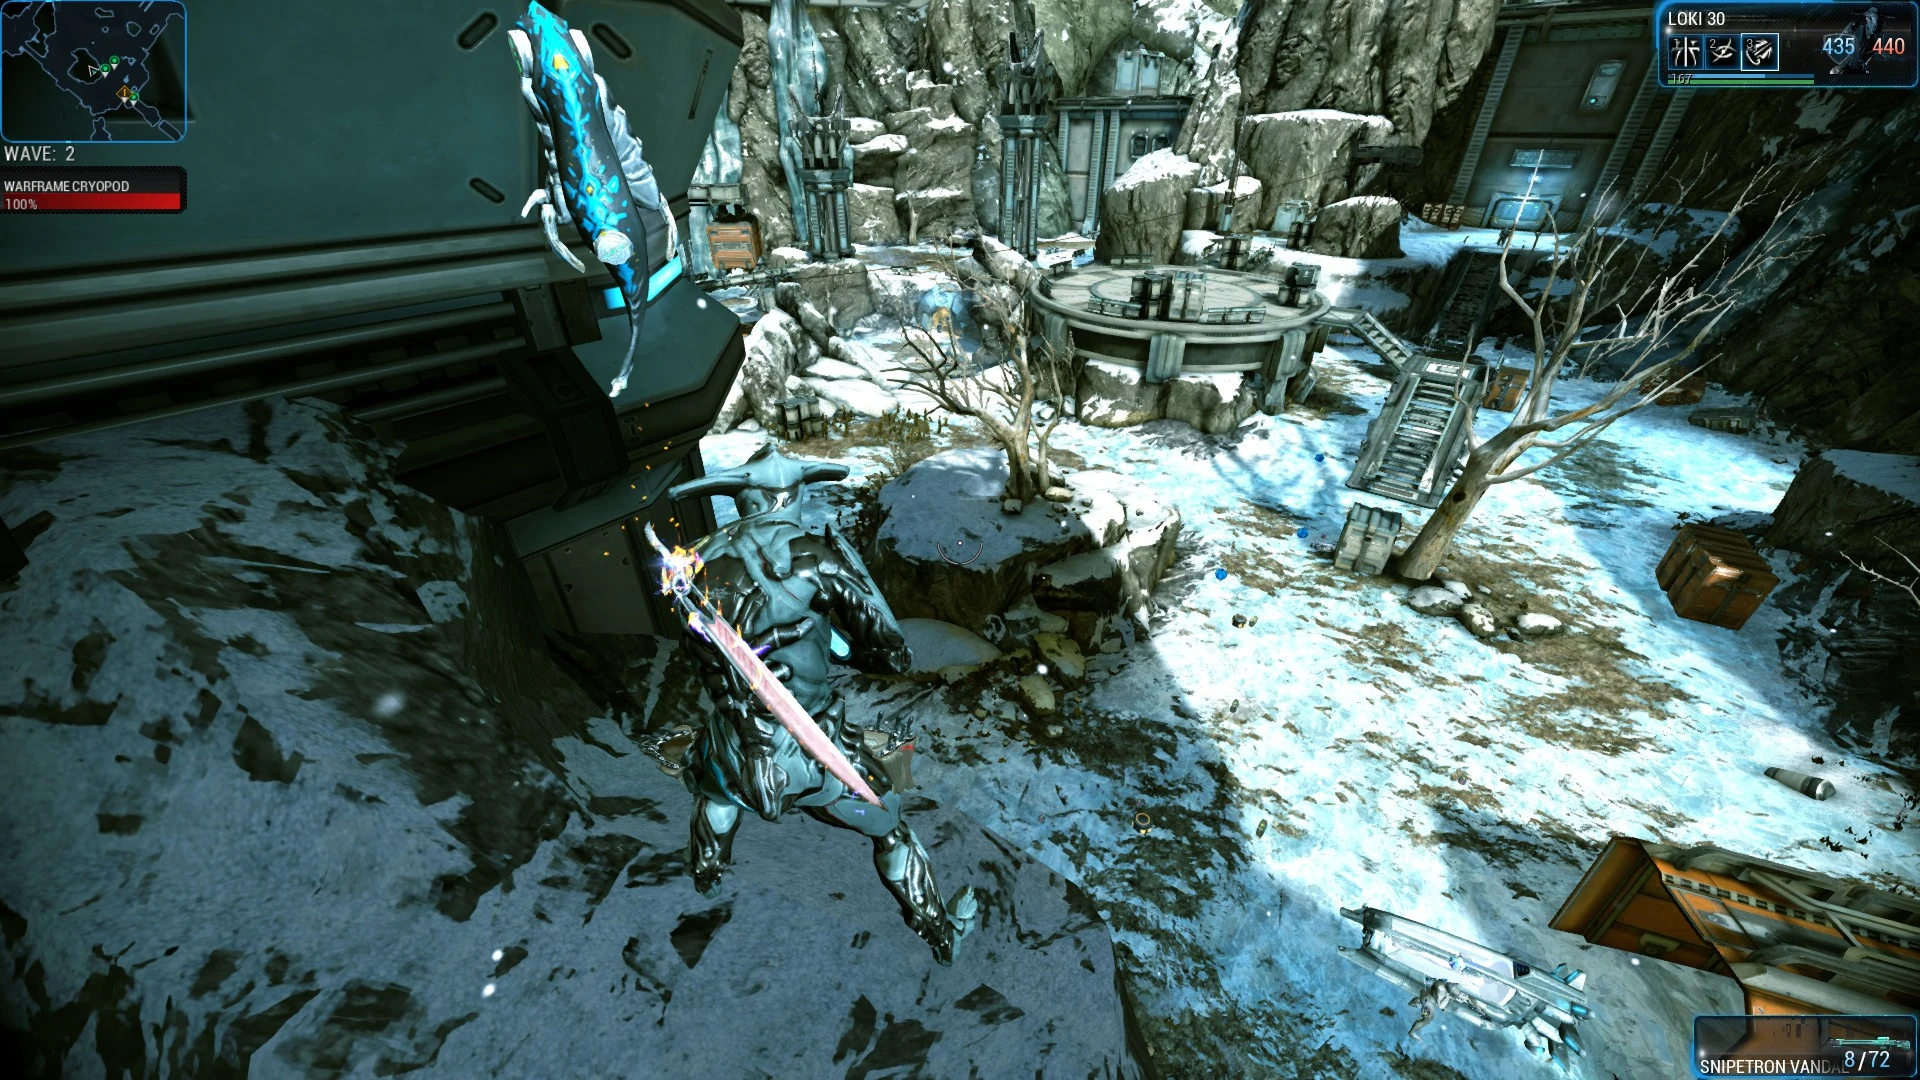
- The raised platform only has 2 avenues of approach and MOAs can jump up the side of the platform as well (the majority of enemies only come from 1 direction - this is the second easiest location to defend).
Map E also has 3 potential locations for the cryopod; either on the center platform where the two shorter bridges meet, or on either of the corners where the long bridges and center bridge meet. The center location is by far the easiest, as enemies are funneled through the short bridges. The corner areas are more challenging as enemies come from both of the bridges, including the small walkway along the long bride, climbing up from the ravine as well as flanking from the upper areas above the cryopods.
On map I the cryopod is sitting on a tram that randomly moves along a rail between 2 locations.
- The tram usually stays in one location for multiple waves, with a chance of moving at the end of a wave. Tenno can also ride the tram while it's moving.
- The cryopod will always spawn in the same location.
Map O has 4 cryopods located on 4 separate corners of the map. After each wave one of the four cryopods is randomly selected to become vulnerable to attack, indicated by a blue aura surrounding it, and will become the current enemy target. Players must thus move to each vulnerable Cryopod as they are marked every wave in order to defend them.
Map P has a single cryopod in the middle of a platform which collapses every 5 waves. Wave 6 has the platform collapse into an Orokin complex while Wave 11 has the platform fall into a huge moon cave. The platform does not fall any further after wave 11.
Currently there are several planet-exclusive defense maps:
- Grineer map G is available only on Mars.
- Corpus map T is available only on Jupiter.
- Grineer map I is available only on Ceres.
- Grineer map J is only available on Earth.
- Corpus map N is only available on Europa.
- Grineer maps O and R are only available on Uranus.
- Grineer map P is only available on Lua.
- Grineer map Q is only available on the Kuva Fortress.
- Infested map K is only available on Deimos.
- Orokin map M is only available in the Void.
Locations
There are a total of three tiers which determines the reward pool players have access to at each 5th wave checkpoint.
Extraction
At the end of each round, the decision screen indicates what each individual player intends to do, with undecided players continuing to battle. It is not a vote and extraction occurs for individual players, not the group; these players will appear to disconnect. It is normally advised to decide on a leaving wave before entering the mission or alternatively shortly after it starts. If not, then everyone should leave at the same time as soon as one of the party members decides to extract.
Significant lag may prevent this option from appearing entirely for clients if the latency is from the host of the match, and the players will be forced to stay and have a host migrate. Keep this in mind if you join a match and notice an unusually high amount of latency.
Composition
- Waves 1-4 consist of MOAs, Crewmen, Prod Crewmen, and Oxium Ospreys.
- Waves 5-9 consist of Shockwave MOAs, Shield Ospreys, Elite Crewmen, Detron Crewmen, Sniper Crewmen, Techs, Sapping Ospreys, and Leech Ospreys in addition to previous waves.
- Waves 10+ consist of Railgun MOAs, Fusion MOAs, Mine Ospreys, Nullifier Crewmen, Anti MOAs, and Scavenger Drones in addition to previous waves.
- On Io, Jupiter, near the end of every 5th wave, two or three Eximus Amalgam units will spawn.
- Waves 1-4 consist of Volatile Runners, Runners, Leapers, Crawlers, Nauseous Crawlers, Toxic Crawlers, Electric Crawlers, Lobber Crawlers and Chargers, along with a random mix of Ancient Healers or Ancient Disruptors.
- Waves 5-9 consist of Ancient Disruptors, Ancient Healers, Tar-Mutalist MOAs, Swarm-Mutalist MOAs and Mutalist Ospreys in addition to previous waves.
- Waves 10+ consist of Toxic Ancients, Brood Mothers, and Boilers in addition to previous waves.
- The only Infested non-boss enemies that don't appear in survival are Mutalist Ospreys.
- Waves 1-4 consist of Butchers, Flameblades, Powerfists, Lancers, and Troopers.
- Waves 5-9 consist of Heavy Gunners, Ballistas, Eviscerators, Shield Lancers, Scorches and Scorpions in addition to previous waves.
- Waves 10+ consist of Drahk Masters, Commanders, Rollers, Seekers, Bombards and Napalms in addition to previous waves.
- Waves 1-4 consist of Corrupted Lancers, Corrupted Butchers, and Corrupted Crewmen.
- Waves 5-9 consist of Orokin Drones, Corrupted Heavy Gunners, and Corrupted MOAs, in addition to previous waves.
- Waves 10+ consist of Corrupted Ancients, Corrupted Bombards and Corrupted Nullifiers, (T2, T3 and T4 only), in addition to previous waves.
Rewards
Rewards from Defense missions are offered every 5 waves during the extraction prompt. If a player chooses to extract, they receive the reward for that particular wave along with rewards offered from previous extraction prompts on that mission. The order of the rotations is AABC.
- The percentages display the chances of a particular item being received as a reward during each extraction prompt.
| A | B | C | |||
|---|---|---|---|---|---|
| 9.09% | 8.33% | 8.33% | |||
| 9.09% | 8.33% | 8.33% | |||
| 9.09% | 8.33% | 8.33% | |||
| 9.09% | 8.33% | 8.33% | |||
| 9.09% | 8.33% | 8.33% | |||
| 9.09% | 8.33% | 8.33% | |||
| 9.09% | 8.33% | 8.33% | |||
| 9.09% | 8.33% | 8.33% | |||
| 9.09% | 8.33% | 8.33% | |||
| 9.09% | 8.33% | 8.33% | |||
| 9.09% | 8.33% | 8.33% | |||
| 8.33% | 8.33% | ||||
Drop tables outdated? Readers can update Module:DropTables/data and cross reference with official drop tables on https://www.warframe.com/droptables.
| A | B | C | |||
|---|---|---|---|---|---|
| 14.29% | 6.25% | 11.06% | |||
| 14.29% | 6.25% | 11.06% | |||
| 14.29% | 6.25% | 11.06% | |||
| 14.29% | 6.25% | 11.06% | |||
| 14.29% | 6.25% | 11.06% | |||
| 14.29% | 6.25% | 11.06% | |||
| 14.29% | 6.25% | 11.06% | |||
| 6.25% | 4.51% | ||||
| 6.25% | 4.51% | ||||
| 6.25% | 4.51% | ||||
| 6.25% | 4.51% | ||||
| 6.25% | 4.51% | ||||
| 6.25% | |||||
| 6.25% | |||||
| 6.25% | |||||
| 6.25% | |||||
Drop tables outdated? Readers can update Module:DropTables/data and cross reference with official drop tables on https://www.warframe.com/droptables.
| A | B | C | |||
|---|---|---|---|---|---|
| 10% | 6.67% | 11.06% | |||
| 10% | 6.67% | 11.06% | |||
| 10% | 6.67% | 11.06% | |||
| 10% | 6.67% | 11.06% | |||
| 10% | 6.67% | 11.06% | |||
| 10% | 6.67% | 11.06% | |||
| 10% | 6.67% | 11.06% | |||
| 10% | 6.67% | 2.26% | |||
| 10% | 6.67% | 2.26% | |||
| 10% | 6.67% | 2.26% | |||
| 6.67% | 2.26% | ||||
| 6.67% | 2.26% | ||||
| 6.67% | 2.26% | ||||
| 6.67% | 2.26% | ||||
| 6.67% | 2.26% | ||||
| 2.26% | |||||
| 2.26% | |||||
Locations:
Drop tables outdated? Readers can update Module:DropTables/data and cross reference with official drop tables on https://www.warframe.com/droptables.
| A | B | C | |||
|---|---|---|---|---|---|
| 13.33% | 22.12% | 6.67% | |||
| 13.33% | 11.06% | 6.67% | |||
| 13.33% | 11.06% | 6.67% | |||
| 13.33% | 11.06% | 6.67% | |||
| 13.33% | 11.06% | 6.67% | |||
| 13.33% | 11.06% | 6.67% | |||
| 13.33% | 6.15% | 6.67% | |||
| 6.67% | 4.1% | 6.67% | |||
| 2.05% | 6.67% | ||||
| 2.05% | 6.67% | ||||
| 2.05% | 6.67% | ||||
| 2.05% | 6.67% | ||||
| 2.05% | 6.67% | ||||
| 2.05% | 6.67% | ||||
| 6.67% | |||||
Drop tables outdated? Readers can update Module:DropTables/data and cross reference with official drop tables on https://www.warframe.com/droptables.
| A | B | C | |||
|---|---|---|---|---|---|
| 8.29% | 18.18% | 12.5% | |||
| 6.96% | 18.18% | 9.68% | |||
| 6.96% | 18.18% | 9.68% | |||
| 6.96% | 9.09% | 9.68% | |||
| 6.96% | 9.09% | 9.68% | |||
| 6.96% | 9.09% | 9.68% | |||
| 6.96% | 9.09% | 9.68% | |||
| 6.96% | 9.09% | 9.68% | |||
| 6.96% | 2.82% | ||||
| 6.96% | 2.82% | ||||
| 6.96% | 2.82% | ||||
| 6.96% | 2.82% | ||||
| 6.96% | 2.82% | ||||
| 6.96% | 2.82% | ||||
| 1.29% | 2.82% | ||||
Drop tables outdated? Readers can update Module:DropTables/data and cross reference with official drop tables on https://www.warframe.com/droptables.
| A | B | C | |||
|---|---|---|---|---|---|
| 22.22% | 77.44% | 22.56% | |||
| 11.11% | 22.56% | 11.06% | |||
| 11.11% | 11.06% | ||||
| 11.11% | 11.06% | ||||
| 11.11% | 11.06% | ||||
| 11.11% | 11.06% | ||||
| 11.11% | 11.06% | ||||
| 11.11% | 11.06% | ||||
Drop tables outdated? Readers can update Module:DropTables/data and cross reference with official drop tables on https://www.warframe.com/droptables.
Locations:
Drop tables outdated? Readers can update Module:DropTables/data and cross reference with official drop tables on https://www.warframe.com/droptables.
| A | B | C | |||
|---|---|---|---|---|---|
| 26.67% | 35.29% | 42.11% | |||
| 20% | 17.65% | 15.79% | |||
| 20% | 17.65% | 15.79% | |||
| 13.33% | 17.65% | 15.79% | |||
| 6.67% | 5.88% | 5.26% | |||
| 6.67% | 5.88% | 5.26% | |||
| 6.67% | |||||
Locations:
Drop tables outdated? Readers can update Module:DropTables/data and cross reference with official drop tables on https://www.warframe.com/droptables.
| A | B | C | |||
|---|---|---|---|---|---|
| 26.67% | 27.91% | 29.79% | |||
| 20% | 13.95% | 17.02% | |||
| 20% | 13.95% | 12.77% | |||
| 13.33% | 13.95% | 12.77% | |||
| 6.67% | 4.65% | 4.26% | |||
| 6.67% | 4.65% | 4.26% | |||
| 6.67% | 4.65% | 4.26% | |||
| 4.65% | 4.26% | ||||
| 4.65% | 4.26% | ||||
| 4.65% | 4.26% | ||||
| 2.33% | 2.13% | ||||
Locations:
Drop tables outdated? Readers can update Module:DropTables/data and cross reference with official drop tables on https://www.warframe.com/droptables.
| A | B | C | |||
|---|---|---|---|---|---|
| 26.67% | 30.3% | 43.9% | |||
| 20% | 18.18% | 14.63% | |||
| 20% | 18.18% | 14.63% | |||
| 13.33% | 18.18% | 14.63% | |||
| 4.35% | 6.06% | 4.88% | |||
| 4.35% | 6.06% | 4.88% | |||
| 4.35% | 3.03% | 2.44% | |||
Locations:
Drop tables outdated? Readers can update Module:DropTables/data and cross reference with official drop tables on https://www.warframe.com/droptables.
| A | B | C | |||
|---|---|---|---|---|---|
| 42.86% | 34.29% | 34.29% | |||
| 21.43% | 17.14% | 17.14% | |||
| 21.43% | 17.14% | 17.14% | |||
| 5.71% | 17.14% | 17.14% | |||
| 4.29% | 5.71% | 5.71% | |||
| 4.29% | 5.71% | 5.71% | |||
| 2.86% | 2.86% | ||||
Locations:
Drop tables outdated? Readers can update Module:DropTables/data and cross reference with official drop tables on https://www.warframe.com/droptables.
Dark Sector Defense
Defense missions that take place in Dark Sectors always involve the Infested. These Defense missions have a higher level range (and thus, higher difficulty) than the planet they're found on, but give out larger quantities of experience, including the experience bonuses inherent in Dark Sectors, and have a chance to reward melee mods which cannot be obtained outside of Dark Sectors.
Wave Defense
Wave Defense is a variation of the normal Defense rules, commonly found in Nightmare Mode, Invasions, and previously Alerts. Instead of starting at wave 1 and counting up until the players extract or leave, the waves start at a predetermined number and count down to 1, after which the mission ends automatically. There are no mission rewards until all waves are completed. This mission type was first introduced in the Artifact Defense Event.
The following Defense variants, organized by the number of waves, operate by Wave Defense rules:
- 15 Waves: Icefields of Riddah (Grendel Chassis Locator)
- 10 Waves: Syndicate, Void Raider, Nightmare Mode, Sortie, Alert
- 5 Waves: Invasion, Kuva Lich Controlled Territory
Healing Interactions With Defense Objects
- Main article: Defense Objects
Only static defense objects can be healed or receive damage reduction from other sources in accordance with the tables below. Note that the Eidolon Lure is not static and is exempt from the rules in the table below.
Healing over time only takes effect when the defense object's natural health regeneration is active; taking damage from enemies briefly disables both the natural regeneration and external regeneration effects for a few seconds.
| Healing source | Normal effect | Effect on all types of static defendable objects (Cryopods, Excavators, etc) |
|---|---|---|
| 15 HP/sec for each active splinter | Same as normal | |
| 500 Max Shields 80% faster Shield recharge |
Same as normal | |
| 500 Shield restore on attach 50 Shield restore per second |
Same as normal | |
| Up to 100% HP and Shield restore | Heal for 500 over 5 seconds, can’t stack | |
| 100 HP/sec + 1% life steal | 100 HP/sec, no life steal | |
| 25 Shields for each enemy killed Burst heal based on how much damage was dealt |
Shields per enemy killed and heal for 500 over 5 seconds, can’t stack | |
| 5 seconds invulnerability 60% Heal over 5 seconds |
No invulnerability Heal for 500 over 5 seconds, can’t stack | |
| Heal for 50 HP/sec | Same as normal | |
| Heals 30% hp every 1.5 secs when ally stands on it | Heal for 100 per 1.5 sec | |
| Heals allies for a % of damage dealt | Heals are capped up to 50 per second. | |
| 125 burst heal 50 HP/sec |
Same as normal | |
| Heals by % of missing health/second | No effect | |
| Heal allies standing on it for 20 HP/sec | Same as normal | |
| Increase max hp by 300 and heal for 30 HP/sec | Same as normal | |
| Grants shields based on 3% of damage dealt | Capped at 250 shields, no overshields | |
| 4 HP/sec for 20 Seconds | Same as normal | |
| Heals for damage dealt in an AoE | Heal for up to 500 over 5 seconds, can’t stack with other players. Going from a burst to Heal over Time. | |
| Ancient Healer Specter | Heal for 100 HP every 20 seconds | Same as normal |
| Heal 3 HP/sec | Same as normal | |
| 60% chance to heal for 150 HP when picking up a health orb with a 15 sec cooldown | Same as normal | |
| 5 - 25 HP/sec while in Affinity range | Same as normal (based on player testing) |
| Damage Reduction Sources | Normal effect | Effect on all types of static Defendable objects (Cryopods, Excavators, etc) |
|---|---|---|
| 50% Damage reduction | Capped at 50% Damage Reduction | |
| Grants 75% Damage reduction to allies | Capped at 50% Damage Reduction | |
| 50% damage redirected to enemies | No effect | |
| 70% Damage reduction | Capped at 50% Damage Reduction | |
| 50% of Immolates Damage reduction applies to allies | Capped at 45% Damage Reduction | |
| 80% Damage reduction | Capped at 50% Damage Reduction | |
| 40% Damage Reduction | Capped at 50% Damage Reduction | |
| Absorbs 90% of damage | Capped at 50% Damage Reduction | |
| 25 - 90% Damage Reduction | No effect (based on player testing) |
Source: https://forums.warframe.com/topic/1189247-warframe-revised-railjack-revisited-part-1-update-274/
Notes
- Defense missions are considered some of the best missions for mod farming due to the unlimited amount of enemies and the ability to easily leave after each 5 rounds.
- As of Update 9.0 (2013-07-13), enemies will now swarm the pod or reactor much more aggressively, with more enemies running up to the defense objective and attempting to destroy it. Also due to update 9, enemies will increase in level with each wave faster than before.
- The first wave will start when one of the players have reached the activation "ring" around the objective, or when 3 minutes have passed. Players are free to loot all the resources around the map before activating the first wave by stepping into the ring.
- As of Update 9.7 (2013-08-30), enemies can jump onto boxes and ledges, including many "safe zones" (such as the platform on the bottom right of the picture) making it even harder to avoid damage.
- Update 9.7 also made it possible for enemies to walk onto and across the large railbox (top left of the picture) providing another (and quicker) way for enemies to reach the pod, and that pathway is more difficult to defend.
- As of Update 12.0 (2014-02-05), the being inside any cryopods has changed from a human to a humanoid wearing a gold and black suit, similar to the color scheme of primes.
Bugs
- There is a bug where you will click to exit the defense mission, but you will stay in the mission without a HUD, and sometimes not being able to move or chat at all. Dying will not bring back the HUD and you will not be able to revive. The only way to leave the mission is to force close the game using Alt + F4 or through a process manager.
- Having the chat window open and active while in the process of choosing between 'Extract' or 'Battle' will result in the typing player ending the mission as if they chose 'Extract', even if they chose 'Battle' explicitly.
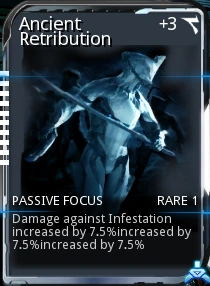
- A test mod card labeled "Ancient Retribution" may show up as a reward, although it cannot actually be rewarded and claiming the card may crash the game or cause instabilities afterwards. The card is used by Digital Extremes for testing and does not actually represent a real mod now or in the future.[1]

- Infested Leapers have a tendency to leap into the Warframe Cryopod which the player/s is/are supposed to be defending in the Dark Sector Defense nodes where the defendable object is a Warframe Cryopod. They will leap straight through the Cryopod and end up in the middle of it and will proceed to swipe at the center of the Cryopod, often spinning around the center of the Cryopod and taking no direct damage simply from being there. It has been tested on multiple levels that Leapers which end up in the center of the Cryopod seem to take more damage from Primary and Pistol weapons than they otherwise would.
- Many Defense mission tilesets can spawn enemies that end up getting caught inside walls or other terrain, and need to be killed with an AoE weapon or ability to continue the mission.
Media
")
")
Participants: iizoell1029, wink46, lefthandshoot, 41rd13
")
")
")
Patch History
Update 30.7 (2021-09-08)
- Fixed a crash that could occur if a Client player aborted after a Host migration in a Defense mission.
Update 30.5 (2021-07-06)
- Fixed objects floating outside the Defense pod in the Stephano, Uranus Defense mission.
- Fixed an issue where the endless Defense checkpoint wouldn’t clear between missions.
- Fixed a few nooks missing collisions in the Corpus Gas City Defense missions.
Hotfix 29.10.4 (2021-03-23)
- Fixed Defense alarm repeating playback on each Defense wave. Defense alarm sound will now only play when the Defense objective is activated the first time.
Update 29.10 (2021-03-19)
- Fixed using enemy control abilities on enemies that spawn units preventing the next wave in Defense missions from starting.
Update 28.3 (2020-08-12)
- The Defense alarm will now sound at the start of every Wave in Orokin Defense missions.
- Fixed Defense mover objectives (Gulliver on Phobos & Hydron on Sedna) affected by Limbo’s Rift continue to take damage regardless of Rift status.
Hotfix 28.2.1 (2020-08-01)
- Fixed an issue where Defense Targets on moving platforms would not move with the platform if a Host migration occurred while it was not in the default position.
Update 28.1 (2020-07-08)
- Fixed broken Defense objectives in Corpus Ship missions after a Treasurer spawns and the squad migrates.
- Fixed enemies in the Corpus Ship Defense tileset sometimes getting stuck on door frames.
Update 28.0 (2020-06-11)
- Fixes towards Defense missions breaking due to an inability to terminate enemies that have been changed to Ally status (Nyx Mind Control, Revenant Enthrall, etc), thus inability to complete the Defense Wave.
- Fixed Clients not seeing the dynamic Damage effects when the Defense Target's Health gets lower in tiles where the Target moves.
Hotfix 27.3.7 (2020-03-31)
- Fixed areas disappearing when viewed from long distances in the Hydron Defense tileset.
Hotfix 27.1.2 (2020-02-18)
- Fixed cases of the Defense target getting stuck in an infinite falling loop in the Sedna Adaro Sortie Defense mission.
Update 27.1 (2020-02-04)
- Fixed an issue where the Defense target's head would float above the cryopod in Defense missions, exposing it to the many dangers of the environment and also the dangers of not having your head connected to your body.
Hotfix 27.0.12 (2020-01-23)
- Defense Waves will now complete if NPCs are downed (but not dead), except for the final Wave, where all NPCs must be taken care of.
Update 25.7 (2019-08-29)
- Defense used to use the base node for enemy count scaling, now difficulty properly scales alongside current enemy level - meaning that the higher the enemy level, the more simultaneous enemies you’ll have to face!
- New players can now join Defense missions until the second Wave instead of the fourth Wave to guarantee enough time to collect Reactant during Void Fissure missions.
- Fixed a loss of functionality when using a controller and spamming Y as the round timer runs out in endless missions (Defense).
- Fixed issues with Nova escaping certain maps for easy-mode Defense.
Hotfix 25.3.2 (2019-07-12)
- Fixed enemies not spawning after a Host Migration in the Grineer Shipyard Defense tileset.
- Fixed Cryopod alignment in the Gas City Defense tileset.
Hotfix 25.2.3 (2019-06-25)
- Fixed overly aggressive optimizations that could lead to graphical popping of certain meshes in the Void Defense tileset.
Hotfix 25.0.8 (2019-05-31)
- Fixed Ivara’s Cloak arrow functioning on Defense objectives, leaving enemies unable to find it.
Update: Specters of the Rail 0.0 (2016-07-08)
- Added a new 'Wave Cleared' sound for Defense missions.
Update 17.0 (2015-07-31)
- Waves will now start with weaker enemies, progressing to support units and ending with heavy and Eximus units to make the end of the wave more intense.
- The number of enemies attacking the player has been increased for early-waves and decreased for later-waves; this should not only improve performance on systems but brings the duration of a 20-wave Defense Mission closer to 25-30 minutes.
- The progression of enemy types in all defense missions has been tuned.
- For more information these changes, please see our Developer Workshop here: https://forums.warframe.com/index.php?/topic/495562-defense-experiments/
Update 16.9 (2015-06-17)
- Players joining an Defense Mission mid-progress will now only be able to join before the start of the 4th enemy wave- after then the mission is considered 'objective complete'.
Update 15.0 (2014-10-24)
- Defense and Interception Mission rewards now stack! This removes the "inventory checkpoints" every 5 waves in Defense -- it's all or nothing now. The Reward Rotation for Defense and Interception has also been changed (to be like Survival) as Stacking Rewards is now in place. The Rewards now rotate through the reward tiers.
Update 14.0 (2014-07-18)
- Added Eximus/Leader spawn scaling to Defense missions.
Update 12.0 (2014-02-05)
- Void Defense missions are now Endless, they no longer have a set number of waves to complete.
- Replaced “Naked Nick” with a tinted Tenno Prisoner for the casket defense mode.
Update 11.6 (2014-01-08)
- Changed enemy scaling for Endless Defense missions at high levels (now wave 100 enemies should be around level 200 instead of 8000).
Update 11.1 (2013-11-27)
- New Corpus Survival and Defense squads using new U11 enemy types.
Update 11.0 (2013-11-20)
- Time between Defense waves has been reduced to 6 seconds
Update 9.5 (2013-08-09)
- All Objectives in Endless Defense now scale to the mission's enemy level - higher end defense should now be slightly more tolerable for solo play or squads without Frost. Does not scale with additional enemy scaling per wave.
Update 9.4 (2013-08-02)
- Defense missions now begin when the pod/core is reached, meaning idlers do not determine when mission begins. One player must reach the defense target for the first Wave to start
Update 9.0 (2013-07-13)
- Enemies will storm the defense targets, which makes them much more aggressive towards it.
Update 8.1 (2013-06-07)
- Defense mission reward tables have been reviewed and changed. Reward tables are now split between factions. Fusion cores have now been added to the drop tables.
Hotfix 7.8.1 (2013-04-24)
- Inventory Checkpoint for Endless Defense added. Reaching every fifth wave (5, 10, 15…) locks in rewards earned to that point.
Update 7.2 (2013-03-22)
- Enemy variety now changes as players progress through waves of Endless Defense
- Ciphers should no longer appear as rewards when completing high level waves of Endless Defense
Update 7.0 (2013-03-18)
- Endless Defense - a new defense mission type. Survive longer for escalating rewards!