Placement Mode[]
Placement mode allows you to customize your dojo or orbiter.
To enter placement mode in the dojo, either:
- Hit Esc → Decorations → Decorate
- Access the room's console, located at the room's entrance(s)
To enter placement mode in the Orbiter
- Hit Esc → Equipment → Orbiter → Decorate
Movement[]
Movement is determined by the standard movement key bindings:
- Forwards: W
- Left: A
- Backwards: S
- Right: D
- Down: LCtrl
- Up: Space
Decoration Menu[]
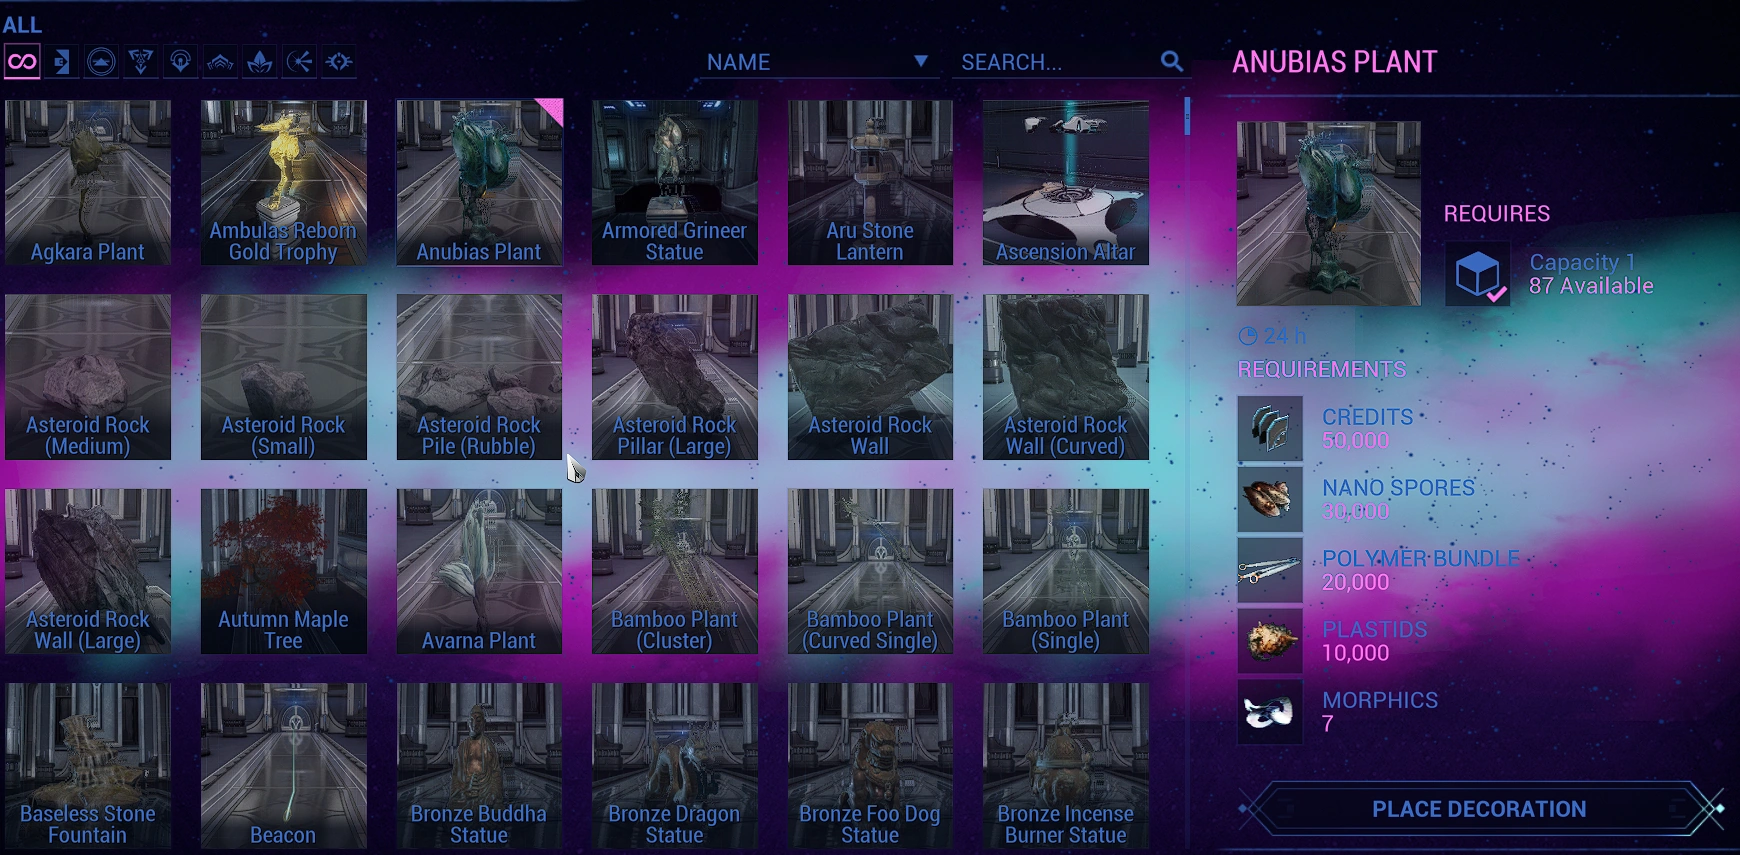
The Decoration menu
Pressing 1 while in placement mode will bring up the decoration menu. The menu will display decorations along with their resource/capacity costs and build times. A limited amount of Decorations can be individually placed in each Dojo room. (see Organization Rooms page for more information about room capacities).
To select a decoration for placement either double click on the desired object, or click once and select Place Decoration in the bottom right.
Clicking once on a decoration in the orbiter menu, however, will select the decoration and go straight to placement since the orbiter decorations have no resource cost info to display. Hovering over decorations will still display capacity cost.
Modes: Basic and Advanced[]
As up Update 30.9, the standard placement options and modifiers were renamed to Advanced Mode, accessed by pressing Tab while in placement mode. By default, on your first login after the update, your placement mode will start in Basic Mode. Basic Mode is meant not to overwhelm newer decorators, and offers only a fraction of options available in Advanced mode. In addition, it changes how decorations are placed. Placement and Post-Placement modifiers listed below, will also listed what modes they are available in, and what differences are created when switching between each mode.
Placement, Funding, and Deletion[]
Free Placement[]
After selecting a decoration for placement, the standard placement mode is known as Free Placement, and as the name would imply you are able to place decorations freely wherever your camera is able to see. The Free Placement camera will still encounter collision on the room exterior or on completed decorations.
Basic Mode: Decorations will appear a set distance away from your camera, and if the decoration encounters a collision while in Free Placement, the decoration will snap its orientation to match the surface of the object encountered. This is referred to as Surface Snapping, and cannot be turned off in Basic Mode.
Advanced Mode: Instead of surface snapping, decorations will maintain their initial orientation regardless of encountered collision.
The only places you can't place a decoration are referred to as Red Zones. Getting their namesake from turning any objects that enter those areas into a solid red, they are located near players, doors, and interactive objects.(eg: room consoles, trading posts, clan vault)
To place an object, left click when it is in its desired location. You can pick an object back up to move it elsewhere at any phase in its construction by left clicking again to bring it back into placement mode.
Unfunded[]
The funding menu.
Once a decoration is placed its surface will be replaced with a yellow hexagonal texture. Highlighting an unfunded decoration and pressing 2 will pull up the funding menu. The left side will display the required resources and amounts needed. The right side will show, first, personal materials available, then clan materials available.
You can up the counters on each required resource by clicking the up arrows and clicking Contribute when you are done, or you can click Contribute All in the bottom right to automatically fill and fund all them. If you do not have the Treasurer permission on your clan rank (You can check by: Hit Esc → Communications → Clan → Clan Management → Edit Hierarchies and then selecting your rank) contributing will automatically use your personal resources.
If you want to automatically contribute to decorations as they are placed, head to and interact with your clan vault. If you have the Treasurer permission, in the bottom right you can toggle Auto-Contribute from Vault and that will enable auto-funding of decorations as they are placed for your entire clan. Please note that the Polychrome is considered a decoration, and will be funded on placement with this on. Auto-fund will only utilize resources stored in your clan vault, and will never take resources from your personal inventory. If your clan vault is out of a resource required, then it will simply fund it as much as it can, but leave the lacking resource empty.
Funded[]
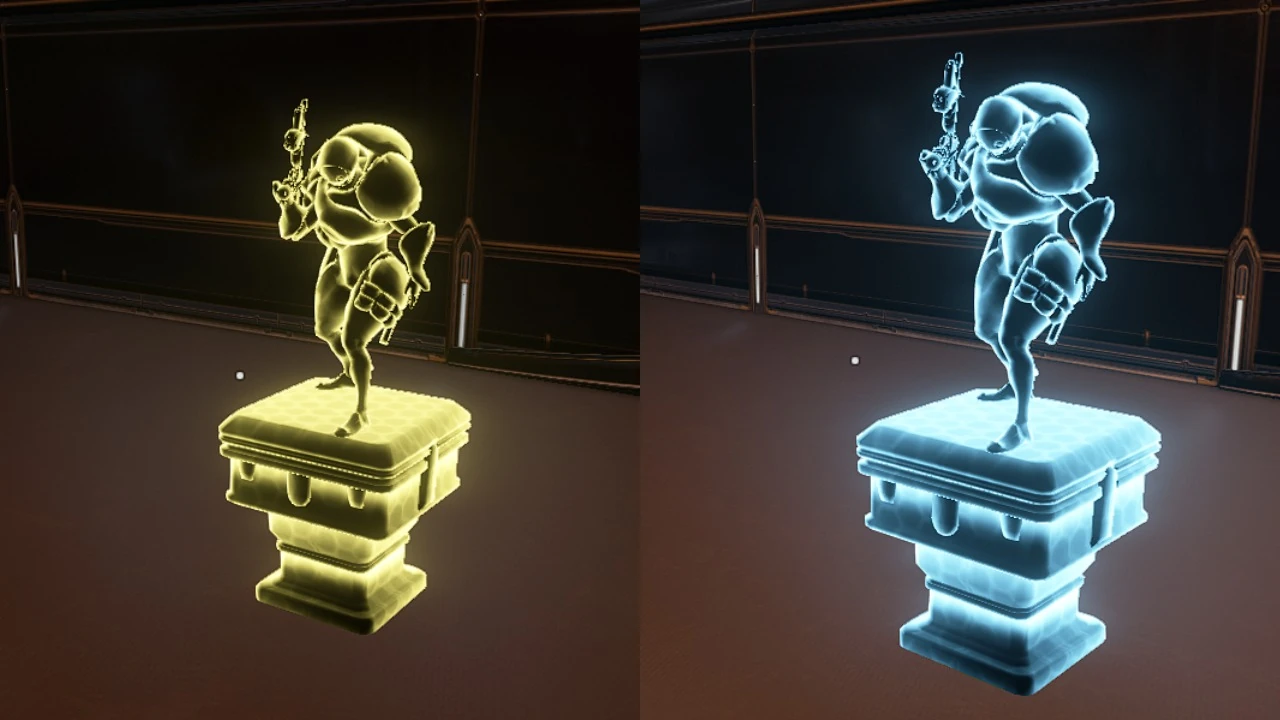
Unfunded, yellow; funded, right.
After a decoration has been fully funded, its surface will be replaced with a blue hexagonal texture. Only after a decoration is fully funded will this reflect and the build timer will start.
Deleting Decorations[]
Decorations can be deleted at any phase of their construction. To delete, right-click any highlighted decoration to delete it. After accepting a mandatory warning window, the decoration will be deleted immediately, and all resources or platinum used to fund the decoration will be refunded to the clan vault.
The amount of resources refunded upon destruction of a decoration will always be the amount that was originally expended in its creation, even if the clan tier has increased since the decoration was placed. This means that clan members should be wary of deleting old decorations, as it may be more expensive to recreate them in the future.
Build Times and Rush Costs[]
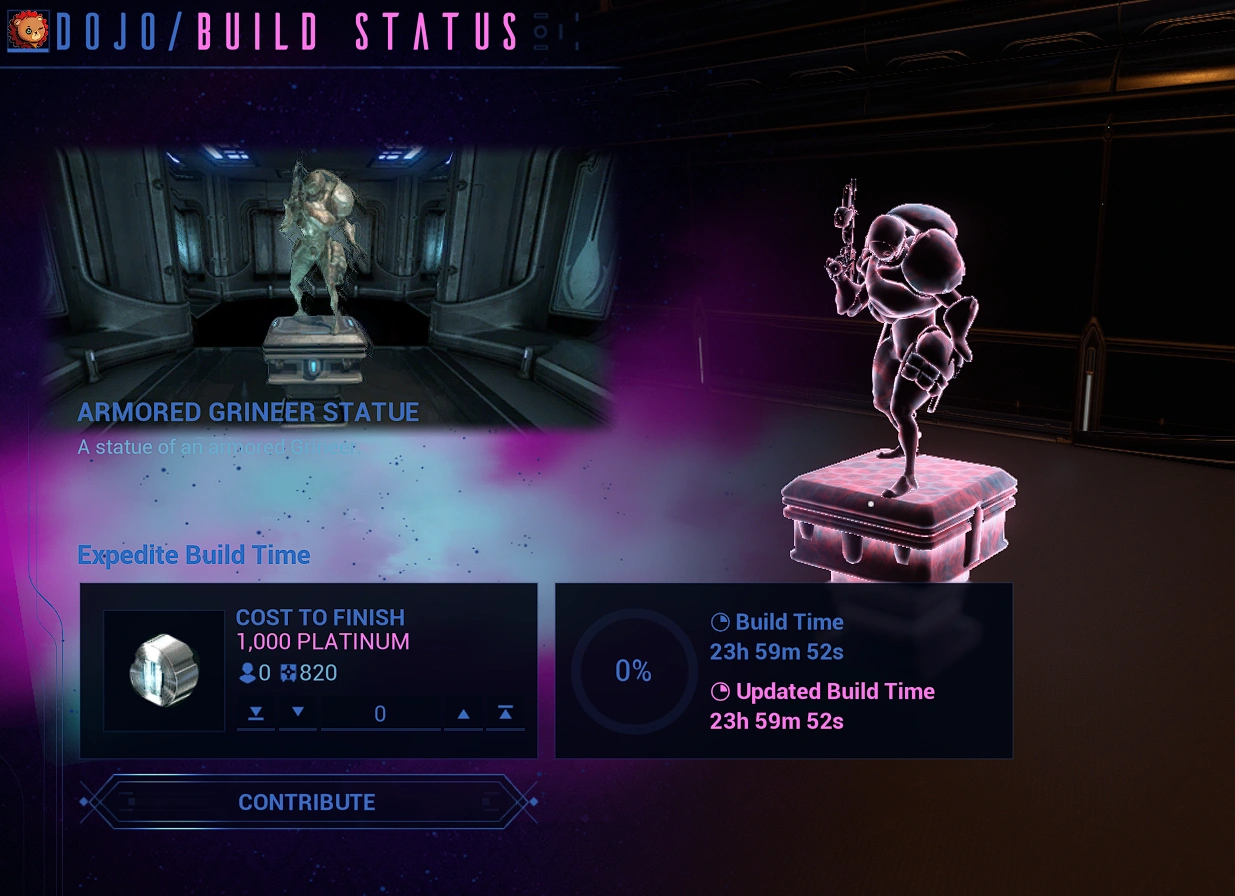

Rush UI
Most decorations take 24 hours to build, with exceptions being the Pruned Bush (18 hours) the Small Topiary Bush (12 hours) and the Dojo Remaster contest trophies (no build time).
The cost to rush decorations (in Platinum) varies by clan tier, build time, and by decoration type (Basic or Complex/Interactive)
The rush cost is reduced by the percentage of time that has already passed. A 70% built decoration only needs 30% of the maximum platinum to be finished instantly. To check a decoration's build progress and view the Rush menu, simply press 2 on a highlighted decoration.
| Rush Type | Ghost |
Shadow |
Storm |
Mountain |
Moon |
|---|---|---|---|---|---|
| Basic | 7 |
22 |
75 |
225 |
750 |
| Complex | Up to 15 |
Up to 45 |
Up to 150 |
Up to 550 |
Up to 1,500 |
Placement Modifiers[]
The following functions are for use during placement.
Rotation[]

A decoration rotating on the "roll" axis.
Objects can be rotated while selected by holding right click and moving your mouse to the left or right. While holding down right click you'll see colored rings which indicate on which axis the decoration will turn. You can toggle rotational axes by pressing Z while right click is held. The axes are as follows: yaw(blue), pitch(red), and roll(green). The point at which each decoration rotates, known as the anchor point, is different per decoration.
Basic Mode: Only one axis of rotation is available, yaw(blue).
Advanced Mode: All 3 axes of rotation are available.
Billboard Facing[]
Billboard Facing locks an object's orientation relative to your camera rather than relative to the room as is standard. It is toggled on and off by pressing Z while an object is selected. Exclusive to Advanced Mode.
Push/Pull[]
Push/Pull allows you to push or pull a decoration relative to your camera. It is activated by holding X while a decoration is selected, and moving your mouse away from or closer to you, to push or pull the decoration, respectively. Exclusive to Advanced Mode.
Scaling[]
Scaling can be used to enlarge to shrink a decoration. As of Update 30.9, Orbiter decorations can now be scaled. Scaling can be achieved by selecting a decoration and either holding R and dragging your mouse back and forth, or by using the C and V keys for incremental scaling. The amount a decoration can be scaled in either direction is limited.
Basic Mode: No incremental scale option is available.
Advanced Mode: All scale options are available.
Surface Snap[]
Surface Snap acts the same as Free Placement other than when you go to place a decoration against any surface, be it another decoration or the room's exterior. After the decoration has encountered a surface it will "snap" its orientation to reflect the surface it comes into contact with and will maintain that position until it encounters another surface. Surface Snap is toggled on by pressing F while a decoration is selected in free placement.
Basic Mode: Permanently on.
Advanced Mode: Can be toggled on and off with F .
Grid Snap[]
Grid Snap forcibly aligns the anchor point of any decoration you select or have selected to a grid. It is toggled on by pressing Shift while a decoration is selected, which will use the smallest grid possible at coordinates spaced by 0.10 meters. Continuing to toggle will take you to 0.25m spacing, 1.00m spacing, and toggling once more will turn it off. Exclusive to Advanced Mode.
Rotation Snap[]
Rotation Snap is similar to Grid Snap except as its name implies, it only applies to rotations. Rather than Grid's 0.10, 0.25, and 1.00m options, Rotation snap offers 15 and 45 degree snap along the available rotational axes. Like Grid, it is toggled on by Shift but only when right click is held. Exclusive to Advanced Mode.
Post-Placement Modifiers[]
The following functions are for use after placement.
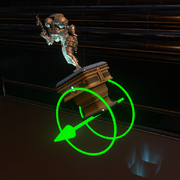
Constrained Movement[]

A decoration in Constrained Movement. The X, Y, and Z axes are shown as red, blue, and green arrows.
Constrained Movement is exclusive to Advanced Mode and allows for placement and rotational adjustments after the decoration has been placed, without the need to pick it back up in Free Placement. Constrained Movement is accessed by highlighting a decoration and pressing R , afterwards, the decoration will show completed textures if not already completed and will display colored arrows to represent the axes upon which you can shift the decoration. Pressing the key corresponding to one of the three axes and moving your mouse will shift the object along that line.
- X Axis(red): R
- Y Axis(blue): F
- Z Axis(green): X
An object can only be shifted along the axes if its anchor point is within sight of the user's camera.
Grid Snap, Rotation, and Rotation Snap can still be accessed and applied via Constrained Movement. However Billboard Facing, Push/Pull, Scaling, and Surface Snap cannot be used.
Global Translation vs Local Translation[]

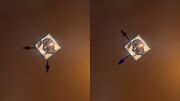
World Translation axes(left); Local Translation axes(right)
Upon entering Constrained Movement you are on World Translation by default. World Translation axes are relative to the room, however you can shift to axes relative to the object's orientation instead by pressing Z to switch to Local Translation. After switching to Local you'll see the colored arrows shift position and align themselves with whatever orientation the decoration is set to. Pressing the corresponding axis keys will now move the object along the new set until Z is pressed again.
Duplication[]
Objects can be duplicated after they have been placed by highlighting a decoration and pressing F . Duplicating will also copy the scale of an object as well as its orientation. Identical in both modes.
Duplicating an orbiter decoration will simply create another of the same decoration(if another is available from vault/inventory to place) at the default starting orientation.
Editable Information[]
While very few, some decoration have editable information that can be accessed after the decoration is placed. Namely the Note Beacon(Orbiter) and the Tributa Statue(Dojo), both of which are used to display text.
Highlighting either the Beacon or the Tributa after placement and pressing 2 will pull up a menu where you can choose text displayed, text coloring, text scale, and projection distance. For more information on how to display unique icons on these displays, see Text Icons.
Polychrome Room[]

A Polychrome placed.
The Polychrome is used to change the colors of the base room itself or the lighting colors therein. The Polychrome can be placed like any other dojo decoration(note that like other interactive objects it will cause a Red Zone around it) and will give no physical indicator that it is funded or not.
To access placement mode for the Polychrome, hit Esc → Decorations → Polychrome Room
The only way to remove a Polychrome is to follow the same process but you'll notice a different prompt if you've already placed it; Esc → Decorations → Remove Polychrome
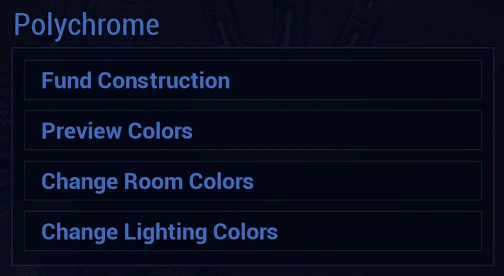
Accessing the Polychrome will give you four options
The menu provided after accessing the Polychrome.
1: Fund Construction[]
This will open up a funding menu identical to the one shown for regular dojo decorations. Unlike regular dojo decorations though, resources spent funding a Polychrome cannot be recovered. As such, be certain you like the colors you are applying because you will never get those resources back.
After a Polychrome is funded no changes can be made to the color choices, with the exception being a Polychrome that was placed with auto-fund on. When that happens you still have the 24 hour bake window to select and apply a color scheme.
The resource requirements are scaled to clan tier and the resources required vary by color used.
2: Preview Colors[]
This will apply any room color changes and lighting changes stored in the Polychrome and display them to the user alone on a twenty second timer. The timer can be halted indefinitely however by entering operator mode, after which you can switch back and enter Decoration Mode with the colors in preview until you leave the dojo or interact with the Polychrome again.
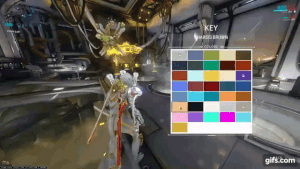
3: Change Room Colors[]

An example of how different room coloring options affect the Chem Lab.
This will display five sections that dictate the room's exterior coloring.
- Primary
- Secondary
- Tertiary
- Accents
- Lights
Lights may seem unnecessary when you're able to control the lighting inside the room, but this actually refers to lights of the base room(eg: room consoles, embedded wall lights)
4: Change Lighting Colors[]

An example of how different room lighting options affect the Chem Lab.
This will display three sections that dictate the room's lighting.
- Key
- Accent
- Fog
Note that these three lighting options are not weighed equally in all rooms. In the Crimson Branch of the dojo for example, Key dictates almost no changes in lighting while Accent dominates the entire room.
Preview Decorations[]
Accessed in any room's console, you can select the Preview Decorations option. This will preview all decorations affiliated with the room in a built, physical, and funded state for 60 seconds so you can see what your room would look like before funding it. You can move around freely in this period, but cannot enter decoration mode normally. If you enter through Polychrome placement, any edit to any decoration during the preview, will end the preview. You can end the preview early by going back to the room console, or entering your menu and cancelling it there.
Personal Decorations[]
Most but certainly not all orbiter decorations can be donated to the dojo via the Clan Vault(Treasury). Once donated they can never be retrieved for use in your orbiter again. Referred to as Personal Decorations they can be accessed by pressing Esc → Decorations → Personal Decorations in the dojo. They require no contributions to build and are placed immediately.
The decoration menu for Personal Decorations is identical to that of the orbiter, and functions the same.