 |
“Ngươi lẽ ra không nên đến đây! Sẽ chẳng còn gì thú vị nếu mất đi yếu tố bất ngờ!” Bài viết này tiết lộ nhiều về cốt truyện của game.
|
The War Within là quest chính xuất hiẹn vào Update: The War Within. Trong quá trình làm nhiệm vụ sẽ mở cho chúng ta biết về nguồn gốc của Twin Queens, Teshin, và sự thật ẩn giấu về những đứa trẻ Zariman 10-0 .
Cách chơi
Cảnh báo: trong phần dưới đây sẽ làm lộ một số tình tiết trong cốt truyện và quá trình làm quest. Vui lòng làm quest trước khi đọc
Để nhận được quest, yêu cầu người chơi tối thiểu có Mastery Rank 5, đã hoàn thành The Second Dream và hoàn tất mục Sedna Junction ở Pluto.
Khi người chơi đạt đầy đủ điều kiện yêu cầu, Má mì Lotus sẽ gửi thư tới chúng ta với nội dung như sau:
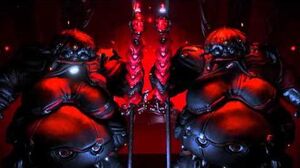
Khi đó quest sẽ được kích hoạt trong Codex. Một đoạn phim ngắn sẽ hiện rõ 2 chị em Twin Queen đang bàn tán sôi nổi về sự Chuyển sinh. Quay trở về Orbiter, Má mì đang lo lắng hỏi thăm sức khỏe của Operator khi thấy trường năng lượng Somatic phát ra cao đột biến. Sau khi trấn an tình trạng sức khỏe của mình là bình thường, Má mì yêu cầu Tenno cắt cử 1 warframe tới Lua để tìm hiểu tình hình.
Cuộc điều tra Hồ chứa tại Lua: Zeipel, Lua
Ngay khi hạ cánh xuống Lua, Má mì kể lại tụi nhỏ bây giờ ra sao tại nơi mà Magulis đã từng giúp lũ nhỏ kiềm chế và phong ấn sức mạnh Void vào bản thân, Má mì kể rằng đó là cách mà các Tenno được sinh ra. Điều này cũng như việc Operator đã từng cố gắng tìm hiểu nơi mình thực sự được sinh ra, Má mì kể lại rằng chúng là những thứ còn sót lại từ Zariman cũng như Orokin từng khủng hoảng trong việc khắc phục lỗi lầm của mình. Sau khi phát hiện ra tín hiệu lạ gần đó, Má mì yêu cầu Tenno tìm hiểu thực hư.
Đi sâu hơn vào khu vực, Tenno sẽ bắt gặp một bóng người có khả năng tốc biến, Tenno chợt nhận ra ngay bóng ma đó là Tenshin. Choáng váng với sự hiện diện của Tenshin, Má mì yêu cầu Tenno theo dấu hắn và để xem mục đích chính của hắn là gì khi lảng vảng gần khu Reservoir ( Hồ chứa).
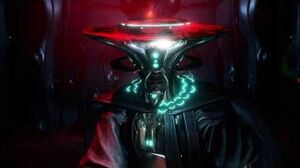
Thông qua hệ thống truyền tin, Teshin yêu cầu Tenno, những kẻ mà hắn thích gọi là "đứa trẻ",rằng mọi việc chẳng liên quan tới chúng. Mảy may bỏ qua thái độ của Teshin, Operator hỏi hắn đang làm trò gì quanh đây. Khi Tenno gần như bắt kịp Teshin, chúng thấy Tenshin đang làm gì đó gần 1 Hồ chứa bị hỏng, cùng lúc 1 giọng nói của Thánh nữ yêu cầu Teshin mang "chúng" tới chỗ cô ấy. Sau khi tò mò về nhân dạng của giọng nói đó, Teshin thừa nhận Thánh nữ chính là "Nữ Hoàng" và Operator chợt nhận ra đây chính là Twin Queen của chủng Grineer.
Ngay chính lúc đó, sự an toàn của tụi nhỏ chẳng còn bao nhiêu, Teshin chiến đấu với chúng nếu chúng cứ tiếp tục đi theo hắn. Và hắn sử dụng 1 Specter để trốn thoát, đồng thời bè lũ Corrupted xuất hiện rất nhiều bao quanh.
Operator yêu cầu Má mì tiếp tục truy vết Teshin bởi chính con Specter còn lưu lại sự hiện diện của hắn. Một ý nghĩ thoáng qua, Lotus cứ nghĩ Grineer Queen chỉ là một truyền thuyết được truyền lại bởi lũ chỉ huy Grineer chứ không hề tồn tại nên khuyên Tenno nên để yên cho Teshin hoàn thành việc đó 1 mình. Nhưng không, Operator hiện đang bất mãn vì thái độ láo toét và không nhân nhượng của Teshin nên chúng đã không nghe lời và yêu cầu bà tiếp tục truy vết Teshin trong khi chúng đang bận xử lý lũ Specter còn sót lại.
Người chơi lúc này phải truy đuổi 1 trong những bóng ma của Teshin, thứ khi xuất hiện sẽ để lại một vệt năng lượng màu tím, và hạ gục Teshin. Không như các mục tiêu trong nhiệm vụ Capture khác, bóng ma của Teshin sẽ tấn công lại người chơi nếu bị đe dọa. Khi Bóng ma bị hạ gục, người chơi sẽ phải bắt chúng như những mục tiêu bình thường khác. Sau khi hoàn thành, Lotus yêu cầu Tenno rút quân.
Truy đuổi Teshin phần 1: Carpo, Jupiter
Heading to a Corpus Gas City on Jupiter where the Lotus has tracked Teshin's signal, the Lotus theorizes on the tactical advantage they can gain against the Grineer if they can locate the Twin Queens. The Operator then wonders why Teshin doesn't want the Tenno's help if he's tracking down the Queens, making the Lotus muse about Teshin's prideful personality.
Once the Tenno catches up to Teshin's location, it is revealed that they are tracking yet another of Teshin's Specters, and the Lotus asks the Tenno to capture it so they can use it to track Teshin. As with the previous mission, players must disable and then Capture the Teshin Specter before it can escape. Players can then extract once they have accomplished the mission.
A recent patch may have made the rest of this quest solo-only.
Truy đuổi Teshin phần 2: Bãi thiên thể Naga, Sedna
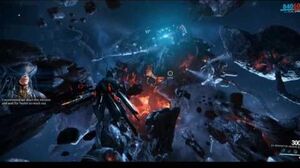
The Lotus tracks down Teshin's next location to a supposedly uninhabited asteroid field that deep scans reveal to have a 'security matrix', making the Lotus believe that someone is hiding something. The Lotus then asks the Tenno to prepare their Archwing for the mission.
Deployed near an unusual asteroid structure, the Lotus briefs that the Tenno must disable the security matrix surrounding it before they can head inside to investigate. The Lotus asks Ordis as to whether their angle of approach is the best, to which Ordis points out the various traps and dangers outside of the shipping corridor the Tenno are in, and are thus advised to stick to this route.
Inside the asteroid base, Ordis points to the presence of a Grineer transport ship passing through several laser scanners on their route. In this section, players must avoid the red laser scanners within the corridor by keeping the moving transport between themselves and the red laser scanners as they pass. There are two sets of lasers that players must clear safely before they reach the end of the corridor, terminating into a transport hangar, where the player will encounter Kuva Grineer for the first time.
Upon reaching the hangar players are automatically detached from their Archwings to transition into standard ground combat, where they are then tasked with disabling the security matrix by activating a console. When the console is activated, players must then defend the console from Grineer attack for 2 minutes until the shutdown is complete - players will fail the mission if the console is destroyed. Once the security is overridden, players must then kill all remaining Grineer within the hangar to continue with the mission.
Transitioning into Archwing once more, the Operator expresses their surprise at the asteroid base that lies beyond the hangar, with the Lotus presuming it to be the Queen's Fortress. The Operator notes the Fomorian engines attached to the fortress, and realizes that the base is mobile, explaining why they've never been able to find it. The Lotus asks the Tenno to return to their ship and wait for Teshin to contact them, but the Tenno sees this as an opportunity to discover what's inside, fearing that they'll lose their chance if the fortress moves again.
At this point, players are asked via a prompt whether they want to continue into the Fortress or not, warning them that mission access will be restricted once they proceed, meaning that players will be unable to abort the mission or change equipment from that point onward. Quest will be in Solo mode from that point as well.
Xâm nhập pháo đài Grineer: Dakata, Kuva Fortress
Proceeding inside the Fortress, the Operator tries to contact the Lotus, only to discover that they no longer have contact with her, and thus must proceed without her guidance. The Fortress features various scanners that will trigger defenses when a Tenno is detected; player can choose to either avoid the scanners by stealth, or simply run through the level as fast as possible.
Deeper into the Fortress, player will come upon a large cavernous room with an large elevator whose access is locked. In order to activate the elevator, the player must find three Elevator Keys mounted on consoles throughout the cavern, and then carry them to the main console in the center of the room . Only when all three Elevator Keys are inserted will the main elevator open, granting access to the bottom levels.
Deep inside the Fortress, the Tenno finally find the Queen's throne room, where they are then confronted by Teshin, telling them that they have ruined them both, as Kuva Guardians and the Twin Queens themselves descend into the room. The Queens reveal Teshin's true name as Teshin Dax, a Dax soldier from the old Orokin Era, who is unable to disobey the Queen's orders. Disappointed at how Teshin brought the Warframe instead of the Operator themselves, the Queens nonetheless manage to restrain the Tenno with Teshin's help, and proceeds to disrupt Operator's connection to it. Back in the Orbiter, Ordis identifies this as a Transference Surge and urges Operator to cut the link, which Operator claims they cannot do. Unable to shut down the Link from the Orbiter and prevent the Surge, the Operator is rendered unconscious.
Sự Thanh Trừng
The Operator wake up outside of their Transference chamber to the laments of distraught Ordis. Once the Operator calms the Cephalon down, they ask Ordis to reestablish Transference with their Warframe. To this Ordis replies that he is unable to do so, asking the Operator to reestablish the link with their Void energies. At this point, players must use their Void powers on the Somatic Link receptacle on top of the Transference chamber by firing a Void Beam at it, activated via the fire key.
After failing to restart Transference, Ordis suddenly initiates his Purge Precept, as he begins to shoot at the Operator using their Sentinel's default guns with the objective of killing them, stating their inability to command the Warframes as the reason. The player must now escape to the front of the Orbiter, avoiding both the Sentinel's attacks, and steam vents that periodically stagger and block the player from progressing.
Trên đỉnh Tuyết Sơn: Earth
Managing to escape to the front of their landing craft, the Operator now find themselves stranded on top of a snowy mountain on Earth. Players must navigate the snow-covered path and avoid getting blown off by the wind as they make their way to a cave at the end of the path.
Within the cave, the Operator finds a corpse by a fireplace, where they are then confronted by Teshin once more. After a brief altercation where the Operator fails to land a punch on Teshin, the latter locks the Operator inside the cave by closing an old automated door. As Teshin's voice explains the nature of Margulis' "lie" as to what she did to the Tenno, the Operator comes across a massive Ayatan Sculpture encased in icy stalactites. Players must use their Void Beam to destroy the ice, before shooting the front of the Sculpture with the beam, setting off a reaction that sees the Operator fall to the abyss below.
Quái vật hám đói
After waking up from their fall, and remembering bits of their past narrated by the Queens, the Operator comes across a chamber with the floor covered in bones and skeletons, with a creature - a Golden Maw - visibly moving underground that Teshin warns the Operator of.
The objective of this particular section is to cross the chamber safely to the other side without being devoured by the Golden Maw, who will erupt from the ground and consume the Operator if the player stays too long within the floor of bones. In order to cross the chamber, players must sprint and jump to safe areas, visible as large, solid rocks, before the creature can reach them. The Golden Maw itself will move around the bone floor in particular patterns, and thus players must time their runs to when the creature is furthest from their position. Alternatively, there are side paths in the chamber that allow for safe passage to the rocks.
After crossing the chamber, the Operator recalls another memory of their time aboard the Zariman, and along with it the ability to perform Void Blast, a powerful conic blast that can be fired by the Operator to the front, and which they can use to destroy the barrier blocking their way further down the cave. After another memory narrated by the Queens regarding the Operator's original father, the Operator will unlock another ability called Void Dash, a short-range teleport allowing them to cross large distances quickly, and which the player can use to cross the gap by that part of the corridor going forward. Both abilities use up energy, visible as a symbol on the player's crosshair; the brightness of the symbol determines the energy level, with the crosshair become dimmer the more energy is used until it is depleted, and brightening as the energy recharges.
Players will come across yet another bone chamber, this time with two Golden Maws, thus necessitating the use of their newly acquired powers to cross the chamber. After another narrated memory, the Operator will unlock Void Mode, a short-term invisibility/invincibility power that remains active as long as the appropriate key is held. As with the other Void powers, Void Mode consumes energy while active.
Another bone chamber will present itself to the player soon after, which will require players to use Void Mode in conjunction with their other powers to cross.
At the end of the path another memory is narrated by the Queens, however players are now given a choice between three replies in how to respond:
- [Sun] I held out hope
- I held out hope we'd be rescued. So I avoided the bloodshed.
- [Neutral] They had lost their minds
- They had lost their minds. I didn't blame them. We built a makeshift prison.
- [Moon] They were nothing but animals
- They were nothing but animals by then. So I hunted.
The Operator will then unlock the ability to perform Transference, allowing them to physically possess and take control of an eligible target, as Teshin explains that they have now unlocked their full power. In the next and final bone chamber, players are tasked with using Transference against a Golden Maw, which can be done by stunning the Maw with Void Blast, and then using Transference while targeted. Once players have control of the Maw, they can use the Maw's ability to burrow and attack to cross the chamber to the mountain exit.
Outside, players must navigate their way through the mountain side before coming across a Yuvan Theater, a place where Orokin used to gather to barter over the "young and exotic", to be used in the process of Continuity. Teshin then reveals that Continuity is what the Queen intends to perform on the Operator, as well as the nature of the process: to take over the Operator's mind and body, claiming it as her own.
Another memory is narrated by the Queens, and another dialogue choice is offered:
- [Sun] I hated it
- [Neutral] I controlled it
- [Moon] I embraced it
The entire sequence in the mountain pass is revealed to be a mental scenario taking place in the moments before the Queen's Transference Surge completes, as the Operator manages to break free from the Transference Surge this time, Waking up in the Orbiter once more, the Operator finds that they have retained the new powers they have unlocked, including their Void Beam no longer having a restriction. Wanting to get their Warframe back, and with Ordis telling them that the Fortress has moved once again, the Operator performs a Transference with player input to teleport themselves to their Warframe.
With the Warframe and Operator now together within the Queens' chamber, the Worm Queen flees while the Elder Queen orders their Kuva Guardians to attack the Tenno. The Kuva Guardians are immune to Warframe attacks, and Warframe powers are nullified inside the chamber, along with the player being unable to use their Primary and Secondary weapons, or any Gear. In order to fight the Guardians, the Tenno must utilize their Operator's void powers to destroy them by stepping out of their Warframe using their Transference ability. Each Kuva Guardian can be killed via the following steps:
- The Kuva Guardian must first be stunned with a Void Blast.
- Once the Kuva Guardian is kneeling on the ground with an orange glow around them, players must Void Dash through the Guardian to disarm them.
- Finally, once the Kuva Guardian switches to their Twin Rogga pistols, players can now deal damage to them using Void Beam or Warframe.
The Operator can take damage, but cannot be killed; if the Operator's health is depleted, they are immediately returned to the Warframe, and can be re-summoned afterwards. Each Operator's death depletes Warframe's total health though, so it's still possible to fail this way.
On killing the first Kuva Guardian, Teshin will point out the weakness to the Queen's systems: the large, red braids hanging around their throne. Killing each set of Kuva Guardians will make the braids vulnerable to attack, indicated by their glyphs glowing red, and thus allowing them to be destroyed with the Operator's Void Beam.
After the player destroys the braids, the Elder Queen will order Teshin to attack the Tenno. Unlike the Kuva Guardians, Teshin is capable of restraining the Operator via his Orvius glaive weapon, rendering the Operator helpless. However, Teshin is vulnerable to the Warframe's melee attacks.
Once the player has defeated Teshin, the Queen will try to attack the Tenno with a beam from her Scepter. For this part, players only have to wait for the Queen to drop her shield to fire the beam, and then use Void Dash against the Queen. With the Queen's Kuva Scepter in hand, another dialogue choice will be given to the player, which will affect the cutscene that follows:
- [Sun] Let her rot
- [Neutral] I will do it
- [Moon] Kill her
Regardless of which choice the player makes, they regain contact with the Lotus, and are then ordered to extraction while fighting off any Grineer still present.
Upon their return to the ship, Ordis asks the player if they can still use Transference, prompting the player to perform Transference to switch to their Operator. A short argument erupts between the Lotus and the Operator over Margulis' actions with the Tenno, before Ordis interrupts with reports of an active Old War beacon. Players can initiate investigating the beacon by activating the Orbiter's navigation console.
Trở về đỉnh Tuyết Sơn: Earth
The player once again returns to the same mountain pass they visited during the dream sequence. While the route is identical to the previous Mountain Pass mission, this time there are obstacles to the player's path that has to be removed using the player's powers - Void Blast for destroying ice walls, and Void Beam for opening Orokin doors by shooting a barrel with glowing lines beside the doors.
On reaching the large Ayatan Sculpture seen previously, players can activate it once again by shooting it with a Void Beam. Once activated, a series of platforms will float and be lit up as the player traverses them via Void Dash, until they reach a door at the top of the chamber. Beyond it, at the summit of the mountain, the Operator meets with Teshin again, and they talk about the Kuva Scepter Operator took from the Queen and how best to use it. The final dialogue choice for players will appear:
- [Sun] Destroy
- You mad at me, kiddo? Did you forget? You owe me.
- [Neutral] Control
- Don't forget, kiddo... you're nothing without me.
- [Moon] Consume
- Hey, kiddo, what took you so long?
Teshin shakes the Operator out of their trance, and asks them to be careful, as the world "weighs more heavily" on them now.
Hệ quả
After completing the quest, Teshin will send an inbox message, asking for forgiveness for his actions. The message also comes with four rewards for completing the quest:
- Broken Scepter
- Orvius Blueprint
- Riven Mod
- Grineer Queens Glyph.
Completing the quest will unlock the Kuva Fortress location on the Star Chart, as well as permanently unlocking the ability to use the Operator in combat.
Các lỗi thường gặp
- During The Purge Precept sequence, if using Helios, your sentinel will attack, and kill you, preventing further progress.
- During The Purge Precept sequence, it is possible for the door not to open whilst the Liset is decompressing, the player will need to forcibly close the game in order for them to be able to progress if the former happens.
- Allowing oneself to die to their sentinels weapon will cause the door to not open.
- Opening your Ability Screen, while in the Labyrinth, being in your Tenno form, will cause the game to freeze.
- There is a chance that while fighting the Queen, she can fail to use her laser at all. Fixing this will require forcibly closing the game.
Có thể bạn chưa biết
- 32.5% of the players were aligned to the Sun, 37.5% to the Moon, and 30% remained Neutral as per Devstream 83.
- The Lotus already hints to The War Within during her final conversation with the Tenno at the end of The Second Dream.
- Orbiter is free of any previously placed decoration during the Quest. This is because any quests that involve the player to walk around in their ship essentially makes a copy of their ship to be used with the mission system.
Media
Playthrough
| Quests |
| The Archwing • Hidden Messages • Howl of the Kubrow • The Jordas Precept • The Limbo Theorem A Man of Few Words • Natah • The New Strange • Sands of Inaros • The Second Dream • Once Awake Patient Zero • Stolen Dreams • Vor's Prize |

