Sin resumen de edición |
(TRADUCIENDO NO EDITAR) |
||
| Línea 27: | Línea 27: | ||
*'''Borrar''': Borra la carga actual. |
*'''Borrar''': Borra la carga actual. |
||
*'''Duplicar''': Esto copia la carga actual y la transfiere a una nueva ranura de carga. Un jugador debe tener más de una ranura de carga para realizar esta acción. Esta opción también mostrará cuántas ranuras quedan libres en el arsenal del jugador. |
*'''Duplicar''': Esto copia la carga actual y la transfiere a una nueva ranura de carga. Un jugador debe tener más de una ranura de carga para realizar esta acción. Esta opción también mostrará cuántas ranuras quedan libres en el arsenal del jugador. |
||
| − | *'''Comprar ranura extra''': Permite que el jugador compre una ranura de carga adicional por 20 {{Icono|Item|Platinum}} cada una. |
+ | *'''Comprar ranura extra''': Permite que el jugador compre una ranura de carga adicional por 20 {{Icono|Item|Platinum|texto}} cada una. |
Las salidas de carga disponibles que un jugador ha creado pueden seleccionarse eligiendo el nombre de la carga que se muestra en la parte superior de la pantalla del arsenal junto a la cabeza del Warframe. |
Las salidas de carga disponibles que un jugador ha creado pueden seleccionarse eligiendo el nombre de la carga que se muestra en la parte superior de la pantalla del arsenal junto a la cabeza del Warframe. |
||
Revisión del 00:59 10 feb 2019
El arsenal es un segmento ubicado dentro de un Orbitador Tenno, desde el cual un Tenno puede administrar y personalizar sus Warframes, armas, compañeros, Archwings y K-Drives. Es el primer segmento desbloqueado cuando un jugador aborda por primera vez su orbitador y es el aspecto más vital de la preparación de la efectividad en combate de un Tenno fuera de la batalla al seleccionar y modificar el equipo necesario para cada misión.
El segmento del arsenal se ubica en la parte trasera del primer nivel de la cubierta inferior del orbitador y se puede acceder interactuando con él (por defecto X ). Alternativamente, también se puede acceder directamente desde cualquier lugar dentro del orbitador a través del menú principal (por defecto Esc ) y encontrar la pestaña "Arsenal" en "Equipo".
Opciones
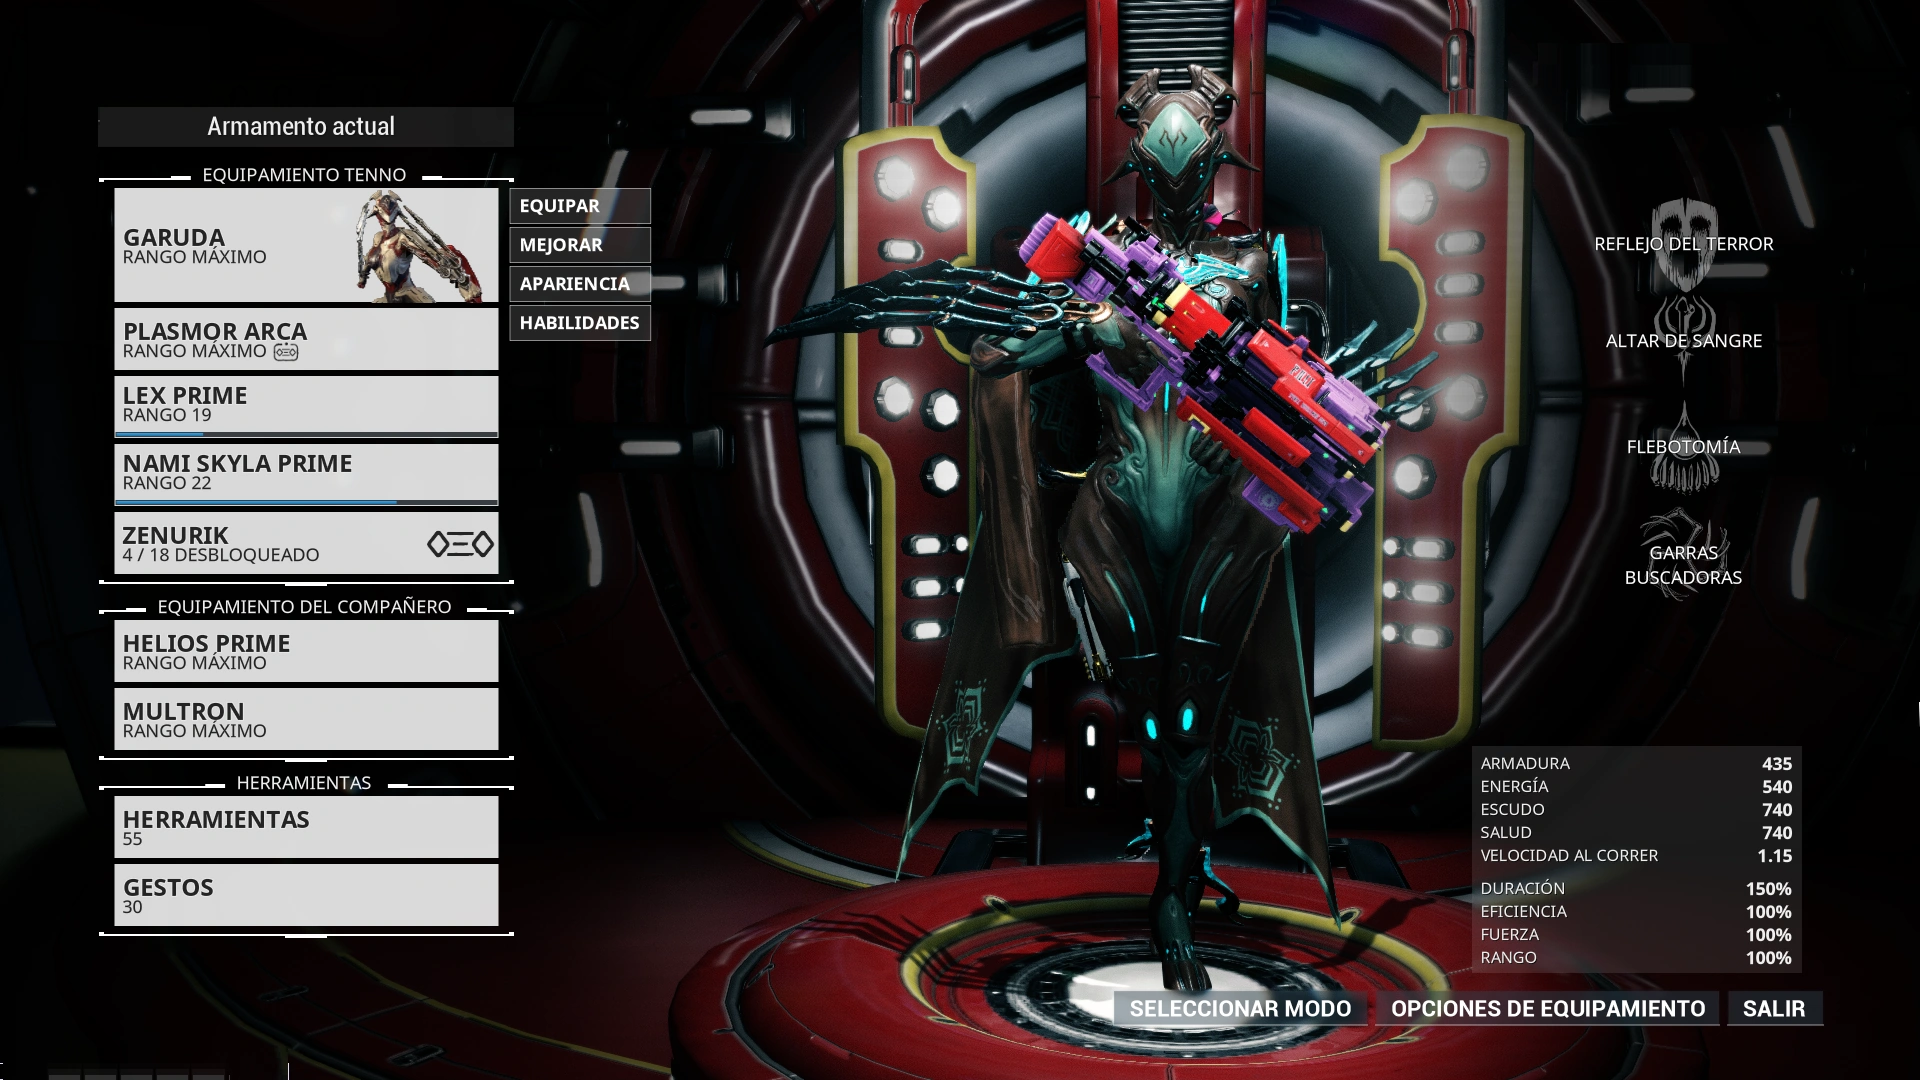
La vista principal del arsenal.
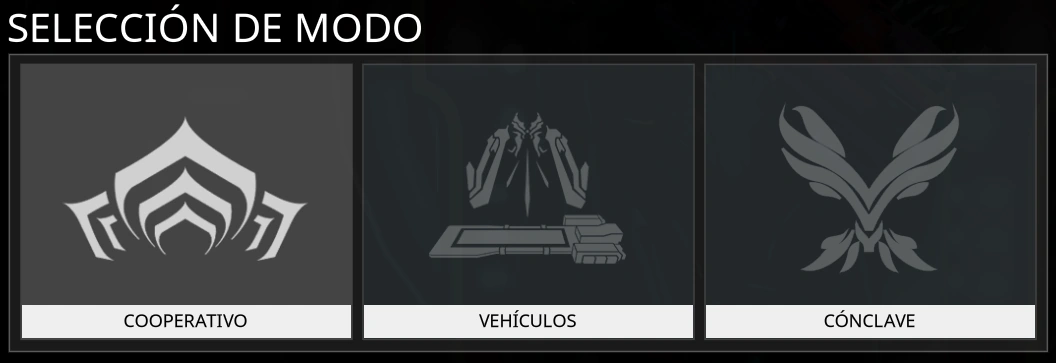
Selección de modo.
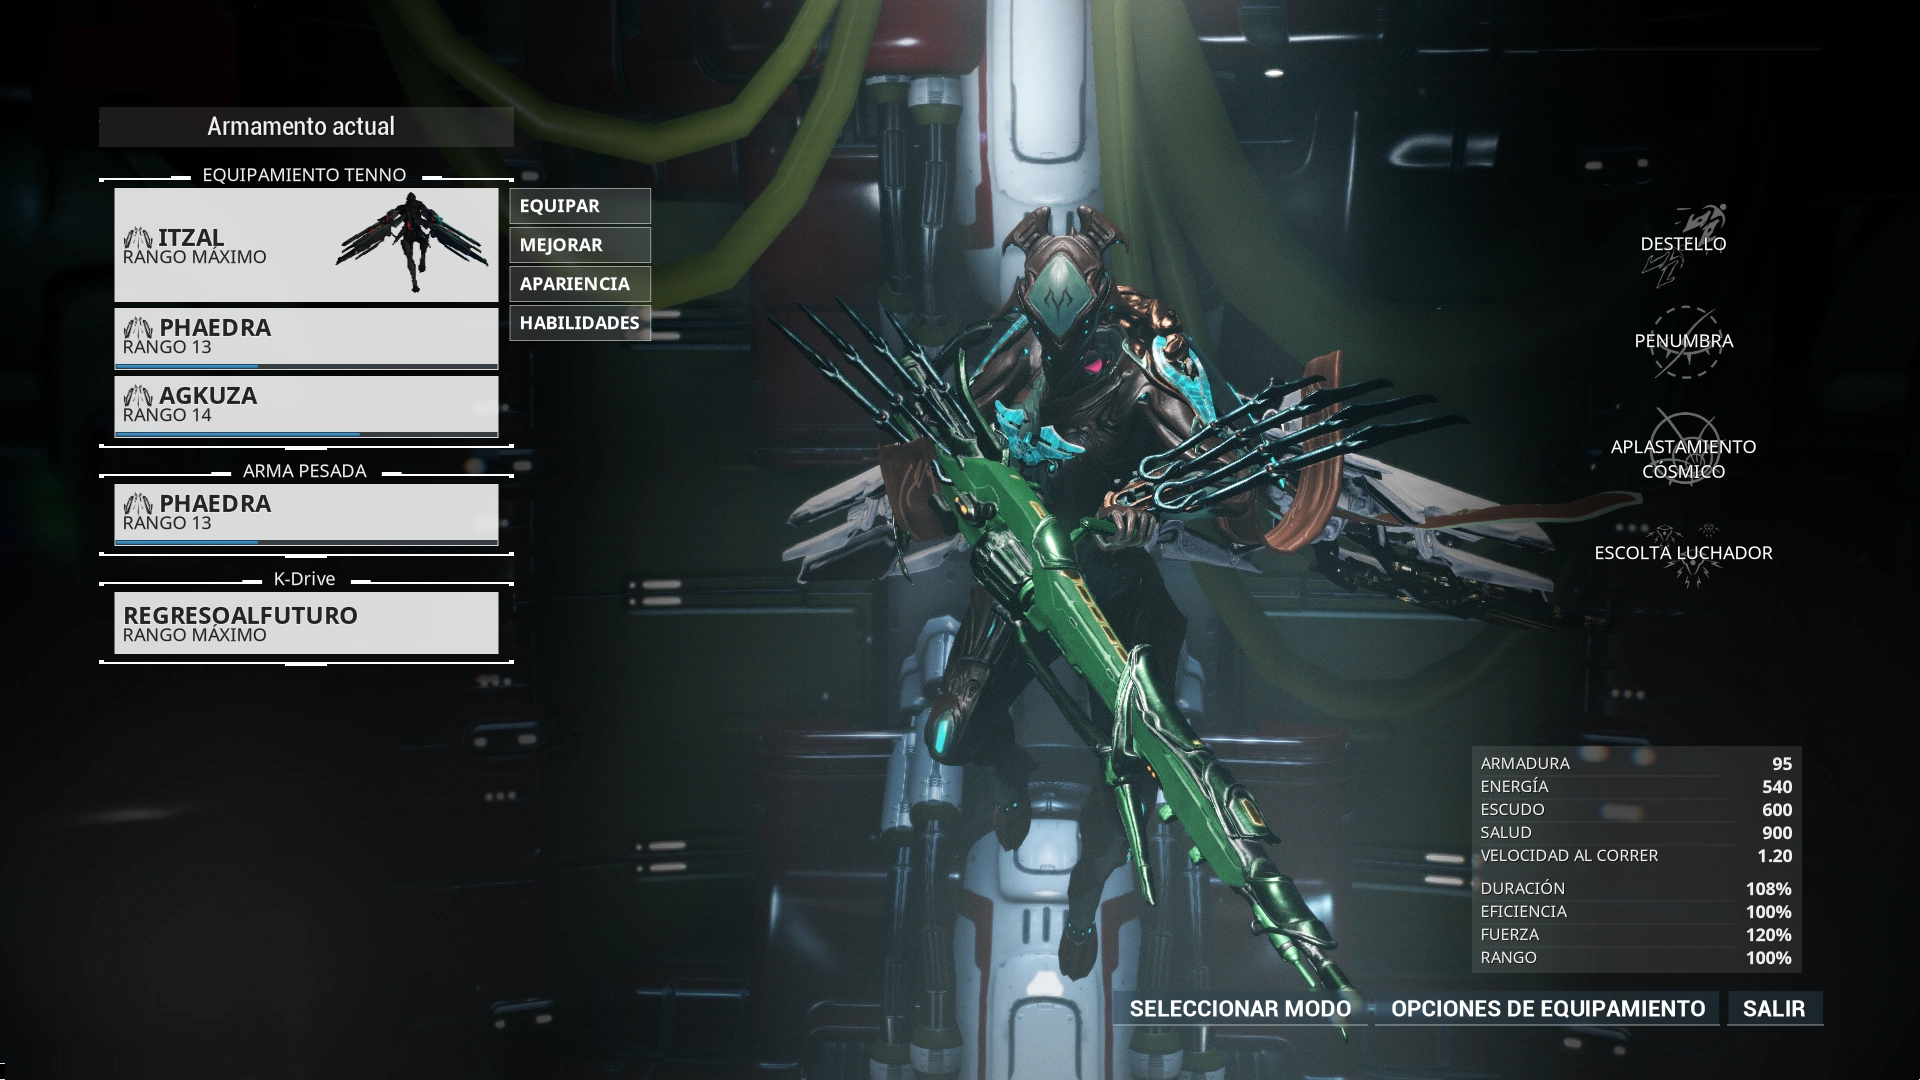
Pantalla de Archwing.
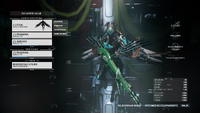
La vista principal del arsenal es donde los jugadores pueden ver las diversas opciones disponibles dentro del segmento del arsenal. El Warframe equipado actualmente con todas las armas equipadas se encuentra visiblemente en medio del mismo, que puede rotarse para ver el Warframe desde diferentes ángulos manteniendo presionado LMB y arrastrando hacia la izquierda o la derecha. Las cuatro habilidades del Warframe equipado se enumeran junto con sus respectivos iconos y una breve descripción a la derecha de la pantalla, junto con una descripción de los cascos del Warframe actualmente equipados y una descripción general de sus estadísticas y atributos. En la parte inferior, si las pestañas de "armas" o "compañeros" están resaltadas a la izquierda, el panel de estadísticas de la derecha mostrará las estadísticas y los atributos de ese elemento o unidad.
A la izquierda de la pantalla es donde se muestra el nombre del Warframe equipado actualmente y su rango, debajo de él se encuentran las distintas opciones del arsenal desde donde se pueden gestionar todos los aspectos del equipo del jugador.
La parte inferior derecha de la pantalla muestra funciones diversas que permiten acceder a otras opciones de personalización. El principal de estos es el botón "Selección de modo", que muestra una interfaz que permite la selección entre diferentes modos del arsenal, a saber, "Cooperativo", "Vehículos" y "Cónclave".
- Cooperativo: Se refiere al modo del arsenal principal donde el jugador puede personalizar sus Warframes para los modos de misión normales.
- Vehículos: Permite a los jugadores acceder a la descripción general del arsenal de Archwing, la descripción general del arma pesada y la descripción general de K-Drive. Todas tienen las mismas características que la vista del arsenal en cooperativo, incluido el resumen de habilidades y estadísticas a la izquierda de la pantalla y las principales opciones de personalización a la derecha. Un modelo del Warframe equipado actualmente con las armas de Archwing y el Archwing actualmente equipados, el arma pesada actualmente equipado y el K-Drive actualmente equipado se puede girar de la misma manera que se describió anteriormente en la vista principal.
- Cónclave: Abre la vista general del arsenal del Cónclave, que permite a los jugadores personalizar su equipamiento para los modos de Cónclave, es decir jugador vs. jugador.

Opciones del equipamiento del arsenal.
La última opción disponible en la vista principal del arsenal es el botón "Cargar", que se encuentra al lado del botón de "Vehículos" en la parte inferior derecha. El botón de carga le brinda a los jugadores la posibilidad de guardar su configuración y configuración actual de Warframe y armas para proporcionar una forma conveniente de acceder a dichos parámetros. El arsenal puede guardar un solo equipo de forma predeterminada, sin embargo, los ranuras se pueden adquirir una vez que los jugadores alcancen rango de maestría 10, y cada uno de los rangos otorgará una ranura de carga adicional. Las siguientes opciones están disponibles bajo la pantalla de carga:
- Guardar: Guarda la configuración actual de Warframe y de arma. Se le puede dar un nombre al guardar.
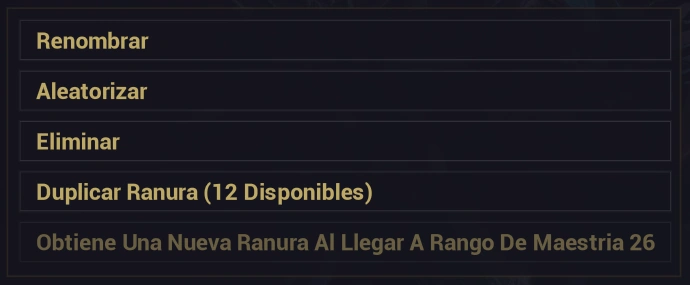
- Renombrar: Renombra la carga actual.
- Aleatorizar: Asigna aleatoriamente la carga, dándole una combinación aleatoria de Warframes, armas y opciones de apariencia disponibles.
- Copiar desde...: Esta opción permite que la carga actual copie otra carga seleccionada.
- Borrar: Borra la carga actual.
- Duplicar: Esto copia la carga actual y la transfiere a una nueva ranura de carga. Un jugador debe tener más de una ranura de carga para realizar esta acción. Esta opción también mostrará cuántas ranuras quedan libres en el arsenal del jugador.
- Comprar ranura extra: Permite que el jugador compre una ranura de carga adicional por 20
 Platinum cada una.
Las salidas de carga disponibles que un jugador ha creado pueden seleccionarse eligiendo el nombre de la carga que se muestra en la parte superior de la pantalla del arsenal junto a la cabeza del Warframe.
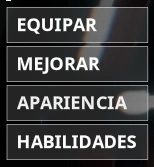
Opciones principales
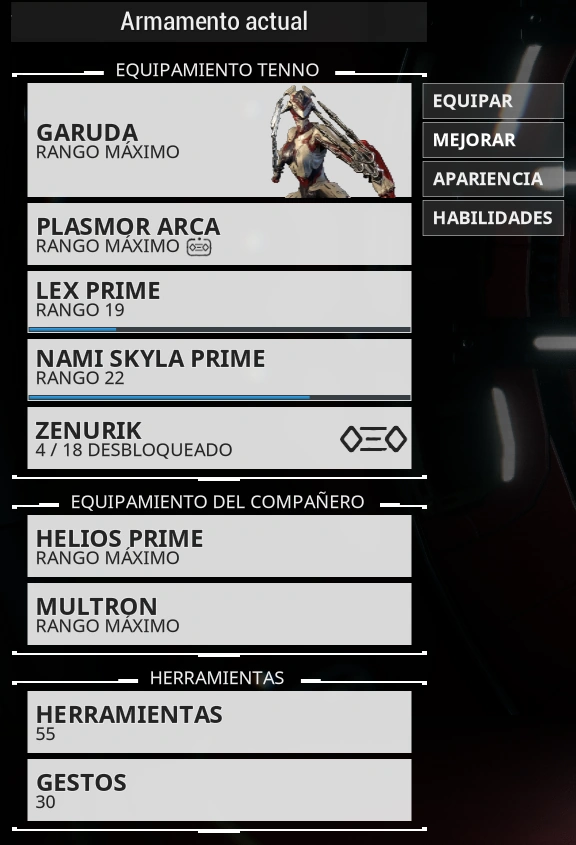
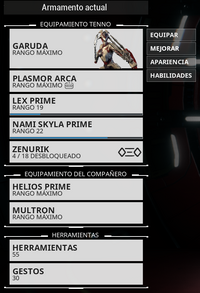
The main options menu to the right of the Arsenal contain six tabs divided into three categories - Tenno Loadout, Companions, and Gear - that organize the different items that players can customize. Each tab under Tenno Loadout and Companions contain the name and image of the currently equipped item, as well as those items current Rank.
Tenno Loadout
- Warframe - This section is where customization and management of the player's Warframe is performed.
- Primary Weapons - The player's Primary Weapons can be managed in this section.
- Secondary Weapons - This section is where a player's Secondary Weapons can be managed.
- Melee Weapons - Melee Weapons can be customized and managed in this section.
Players can choose to unequip their Primary, Secondary or Melee Weapons, allowing them to go into a mission without carrying said weapons. Only two out of three of these weapon classes can be unequipped however, and at least one weapon class must be carried into a mission.
Companions
- Compañeros - The Companions section allows players to manage their Centinelas, or customize Kubrows and Kavats.
- Weapon - This section is where players can manage their Centinela weapons. This tab is disabled if a Pet is the currently equipped companion.
Gear
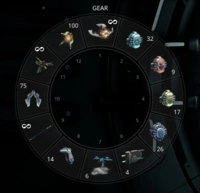
Rueda del menu de herramientas.
- Gear - This section is where a player can customize their Gear loadout, which is represented by a wheel with twelve individual slots that can be accessed in mission by holding down the Gear key (default Q ). Gear comprises various consumable items that players can carry into missions for use, which include Escáner del códice, consumibles de bonificación de equipo, llaves Dragón and espectros among a few, and players can choose which items will be carried on each slot of the Gear loadout wheel. Each slot displays the currently equipped item, as well as their quantity. Slots also have designated number assignments, with Slot number 1 being the topmost slot, and the rest of the slots following in sequence going clockwise. These slot number designations can be given individual hotkeys though the Customize Keybindings option of the Controls tab under Options in the Main Menu (default Esc ), and said hotkeys can be used to immediately use the item in-mission without bringing up the Gear loadout wheel.
- Gestos - Emotes are various gestures and movement routines that a Warframe can perform while on a mission or in a repetidor, and can be accessed by bringing up the Gear key. This tab in the Arsenal allows a player to choose which Emotes they can use in a mission, as a player can only use up to 10 different Emotes while in a mission.
Vehículos
The Vehicles section of the Arsenal can be accessed via the Vehicles button upon bringing up Mode Selection at the bottom right of the main Arsenal overview, and has the following five sections available:
Tenno Loadout
- Archwing - The player's Archwings can be managed and customized in this section.
- Archwing Primary Weapons - The section where Archcañón can be managed.
- Archwing Melee Weapons - The Archwing's Archmelé can be managed here.
- Heavy Weapons - The section where Arch-guns fitted with a Gravimag can be managed here.
- K-Drive - K-Drives can be managed here.
Subopciones
Subopciones.
Each of the sections under Tenno Loadouts in the main Arsenal and Archwing, and Companions have their own individual sub-options from which the main customization and management options of said sections are performed.
Equipo

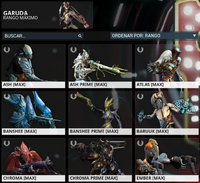
Sección de equipación de Warframes.
The Equip option is where players can select which item of a particular section they want to equip for a particular mission. This section will display all items available to the player at the time, with each item being represented by an image, their name and their current rank. Items that players do not yet possess but can be bought through the mercado are also displayed here, with said items also displaying their ![]() Platinum costs, and players can choose to buy said items directly from this section.
Platinum costs, and players can choose to buy said items directly from this section.
Items that cannot be bought from the Market, such as evento-exclusive items and Prime equipment will not show up in this section unless the player owns said items. Kubrows and Kavats that are kept in stasis will also not appear in this section.
Mejoras
Sección de mejoras de Warframes.
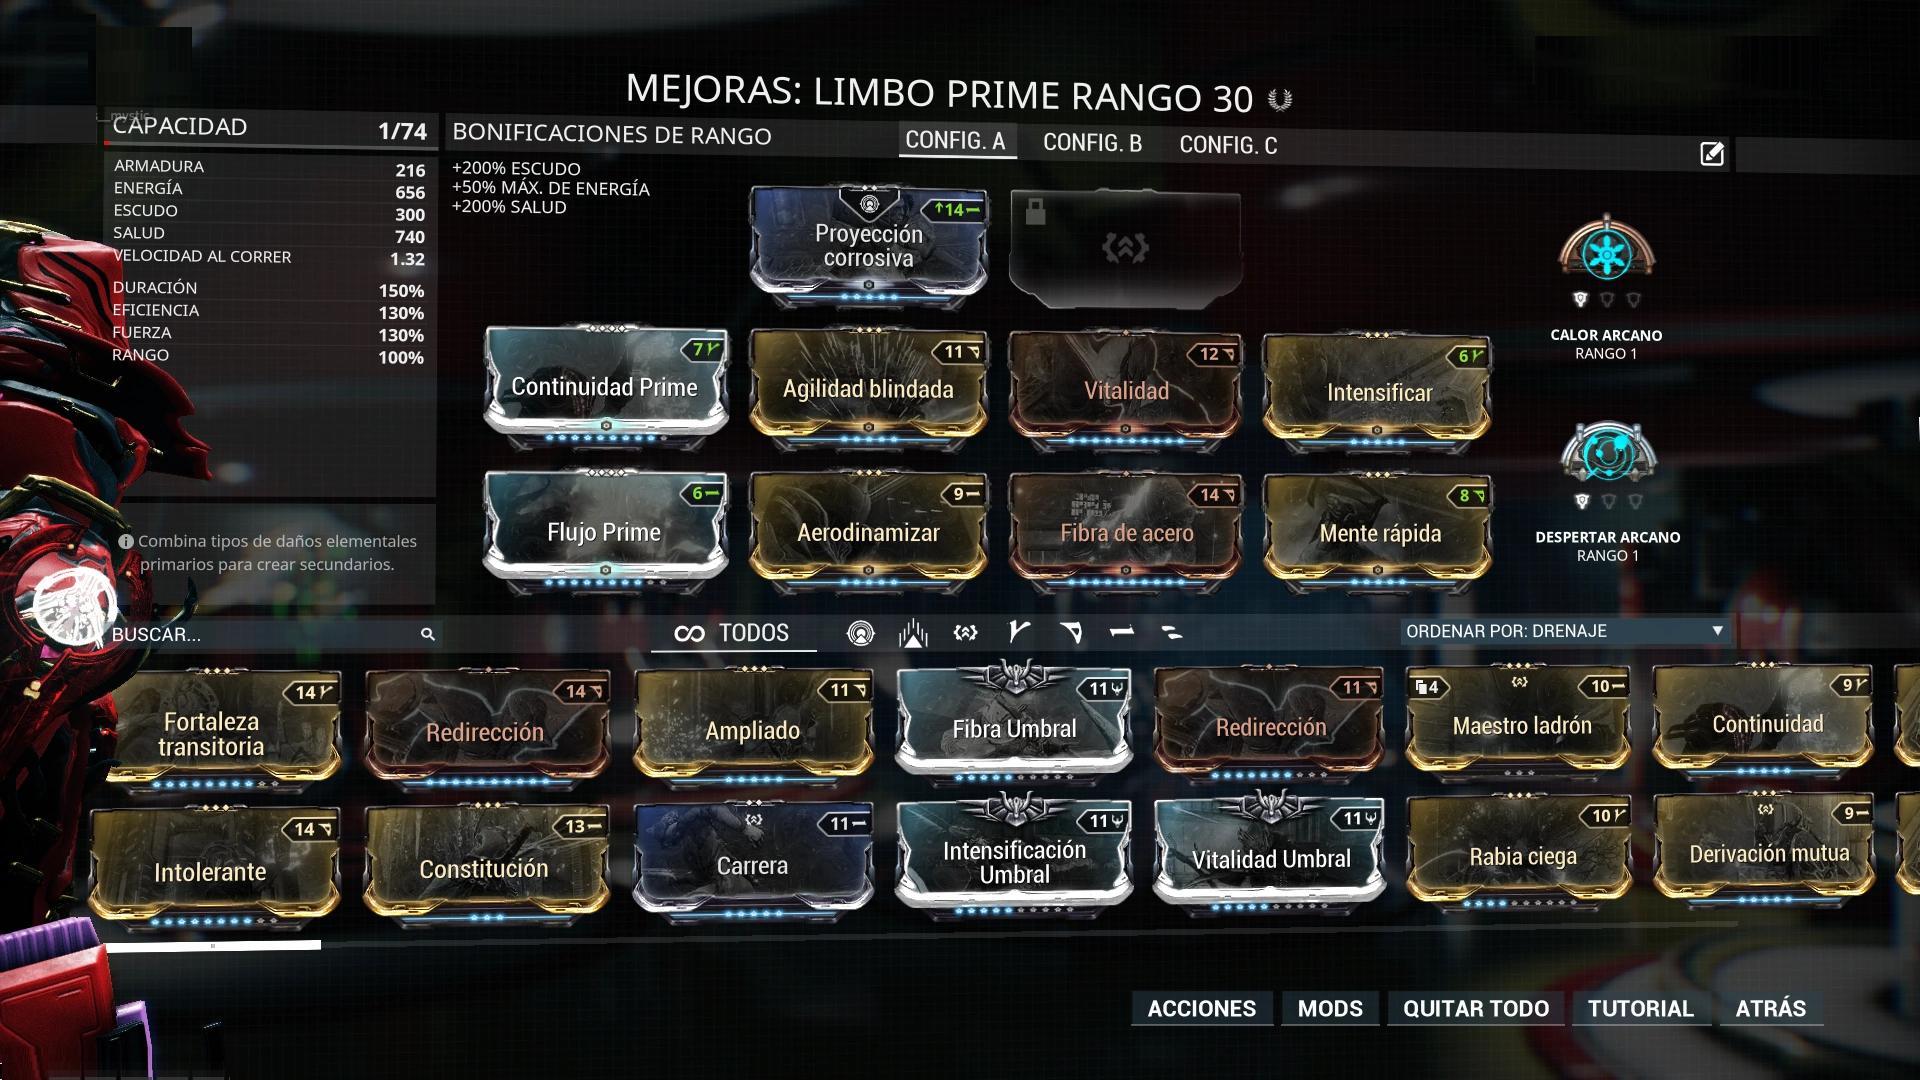
The Upgrade option is the most important aspect of the Arsenal, as this is the section that allows players to manage the mods loadout of their items. mods are cards that can alter the stats and performance of items in combat, making them the primary factor of enhancing an item's effectiveness in a mission.
Unlike the other sections of the Arsenal, the Upgrade section is not unlocked along with the Arsenal, and in order to gain access to it players will have to unlock the segmento de la estación de mods of the Orbiter.
The Upgrade section consists of the following segments:
Header - The very top of the Upgrade section contains the item's name as well as its current rank. Items that have undergone polarización will also display a star icon to the right of the weapon's name and rank, which will display a number indicating how many times the item has been polarized.
Mod Slots - Located at the upper center of the screen, Mod Slots are the centerpiece of the Upgrade section, where mods can be slotted in to modify the item's performance, represented by two rows of blank rectangles. A single Mod fits only in a single Mod Slot, and thus the number of Mod Slots is the main factor in how many Mods a particular item can use. Primary Weapons, Secondary Weapons and Sentinel Weapons have a maximum of 8 available mod slots in 2 rows of 4 slots each, while Warframes and Melee Weapons have an additional 9th slot dedicated to aura and guardias mods respectively that sit above the main mod slots, and finally Companions have 10 mod slots in 2 rows of 5 slots each. Warframes also have an additional slot beside the Aura slot reserved exclusively for mods Exilus, which must be unlocked with an adaptador Exilus. The arrangement of different Mods in the Mod Slots is called a Config, which is the loadout or build that determines the overall performance of the item. Every item has can save up to three different Config loadouts labelled A, B and C, which can be accessed at the very top of the Mod Slots segment, and players can switch and activate between available Configs while in the Upgrade section, allowing for premade builds to be brought up instantly. Each Config loadout can also be renamed by players to allow for more descriptive labeling.
Stat Summary - This part of the Upgrade section covers the upper left side of the screen, which displays the stats of the Item being upgraded. Any mods that changes a stat shown in the Stat Summary will have their changes displayed there. If a stat is modified to have great values than previously, the Stat Summary will show the previous stat with an arrow pointing to the new stats in green. If said modified values are less than the original stat however, the new stats will be colored red. The stats that are shown can differ between items, with Weapons showing more lines of stats than Warframes.
The stat summary also displays the item's Mod Capacity, which is the amount of Mod Power that an item has, which determines how many of a particular rank of mods can be slotted in. The first number in the display shows how much Mod Power the current build consumes, while the last number shows the maximum Mod Capacity that the item has. More powerful and higher ranking Mods consume more Mod Power to slot in than less powerful and lower ranking mods, and Mods can only be slotted in if there is enough Mod Power to accommodate all of the mods, ex. if a Mod requires 14 Mod Power to slot in, but the item only has a Mod Capacity of 12, then the item cannot accept the Mod even if the item has vacant Mod slots.
Mod Capacity is determined by the item's rank, with each rank giving it 1 additional Mod Capacity, resulting in a maximum of 30 Mod Capacity at max rank. Additionally, rango de maestría also effects mod capacity, with each Mastery Rank raising the weapon's starting mod capacity at Rank 0, e.g. if the player has a Mastery Rank of 10, then the weapon will have 10 mod capacity available to it at Rank 0, allowing the player to instantly use mods with a mod power of 10 or below on freshly made weapons. catalizador Orokin and reactor Orokin can be used to further increase Mod Capacity by doubling the amount of Mod Capacity given per rank, resulting in 60 Mod Capacity at max rank. When available, auras and guardias mods also increase an item's Mod Capacity beyond the item's maximum rank, and Forma can be used to polarizar Mod Slots, allowing them to accept mods of identical polaridad at only half the Mod Power.
The Stat summary will also display the Warframe's various Power Modifications, which show the effect of mods that affect Warframe Powers, namely eficiencia de habilidades, fuerza de habilidades, duración de habilidades, and rango de habilidades. These are displayed with a value of 100% as their base, and will change to reflect any effect of mods currently installed on the Warframe.
Finally, the Stat Summary also shows random tips and hints for modding at the bottom of the display.
Mod Selection - The Mod Selection screen at the bottom of the Upgrade Section is where the Mods available for that particular item are displayed in 2 rows, allowing players to see which Mods the item will accept, as well as the status and rank of the available mods. This section has various tools to allow for sorting of the mods to enable quick searching of said mods, including:
- Search Bar - Located at the upper right, players can type in the name of the Mod they wish to find.
- Filter Search - The icons at the upper center of this section are used to display only mods that belong to a specific category. Mods can be filtered by Polarity, or by other categories such as aura Mods, guardias Mods, or aumento de habilidades mods.
- Sorter - This dropdown menu to the upper right arranges the mods from left to right in the desired sorting manner, which include:
- Name - Sort Mods by alphabetical order.
- Rank - Sort Mods by Rank, from highest to lowest.
- Drain - Sort Mods by amount of Mod drain, from highest to lowest.
- Polarity - Sort Mods by Polarity.
Players are also able to see if a particular weapon mod might have equipment conflicts between Warframe weapons and Sentinel weapons: If a specific mod is equipped on one, it cannot be equipped on the other if both items are used at the same time on a loadout, e.g. If a player equips a Boar and a Carrier's Barredora both of which are shotguns, the two weapons cannot use the same Quemarropa mod, and thus one of the weapons must either unequip their Point Blank mod, or equip a spare copy of the mod. The mod selection screen will show what mods on a weapon might have conflict if equipped: if looking at a Primary or Secondary weapon, any conflicting mods will be dimmed out with a white Sentinel Icon on it, and if looking at a Sentinel weapon the mods will be similarly dimmed with a white Excalibur helmet icon.
If players exit the Arsenal while a Warframe weapon and a Sentinel weapon share the same mod, a prompt will appear informing players of a conflict, and asking if the player wants to resolve the issue. if the player chooses "OK", the conflict will be resolved in favor of the Warframe weapon, with the mod being removed from the active Sentinel weapon, otherwise players can choose "Cancel" to resolve the matter manually.

Opciones en acciones.
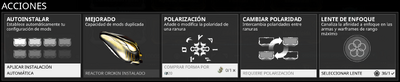
Miscellaneous Functions - Apart from the above, the Upgrade section also has a row of buttons at the lower right of the screen that offer other functions, which include:
- Actions - The Actions button calls up additional options for customizing the item's Modding abilities. There are 4 available options in the Actions button.
- Auto Install - This option automatically installs Mods unto the item. The Mods installed are based off which mods the program thinks would allow it to achieve a high Cónclave score within the available mod capacity, and as such the mods installed may not be the most optimal Mods for a player's desired build.
- Upgrade - This option allows an item to be installed with either an reactor Orokin for Warframes, Companions and Archwings, or catalizador Orokin for weapons, in order to double the item's Mod Capacity. An item can only be upgraded once in such manner.
- Polarización - Polarization is the act of installing or changing a Polaridad in a Mod Slot using Forma to allow said Mod Slot to accept a Mod of identical polarity at only half the Mod Power cost. Unlike Upgrading with Orokin Reactors and Catalysts, an item can be Polarized as many times as desired, however only items that have reached Maxed Rank aka Rank 30 can be polarized, and Polarizing an item resets it back to Unranked.
- Swap Polarity - Items that have previously undergone Polarization can have the option of freely swapping or moving Polarities between Mod Slots, which is essential when creating certain daño elemental builds. This option cannot be used by items that have not been Polarized using Forma.
- Lente de enfoque: The Focus Lens option is where players can select the Focus Lens installed on an item. Focus Lenses can only be installed on Rank 30 Warframes and Weapons, and only one lens at a time can be installed on an item; replacing an installed Focus Lense will destroy the previous lens already installed. This option includes a Search function to allow players to sort for a particular lens quickly.
- Mods - The mods button takes the player out of the Arsenal and into the segmento de la estación de mods of the Orbiter, which can be used if more complex Mod actions are required.
- Remove All - This button removes all installed Mods from the item's Mod Slots.
- Tutorial - The Tutorial button takes the player out of the Arsenal and into the Training Section of the Códice that teaches players about using the Arsenal.
Apariencia

Opciones de apariencia en Warframes.
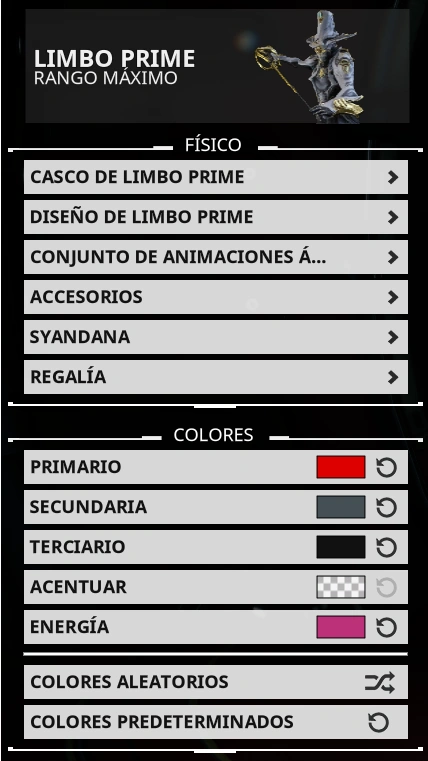
The Appearance option gives the players various options that allow them to modify an item's physical appearance.
Physique
Options under Physique are where players can modify and customize the appearance of an item's base model, whether by changing its color patterns or adding new attachments to change its silhouette. The various options under Physique are as follows:
- Helmet - Only available under the Warframe section, the Helmet option allows Warframes to select the different Casco arcano available for use, which changes the appearance of a Warframe's head. This subsection also shows helmets available in the mercado that players do not yet possess, and players can choose to purchase the helmets directly from this section using Platinum.
- Skins - Skins are cosmetics that alter the overall appearance of an item. Many skins only change the color arrangement of an item, though some can completely change the item's base model (ex. Manticore Axe Skin, Diseño de Excalibur de Protoarmadura). This option only appears on items that have skins available for them. If no skin is selected, this section will read No Body Selected for Warframes and Companions, and No Skin Selected for weapons.
- Animations - Available only to Warframes, this section is where players can choose their Warframe's animaciones inactivas, which are animated motions that Warframes can perform when they have not performed an action for several moments. Selecting Idle Animations also determines the Warframe's basic pose while standing up. All Warframes have three sets of Idle Animations available to them: the basic 'normal' stance, an Agile stance, and a Noble stance, and individual Warframe has their own unique Agile and Noble stances freely available to them. Warframes can also use the Agile and Unique stances from other Warframes, however doing so requires that players purchase the stance with Platinum from the mercado, even if they already own the Warframe that said other stance belongs to. If using the default Idle Animation stance, this section will read No Animation Selected.

Opciones de fijación para Warframes.
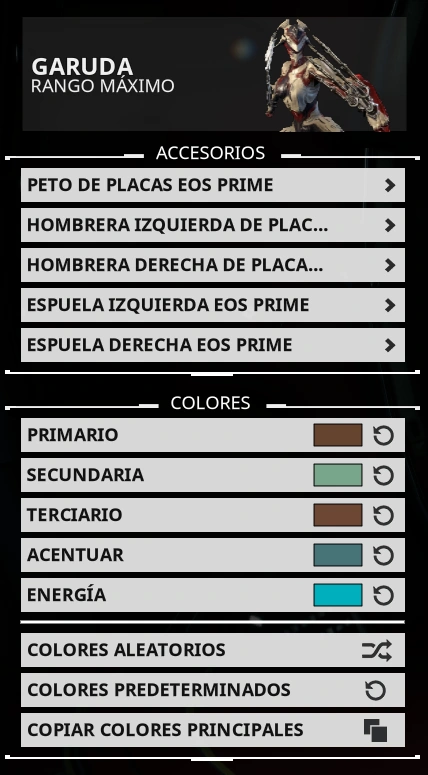
- Attachments - Attachments are cosmetics that add physical mass to the item to alter their shape, which can range from scarf-like Syandanas and cosmetic armadura for Warframes, to Sugatra dangles for Melee Weapons. Available attachments can be attached to the position of the item they are assigned to, and some items can have multiple attachments present at any one time. Each position can be individually assigned a different attachment from another position, allowing for a multitude of different types of attachments to be used on a single item. The positions available are different for each item as listed below -
- Warframes
- Chest - A Warframe's chest can be adorned with various chestplates. If no chestplate is used, this section will read No Chest Selected.
- Left Arm - Armor pieces for the Warframe's left arm. If no armor is used, this section will read No Left Arm Selected.
- Right Arm - Armor pieces for the Warframe's right arm. If no armor is used, this section will read No Right Arm Selected.
- Left Leg - Armor pieces for the Warframe's left leg. If no armor is used, this section will read No Left Leg Selected.
- Right Arm - Armor pieces for the Warframe's right leg. If no armor is used, this section will read No Right Leg Selected.
- Face - Cosmetic items can be placed on the Warframe's face, such as bigotes. This option only appears if there are Face cosmetic options available. If no cosmetic is used, this section will read No Face Selected.
- Auxiliary - This section is reserved for items that do not conform with the above categories, such as Ataduras de Valkyr and the Syandana Mortos, and will only appear on Warframes that can equip said items. If no item is used, this section will read No Auxiliary Selected.
- Sentinels
- Mask - Sentinels can be adorned with cosmetic masks to cover their fronts. If no mask is used, this section will read No Mask Selected.
- Left Wing - Cosmetic attachments for the Sentinel's left wing. If no wing is used, this section will read No Left Wing Selected.
- Right Arm - Cosmetic attachments for the Sentinel's right wing. If no wing is used, this section will read No Right Wing Selected.
- Tail - Tails are Sentinel attachments used to decorate their rear. If no tail is used, this section will read No Tail Selected.
- Primary Weapons
- Arrows - For Bow-type weapons, the Attachment options allows the player to choose skins for the arrows they shoot. Note that while this option is available for crossbow-type weapons (i.e. the Attica and the Zhuge), the arrows will not appear at all due to the weapon's design, and the arrow customization will only be visible when the weapon is fired.
- Melee Weapons
- Sugatra - Sugatras are small dangles that can be used on melee weapons. If no Sugatra is used, this section will read No Sugatra Selected.
- Warframes
- Syandana - Syandanas are scarf-like attachments that are attached to the back of the Warframe.
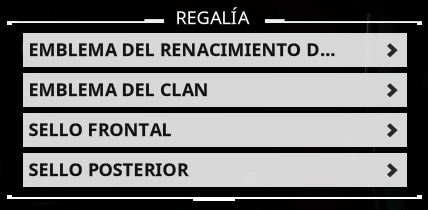
Opciones de Regalia en Warframes.
- Regalia - Regalia consist of various emblems and icons that can equipped to show off a particular achievement or affiliation. There are three different types of Regalia that can be equipped split among 4 subsections.
- Badge - Badges are holographic floating emblems that display's a player's affiliation with a particular player group, and can display a player's clan emblem or even their fundador status. Badges can be displayed on either the left or the right shoulder, or the left and right sides for compañeros. If no Badge is used, this section will read No Badge Selected.
- Event Badge - Event Badges are holographic floating emblems that are used to show off emblems that a player has acquired from participating in eventos and alerta táctica. Event Badges can be equipped on either the left or the right shoulder for Warframes, or the left and right sides for compañero. If no Event Badge is used, this section will read No Event Badge Selected.
- Sellos - Available only to Warframes, Sigils are emblems that are directly emblazoned on a Warframe's body. Unlike other cosmetics available in the Appearance section, Sigils can have their physical dimensions and position on a Warframe's body altered. Sigils are mainly used to show affiliation with a sindicatos, and wearing a Syndicate-affiliated Sigil will grant the player reputación during a mission, which can spent at a Syndicate to earn unique rewards. Other non-Syndicate affiliated Sigils are also available through various means.
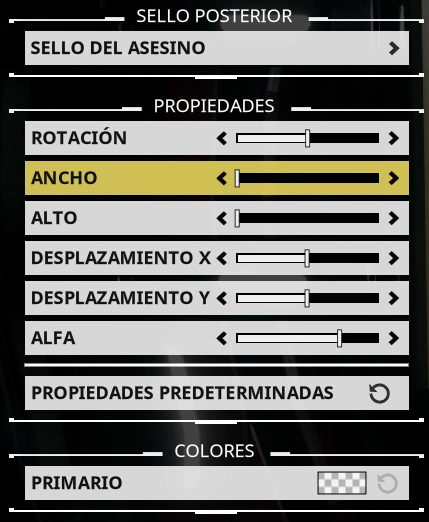
Opciones de los sellos de Warframes.
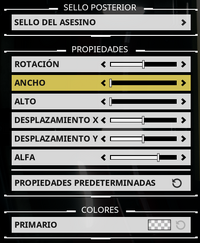
Players can choose to equip a Sigil on either a Warframe's front or the back, though both sides can be equipped with Sigils if desired. Each side comes with their own customization options, which include the following:
Sigil Select - This option is where players can choose the desired Sigil design, as well as see which designs are available for their use. If no Sigil is chosen, this section will read No Chest Selected for the Front Sigil, and No Back Selected for the Rear Sigil.
- Properties: The Properties section allows various properties of the Sigil to be customized. All the options here are modified using sliders.
- Rotation - Rotation allows the Sigil to be rotated along its center. Dragging the slider left will rotate the Sigil counterclockwise, while dragging it right will rotate it clockwise.
- Width - This option determine the Sigil's width. Sliding left decreases its size, while sliding right will increase it.
- Height - Determines the Sigil's height. Sliding left decreases its size, while sliding right will increase it.
- X Offset - Changes the horizontal position of the Sigil on the Warframe. Sliding left will move the Sigil to the left, while sliding right moves it to the right.
- Y Offset - Changes the vertical position of the Sigil on the Warframe. Sliding left will move the Sigil downwards, while sliding right moves it upwards.
- Alpha - Modifies the Sigil's visibility and brightness. Sliding left makes the Sigil dimmer and more transparent, while sliding right makes the Sigil brighter and more opaque.
Sigils can also have their color customized, although they possess only Primary Color as an option.
- Holster Style - Available only to melee weapons, this option is where players can modify the style and positioning of their melee weapon when holstered. This tab contains the following options:
- Holster Style - This option determines the general placement of the weapon on the Warframe's body when holstered, as well as the animations when drawing or sheathing the weapon. Each melee weapon type has a standard default Style, and two alternate styles that each can be purchased for 20 Platinum.
- Customize - This option is where players can further modify the appearance of their weapon's holster position, which includes the following:
- Position - Determines the location of the weapon relative to the Warframe.
- X-Offset - This slider determines the horizontal position of the weapon around a vertical axis, with the weapon moving around a fixed circumference. Moving the slider will adjust the weapon's position either left or right.
- Y-Offset- This slider determines the weapon's altitude relative to the Warframe. Moving the slider left will lower the weapon's position, while moving it right raises it.
- Z-Offset - This slider determines how far away the weapon is from the vertical axis of its position. Moving the slider left brings the weapon closer to the Warframe, while moving it right takes it further away.
- Reset Position - Returns the weapon's Position options to their default states.
- Rotation - Determines the rotational positioning of the weapon.
- Pitch - Rotates the weapon along the horizontal axis. Moving the slider left rotates the weapon down, while moving right rotates the weapon up.
- Yaw - Rotates the weapon along its centerline. Moving the slider left rotates it clockwise, while moving it right rotates it counter-clockwise.
- Roll - Rotates the weapon along the weapon's vertical axis. Moving the slider left rotates it forward, while moving the slider right rotates it back.
- Reset Rotation - Returns the weapon's Rotation options to their default states.
- Position - Determines the location of the weapon relative to the Warframe.
- Holster Style - This option determines the general placement of the weapon on the Warframe's body when holstered, as well as the animations when drawing or sheathing the weapon. Each melee weapon type has a standard default Style, and two alternate styles that each can be purchased for 20
Colors

Opciones de la paleta de colores.

Menu de colores favoritos.
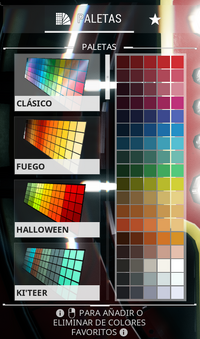
The Colors segment of the Appearance tab is where players can modify an item's color scheme, with the colors available to players determined by what extensión del selector de color they have. Every item in Warframe has five different parts whose colors can each be changed individually, with said sections being as follows:
- Primary
- Secondary
- Tertiary
- Accents
- Energy - Energy color determines the color of various lights and particle effects on an item. Warframe abilities, canalización and sellos animations are among those affected by Energy color.
Note that Kubrows do not have Tint Color 4 among their coloring options, and sellos only have Primary Color for its coloring options.
Clicking on a color part brings up the Palette menu, which displays the available Color Picker Extensions for selection to the left, and the colors available to the selected palette on the right displayed in the form of a 5 x 18 grid. Left-Clicking LMB on a color within the grid will change the corresponding part of the item to the selected color. Right-clicking RMB on the color will mark the color as a Favorite, denoted by a white star appearing on the color's space.
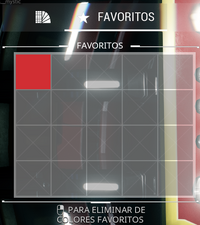
Colors marked as favorites can be accessed via the Favorites tab of the Palettes menu, denoted by a large white star on top of the menu. The Favorites menu contains a 5 x 4 grid, which displays any colors that have been marked as favorites, allowing for easy access to the player's most frequently used colors. Colors can be unmarked from the Favorites menu by right-clicking on the color in the Favorites grid, or right-clicking again on the color in the main Palette menu, which will remove the color from the Favorites grid.
The Colors segment also has other miscellaneous options underneath the main color picker segments, which include:
- Random Colors - This option when selected created a randomized color scheme for the item.
- Default Colors - When selected, Default Colors returns the item to its default color scheme. Certain skins when equipped may have their own default color schemes separate from the item's base color scheme into which this option will revert to. Each individual color part also have their own individual Default Colors button, shown as a circular arrow to their right of their respective tabs.
- Copy Main Colors - Available only to Attachments and Syandanas, this allows these items to copy the color scheme used by the base item they are attached to, whether they be Warframes or Weapons.
- Copy Attachment Colors - Available only to Syandanas, this allows Syandanas to copy the color scheme of the Warframe's attachments.
- Copy Warframe Colors - Availabe only to Weapons and Sentinels, this allows these items to copy the color scheme of the current Warframe.
Miscellaneous Functions - The Appearance tab has additional options accessible via white buttons at the lower right of the screen:
- Estudio: Players can access the Captura function in their appearance options, as the left-most button.
- Randomize: This function will create a random appearance for the selected Warframe, with the system mixing and matching every customization option available to the player including helmets, skins, colors, attachments, syandanas and others.
Habilidades
Sección de habilidades de los Warframes.
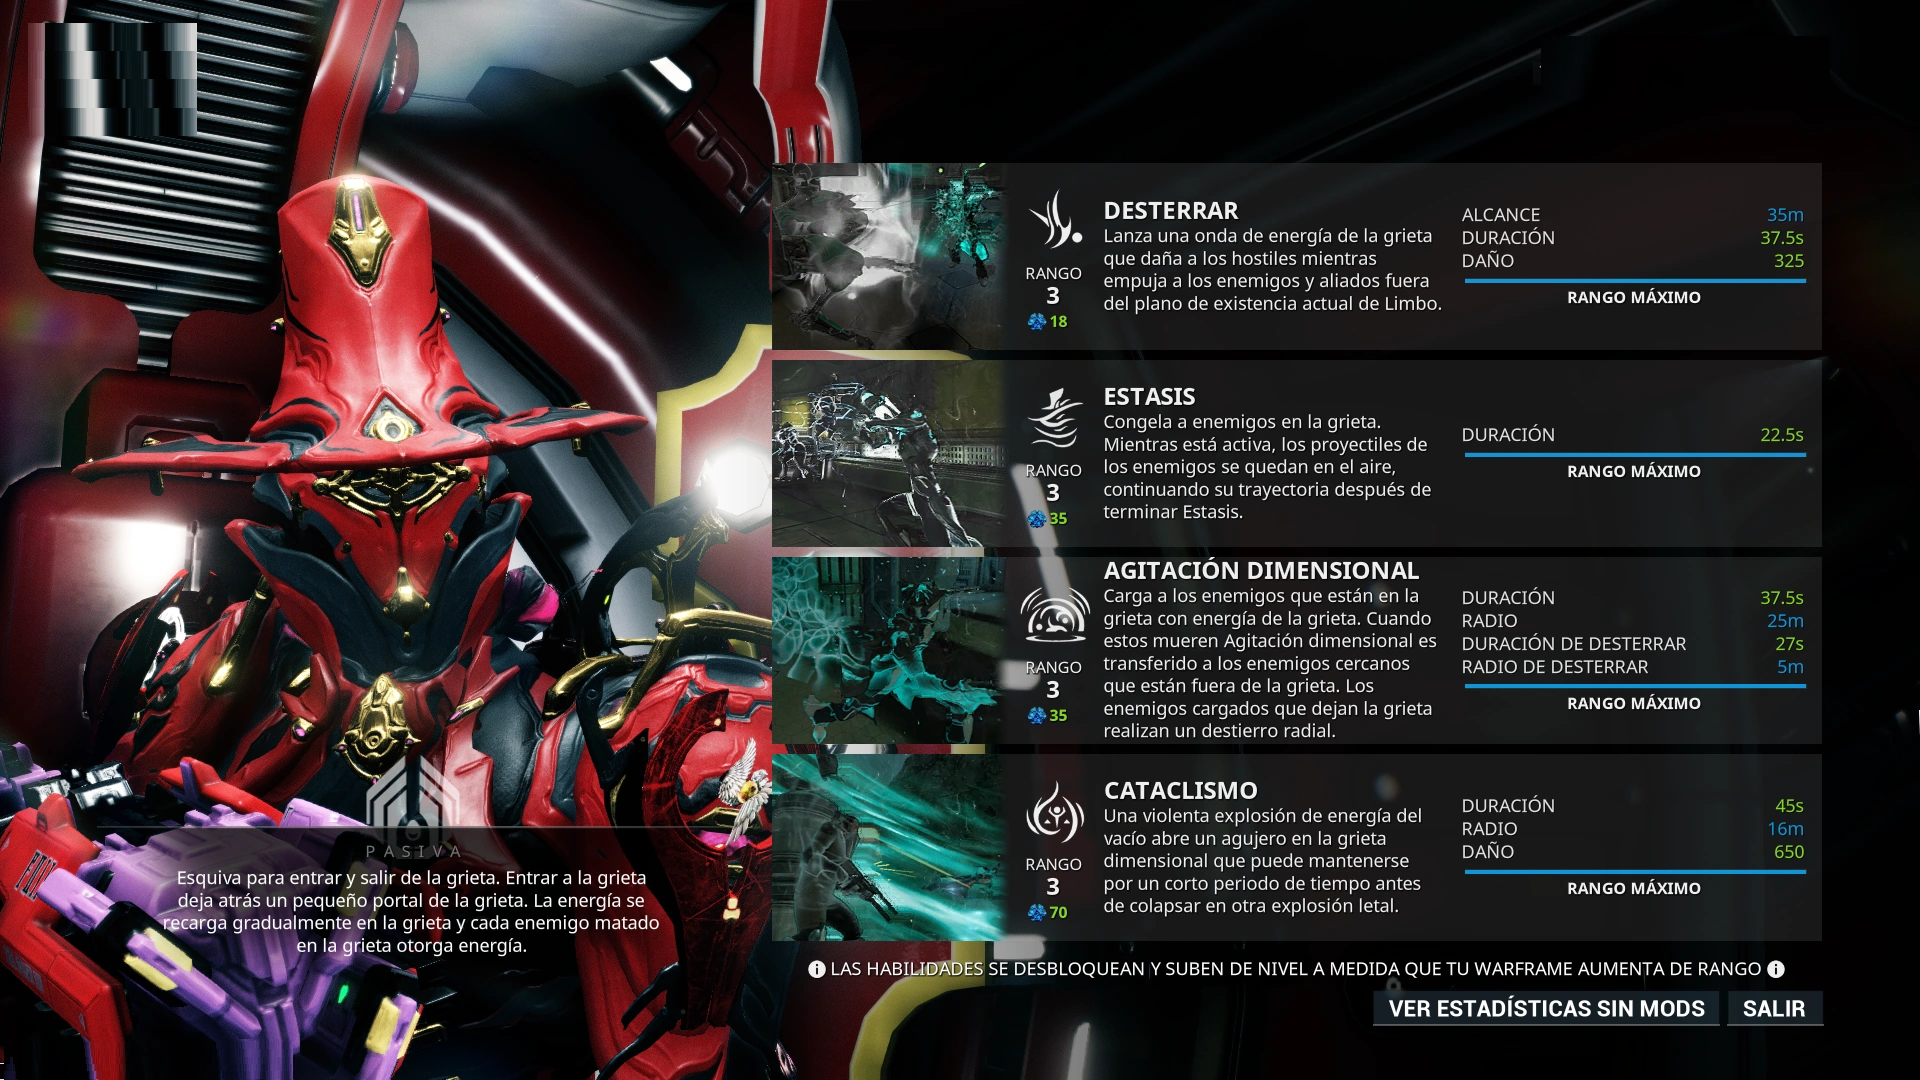
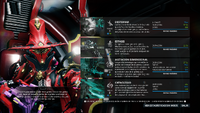
The Abilities sub option is available for Warframes and Archwings, and allows players to see the various special abilities available to a particular Warframe or Archwing. Unlike the other sub options no customization is possible within the Abilities section, as it only acts as an information tab.
Every Warframe and Archwing has a set of 4 special abilities, with each ability displayed in their own segment to the right of the screen, with the following parts:
- Image - The leftmost part of each ability segment shows a moving image that displays what the ability looks like in action.
- Icon - To the right of the image is a white Icon that represents the ability.
- Rank - Below the icon is the ability's current rank.
- Energy Cost - The ability's energy cost will be shown below the rank icon, indicated by a number beside an image of an orbe de energía.
- Name - The center of the segment shows the ability's name, as well as a brief description of the ability below it.
- Stats - The right of the segment is where the various stats of the ability are displayed, such as Damage, Range, Duration and other relevant information. Below the stats is a blue bar that represents the progress of the ability to its next rank, and the text below it shows the next Warframe rank at which the ability will rank up. If the ability has yet to be unlocked a grey icon of a padlock will be shown in place of the stats.
By default, the stats shown on this segment will show their values as modified by any currently equipped mods on the Warframe, with the modified values shown as green numbers. Players can use the View Stats Without Mods button at the bottom of the screen, which allows a player to see the ability's base stats without mods. This particular button is a toggle, and if viewing the stats without mods, the button will change to a View Stats With Mods button to revert the display to its default.
The Abilities tab will also display a description of a Warframe's passive ability on the bottom left side of the screen.
Notas
- Apart from the Orbiter, the Arsenal can also be accessed on the simulacro, which will have its own copy of the Arsenal terminal.
- The Arsenal can also be accessed anywhere on Cetus by bringing up the Main Menu, then selecting Equipment => Arsenal.
Historial de actualizaciones
Missed QoL Change:
- You can now swap your A B C Appearance loadout order in the Arsenal!
- Disabled special Idle animations when customizing your Warframe Appearance in Arsenal. If a special animation is running when you enter the Appearance screen, it will continue until it's done and further special idle animations will not be played.
Ver también
- Atributos de Warframe
- Orbitador, la nave espacial en la que se puede acceder a la sección del arsenal.
- Mods
Plantilla:MechNav