When Warframes are not detected by enemies, they are in stealth, able to sneak past combat encounters or perform devastating attacks to unsuspecting targets. However, conspicuous activity will raise the alertness of observant enemies, which can increase the difficulty of the mission. At various levels of alert, enemies may become more careful, call for help from other nearby enemies, or trigger the alarm control panels to summon backup from other rooms. Alertness decreases over time.
While most missions in WARFRAME do not require or explicitly reward stealthy play styles, the game provides an assortment of weapons, mods, and a different damage multiplier that enable an alternative gameplay option for advanced players who seek immersion or challenges.
Alertness[]
Enemies can only see things in a short, frontal cone and their view can be further restricted by the environment. They are bad at noticing threats at a distance or anyone somewhat above their heads. Crouching will hide a Warframe's silhouette well, and being invisible allows the Warframe to move past enemy eyesight without triggering any suspicion. Loud noise, however, can cause enemies to fire towards invisible Tenno–shooting most weapons while visually shrouded will still alert nearby enemies from all directions.
Distant gunfire or suspicious activity (such as noticing the corpse of an ally or a silent weapon hitting the terrain) may temporarily put enemies in nearby map tiles into a minor alert. These enemies keep watch from behind cover or patrol with guns raised and are more sensitive to the Tenno presence. As they don't know exactly where their threats are, they are more cautious, looking down corners and expanding their vision. This can usually be heard by the player, as enemies talk to each other while in this state. From this state and above, enemies can no longer be Stealth Attacked until their alertness level lowers below a minor alert.
Enemies in a tile enter full combat alert when they see or hear the Tenno directly, are directly shot at, or hear a loud weapon being fired. In this state, they will attempt to pursue the Tenno while getting backup by summoning nearby allies or activating alarms via control consoles. Enemies from other tiles will not enter this state if the enemy detecting the Tenno is killed quickly enough and the alarms are not triggered. Additionally, their range of vision expands and they will be able to spot Tenno and their companions from far away, even after the player disengages from combat. Note that backup troops arriving in nearby rooms may not know what the threat is, and will be put into minor alert instead. Players can infer an ongoing full combat alert from how enemies will notice and fire upon the player from much further away than before.
Infested and Corrupted enemies are exceptions because of their hive-mindedness. They will not use manually activated alarms, but once even one unit reaches full combat alert every other unit in a huge range will enter minor alert too. And, since there are no alarms, it is not possible to remove alerted states. New enemies may still spawn unalerted though, and minor alerts work as usual.
The minimap will change color depending on the alertness of the room's occupants with White, Amber, and Red referring to enemies being unalerted, in a minor alert, or a full combat alert respectively.
Control consoles are liberally scattered around most tilesets. If activated by an enemy, it will alert the entire room and may spread the alert to the whole map. Killing the enemy before they finish using a control panel (they take about 1.5s to complete the alert) will prevent the alarm from sounding. Enemies will not consecutively run towards the same console to set off the alarm, but if the fight takes long enough, another enemy will likely attempt it. Note that if the enemy activating the alarm takes enough damage, they will abort activating the alarm and turn to attack the Tenno. If an alarm is set off, the alarm can be reset by going to another control terminal and hacking it without further spread of notice. While it is possible for stealth to be recovered in missions populated by the Grineer and Corpus, the Corrupted and Infested factions do not use control consoles to sound alarms and any open detection will result in these factions' enemies becoming alert in a very large radius.
Even when the control panel has been accessed and an alarm has sounded, enemies will lose track of the Tenno when the last group of enemies killed is not close enough to set the next group of enemies on alert. They will wander as if they never heard an alarm. By sprinting through rooms quickly, one can sometimes avoid alarms being set off or escape to new rooms distant enough from the hostile room arming its alarm that these new enemies won't hear it. Equipping a sprint speed mod such as Rush on the Warframe can increase this chance of escape.
Cameras can detect Tenno and deploy any nearby Corpus Turrets to engage in combat. However, triggering a camera or shooting a turret will not trigger any kind of alertness for other enemies, nor will the general alarm state in the mission cause the security cameras to be alerted. The challenge reward for 10 stealth kills can easily be accomplished in high-alarm scenarios by destroying cameras that haven't personally witnessed the player. The turret, on the other hand, is hard to destroy if never activated but note that its shots are silent and do not alert the enemies in nearby rooms.
Stealth Damage Bonus[]
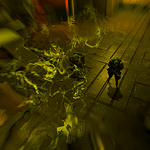
Standard melee attacks are affected by a +700% stealth damage bonus when attacking enemies that are unalerted, made vulnerable to front/back finishers by a stun, or that are otherwise unable to detect the attacking player due to being blinded or under the effect of Banshee's Silence, as well as if the player is cloaked by an ability (e.g. Invisibility). This damage increase changes the color of regular damage pop-ups from white to yellow (similar to critical hits).
Enemies are not always susceptible to increased melee damage for every melee attack. If the player comes into physical contact with an enemy while attacking it, the damage bonus will be temporarily removed. Attacking from different angles and giving the enemy some distance will help improve the consistency of the attack damage. As long as you are invisible, the bonus will reset 3 seconds after an interaction with an enemy (Shooting, melee attack, physical contact).
The Stealth Damage Bonus is affected by the rank of the weapon. Rank 30 weapons deal 700% bonus damage, while unranked ones only gain 100%. In between that the bonus scales linearly as per the formula:
Stealth Damage Bonus = 1 + (6 ÷ 30) × Weapon Rank
Stealth Damage Bonus = 1 + 0.2 × Weapon Rank
Bonus does not scale beyond rank 30.
Critical hits while under these effects will still appear yellow or in their respective color for higher crit tiers. The damage bonus from crits and stealth stack additively with each other.
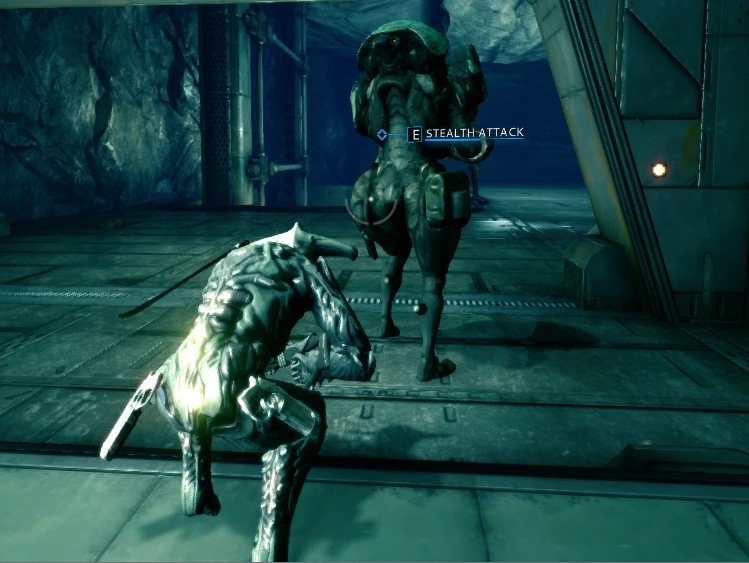
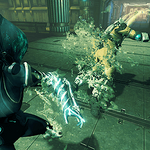
As long as an enemy is unaware of the Tenno presence, a stealth attack may be executed on them. To perform a stealth attack, the player must approach an enemy from behind and activate the stealth attack prompt. Successfully performing a stealth attack will deal a massive amount of damage during a special animation, during which the Warframe is immune to damage and will not be attacked by enemies. The attack's final damage depends on the melee weapon type used, on top of the 8.0x melee damage multiplier described in the preceding section.
As these multipliers factor total weapon damage, equipped mods (including critical chance and critical damage mods) will also affect the stealth attack's final damage. Stealth attacks inflict True Damage, which is unaffected by armor. Damage value pop-ups always appear yellow, identical to critical hit damage values (even if the stealth attack did not crit).
A complete kill ensures your target cannot recuperate and bring attention to you. Performing an unsuccessful melee stealth kill (which happens often when in a high-level area) or failing to kill an enemy with a silent ranged attack or ability will alert the enemy after a short moment. Due to that short moment, though, it is possible to execute consecutive stealth attacks by pressing melee key quickly right after the previous stealth attack is finished. This is also noteworthy for eliminating pairs or groups of enemies, as enemies within 5 meters of the victim will become cautious (even without seeing the Warframe) for roughly 20 seconds due to the sound of their comrade's death.
Enemy Eligibility[]
Bosses can indeed be stealth attacked.
Some enemies do not grant a stealth attack prompt. Many mechanical or robotic enemies are immune to stealth attacks, either completely or from specific weapon types.
Formerly MOAs would not grant a stealth attack prompt, but through updates this has been changed, and now have stealth attack animations for every class of melee weapon.
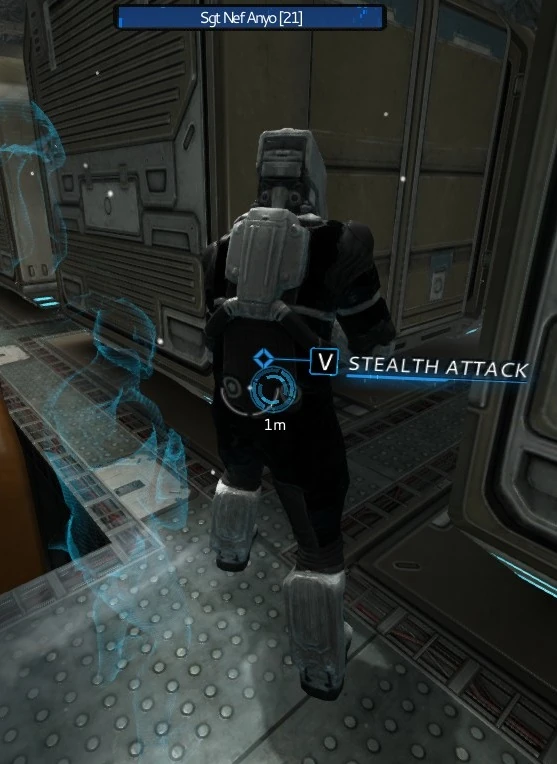
Formerly, humanoid Bosses were vulnerable to stealth attacks. This has been phased out over time, and only The Sergeant can still be stealth attacked. Non-humanoid Bosses such as Phorid and Jackal have always been immune to stealth attacks.
Special Warden enemies take bonus damage from stealth attacks, allowing a larger chance of instantly killing them, which is crucial in order to complete their host mission with the most points. This is especially useful since Wardens have very high health and will trigger the execution sequence if the player is spotted.
Affinity Bonus[]
Killing a target while they are completely unalerted (whether via melee or ranged attacks) will trigger a Stealth Kill Affinity Bonus, which increases the amount of affinity that a player gains from killing said enemy. A notification appears in a player's HUD to the left of the shield counter (like all other outside buffs) upon performing a stealth kill, which will display the bonus affinity value for that kill, as well as the time remaining for the combo duration of 30s. Each successive stealth kill will refresh the combo counter and grant 100% more affinity towards the next kill, stacking up to 500% bonus affinity after 5 stealth kills.
The stealth kill affinity bonus resets if the Warframe kills an alert enemy or is attacked by an alerted enemy (Companions, Sentinels, and Operators do not reset the bonus). Only enemy units will trigger these affinity bonuses. Environmental objects like Corpus Turrets, Security Cameras, Sensor Bars, and Storage Containers will not reset the multiplier nor do they count as a stealth kill. Certain units like Sensor Regulators are also considered objects, and thus will not initiate stealth affinity bonuses.
Oddly enough, certain Warframe powers (like Paralysis) and Melee Combos that initiate stagger may initiate stealth kill affinity bonuses upon performing a Finisher, even if the enemy was previously aware of the player.
Turning invisible will hide the character from sight, preventing enemies from directly seeing them and thus will not alert enemies from moving in their field of view. However, they can still be alerted by firing a noisy weapon or coming into physical contact.
When a Tenno or allied NPCs come out of invisibility, their enemies will take a full second of delay before noticing them, regardless of their alert state.
All melee weapon attacks are silent, including those from thrown weapons, the Deconstructor, and the shotgun attack of the Redeemer (as long as enemies are more than 5 meters away from the player when it is fired). The following ranged weapons are also innately silent or otherwise produce less noise than standard when fired:
The following table lists the abilities which are either silent to enemies or enable the player to perform silent kills. Note that direct damage abilities (Shuriken, Slash Dash, etc.) are silent if cast while invisible or shrouded.
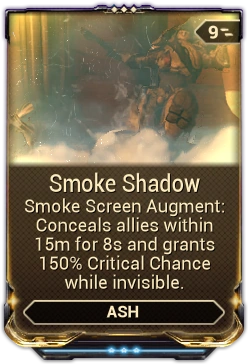
Ash expends 35energy to throw down a smoke bomb that briefly Staggers enemies within a radius of 10 meters, while Ash and his Companion turn transparent and rendering them Invisible to all enemies for 2 / 4 / 6 / 8 seconds.
Ability Synergy: Invisibility halves the energy cost of Blade Storm to 6 energy per enemy.
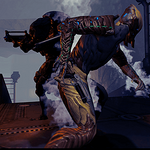
Ash expends 25energy to perform a somersault as he teleports to a target within 20 / 45 / 45 / 60 meters on his aiming reticle. If the target is an enemy, it is staggered and opened to a melee finisher attack.
If the enemy cannot be attacked with a melee finisher (either due to positioning or the enemy type), it will be susceptible to Stealth Damage Multipliers from melee attacks for the duration of the stagger.
As with Smoke Screen, coming into physical contact with the enemy while attacking will temporarily remove the damage bonus.
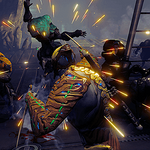
Ability Synergy: Teleport costs 0 energy on a marked enemy target during Blade Storm's Shadow Clones assault phase. Ash will teleport to the targeted enemy and strike it and all remaining marked enemies in a cinematic cutscene sequence.
When an unmarked enemy is targeted instead, Ash will attack it once before striking all remaining marked enemies.
Requires direct line of sight to a small part of the target to cast.
Note that using Teleport on enemies will alert them to your presence, preventing you from receiving the Stealth Kill affinity bonus.
Wardens additionally lose the massive stealth attack bonus they receive from normal stealth attacks.
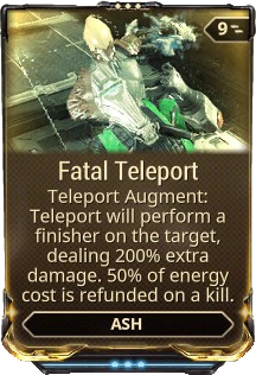
Fatal Teleport is a Warframe Augment Mod for Ash that causes Teleport to immediately perform a melee finisher upon teleporting to the target, with an additional damage multiplier. Additionally, if the finisher kills its target, 50% of Teleport's energy cost is refunded.
Teleport can trigger Covert Lethality, dealing significant damage.
Using Teleport on an unmarked enemy while Blade Storm is active will allow Ash to mark said enemy at no energy cost.
Teleport allows for rapid movement through a tileset.
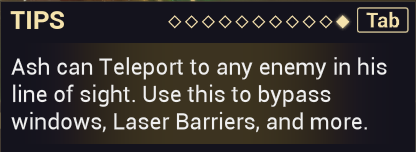
The Tips for Teleport in Ash's preview screen show that it can be used to get to any of its listed targets as long as there is Line-of-Sight, but as of now that does not work. It will simply say, "Target Obstructed", or, "Invalid".
Misc:
3 (number of hits per mark) 2 (number of Shadow Clones) Slash status per hit 50 % (invisible mark discount) 100 % (energy discount for Teleport on marked enemy)
Ash toggles a state of intense focus as he searches for targets to assassinate. During targeting mode, enemies within 50 meters from Ash that are seen near the aiming reticle become highlighted and tagged with a death mark above their head, consuming 12energy per enemy.
Leaving this range while targeting will unmark enemies and refund the energy.
When 1 or more enemies are marked, reactivating the ability will create 2 Shadow Clones that teleport to each marked enemy, striking them with 3 Finisher attacks that inflict 750 / 1000 / 1500 / 2000True damage per hit with a guaranteed Slash status effect.
Blade Storm gains 25% additional damage for each combo multiplier, up to a 3.75x damage multiplier at 12x combo, or 4.0x with Venka Prime equipped at 13x combo. The Innodems additive stats from Evolution II: Perk 2: increase the attack speed by 25%.
Reactivating Blade Storm with no marks will toggle off targeting mode instead.
While in targeting mode, Ash emits black smoke and his vision darkens.
Blade Storm has no casting animations, so Ash can still perform all other functions normally such as maneuvering, casting other abilities, and firing or reloading weapons.
Ash cannot re-enter targeting mode while his Shadow Clones are attacking marked enemies.
Ability Synergy:
Invisibility by means of Smoke Screen or other allied abilities will halve the energy cost of Blade Storm to 6 energy per enemy.
While Blade Storm is attacking, Teleport can be cast on a marked enemy at 0 energy cost to include Ash in the assault. Ash becomes invulnerable for the duration as he teleports and strikes all remaining marked enemies in a cinematic sequence.
While joining Blade Storm costs no energy, Ash must have enough energy to cast Teleport to join.
Strikes by Ash deal the same damage as his clones, but will attack enemies not targeted by his clones at the moment. He consumes marks, which generally accelerates the assault, when the enemy is not dying from the first hit.
Ash can regenerate his shields during the animation.
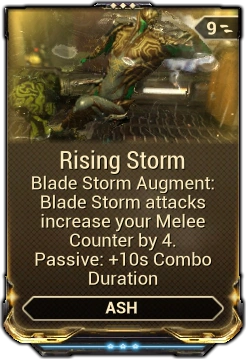
Rising Storm is an AshWarframe Augment Mod that allows the clones generated by Blade Storm to contribute additional hits to the Melee Combo Counter, as well as increases the duration the Melee Combo Counter lasts.
Blade Storm can be activated while zooming in with a ranged weapon. This can be used to more precisely pick targets.
You are invincible while using Blade Storm. This can be used to give time to regenerate your shields.
Blade Storm can be used to pick up items that are very far away or in dangerous situations (an item surrounded by 5 enemies for example). This generally requires a sentinel's Vacuum skill for maximum effectiveness. Simply target an enemy near something you want to pick up and activate the ability. Since you return to your starting point you will return to your "safe spot" but will have picked up health orbs, energy orbs, resources, and even mods.
Blade Storm can be used to start long melee combo chains to gain additional bonus melee damage.
Blade Storm can be empowered by performing melee combo chains before casting, as the ability's damage benefits greatly from the bonus melee damage multiplier.
Since Blade Storm deals True damage, the ability is well suited to dealing with Conculysts and Battalysts.
Ash's second ability, Smoke Screen, synergizes well with this ability, reducing both the energy cost per mark and Ash's vulnerability when marking enemies.
Similarly, Arcane Trickery also synergizes well, since it can be triggered by Blade Storm and reduces the cost per mark.
Blade Storm allows Ash to easily trigger Arcane Ultimatum, giving him a boost in survivability.
Blade Storm finishers also trigger Exodia Might with Zaws, allowing substantial health regeneration without the use of Life Strike.
Considering Blade Storm has a 100% chance to proc Bleed, dealing 43.75% of the base damage 10 times in 9 seconds, the ability actually does 2,000 + ((2,000×0.4375)×10) = 10,750 damage in 9 seconds, making it one of the most powerful abilities in the game if modded and used accordingly.
If used during sliding, Blade Storm seems to use a shorter version of finishing animations, which reduces total animation time.
Blade Storm benefits greatly from the effects of Body Count, Drifting Contact, and Gladiator Rush. Instead of having a 3 second delay before the combo counter disappears, the delay will be 3+12+10+6 = 31 seconds.
Using the Rising Storm augment will further increase the delay.
Since Ash only spawns 2 Shadow Clones, it's highly suggested to equip attack speed mods as the time needed for the Shadow Clones' animations can make gameplay sluggish, especially if a large amount of enemies are marked.
Joining Blade Storm has multiple benefits for Ash:
Becoming invulnerable allows Ash to ignore status effects, such as Toxin, and regenerate his shields.
The rate in which attacks are dealt is increased as there will be 3 attackers instead of 2.
The amount of hits added to the combo counter from the ability will be higher than if Ash were to not join.
Using Teleport on an unmarked enemy while Ash's Shadow Clones are attacking marked ones will result in the unmarked enemy being marked without consuming any energy. Ash will then join Blade Storm until all marks are expended.
Enemies attacked by Blade Storm this way are only attacked once.
Bugs
On certain unspecific occasions Ash will become invulnerable after using Blade Storm. It should also be noted that Blade Storm can cause lag commonly.
Very rarely, after using Blade Storm, Ash will float and become invincible. He is unable to jump or fall down, use melee weapons (or primaries/secondaries in some cases), or use Blade Storm again. Pressing E will teleport to a random enemy and perform a purely aesthetic Blade Storm attack which does no damage. This appears to occur when Blade Storm's initial target is killed before Blade Storm begins.
On some occasions (most likely related to latency), Ash will remain vulnerable whilst being unable to exit this bugged state without getting killed (as in, actually dying and using a revive charge, as revived by a teammate will not end this glitch).
This may occur when the initial target for Blade Storm is killed (by another player/procs) during the teleporting animation, causing Ash to teleport to his casting location, and initiate this bug.
To deactivate the bug, Ash can prompt a "falling out of level" event by power wall climbing to the sky if there is a wall in the map that allows him to. This will respawn Ash to a random location on the ground and deactivate the bug.
Very Rarely, when Ash finishes using Blade Storm he will appear at the location where he used it with 0 Health, unable to move, unable to use weapons, and unable to be damaged by enemies. Any on screen prompts that occur, such as Defense and Interception wave prompts, will not be presented to Ash in this state. Ash cannot be revived as he isn't considered down despite the fact that he has 0 health. The only way to fix this bug is to wait for the mission to end or leave the mission.
If wielding a melee weapon when cast, Blade Storm will occasionally perform Finisher attacks on enemies. This does not occur if the player is hosting.
Occasionally, Ash will fall out of the map after using Blade Storm, where he will either teleport back to the original casting position or die.
If Blade Storm is cast and Ash's holograms seek out a Mind Controlled target, they will attack the target indefinitely until either the Mind Controlled target dies or its duration expires.
Attempting to use Blade Storm against another player when fighting in the Dojo will cause Ash to become invincible and hover in the air. In this state, Ash can only move and use firearms.
When Ash has no melee weapon equipped, it is possible in some cases for Ash to attain an unmodded Skana after using Bladestorm. This Skana is not listed in the end of mission screen, nor in the in-game gear list, and is lost upon dying or completion of the mission.
When used on a Crewship during Railjack missions, and using teleport to join the fray, Ash can grow 10x in size and will be too large to move around not only the Crewship but also the Railjack. Player will have to return to dock to reset size.
Banshee expends 75energy to emit a sound dampening aura within 10 / 13 / 15 / 20 meters around her for 10 / 15 / 20 / 30 seconds. Enemies entering the aura will initially experience a sonic disturbance becoming momentarily stunned for 2 seconds; affected enemies remain deafened to sounds which alert them to the direction of nearby combat, as well as become unable to perform special abilities while within Silence's influence.
Unaware enemies will not become alerted when affected by the aura and will resume normal behavior after recovering from the stun.
Enemies exiting then reentering the aura can repeatedly experience the stun again.
Silence will also deafen the caster, muffling all gunfire from friend, foe, and self alike.
Enemies immune to crowd control, such as Overguard or bosses, will not experience the stun effect.
Enemies under the effect of the aura will not respond to sounds such as gunfire, alarms and death screams, and generally become unable to detect players and other enemies by means other than sight or touch.
Unaware enemies will still become alerted when sighting players or taking damage.
Taking damage will not inform enemies to the location of the attacking player, but they are still likely to investigate in the direction the attack came from.
Enemies that are alert before entering Silence's aura will remain alerted, but may still lose track of players if line of sight is broken.
After a brief delay, enemies that do not have line of sight with a player will become susceptible to Stealth Damage Multipliers from melee attacks as long as line of sight remains broken and the player does not come into direct physical contact with the enemy.
The ability does not change a weapon's Noise Level from "Alarming" to "Silent".
Disables enemies from using most special abilities which are neither a ranged nor melee attack; passive abilities are not disabled.
Summoning/spawning (Drahk Master, Fusion MOA, Brood Mother, Juno Tech, etc) - note that some units such as Drahk Master immediately summon after spawning. This cannot be prevented unless they are within range of you when they spawn, but it will prevent any further summoning.)
All attacks which aren't their standard ranged weaponry are disabled, including the spinning laser attack which can be disabled while already in progress.
If a silenced sentient is also disarmed then it will do NOTHING because it has no programmed melee attack. It will simply hover in place or move around helplessly.
Silence can be used as a form of crowd control due to the momentary stun dealt to enemies entering its field. This is most useful for Banshees engaging in melee combat, as they can stun ranged enemies simply by approaching them, giving them time to close the distance and engage.
Silence can also be used to keep Infested enemies at bay, giving more time to attack them from range.
With a maximized range build, Silence can be used to clear a room of enemies using firearms without alerting enemies in adjacent rooms. Keep in mind however, that enemies will still react if they see you, or if they see one of their own killed.
Despite the excellent utility provided, Silence can also render Banshee deaf, preventing her from anticipating nearby enemies or enemies from behind while attacking enemies.
Too much range may reduce the potency of this ability as a crowd control tool, as enemies are only stunned when they initially enter the aura and may be out of attack range (behind walls, etc.), allowing them to recover.
Enemies are more likely to target the player's Sentinel when Silence is active, which can prove to be harmful for weaker Sentinels.
Blinded enemies under the effect of Silence will not react to most things aside from direct contact and wander around aimlessly.
Staying on the move and frequently breaking line of sight with affected enemies can result in taking much fewer hits as they cannot use the sound of gunfire to find players or other enemies that are in combat.
Bugs
At times, Silence can be cast yet be unable to affect enemies, indicated by the lack of an energy glow on them. The sound reduction for the player and energy ripples on Banshee will remain until mission ends, however.
The skill can most likely not be recast while this bug is in active.
Silence ability block can sometimes prevent triggers coded as abilities that activate after certain animations and scripts, including Lieutenant_Lech_Kril from becomming vulnerable after using his hammer slam by preventing the backpack coolant freeze, Raptors power cell explosion if the Osprey was silenced from spawn to death and pipe within range and General Sargas Ruk opening his heatskin during Eruption in phase 2.
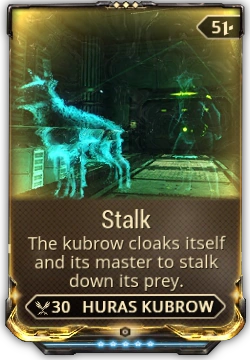
The Stalk mod allows the Huras Kubrow to cloak itself and its master when hostile entities are within range. Though firing a weapon while stealthed will break the effect, the Huras Kubrow will still cloak the player if they are holding down the trigger of a continuous rifle such as the Synapse when the ability activates. Warframe abilities do not break this stealth effect.
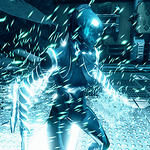
Loki expends 50energy to camouflage himself, turning transparent and rendering him invisible to enemies for 5 / 7 / 9 / 12 seconds. While Loki is invisible, all sound effects are muffled and slightly muted. Loki's vision becomes blurry when he's not in motion, and his visual field becomes more sensitive to light.
Use as a way of reviving fallen players without having to worry about entering bleedout yourself. Be wary of other revivers though, they will draw fire on you.
Can be cast in mid-air, which can help you avoid getting gunned down by large crowds during the cast animation, which makes you stay put when used on the ground.
Changing Loki's energy color to "pure black" (very bottom left color in the Smoke Colors pack) will turn Loki completely invisible, meaning this color gets rid of the shimmering effect.
As this means you can't see yourself at all, this can make movement and placement for melee attacks more difficult.
It can be a way in order to take a clear picture if you disable HUD.
As general rule when playing with others – mind your positioning, flank enemies, keep your distance from allies, and never stay in the line of fire between allies and enemies.
Since it is not a channeled ability, energy can be regenerated while it is active, meaning Energy Siphon and Trinity's Energy Vampire can provide high uptime.
Bugs
If active before a boss cut-scene triggers, when the cut-scene finishes Loki will become visible however the duration will not reset.
Kubrows will be cloaked but will still be targeted by enemies.
Loki's body (but not the head) may become visible on occasion. Enemies will be able to detect you when this occurs, and the invisibility time will continue to run.
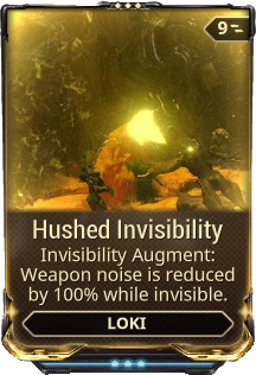
At maximum rank, Loki's Invisibility augmentHushed Invisibility will render all weapons and noise made absolutely silent, enabling stealth attacks with non-silent weapons as long as the attack one-shots the unalerted enemy.
Mag expends 25energy to generate a strong magnetic vortex in front of her lasting for 2 seconds, pulling every enemy within a 6 meter radius around herself, as well as enemies within 15 / 20 / 22 / 25 meters and a 90° angle of the aiming reticle. Affected enemies are Ragdolled and pulled into the vortex at a velocity of ? meters per second, while dealt 100 / 125 / 150 / 300Magnetic damage.
Cast animation of ~0.5 seconds, affected by Casting Speed.
Still inflicts damage to enemies immune to crowd control.
Will not stop certain enemy abilities mid-animation, such as Heavy Grineer's Radial Blast and the Volatile Runner's detonation.
Pull's visual effects, including a tint on enemies affected by it, are affected by Mag's chosen energy color.
Casting Pull is a One-Handed Action that can be done while performing many actions without interrupting them, including reloading, charging, shooting, and moving (either sprinting or sliding).
Can be used in mid-air, but not while on a zipline.
Pull grounds fliers, rather than pulling them toward the player.
Subsuming Mag to the Helminth will offer Pull and its augments to be used by other Warframes.
However, Subsumed Pull's cone range is reduced to 7.5 / 10 / 11 / 12.5 meters.
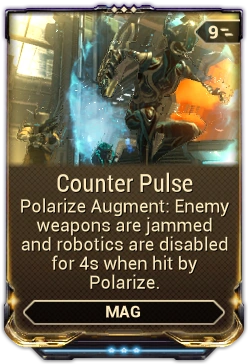
Emit an energy pulse that depletes enemy shields and armor as it restores ally shields. Debris left over from the pulse becomes Polarize Shards. Nearby Polarize Shards orbit Mag and cut enemies, inflicting bleed status.
Mag expends 75energy to emit a spherical pulse of magnetic energy from herself with an initial radius of 8 meters. The pulse expands outwards for 5 seconds, at a constant rate of 5.9 meters per second, reaching a total radius of 37.5 meters. If the pulse comes into contact with an enemy that has shields, the pulse will drain up to 250 / 300 / 350 / 400 of them. If the enemy has armor, it will be permanently drained by up to 250 / 300 / 350 / 400 points with the enemy additionally suffering True damage equal to the amount removed. Any allies that come into contact with the pulse will have their shields restored by up to 250 / 300 / 350 / 400.
Initial radius and traveled distance are summed to: Total Radius = (1 + Ability Range) × 8 + (1 + Ability Duration) × 5 × 5.9.
With maxed Stretch and Continuity, rank-3 Polarize will have a total radius of (1 + 0.45) × 8 + (1 + 0.3) × 29.5 = 49.95 meters.
Cast animation of 1 second, affected by Casting Speed.
Shields must be completely drained from a target before a new Polarize cast can deplete armor as well.
All drained enemies will produce a violent outburst of magnetic energy inflicting 100% / 150% / 200% / 250% of the drained shields or armor as Magnetic damage to all other enemies within a 2.5 / 3 / 3.5 / 4 meter radius of them.
Explosion damage diminishes with distance.
Damage bypasses obstacles in the environment.
Explosion radius is increased by 0.5̅5 meters for each meter the pulse grows outwards after the initial radius.
Explosion can hit objects, such as Containers and Resource Nodes.
Enemies who have been drained are not damaged by their own explosion, but they can be damaged by nearby enemies who were also drained.
All drained enemies drop one Polarize Shard that lingers for 30 seconds, with a 50% chance to drop two. These Shards are automatically picked up by Mag once she is within 3 meters of them, and will rapidly orbit her to attack enemies within 1 meter. Polarize Shards inflict 50 damage distributed evenly between Puncture and Slash, scaling with the total shields or armor drained, and with a guaranteed status effect.[1]
Shard damage is affected by total shields or armor drained, gaining 25% of the total drained value as damage.
Magnetize will absorb Polarize Shards, trapping the Shards within and allowing them to do immense damage.
Shards will return to their previous state when Magnetize ends.
Polarize's visual effects, including shards, are affected by Mag's chosen energy color.
Casting Polarize is a One-Handed Action that can be done while performing many actions without interrupting them, including reloading, charging, shooting, and moving (either sprinting or sliding).
Can be used in mid-air, but not while on a zipline.
Can be used to restore shields to stationary defense objectives such as Cryopods and Excavators.
Explosions can damage or break objects such as Containers, Resource Nodes, Laser Plates, and Rotation Plates in the Orokin Tower, given a drained enemy was close enough to them.
Shards can inflict high amounts of Slash procs, if used in conjunction with Magnetize they can cause immense Bleed damage.
Pairing this combo with Nourish will grant Shards Viral damage and status, allowing you increase their Bleed damage even further.
The damage portion of Polarize is useless in missions where enemies completely lack shields and armor.
Due to the high base shield replenishment, using Catalyzing Shields will drop down your shields to 111 on max rank, making negative strength still fully replenish at percentages as low as 30% strength.
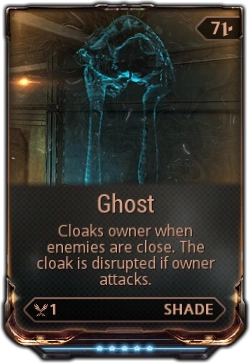
Ghost allows the Shadesentinel to cloak itself and the Warframe when hostile entities are within range, rendering themselves invisible to enemies. Though firing a weapon while stealthed will break the effect, the Shade will still cloak the player if they are holding down the trigger of a continuous rifle such as the Synapse when the ability activates. Warframe abilities do not break this stealth effect.
The casting of any of Vauban's abilities are silent—this does not mean all of the abilities' effects are.
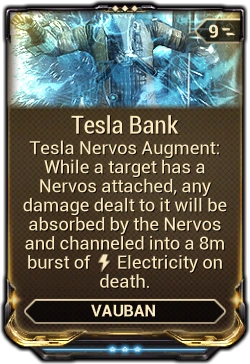
Vauban expends 25energy to throw a capsule in an arcing trajectory toward the aiming reticle, releasing a Tesla Nervos on impact with a surface. Upon directly striking an enemy, the capsule inflicts 15Blast damage with a ?% status chance. The Tesla Nervos is an invulnerable LatcherSpecter that follows Vauban and seeks to latch onto a nearby enemy, shocking the target and stunning it in place as long as the Tesla Nervos remains attached. The stunned target receives 10 / 15 / 20 / 25Electricity damage per second, while discharging an electric burst every 1 second to inflict 80 / 100 / 120 / 150Electricity damage with 50%Status Chance to all enemies within a 4 / 4 / 5 / 6 meter radius; each Tesla Nervos holds 5 / 6 / 7 / 10 electrical charges that last until used.
If the stunned target is killed before the Tesla Nervos uses up its charges, the Tesla Nervos will detach and look for another enemy.
If the Tesla Nervos uses up all of its charges, it will dissipate and release its stunned target.
Tesla Nervos will teleport to Vauban provided it is too far away and not currently attached to an enemy.
Multiple Tesla Nervos can attach to the same enemy target.
Holding down the ability key (default 1 ) causes Vauban to juggle up to 4 Tesla Nervos capsules once fully charged. Release the hotkey to throw and scatter them toward the direction of the aiming reticle, deploying multiple drones in one cast for no extra energy cost.
Deploying new Tesla Nervos past the drone limit causes older drones to dissipate, even when they are still attached to enemies.
Number of active drones is displayed on the ability icon.
Ability Synergy:
Enemies stunned by Tesla Nervos passively receive 25% increased damage from Vauban's weapons and abilities.
Tesla Nervos is affected by Minelayer's Vector Pad and will be propelled toward the pad's direction on contact.
Tesla Nervos can attach to enemies already affected by Minelayer's Tether Coil and Bastille.
Can be recast while active to deploy new drones with full charges.
While Tesla Nervos are moving, they emit a mechanical clicking sound to indicate their presence.
Tesla Nervos do not show minimap icons or waypoints to track their position.
Tesla Nervos features a unique model apart from the Grineer Roller and Latcher. Vauban's Appearance colors affect the Tesla Nervos' appearance as well.
Subsuming Vauban to the Helminth will offer Tesla Nervos and its augments to be used by other Warframes.
If Vauban is playing as client, Tesla Nervos will use its default model rather than their custom models depending on the equipped skin (normal, Prime, or Vauban Citadel Skin).
Equipped to manufacture an assortment of advanced technology, Vauban selectively arms himself with a specialized landmine by tapping the ability key (default 2 ) to freely cycle between the Tether Coil, Flechette Orb, Vector Pad, and Overdriver. Hold down the hotkey to expend 25Energy and throw the selected landmine in an arcing trajectory toward the aiming reticle. Upon striking an enemy, the landmine inflicts 15Blast damage with a ?% status chance; the landmine lasts for 25 seconds once deployed.
Mine selection and throw can be inverted in the Options menu.
Minelayer's cycle selection wheel is displayed above the ability icons. Duration timer for the latest thrown mine of each type are shown beneath each mine icon in the wheel.
Vauban's variety of four landmines each perform different functions to hinder enemies and assist his allies:
Tether Coil deploys upon contact with an ally, enemy or surface, sticking onto the first entity or object it touches. Once stuck, the coil extends energy wires that inflict 100 / 150 / 200 / 250Slash damage, Ragdoll and pull in up to 1 / 1/ 2 / 2 enemies within sight and 15 / 16 / 18 / 20 meters from the coil. Vauban can deploy up to 4 Tether Coils on the battlefield.
If affected enemies are killed, Tether Coil will attach to new targets throughout its duration.
Tether Coil does not target enemies already pulled by other Tether Coils.
If placed on Warframes or enemies, it will pull surrounding enemies to them. The wire also serves as an indicator for the location of any enemies that may be hidden.
Flechette Orb deploys upon contact with an enemy or surface, falling onto the ground and hovering in place. Once deployed, the orb turret rapidly fires high velocity nails randomly in all directions, inflicting 200 / 250 / 300Puncture scaling damage with a 50% critical chance, 2.0x critical multiplier and ?%Puncture status chance on enemies hit; enemies coming within 10 meters are prioritized by the turret with high accuracy. Vauban can deploy up to 4 Flechette Orbs on the battlefield.
Flechette Orb's nail damage benefits from Ability Strength, enemy level, Vauban's passive, and Overdriver damage bonus using the following expression:
Enemy Level Multiplier = ceil(Enemy Level ÷ 10). The multiplier only increases after 1 level past the per-10-levels mark (e.g. levels 11, 21, 31, 41, etc).
With a maxed Intensify, an active Overdriver on Vauban himself, and an incapacitated enemy at level 101, Flechette Orb will deal 300 × (1 + 0.3) × (1.0 + 0.25) × (1.0 + 0.325) × (11) = 7,105.3125Puncture damage per nail.
In the event of a critical hit, the damage is doubled to yield 7,105.313 × 2 = 14,210.626Puncture damage.
Critcal chance, critical multiplier, status chance, target radius, and max orbs active are not affected by weapon-specific mods, but are affected by some general buffs.
Mutalist Quanta Orbs apply 25% flat critical chance, 25% critical damage, up to 500% Electricity, but reduces damage by 0.66x on projectiles that pass through.
Vector Pad deploys upon contact with an enemy or surface, falling onto the ground and illuminating arrows toward the throw direction. Allies crossing the pad while moving in the arrow direction are propelled forward at a speed of 25 meters per second. Enemies crossing the pad are propelled away toward the arrow direction at the same speed, regardless of the direction they were moving. Vauban can deploy up to 4 Vector Pads on the battlefield.
Even if allies are sliding or rolling across the pad, they need to be inputting a movement in the pad's direction to get boosted. Correspondingly, players can get boosted by the pad even if maneuvering in a different direction by inputting the appropriate movement.
As such, players can roll or slide without holding forward during the maneuver if they want to cross the pad in it's direction without getting boosted.
Allies can reduce Vector Pad's momentum by shifting their movement away from the launch direction during and after launch.
Can be used in conjunction with different parkour Maneuvers, such as Bullet Jump, jump, double jump, dodge roll and slide.
Enemies repelled away by Vector Pad can often be launched in an upward arcing trajectory.
Overdriver deploys upon contact with an enemy or surface, attaching to the first object it touches. Once attached, the Overdriver jumps to the nearest player, Companion, or mission objective within a 10 meter radius, granting it a 25% damage bonus to weapons for the mine duration. Vauban can deploy up to 4 Overdrivers on the battlefield, including those already buffing allies.
Damage bonus also applies to damage from Flechette Orb's nails.
Buff duration equals to the remaining time on the Overdriver mine until it expires.
Damage bonus applies multiplicatively to total damage and Vauban's passive.
Overdriver does not jump to allies already buffed by another Overdriver.
Overdriver mines have a tendency to prioritize buffing players if placed directly on the ground, while jumping to Companions and other allies if placed on a vertical surface.
If Vauban casts a new Overdriver while at max number of active drivers, the oldest mine will disappear, even when still attached to a friendly target.
Ability Synergy:
Enemies pulled by Tether Coil passively receive 25% increased damage from Vauban's weapons and abilities.
Tether Coil can bring enemies into range of a Bastille containment field for suspension or vortex suction, while releasing the coil's wires to seek new targets.
Vector Pad can launch enemies into range of Tether Coils, Flechette Orbs, other Vector Pads, and Bastilles.
Overdriver can attach to Tesla Nervos to increase their damage output.
Casting Minelayer is a two-handed animation that allows free movement but interrupts certain actions such as reloading.
Vauban expends 75energy to throw a targeting beacon in an arcing trajectory toward the aiming reticle. Upon striking an enemy, the beacon inflicts 15Blast damage with a ?% status chance. Upon contact with a surface or 1.5 seconds has elapsed, an orbital cannon fires a powerful energy laser that penetrates through solid matter to strike the beacon, inflicting 1,000 / 1,500 / 2,000 / 2,500Blast scaling damage and Ragdoll to all enemies within a 4 / 4 / 5 / 5 meter radius.
Photon Strike's explosion damage benefits from Ability Strength, Vauban's passive, and enemy level using the following expression:
Enemy Level Multiplier = ceil(Enemy Level ÷ 10). The multiplier only increases after 1 level past the per-10-levels mark (e.g. levels 11, 21, 31, 41, etc).
With a maxed Intensify and an incapacitated enemy at level 101, Vauban will deal 2,500 × (1 + 0.3) × (1.0 + 0.25) × (11) = 44,687.5Blast damage.
The targeting beacon will bounce off walls and enemies.
Photon Strike will damage units along the path of the beam.
If the beacon contacts a Guardian Eximus's rotating shields, the beacon will disappear and the ability will not activate.
Ability Synergy:
Photon Strike's targeting beacon is attracted by Bastille's vortex mode, pulling it to the center of the vortex and allow for easier targeting of enemies caught within.
If multiple vortexes are in range, Photon Strike's beacon will be pulled to the first vortex created.
If cast while in midair, the casting animation changes with Vauban hovering briefly as he spins to throw the beacon.
Photon Repeater is a Warframe Augment Mod for Vauban that allows the next cast of Photon Strike to cost no energy and fire two strikes in succession if the previous cast hits a specified number of enemies.
Erect a containment field to capture enemies and suspended them in stasis, stripping their armor. Hold to collapse all Bastilles into a single damaging vortex.
Vauban expends 100energy to throws a modular device in an arcing trajectory toward the aiming reticle. Upon striking an enemy, the device inflicts 15Blast damage with a ?% status chance. Upon contact with a surface, the device erects a Bastille energy containment field that suspends up to 6 / 8 / 10 / 12 enemies into the air within a 5 / 7 / 8 / 10 meter radius. Armored enemies suspended by Bastille permanently lose 2.5% / 5% / 7.5% / 10% of their total Armor points per second, while unarmored enemies are simply held captive; simultaneously, Vauban and allies standing inside the containment field gain an armor bonus up to 1,000 armor points, based on the amount stripped from the suspended armored and unarmored enemies within. Bastille armor bonus lasts indefinitely while inside the field and remains active for 10 seconds once outside.
Bastille still grants Vauban and his allies an armor bonus if the suspended enemies are unarmored. The armor bonus is gained at a reduced rate compared to directly stripping armor from armored enemies.
Bastille armor bonus duration is reset to full when moving into any Bastille containment fields.
Suspended enemies are lifted into the air and completely immobilized, allowing headshots to hit their mark without resistance.
Bastille containment field will continue to capture enemies up to the max target count throughout its duration, in the event captured enemies are killed and new enemies come into range.
After 8 / 10 / 12 / 15 seconds have elapsed, the containment field automatically collapses into a Vortex singularity for 3 seconds. The Vortex constantly Ragdolls and draws in all enemies within the same radius toward the device, inflicting 50Magnetic damage per second with ?% status chance.
Hold down the ability key (default 4 ) without any containment fields active to throw a new device set to Vortex mode. Hold down the ability key to collapse all active Bastille containment fields into Vortexes. Both methods of manually creating Vortexes resets the new and existing devices to last for 10 / 12 / 13 / 15 seconds.
If Bastille fields are in range of each other, manually collapsing them into vortexes causes them to converge on the location of the first active Bastille, based on the order of creation. Enemies and pickups captured by the vortexes will be dragged along toward the new destination.
Vortex also draws in Pickups within its radius for convenient collection.
Ability Synergy:
Enemies suspended by Bastille or pulled by Vortex passively receive 25% increased damage from Vauban's weapons and abilities.
Minelayer's Tether Coil and Vector Pad can bring enemies into range of Bastille. Enemies tied to Tether Coils are released into Bastille's containment field for suspension, freeing the coils to seek new targets.
Coils are not freed if enemies tied to Tether Coil are pulled into Bastille's vortex mode, however.
Photon Strike's targeting beacon is attracted to Bastille's vortex mode, causing the beacon to home in on the device with the laser striking all enemies within range.
Can be used while performing many actions without interrupting them, including reloading.
Can be cast multiple times while active.
If cast while in midair, the casting animation changes with Vauban hovering briefly in the air as he throws the device.
Bastille is a one-handed action. As such, it can be used while performing various maneuvers and actions without interruption.
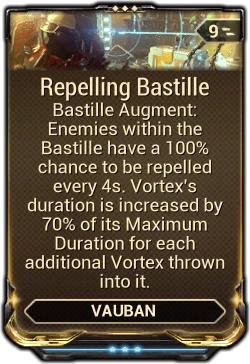
Repelling Bastille is a Warframe Augment Mod for Vauban's Bastille that repels new enemies when it reaches the maximum amount of enemies it can contain, and increases Vortex's duration for every additional Vortex thrown into it.
When used in narrow hallways or choke-points, enemies that are held up in the field block the path of others behind, negating the enemy limit and blocking all the enemies from advancing.
Bastille spawns from a ball that Vauban throws in an arc, so it can be deployed where aimed.
Bugs
If Vauban is playing as client, Photon Strike's beacon will not be attracted to Bastille's vortex even when thrown into its suction range.
Vortex will slow down allied specters such as the Corrupted Lancer specter.
It's not recommended to bring a companion when playing stealth without a way of cloaking (becoming invisible) yourself, as crouching may reduce enemy visibility for you, but it does not affect your companions and could still leave them in enemy sight.
Be patient and learn the behaviour of your enemies. Good timing means you can avoid patrols and position yourself to attack enemies from behind.
Check your surroundings to sneak up on an unsuspecting enemy without interruption. Do not eliminate an enemy if it is being watched by another enemy. If enemies see a corpse that has not disappeared yet, they might be alert for a short period of time.
In large rooms, look for exposed ceiling rafters or ventilation shafts that can be used to traverse areas without the risk of directly encountering enemy patrols.
Always allow at least a two-meter distance between enemies before engaging them in melee as a precautionary measure.
Staggered enemies don't make sounds, but they become alert and will alert others if given a chance to recover. If you did not kill an enemy with a single hit, keep it staggered by stealthy means and you'll be fine. Cold procs will lengthen the amount of time an enemy stays staggered.
Stand to the side of a door to open it and peer slightly by moving the camera. You can see around the left edge of obstacles by changing the camera to hang over your left shoulder (default is H ).
Having a Sentinel equipped may compromise stealth, as it does not hide behind low cover. If you do bring a Sentinel, make sure to remove their targeting precept mod or the weapon itself. The only exception is Shade's Revenge, which will not target enemies unless they attack players.
If you have a Shade with the Ghost ability, consider sprinting toward an enemy to activate it quickly.
Sniper Rifles and other long-range weapons such as the Latron are less likely to attract attention. This is most likely because the weapon noise at the gun's barrel is far greater than the noise at the impact site.
Use a Codex Scanner or Synthesis Scanner. Scanners can show enemies within 50 meters through walls and behind cover. However, if used to scan, it will remove the scanned enemies from the player's view.
Practice stealth play on low-level Extermination missions. As players will usually one-shot almost all enemies, they will get the hang of silent weapons, the enemy's cone of vision, and other things that would be difficult to practice with the most difficult of missions.
Try doing stealth missions solo, as various players that may join mid-round may not agree with taking a stealthy approach to a mission. A solo player is also able to improve on their mistakes and their mistakes alone.
If going invisible in Corpus stealth missions, be very careful of Nullifier Crewmen and Fog Combas and Scrambuses, as they can disable a Warframe's invisibility powers.
Unalerted enemies that are sent to sleep by Equinox's Rest and Ivara's Sleep Arrow can be killed using automatic weapons that deal weak damage per shot without alerting them, as long as the enemy is killed quickly enough after passing their waking damage threshold. Both abilities can also be used on clustered enemies to prevent them from being alerted by kills made in their proximity.
The fiery battle damage environmental hazard will spawn extremely alert enemies at the start. To resume stealth, kill all alert enemies in the area quickly and hack the nearest panel to reset the alarm. They will revert to an unalert state after some time. If the alarm is not reset, all enemies will spawn in the alerted state.
Sources of enemy radar, such as Enemy Sense, Enemy Radar and Animal Instinct, reveal enemies within range on your minimap as red arrows indicating position, general facing, and alertness level. Use this information when available to gauge the situation and plan how to proceed in a stealthy manner.
Bugs[]
After Hotfix 25.8.1 (2019-10-09), only stealth finishers could receive a bonus, though no mention of this change was made in any patch notes. As of a recent patch, proper stealth bonus functionality returned.
With projectile-based weapons, (Primary, Secondary weapons, AND thrown melee kills) enemies will see the projectiles and become alert.
The practicality of attempting an assassination on heavy and shielded units, especially purely mechanical enemies such as Corpus Ospreys.
If you aren't at the same altitude as the target, the prompt will not easily appear.
Being at a lower altitude will teleport the enemy to your current location, possibly causing them to overlap with walls. This usually happens on the stairs.
A Prompt will appear and disappear unexpectedly when the enemy is alerted.
After each stealth attack, you finish standing up, which might reveal your position. You will need to release and re-press the crouch button to return to the crouch position. If you are using a toggle crouch key, simply press it during the animation to return to crouching when the attack completes.
Dropping off a ledge will also cause you to stand upon landing.
A glitch can occur when stealth attacking Infested Ancients, Heavy Gunners or CorpusTechs. Upon entering the stealth attack animation, the enemy will shrink to roughly the player's size. (This shrinking glitch can also occur when using Ash's Blade Storm. Blade Storm has a possibility to also shrink Grineer soldiers, as well as a few bosses, including Lieutenant Lech Kril.)
It is possible to attempt a stealth finisher without a melee weapon. This uses the finisher animation of nikanas but does very little damage.
For a long time, it was possible to notice enemy spawn points (usually in Survival missions) and continue to fire your weapon under stealth to gain continuous stealth bonus experience, allowing quick leveling and Focus affinity.
To counter this, a mechanic was introduced wherein newly spawned enemies have a hidden timer active. This timer, which can be around 4-8 seconds or in rare cases indefinitely, causes killing this otherwise unalerted enemy to not count as a stealth kill and thus will reset any stealth bonus multiplier you have if this enemy is killed. This is why players may notice that despite all enemies being unaware of your presence, killing them all at once with an explosive weapon will often not give you any stealth affinity, or lose your current stealth multiplier.
Enemies may now “react” (without changing their Alert state) to you by stopping and looking around if you shoot a Silent weapon within 2-3m of them several times quickly.
Enemies no longer receive a mental perception of an attacker, but rather mental perception of the source object. This causes them to play a reaction and become alert, but not have any extra information about the player. Enemies that are shot with projectiles that are silent and/or without a sound effect will now report a visual perception (rather than doing nothing). Previously enemies knew the exact location of their attacker when taking damage, regardless of the source.
Joining our updated Spy 2.0 are some exciting improvements to stealth combat! Players will now find that sneaking around each Mission may come with some excellent rewards. These alterations to stealth gameplay will continue to evolve based upon player feedback, but for now stealth aficionados can sink their teeth into the following changes:
Stealth Streaks are here! Stealth kills can now receive Affinity multipliers if done in succession. Players will have 30 seconds from one stealth kill to the next to increase their Affinity multiplier, which goes up to 5x for melee and 2x for Ranged!
Finisher damage will now increase based on weapon rank and enemy level. Finisher Damage for stealth kills capped at 8x damage with max rank melee weapon!
The UI will inform you of your Stealth Streak where buff timers are usually located!

")
")
")
")
")
")
")
")
")
")
")
")
")
")
")
")
")
")
")
")
")
")
")
")
")
")
")
")
")
")
")
")
")
")
")


")
")
")
")
 Cold procs will lengthen the amount of time an enemy stays staggered.